Thank you for being one of our buyers. We are glad that you have joined us and that you are a user of our products. We hope you like it. As part of our support for our products, we have provided a complete user guide for our products. All you have to do is follow this guide step by step to install your site.
This item made by Vironeer under Envato Extended & Regular License
What Vironeer Support Include?
We don't provide free customizations or installations or server problems fixing, we can provide them as paid services.
Those settings to upload 1GB file, you need to change them besides on your needs and your server specifications.
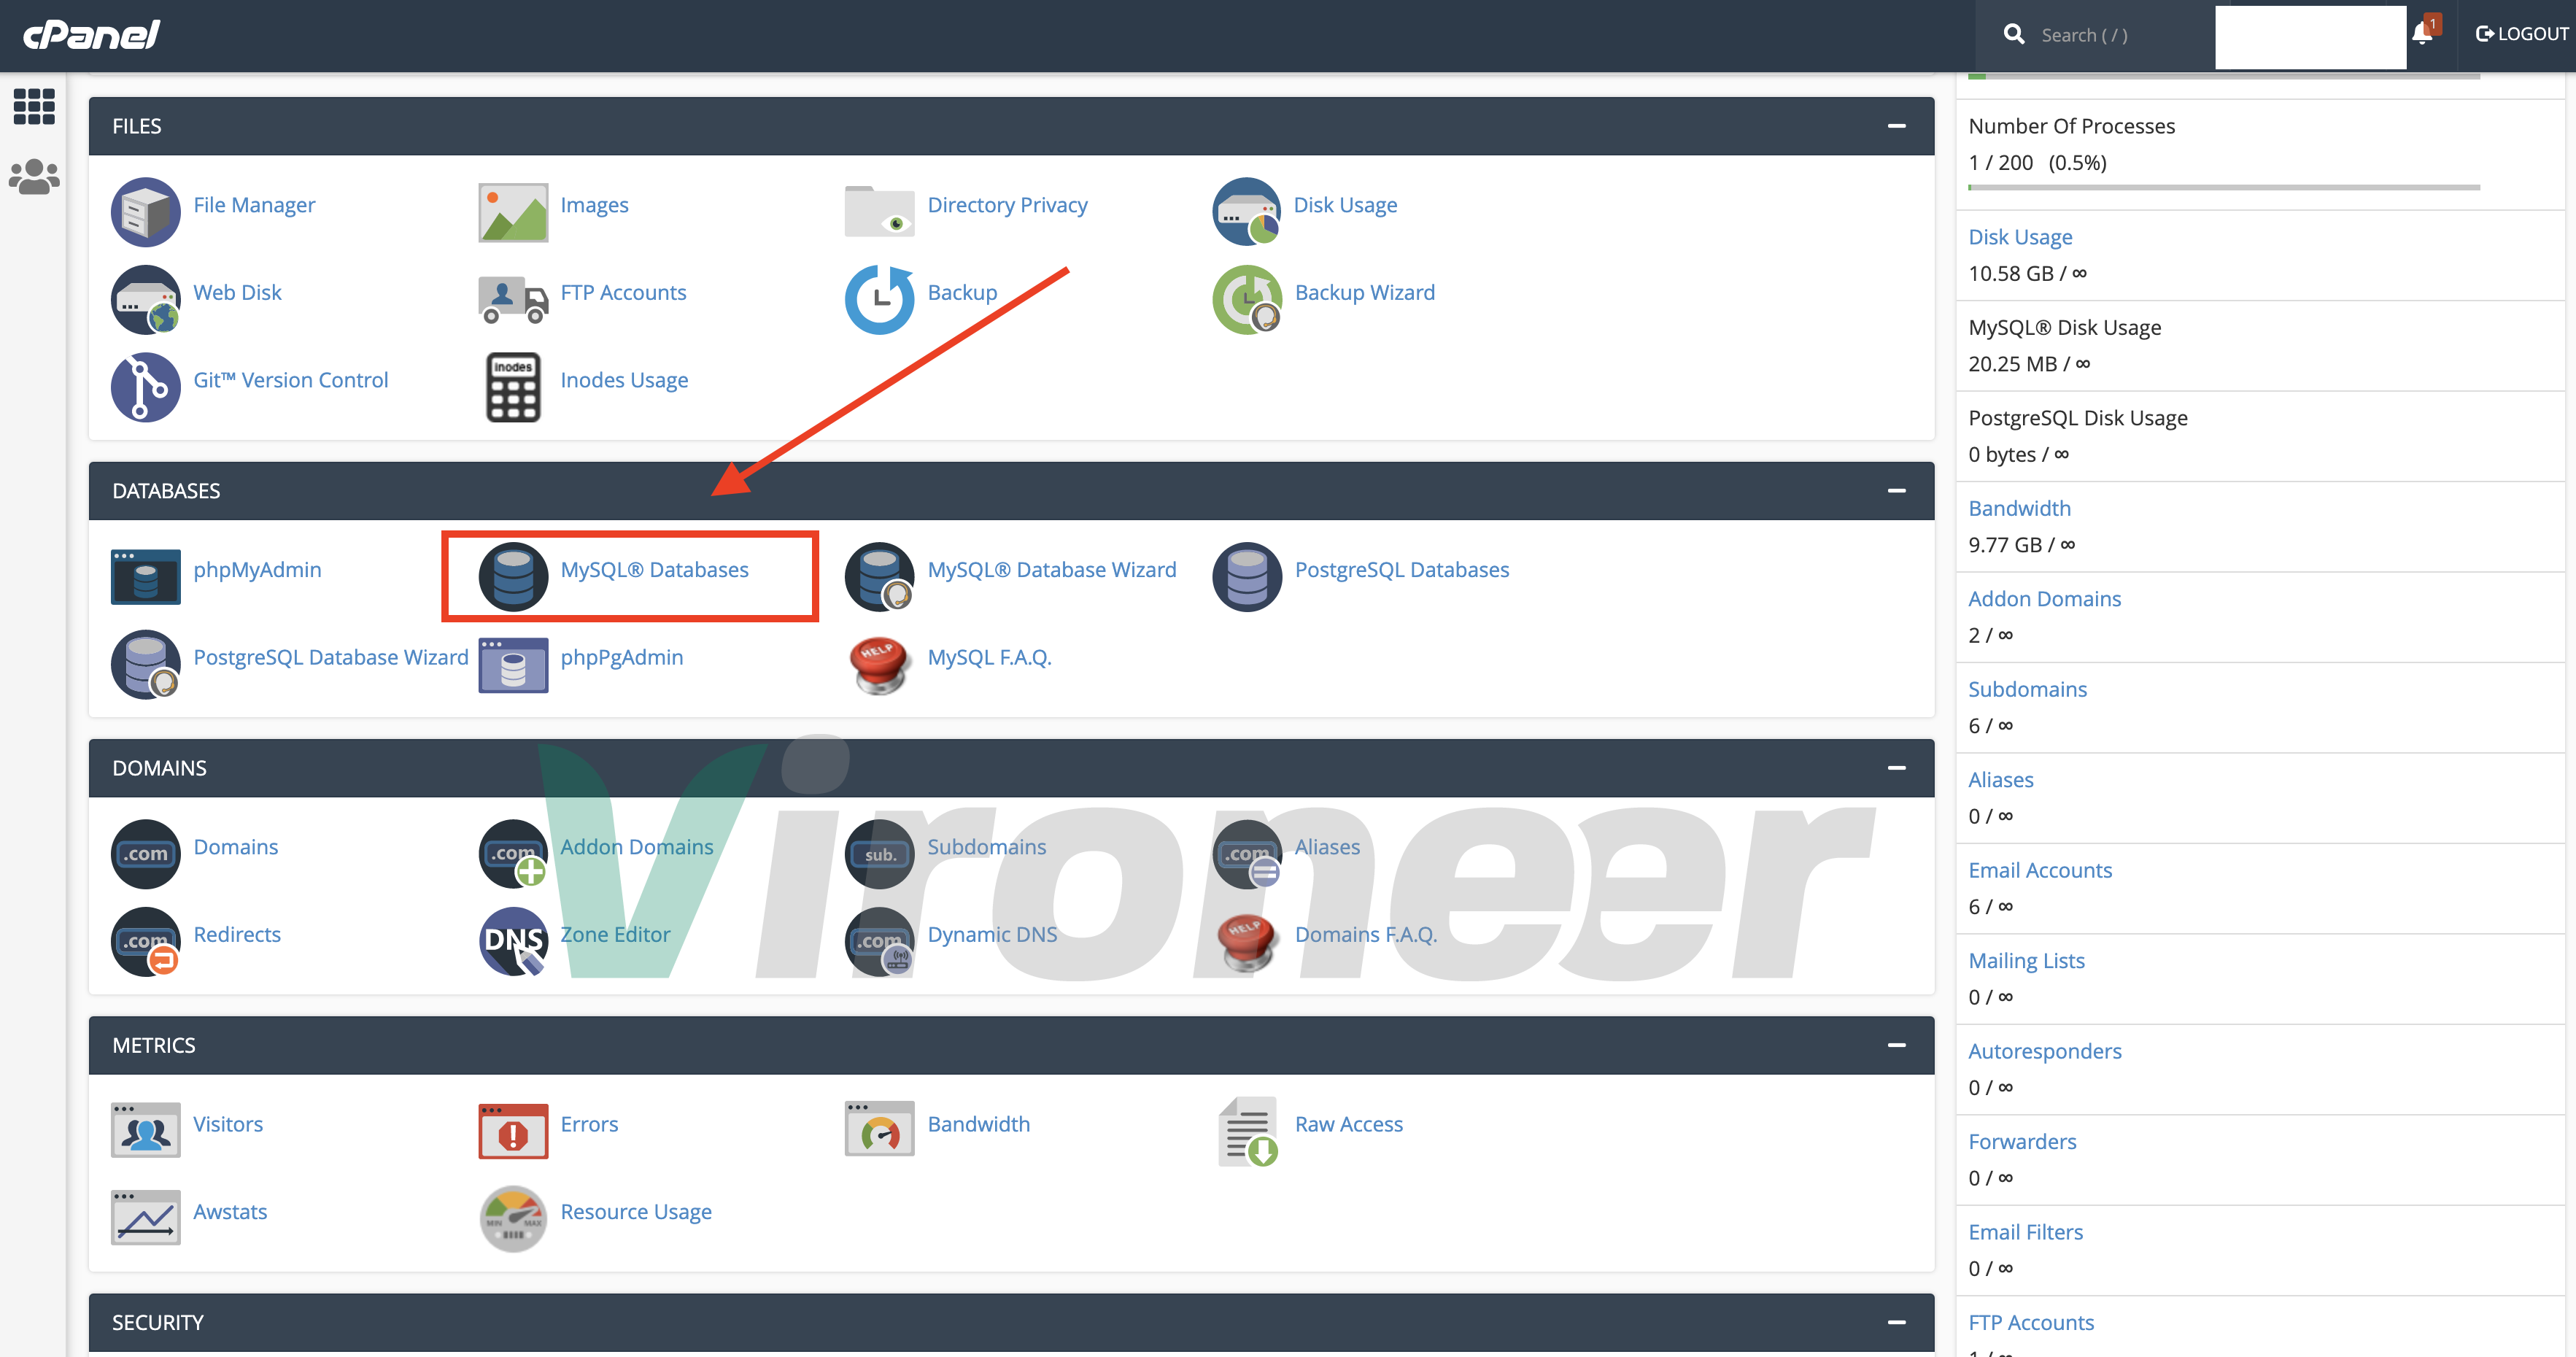
1 - Login to your server and click MYSQL DATABASE
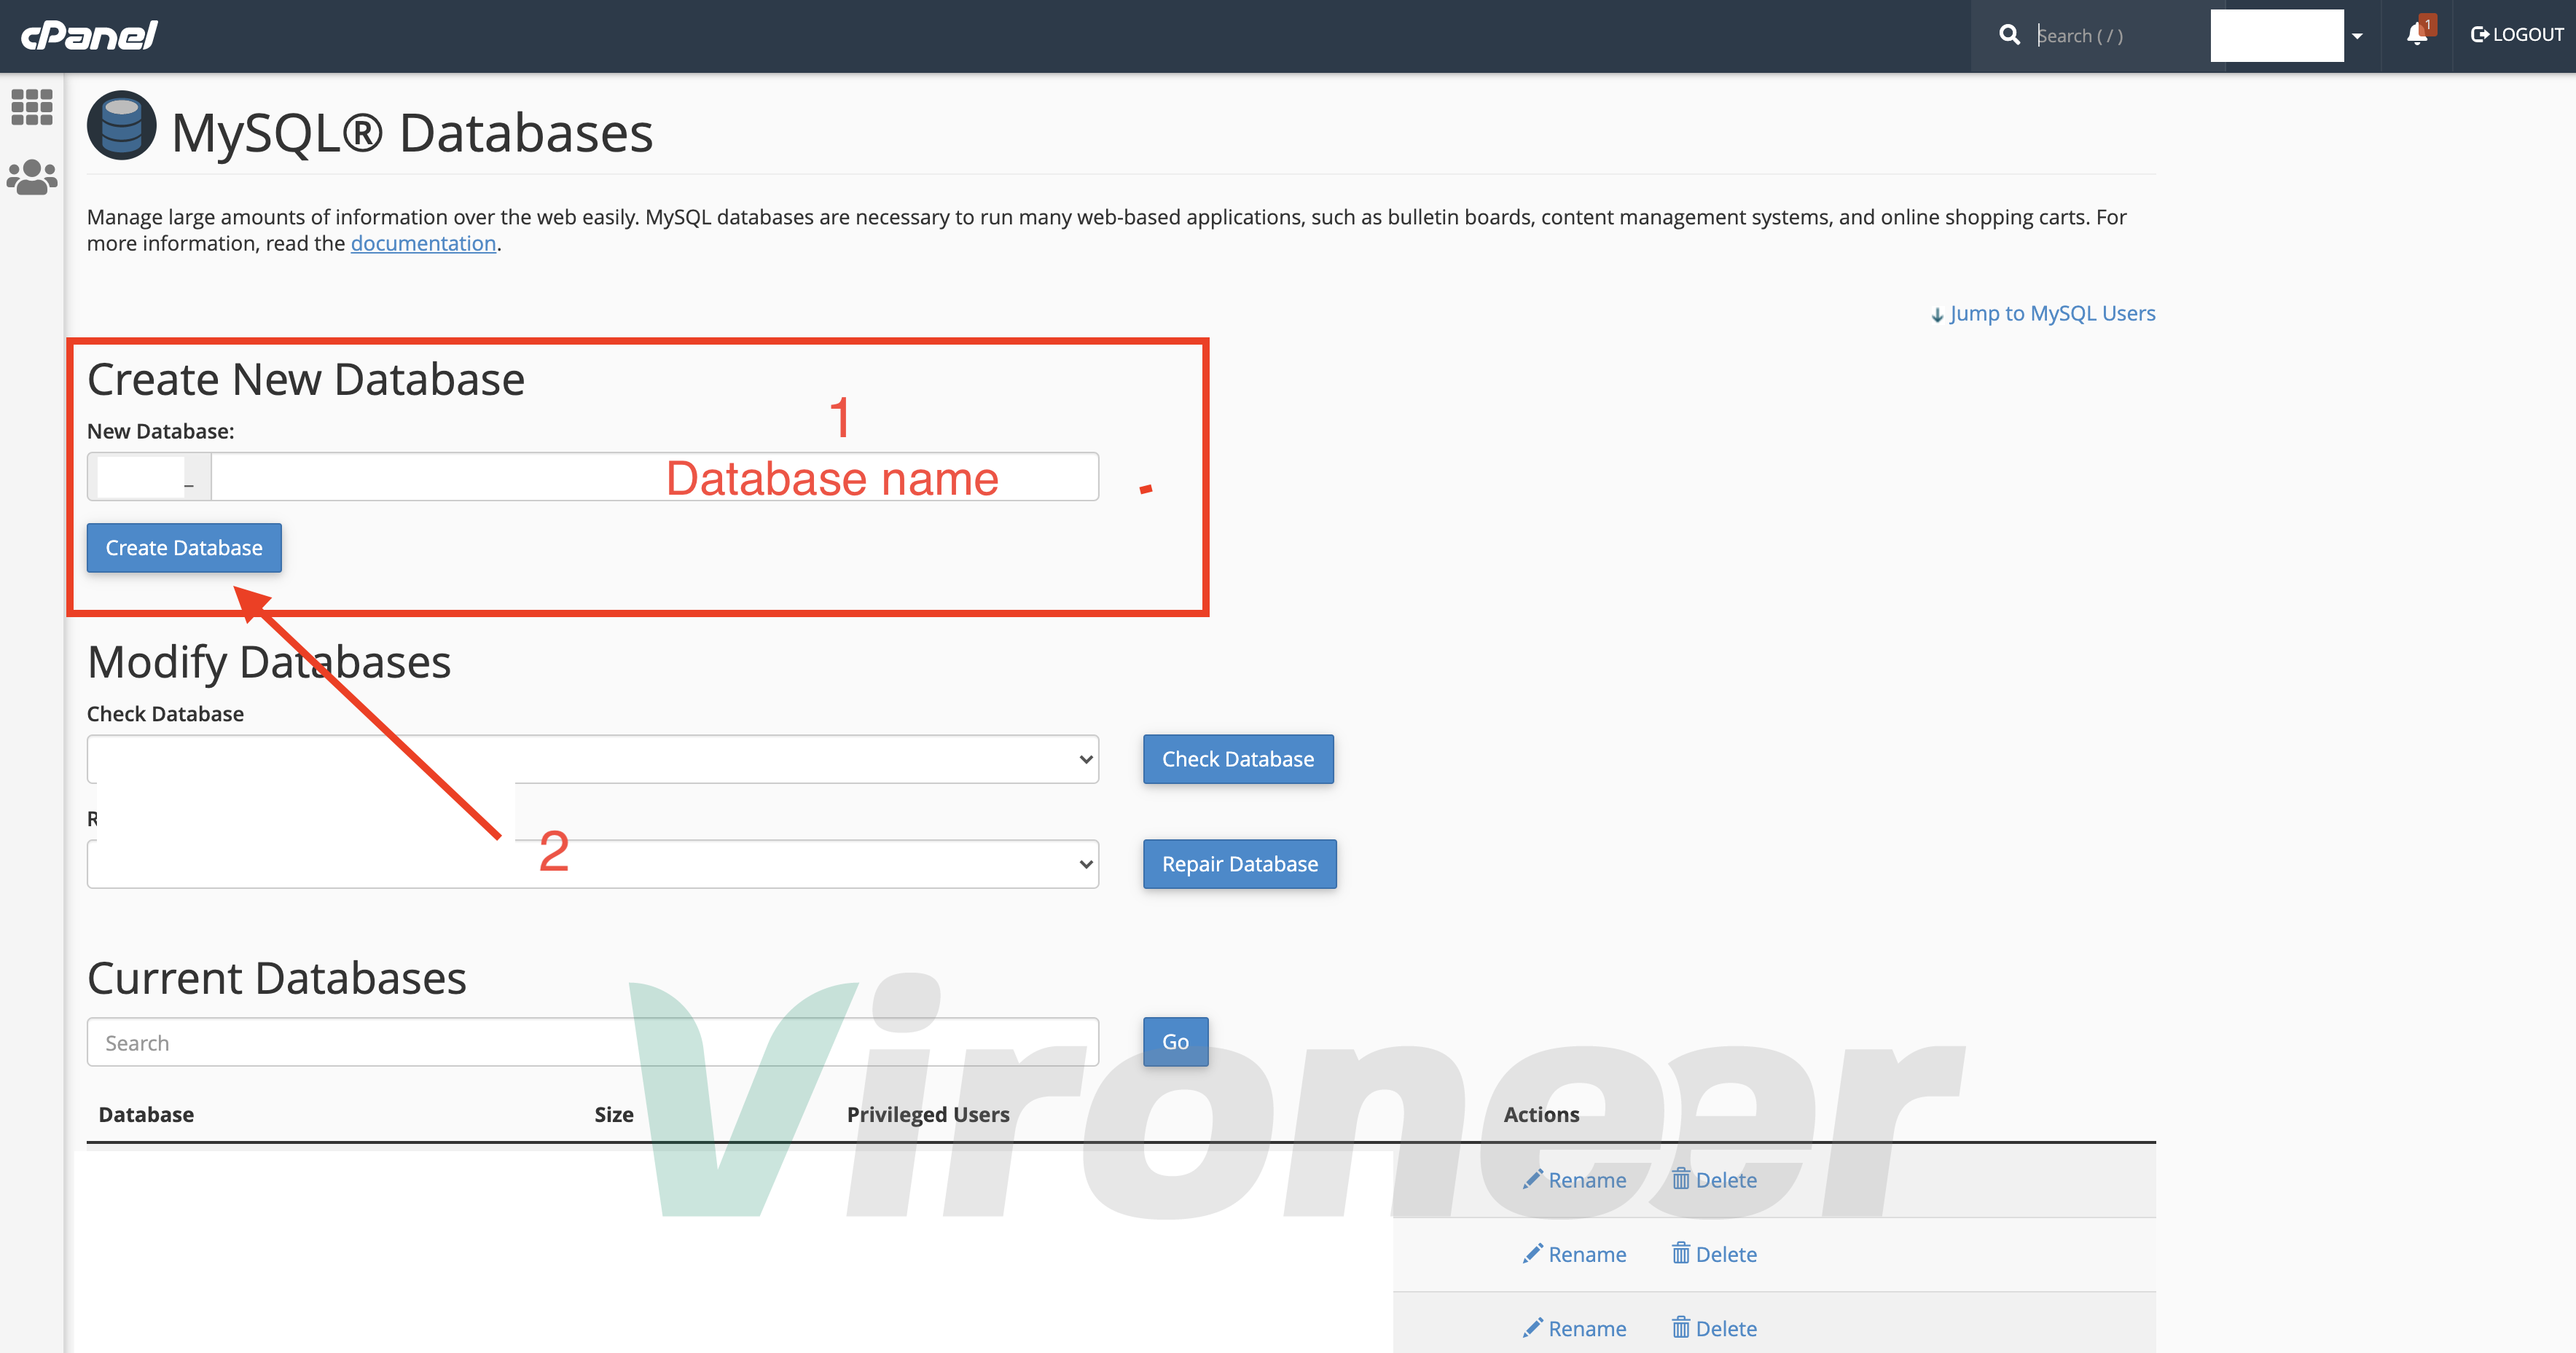
2 - Enter database name and click create
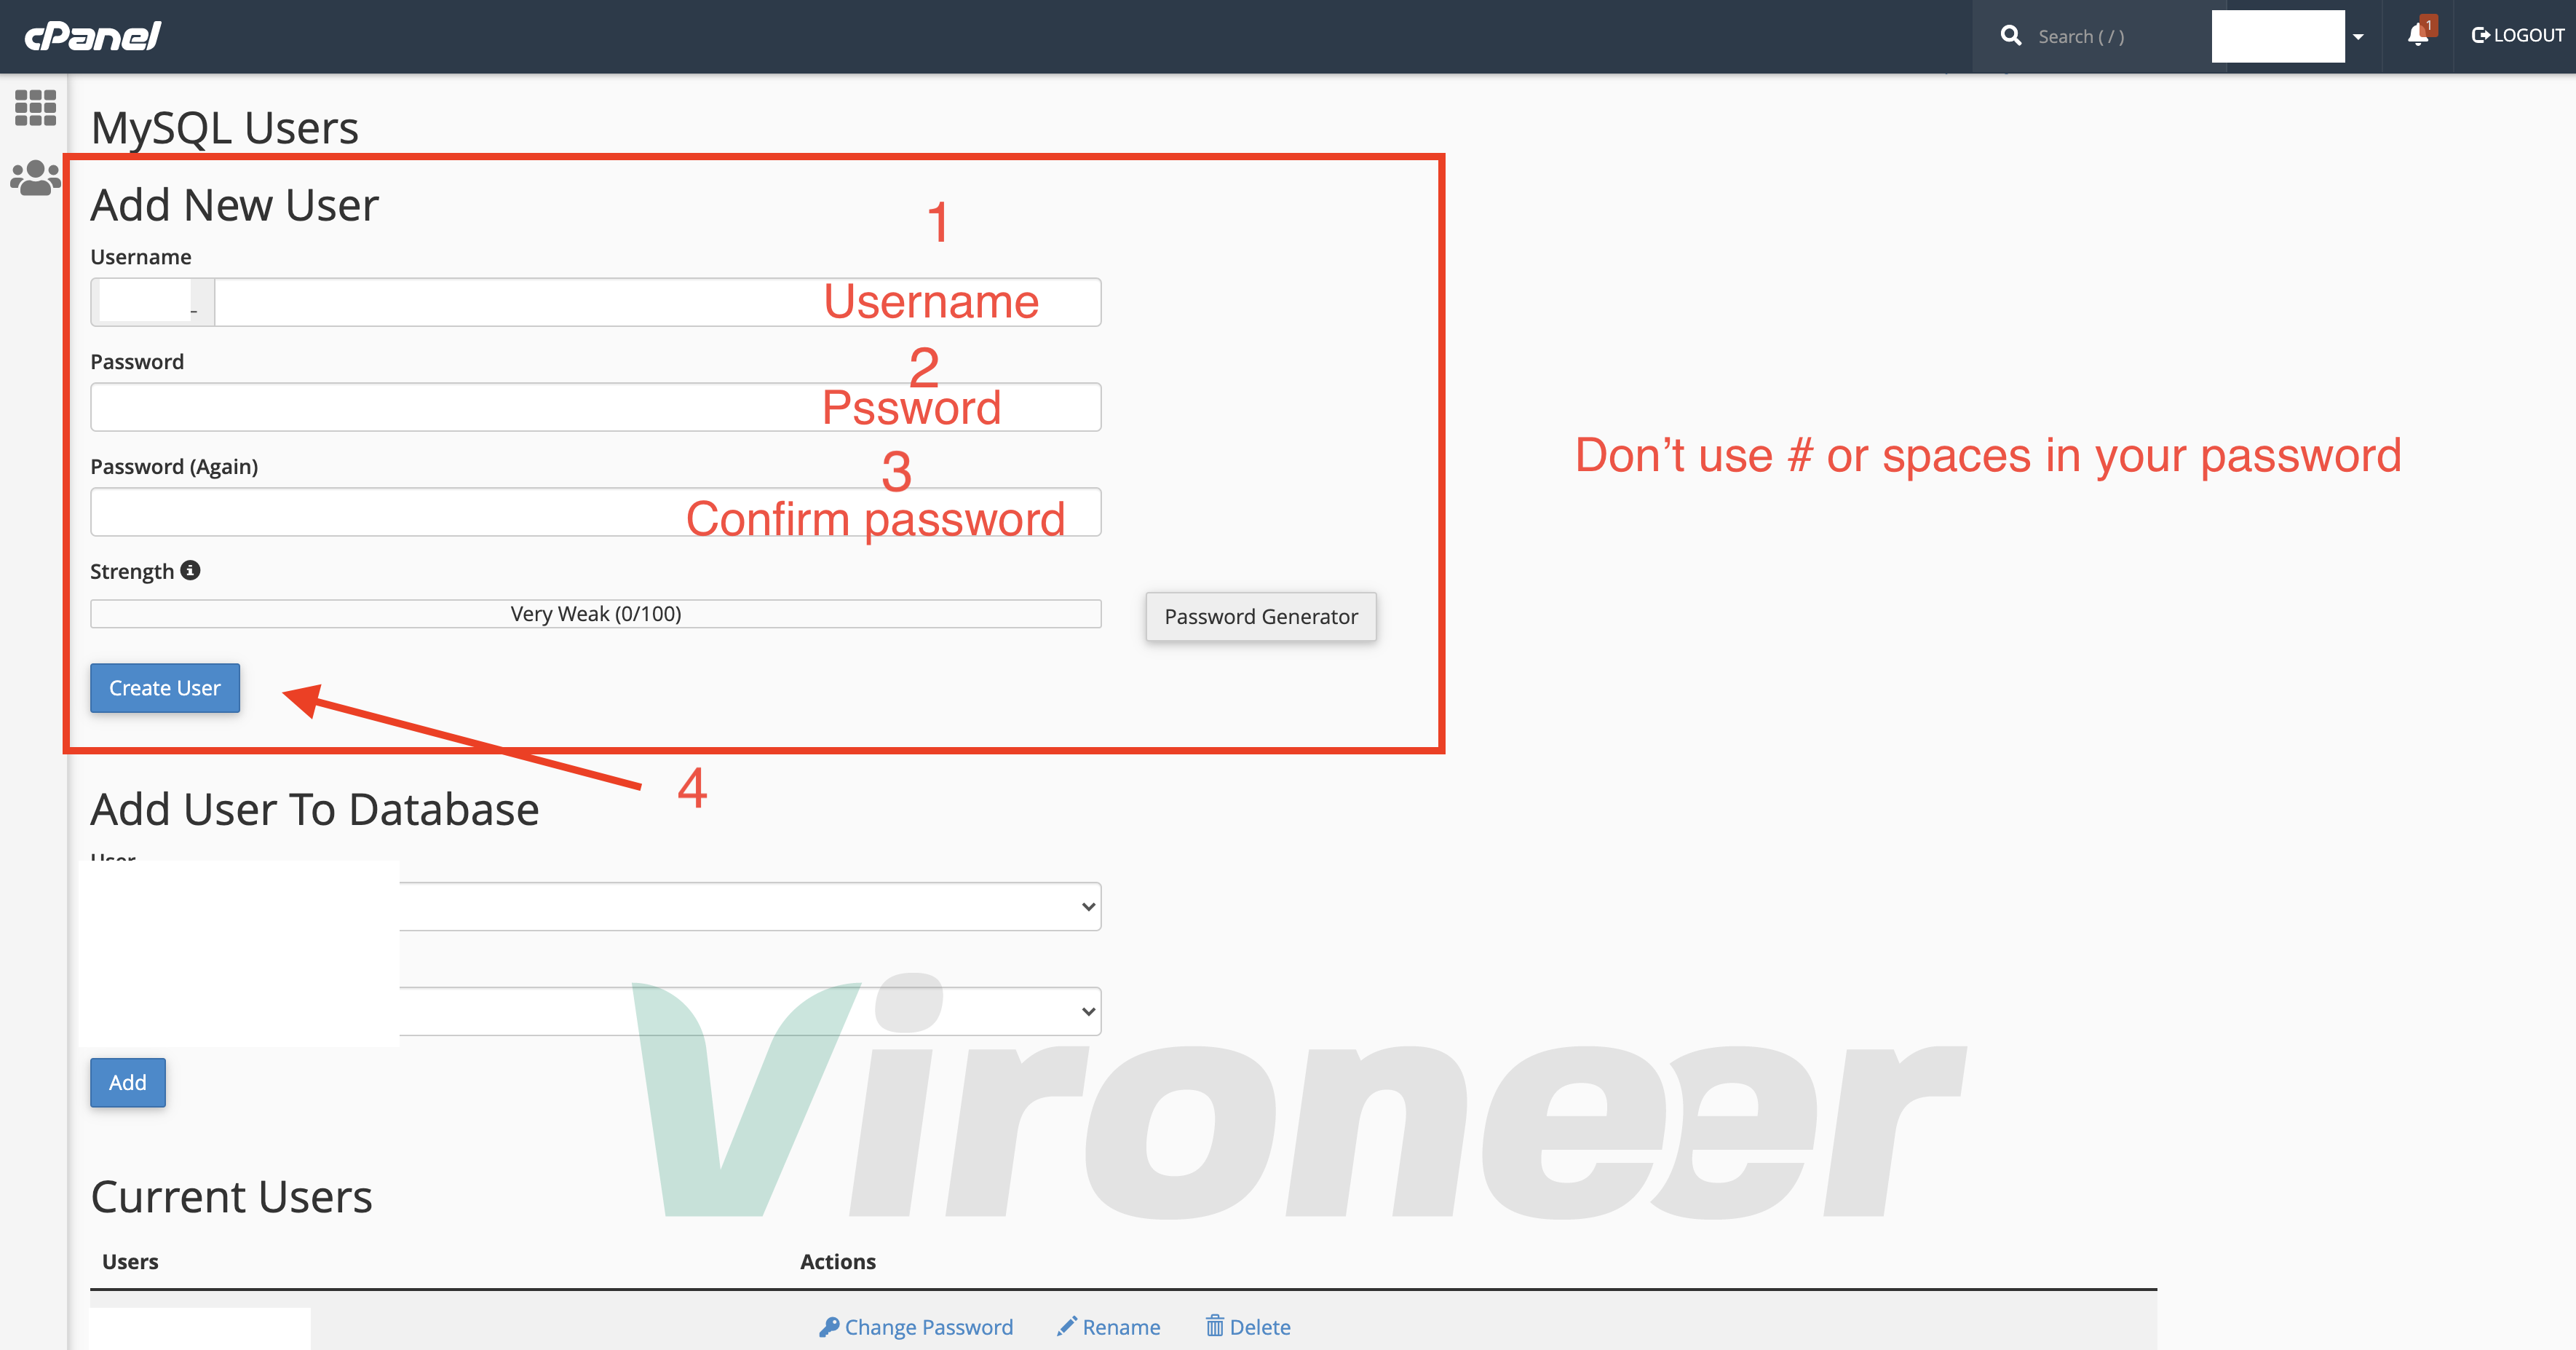
3 - Enter your details and click create
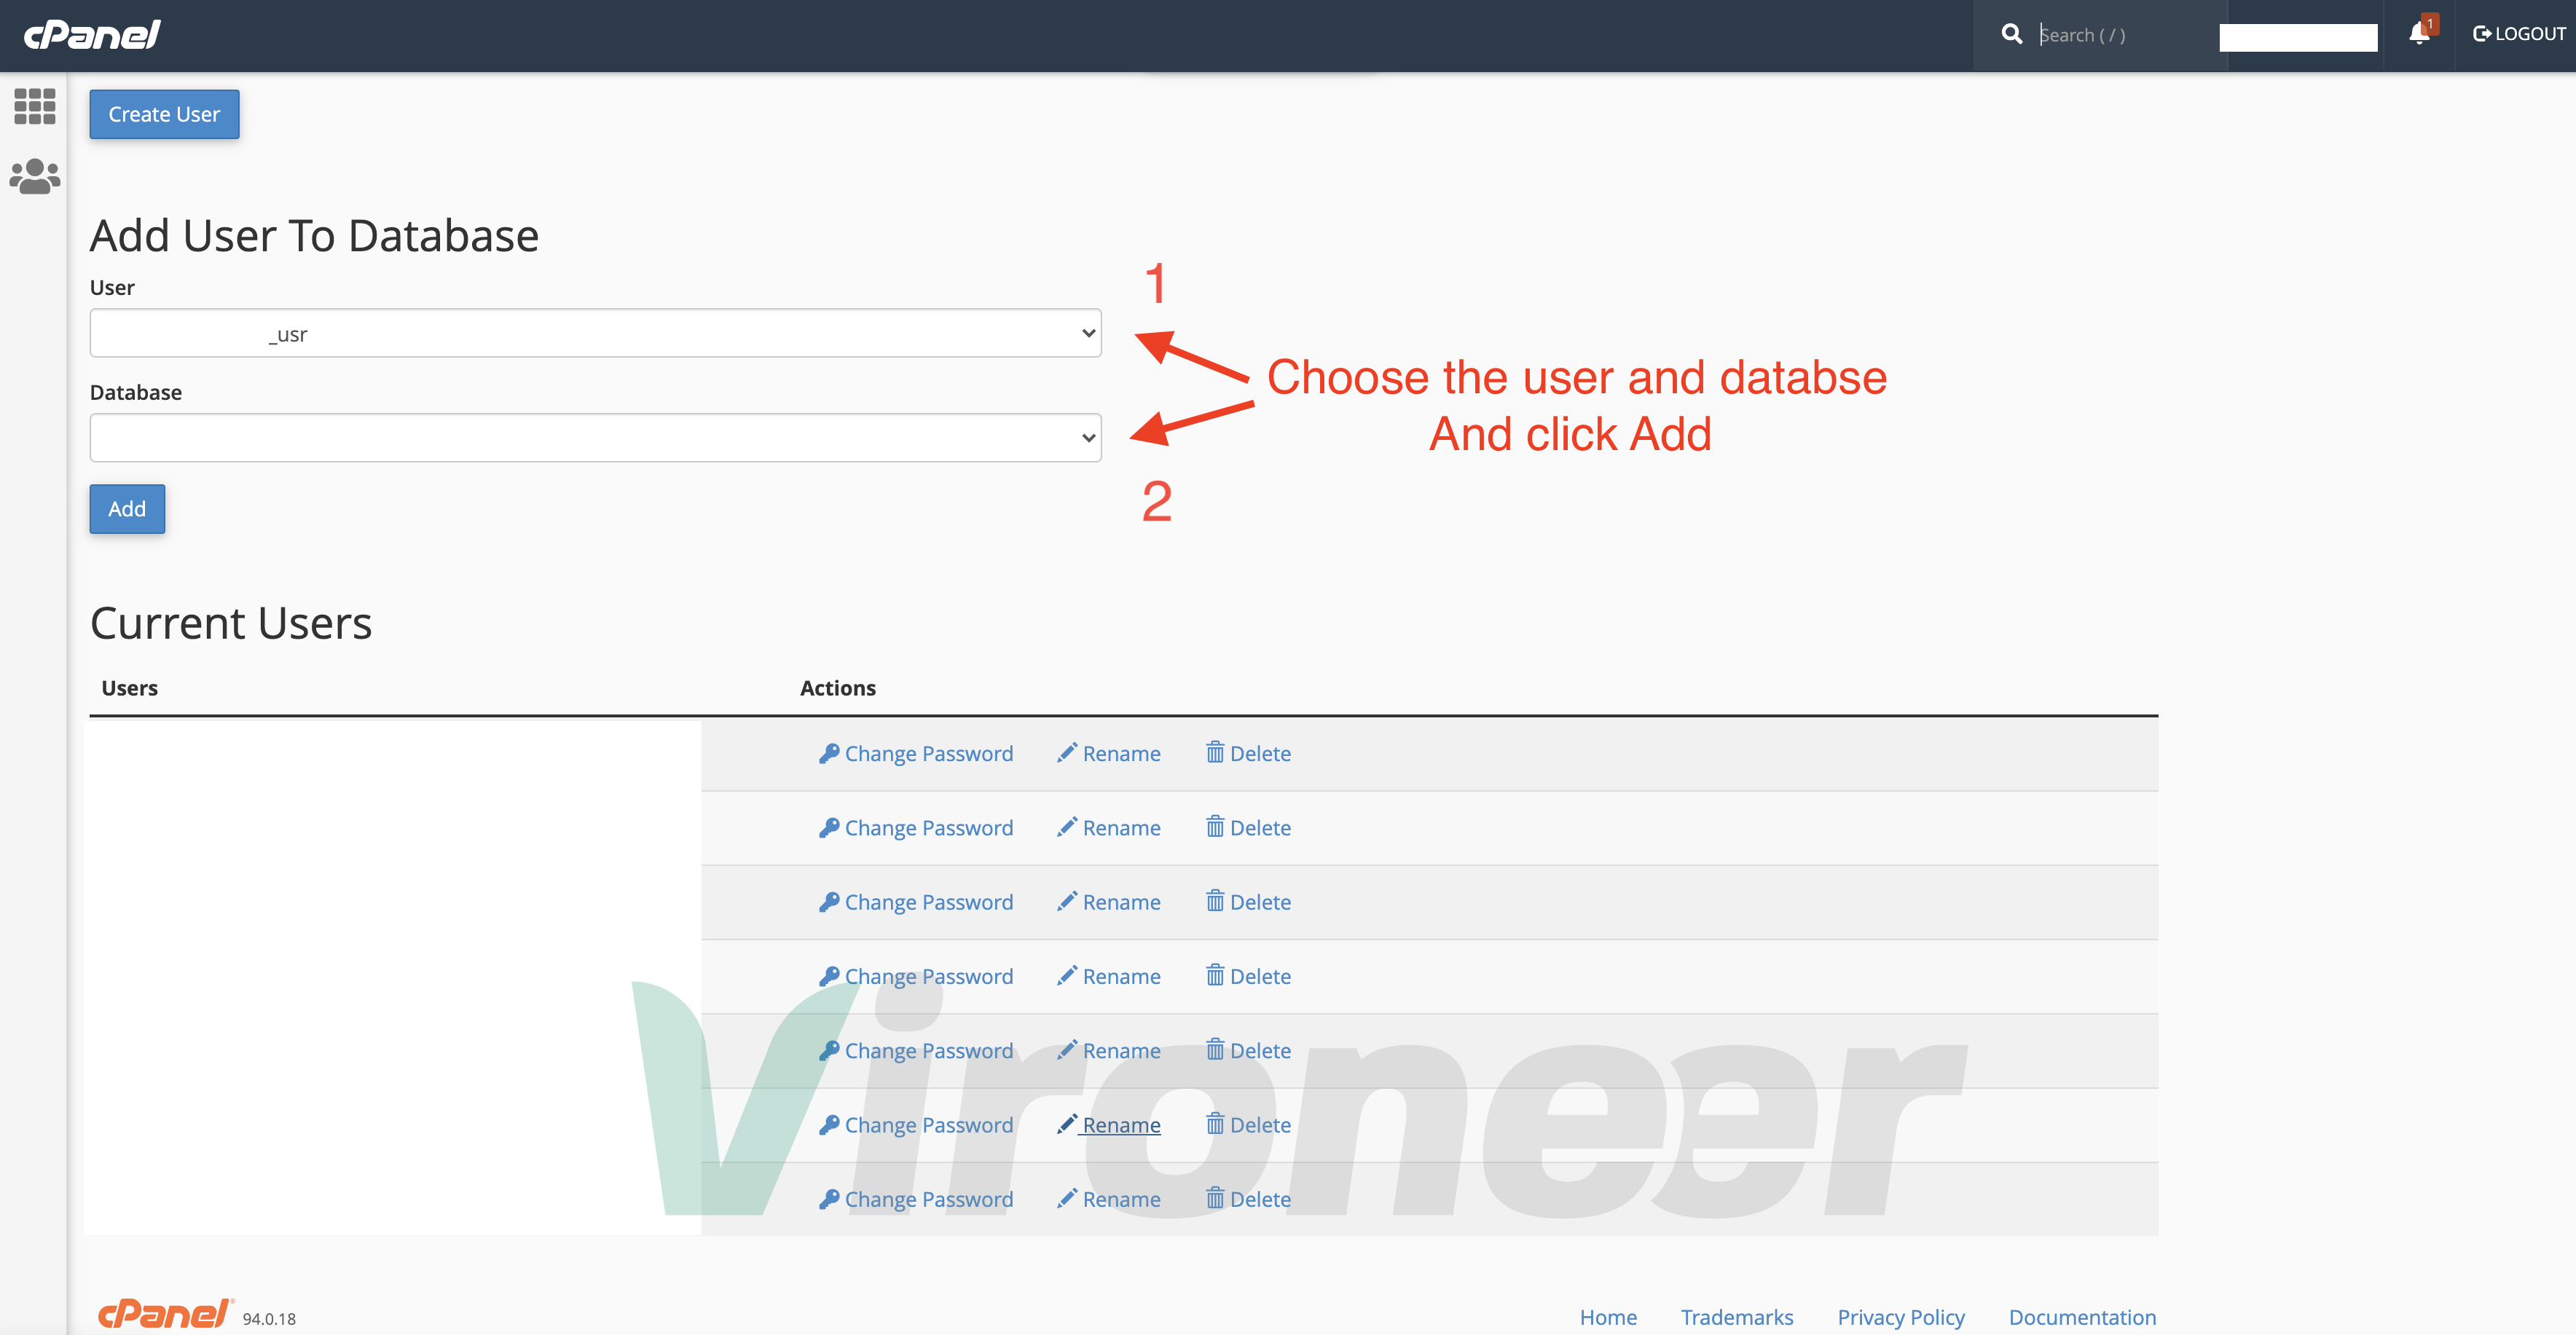
4 - Choose database name and database user then click add
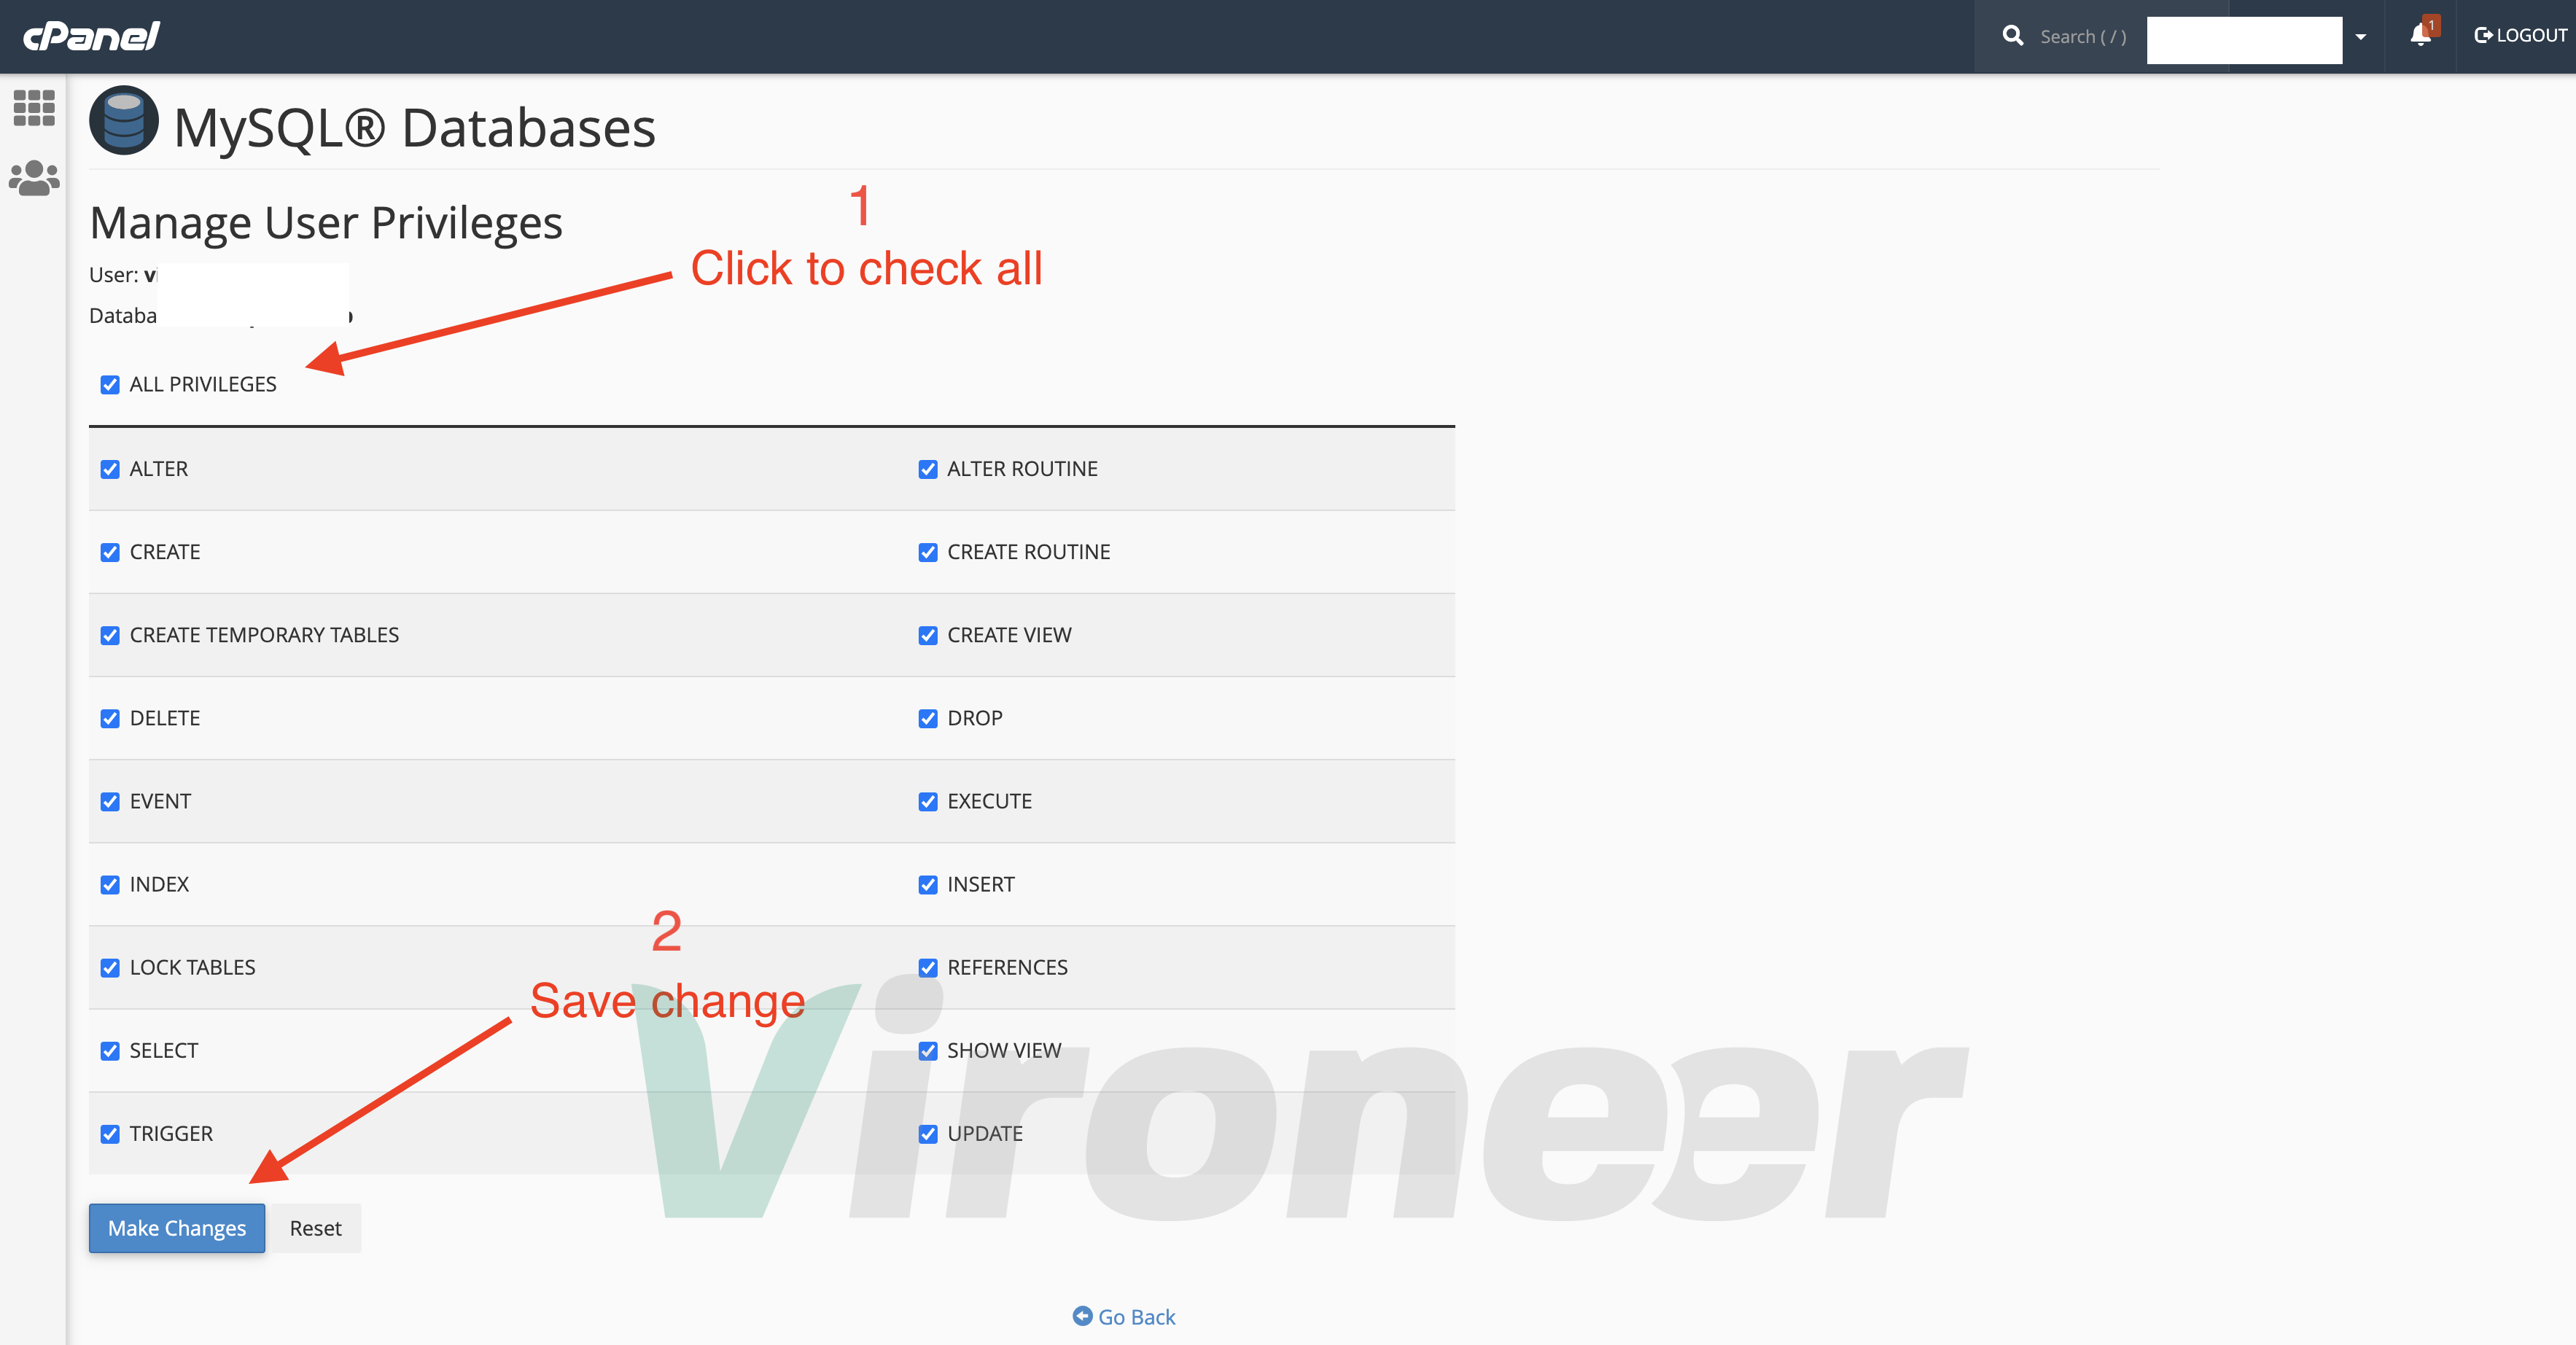
5 - Choose All privileges then click make changes
First download the files from CodeCanyon and extract them in your computer
Script.zip
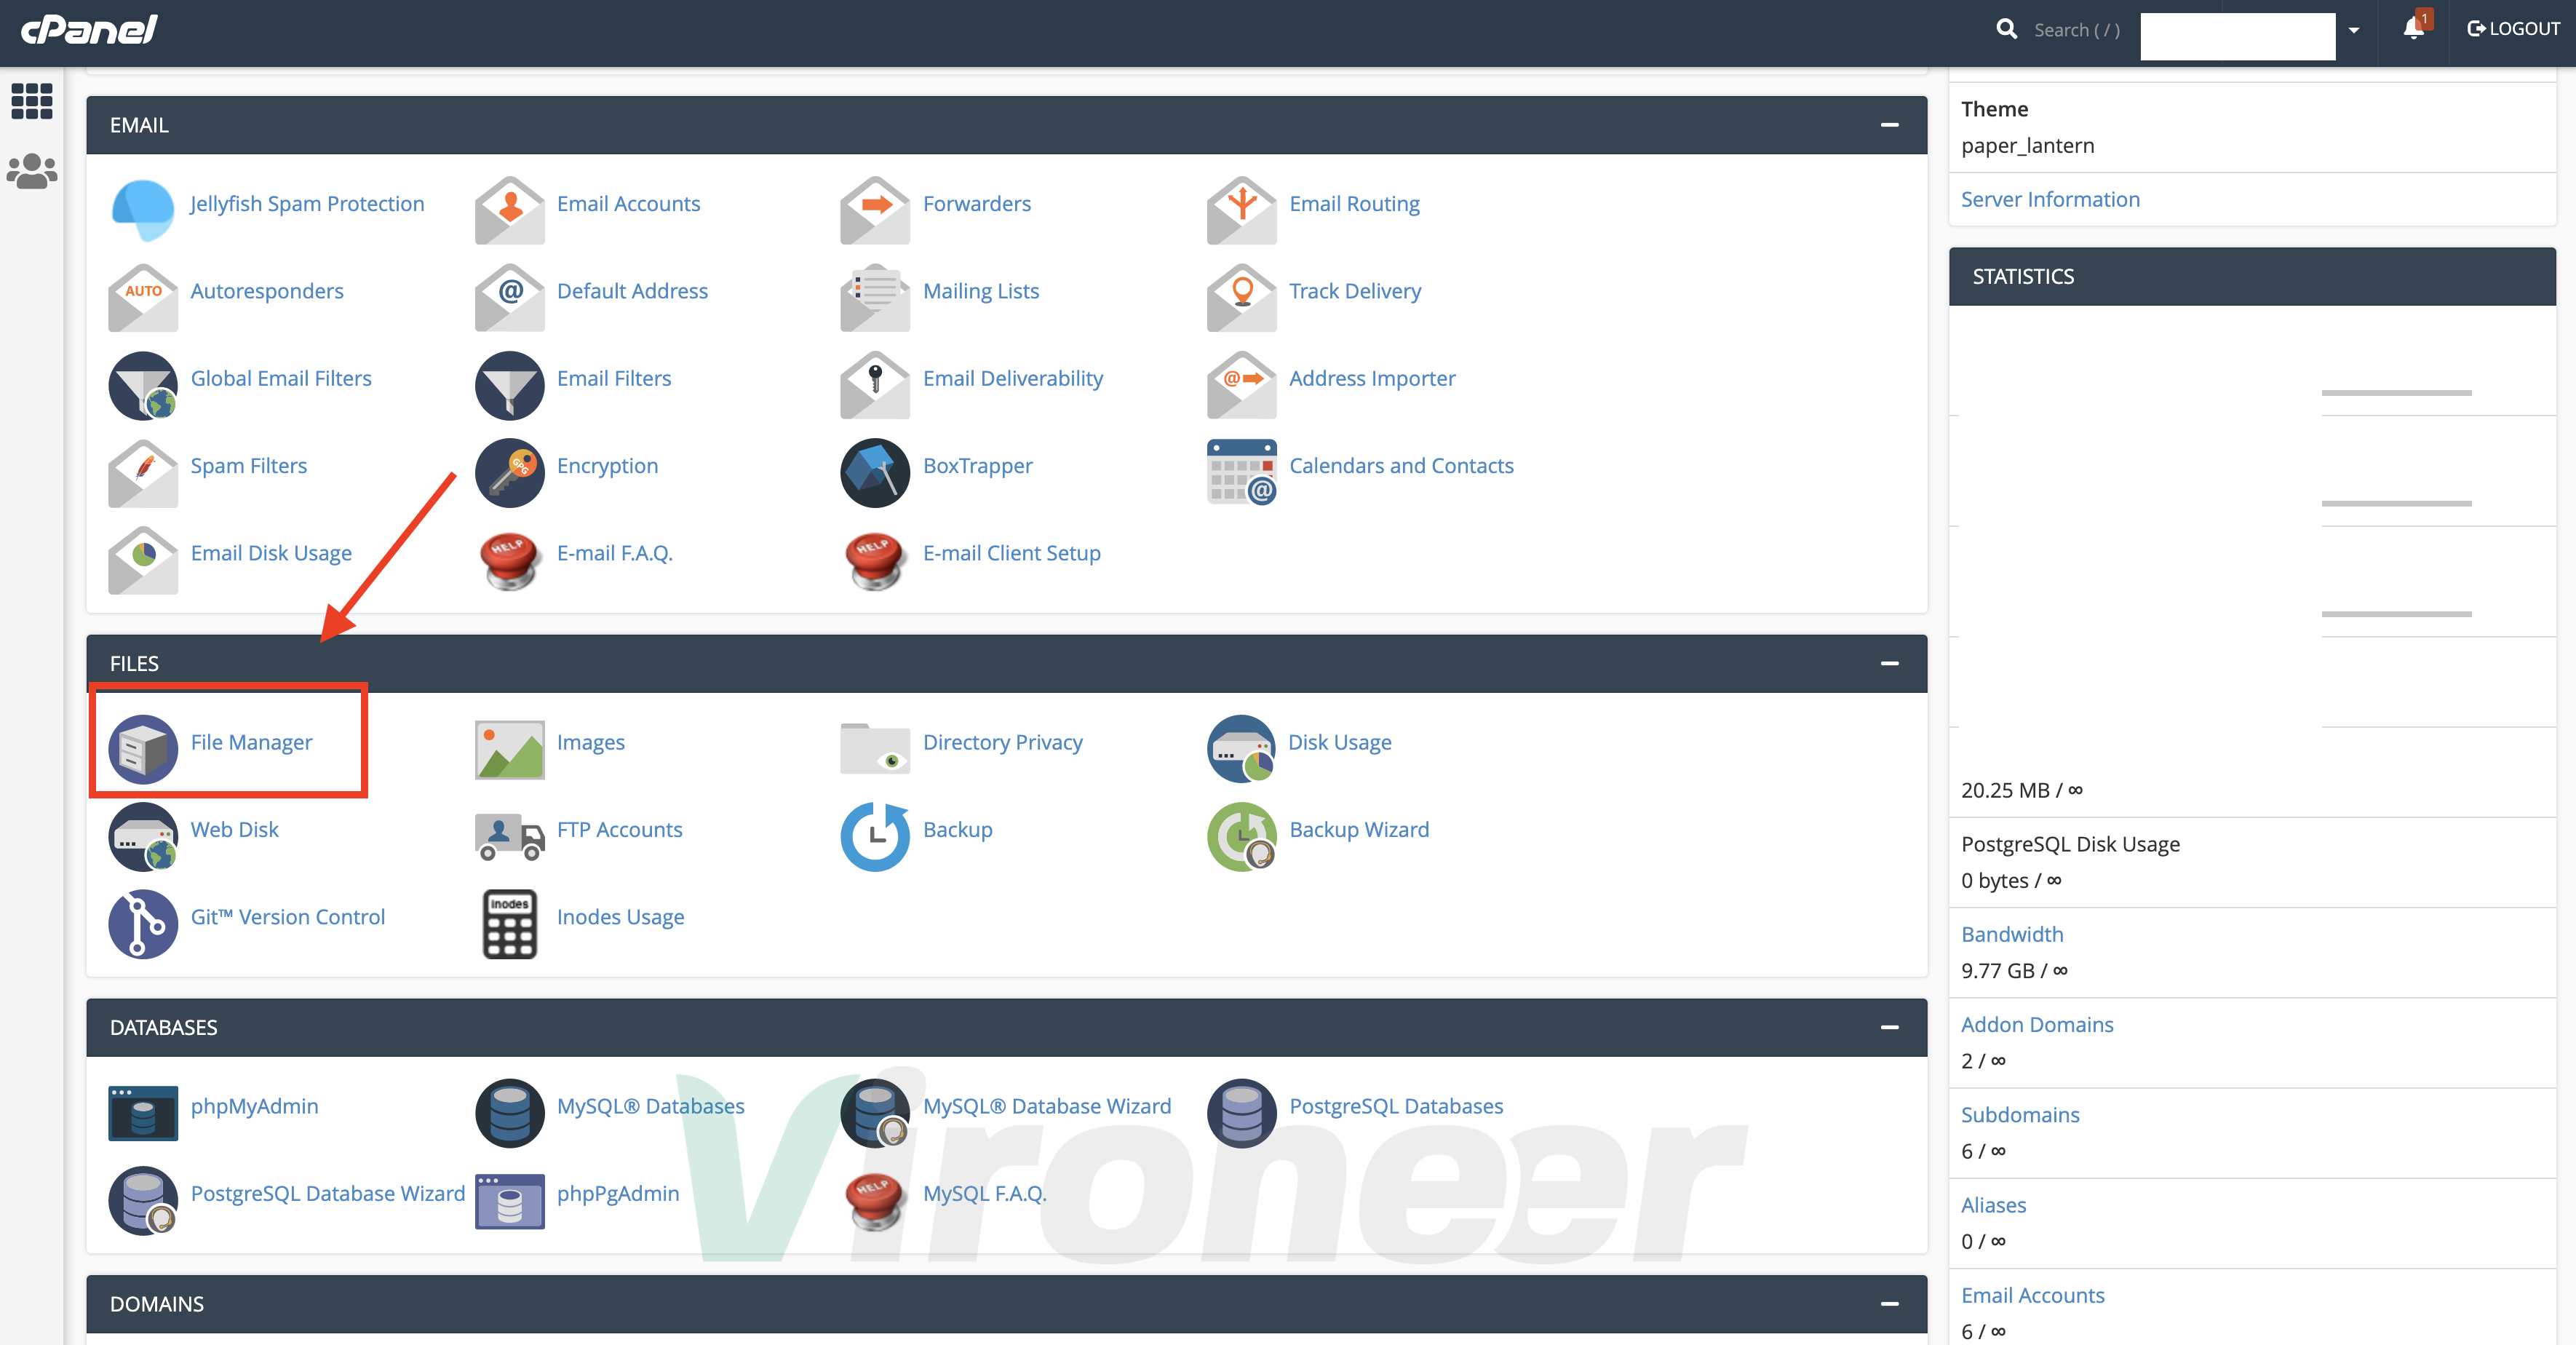
1 - Go to your server file manager
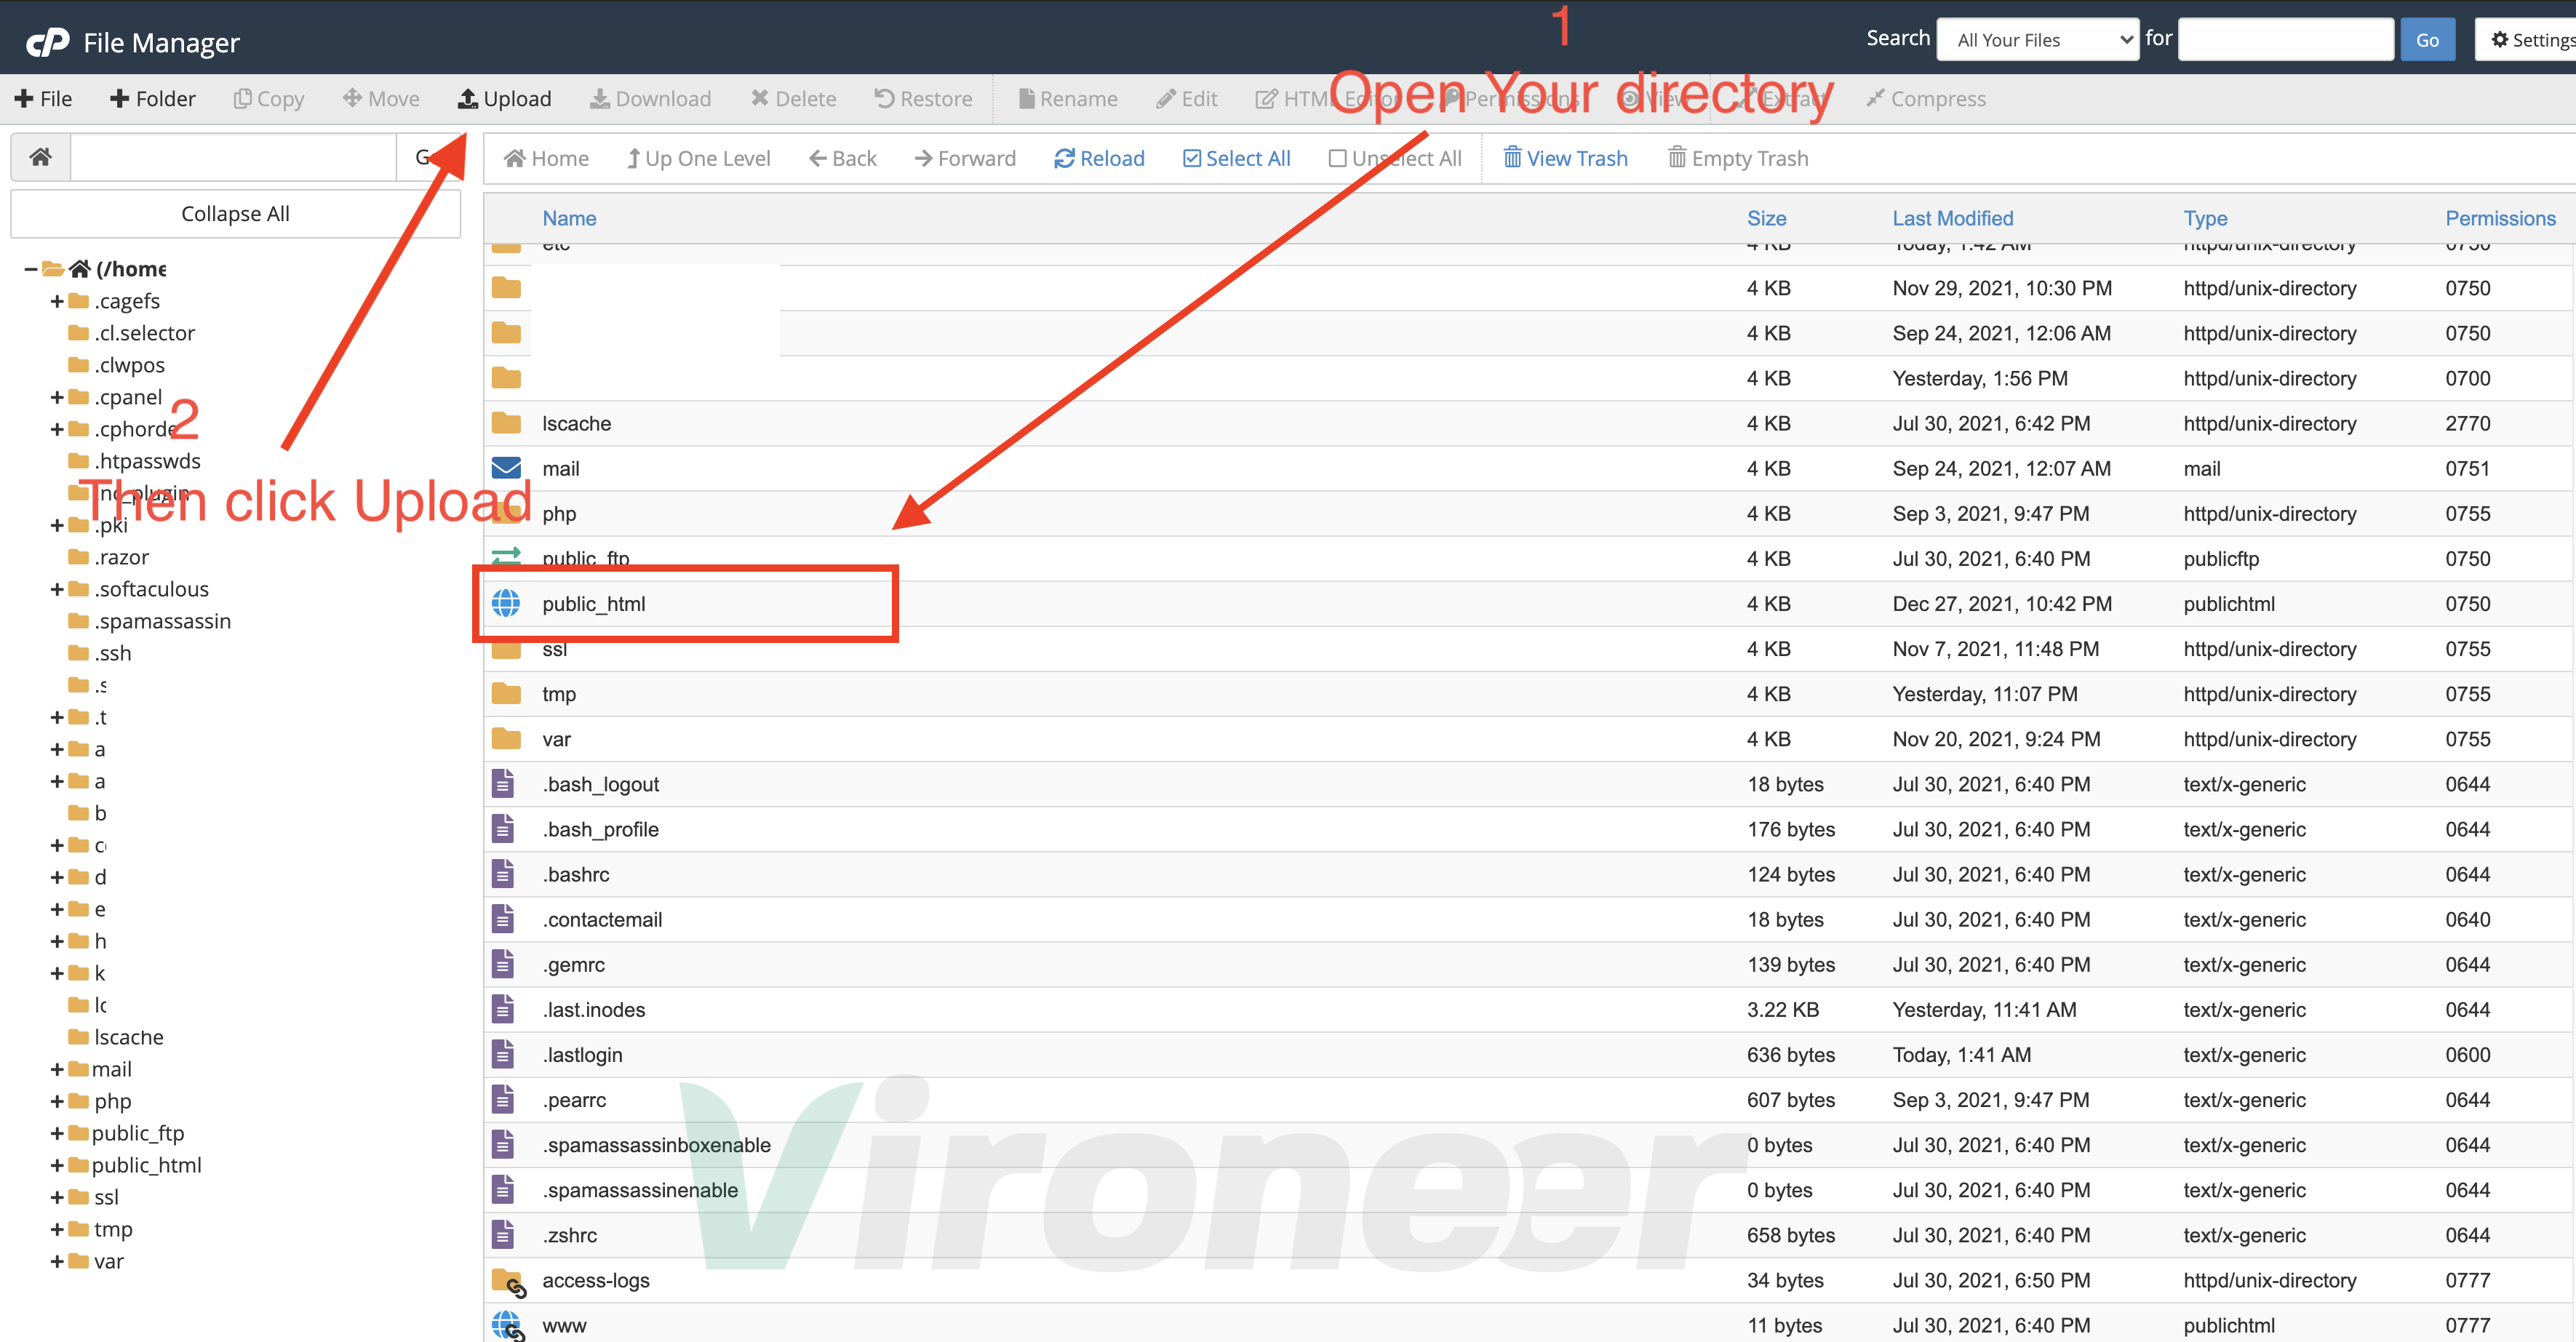
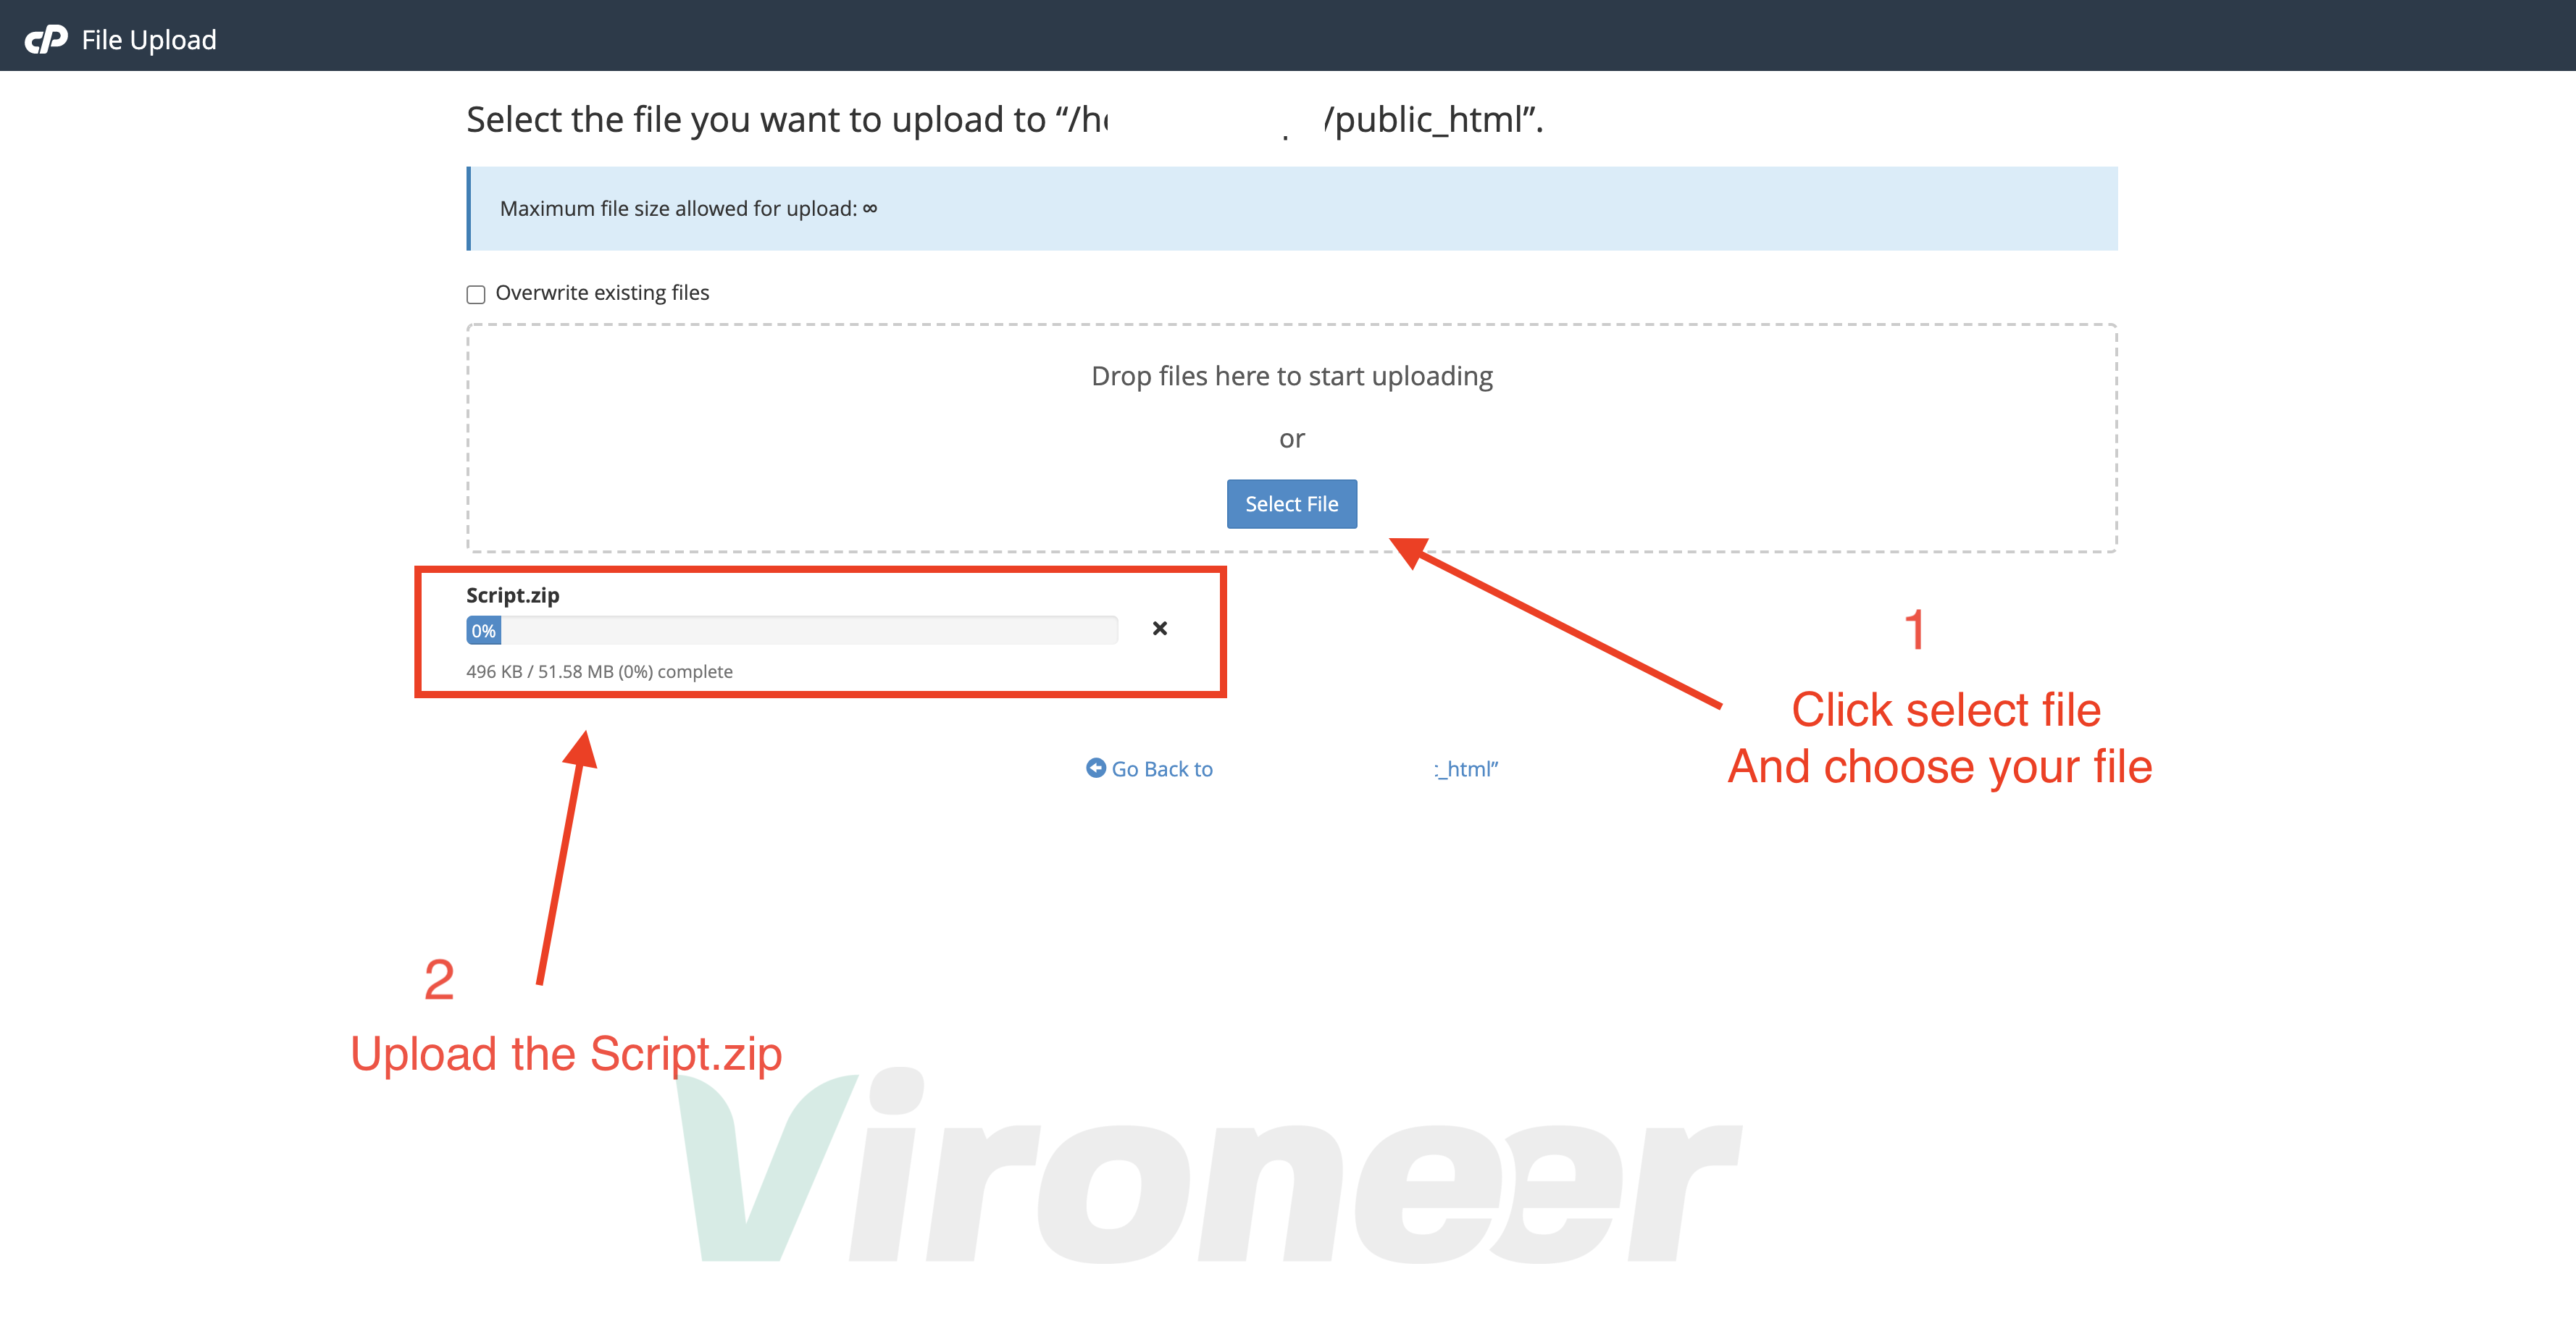
2 - Open your directory then click on upload
3 - Click select file then choose the Script.zip
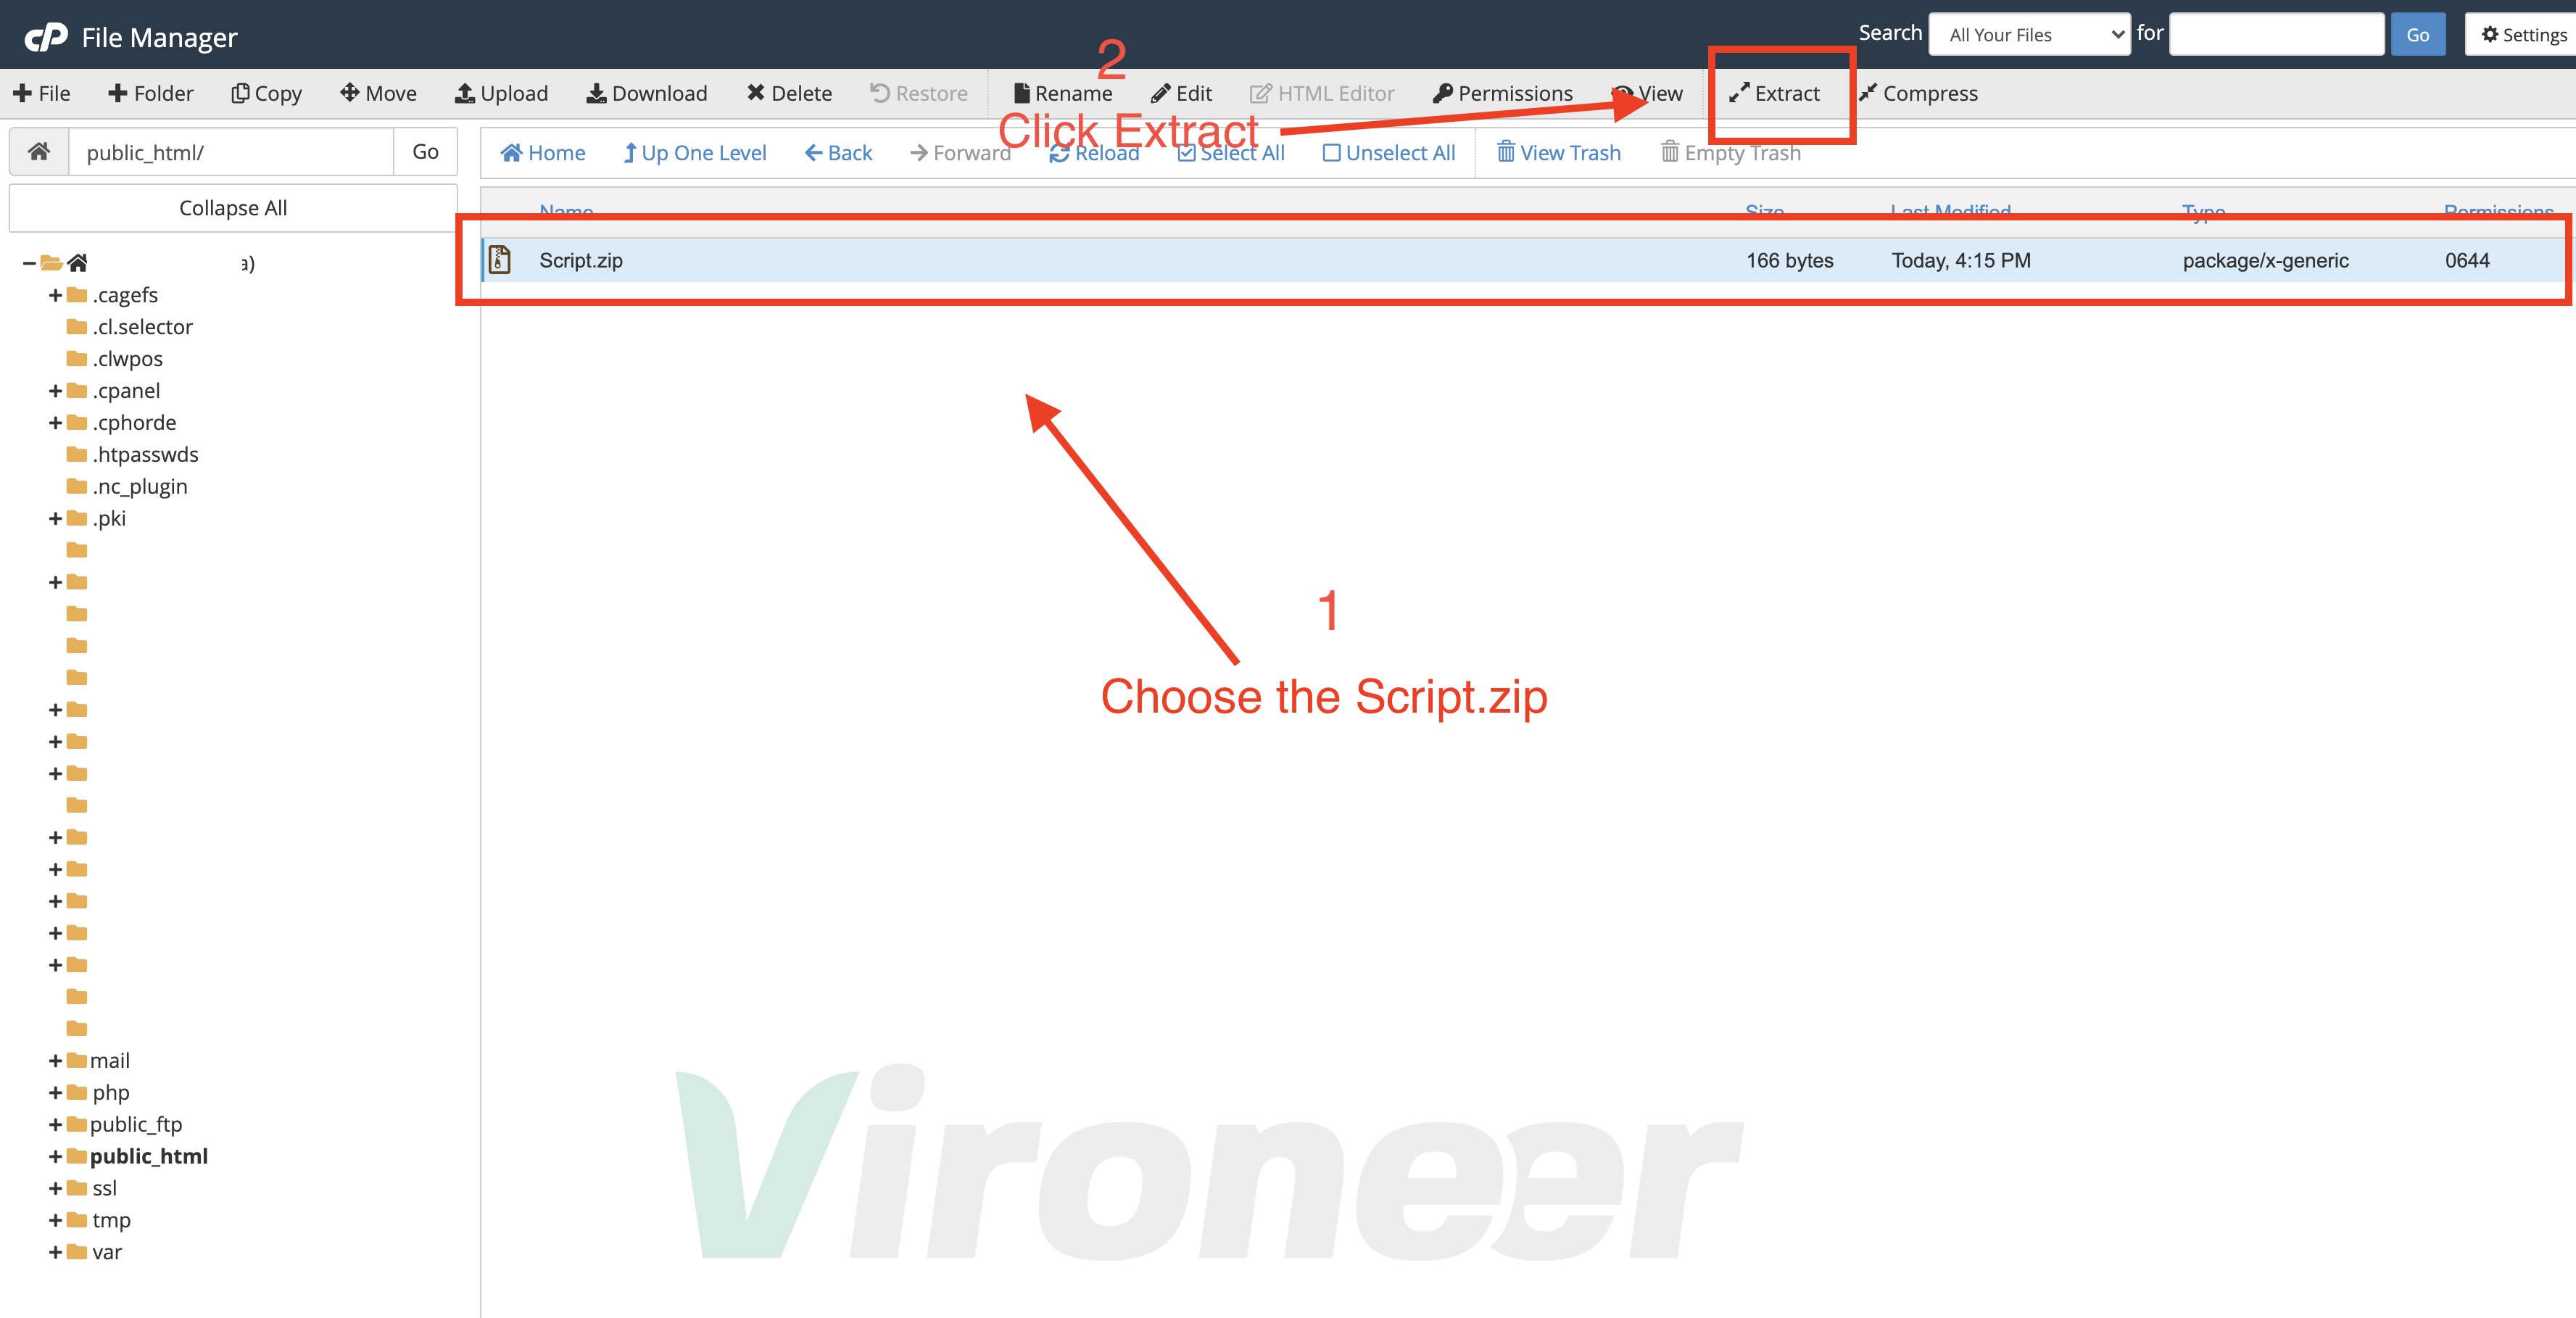
4 - Choose Script.zip then click extract
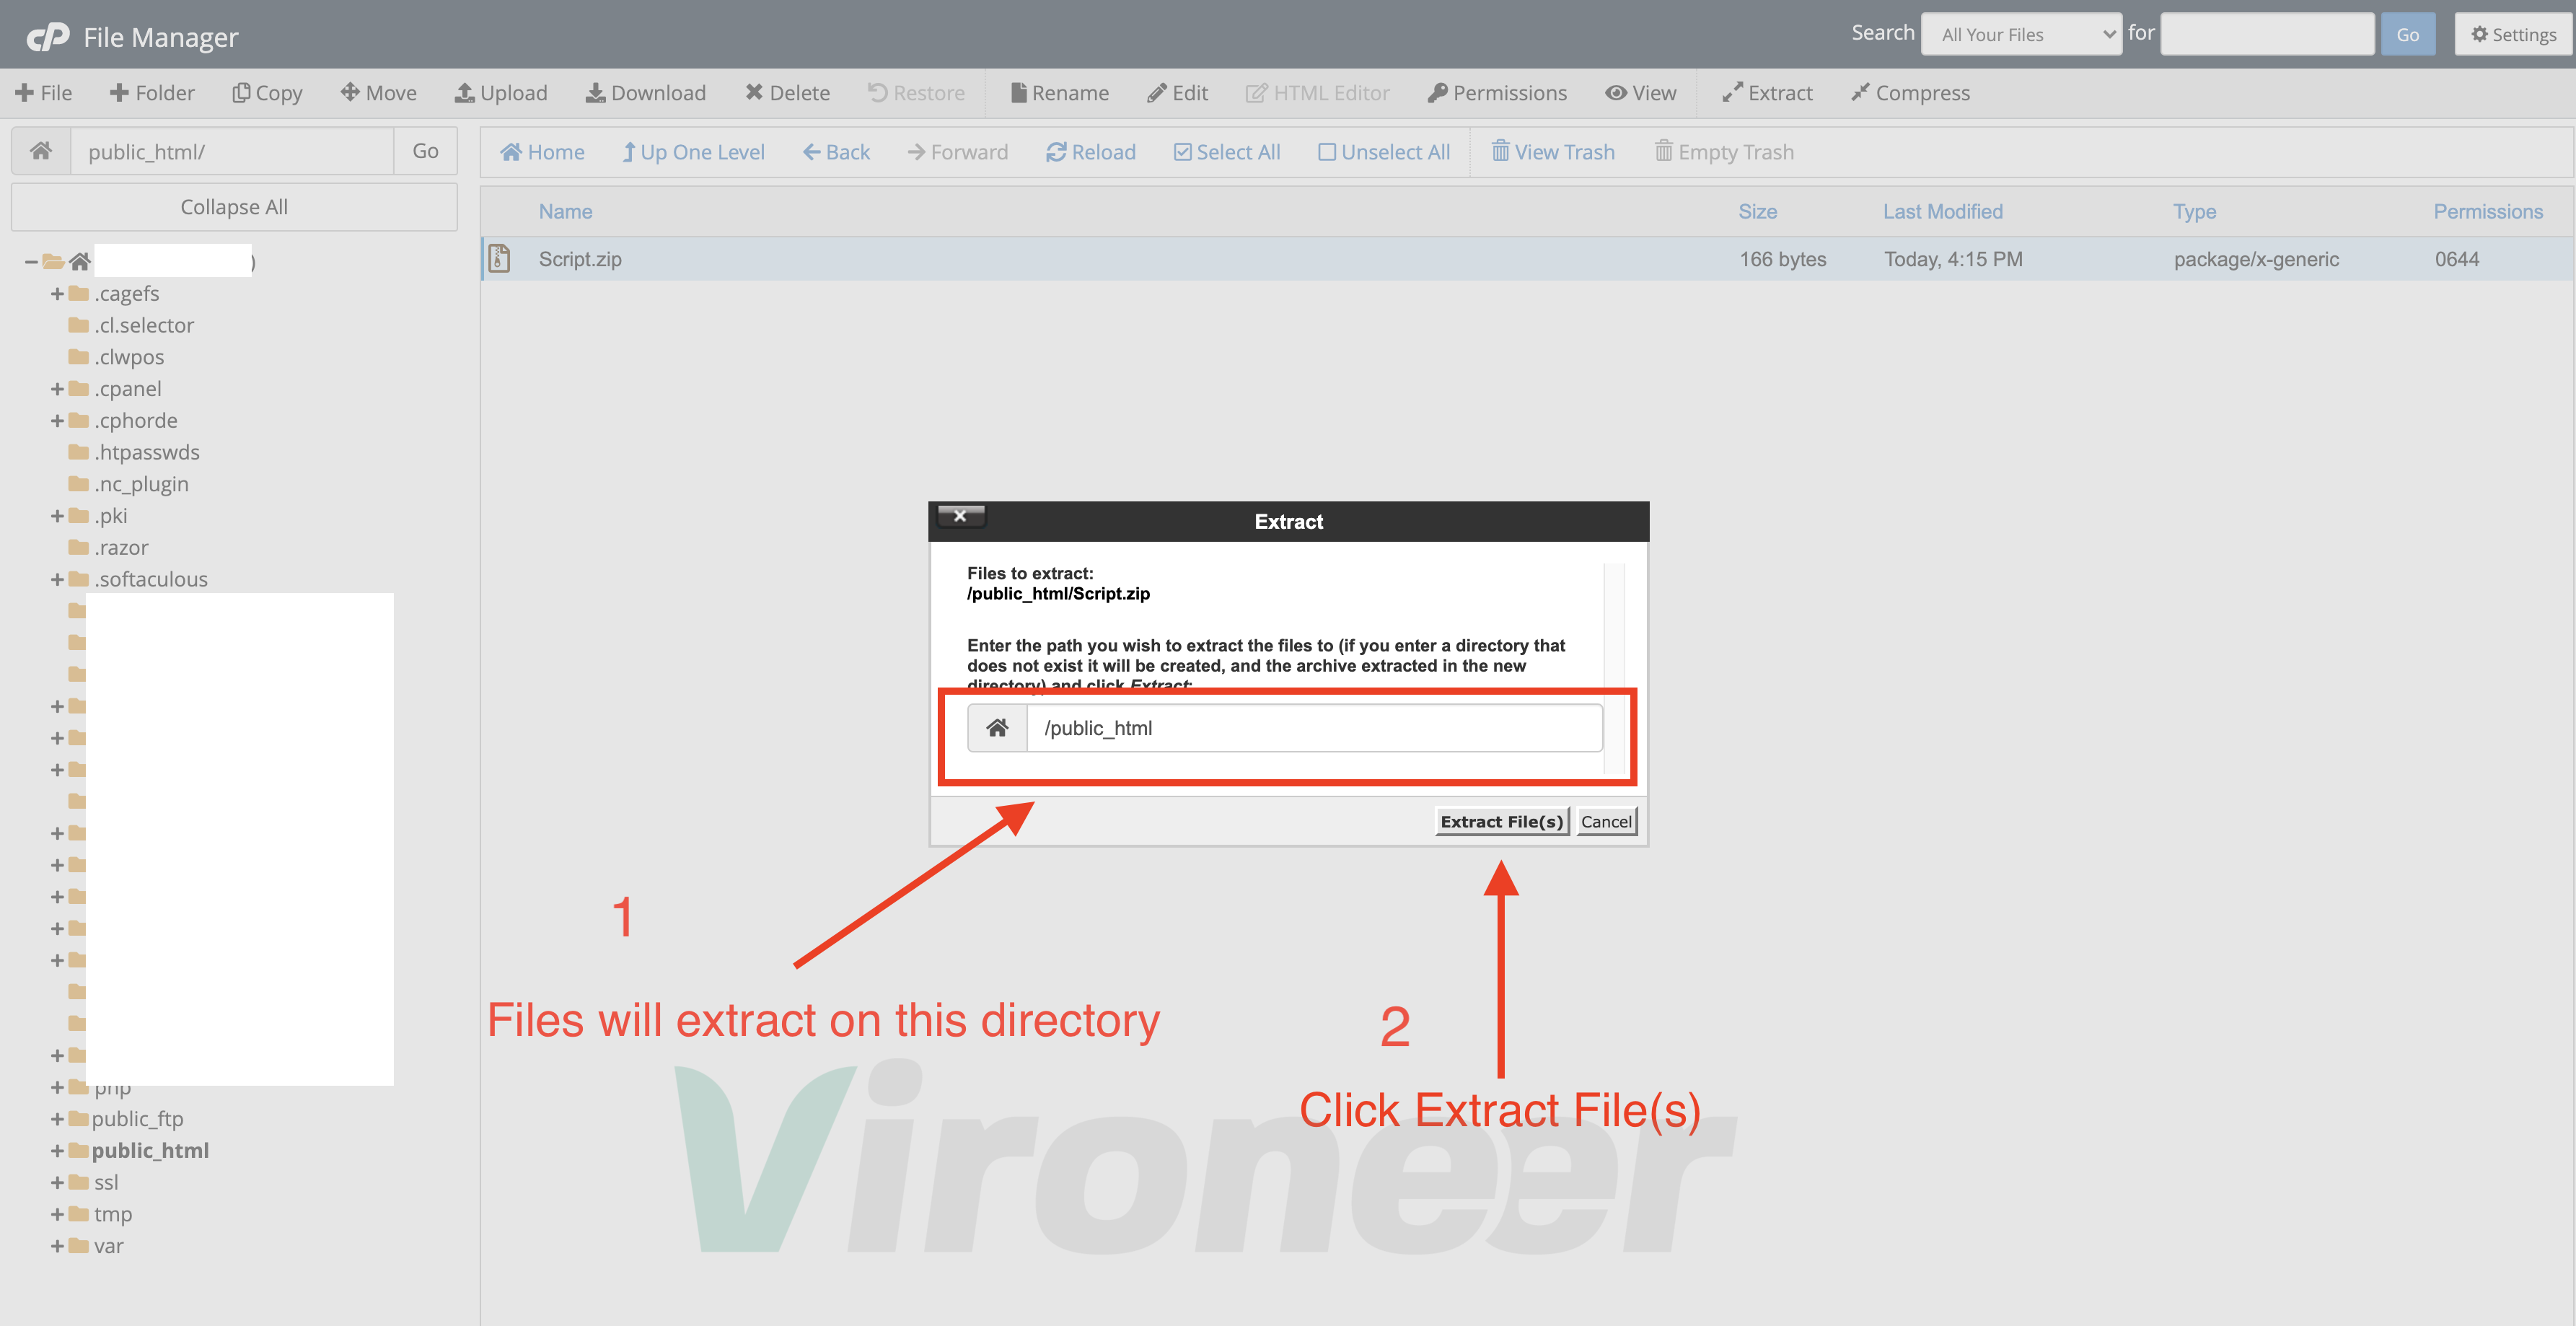
5 - Click extract file(s) then open your website URL
if your website URL cannot open or you see Error with code 500 or 403, its coming from your server side, please contact your server support, or check your server logs to know where is the problem.
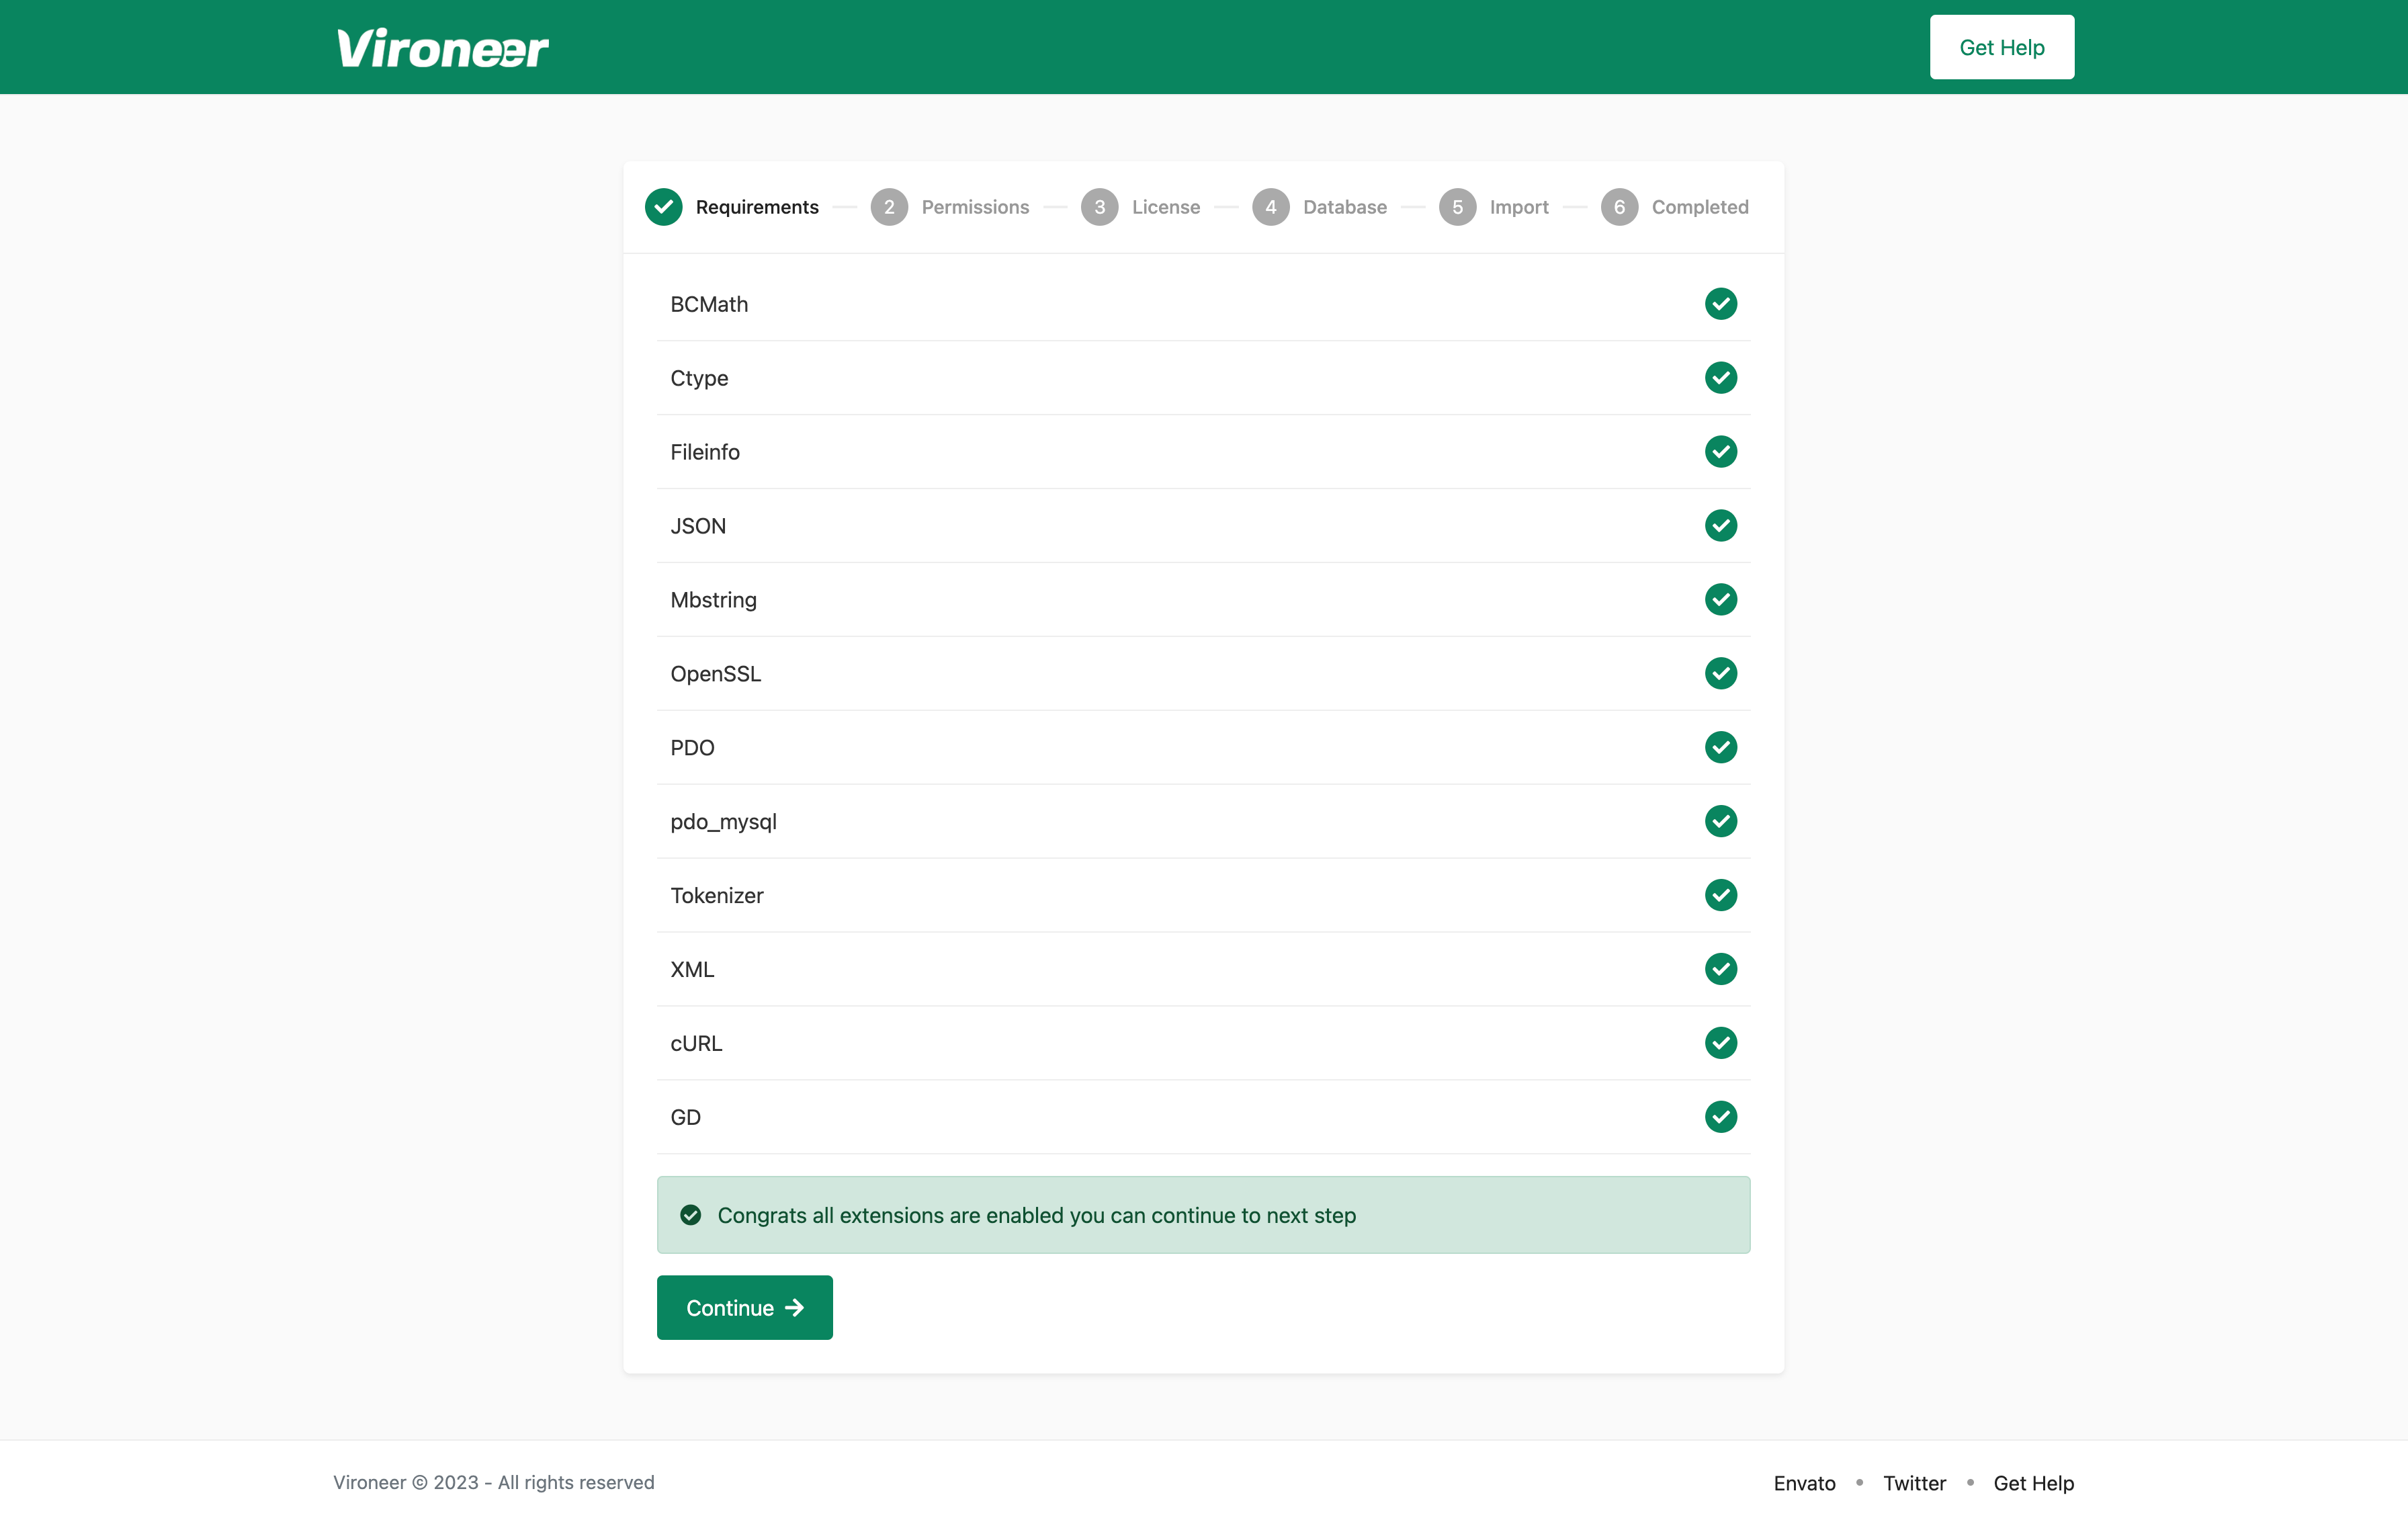
1 - Make sure all the requirements are enabled, if its disabled please enable it or contact your server support.
2 - All those files must have a 0775 permission.

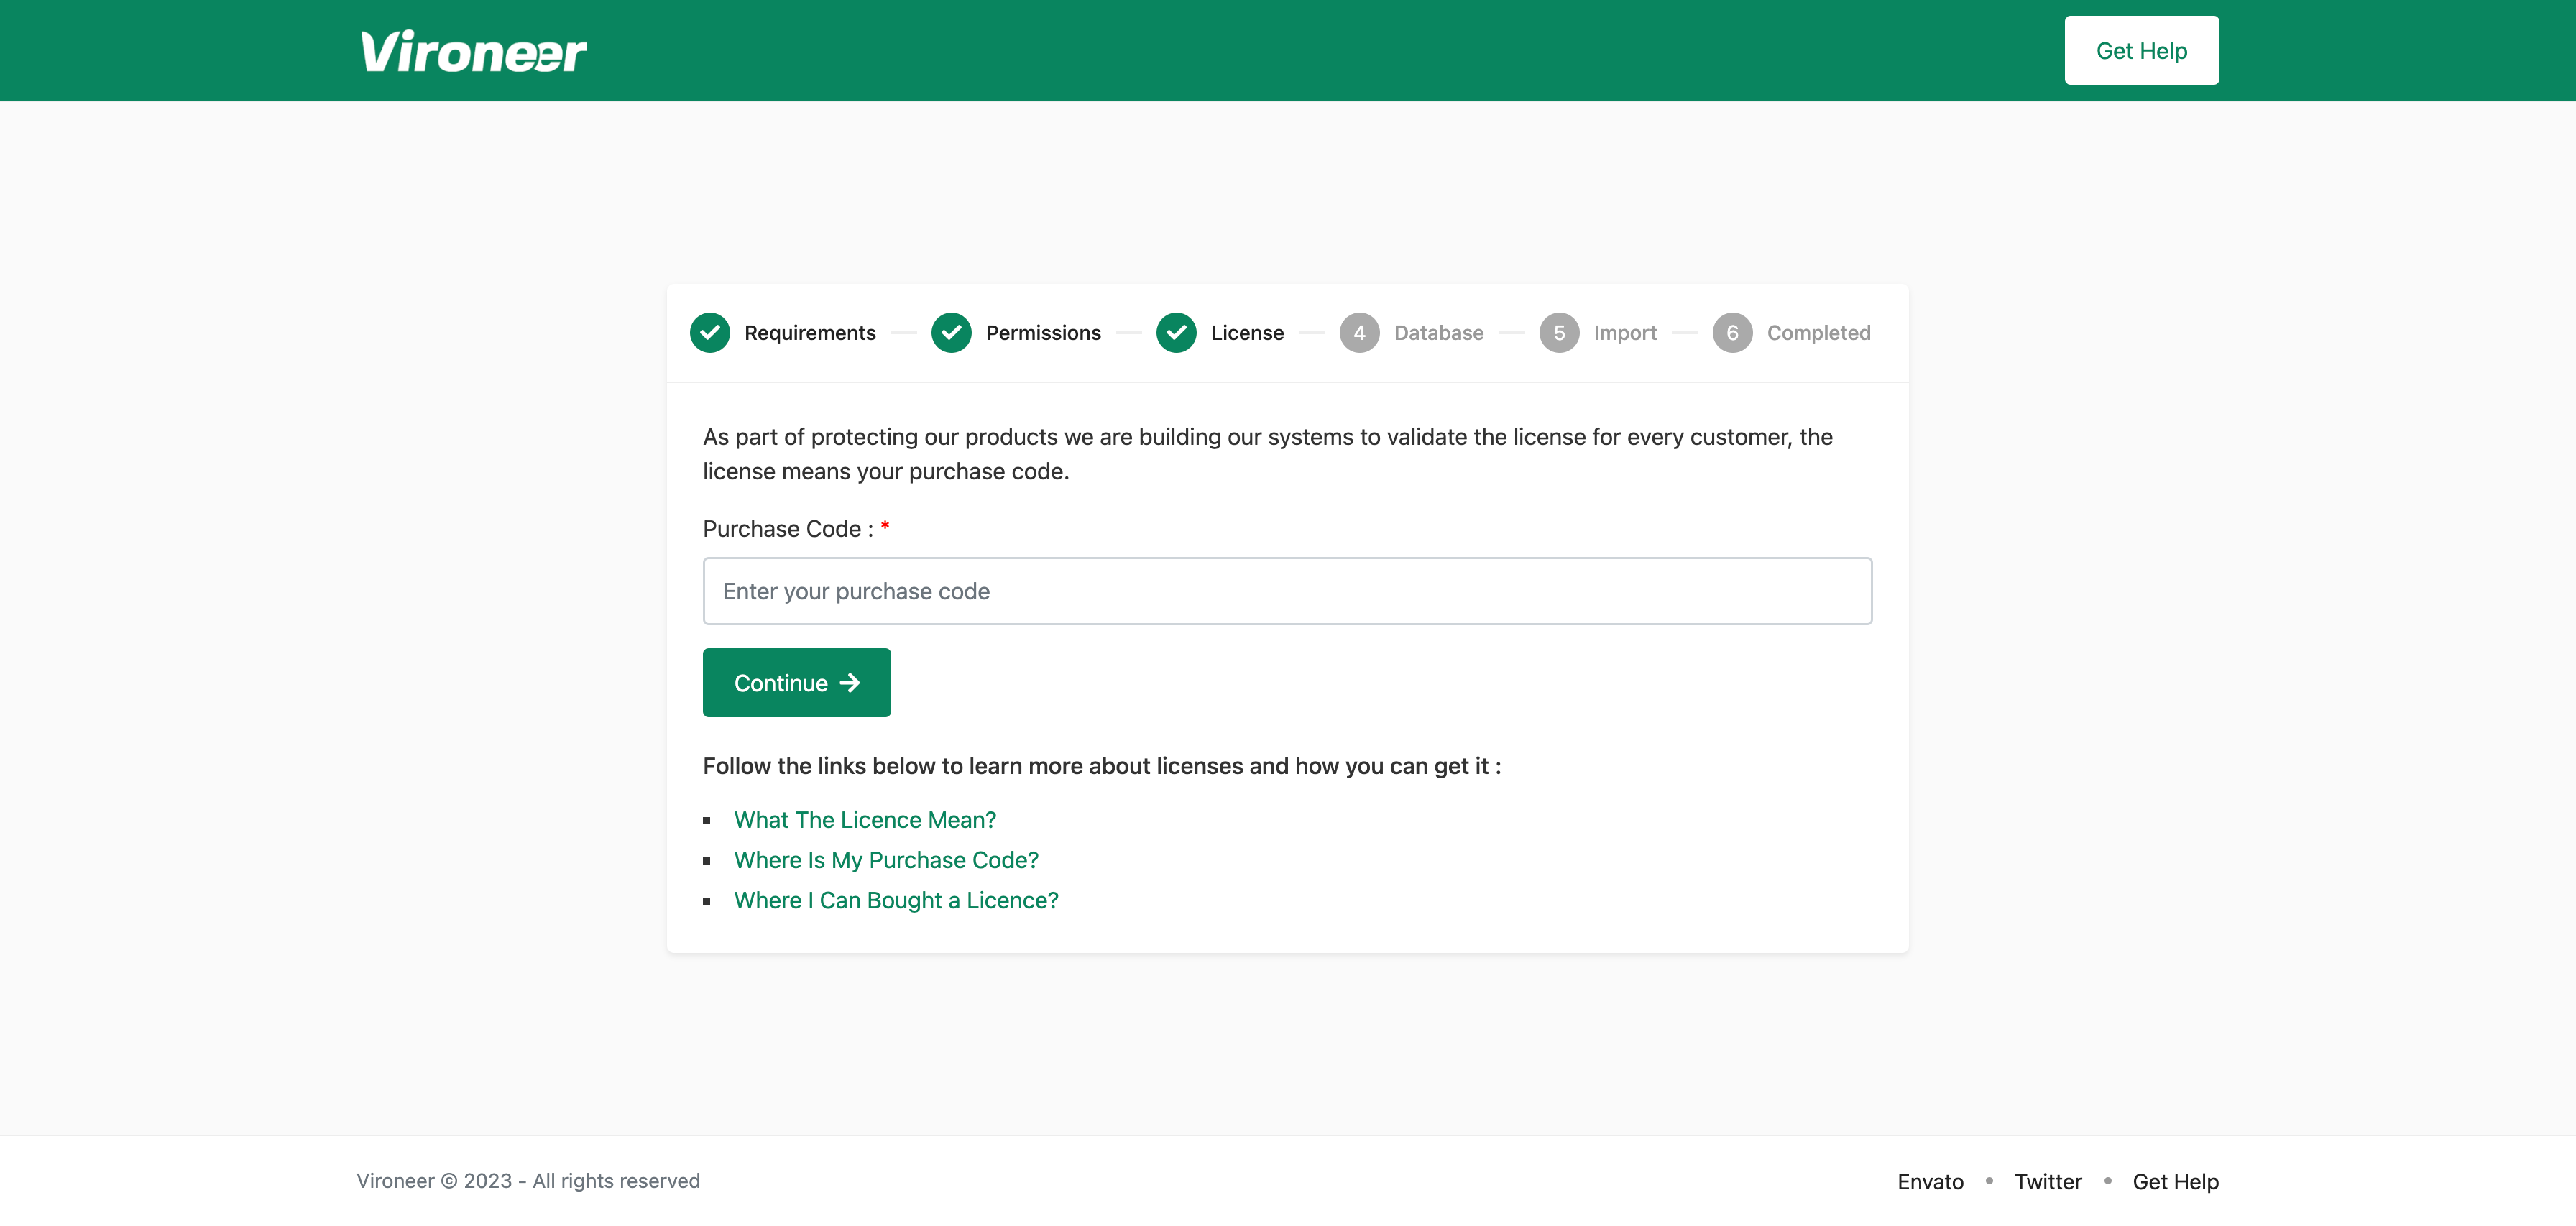
3 - Enter your purchase code and click continue.
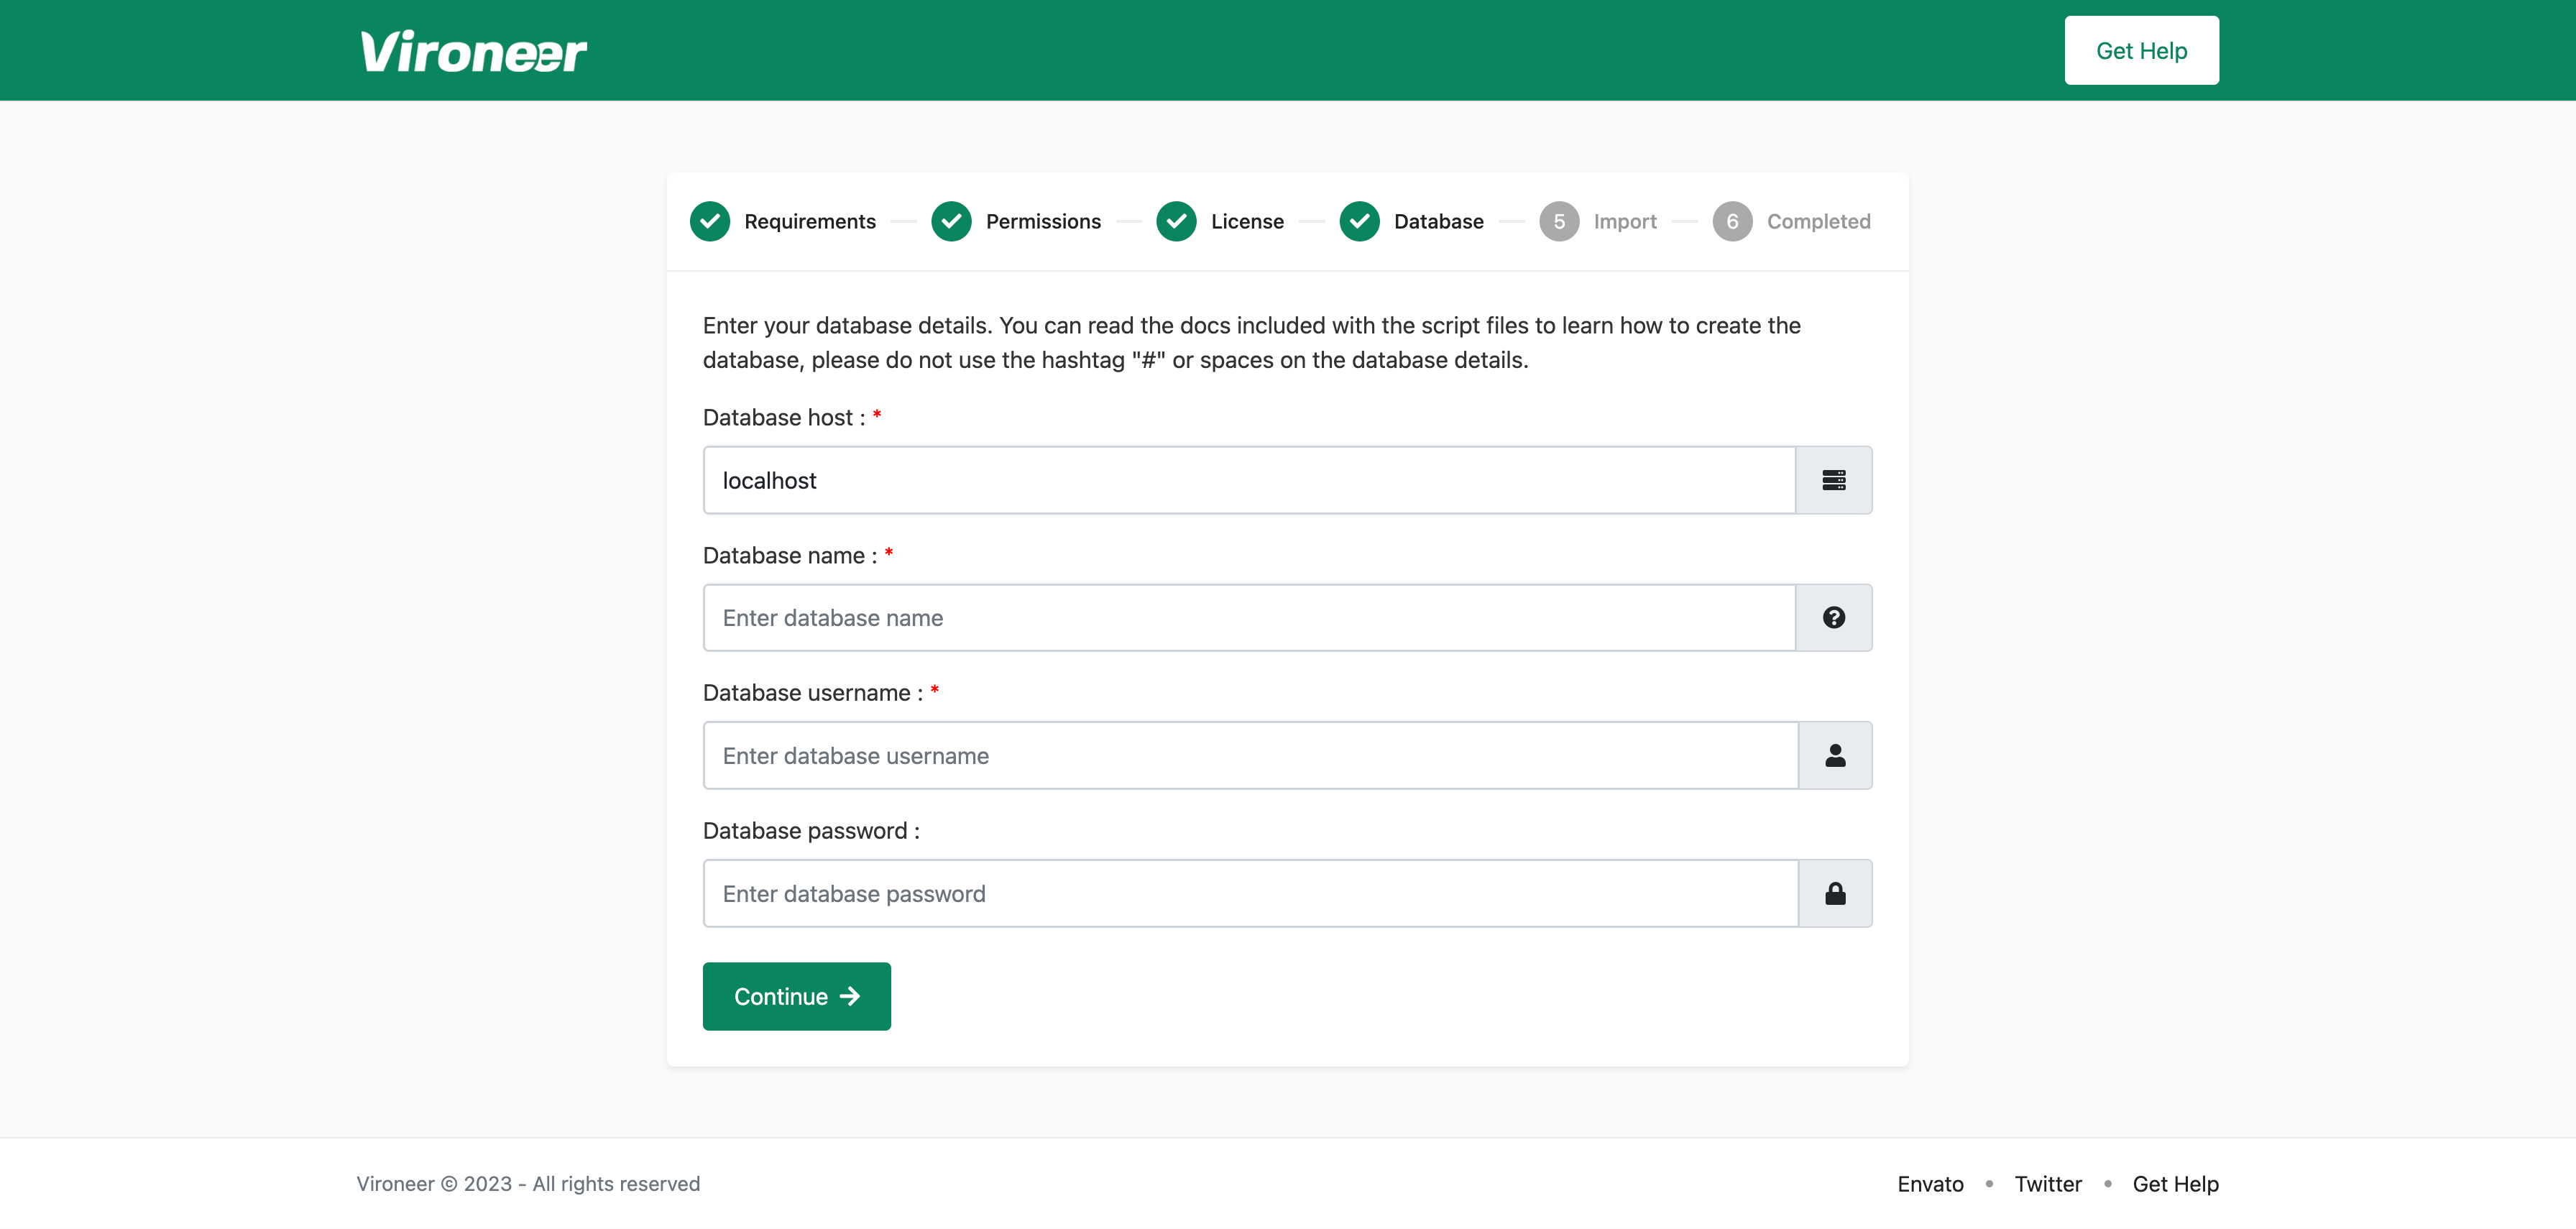
4 - Enter your database details and click continue.
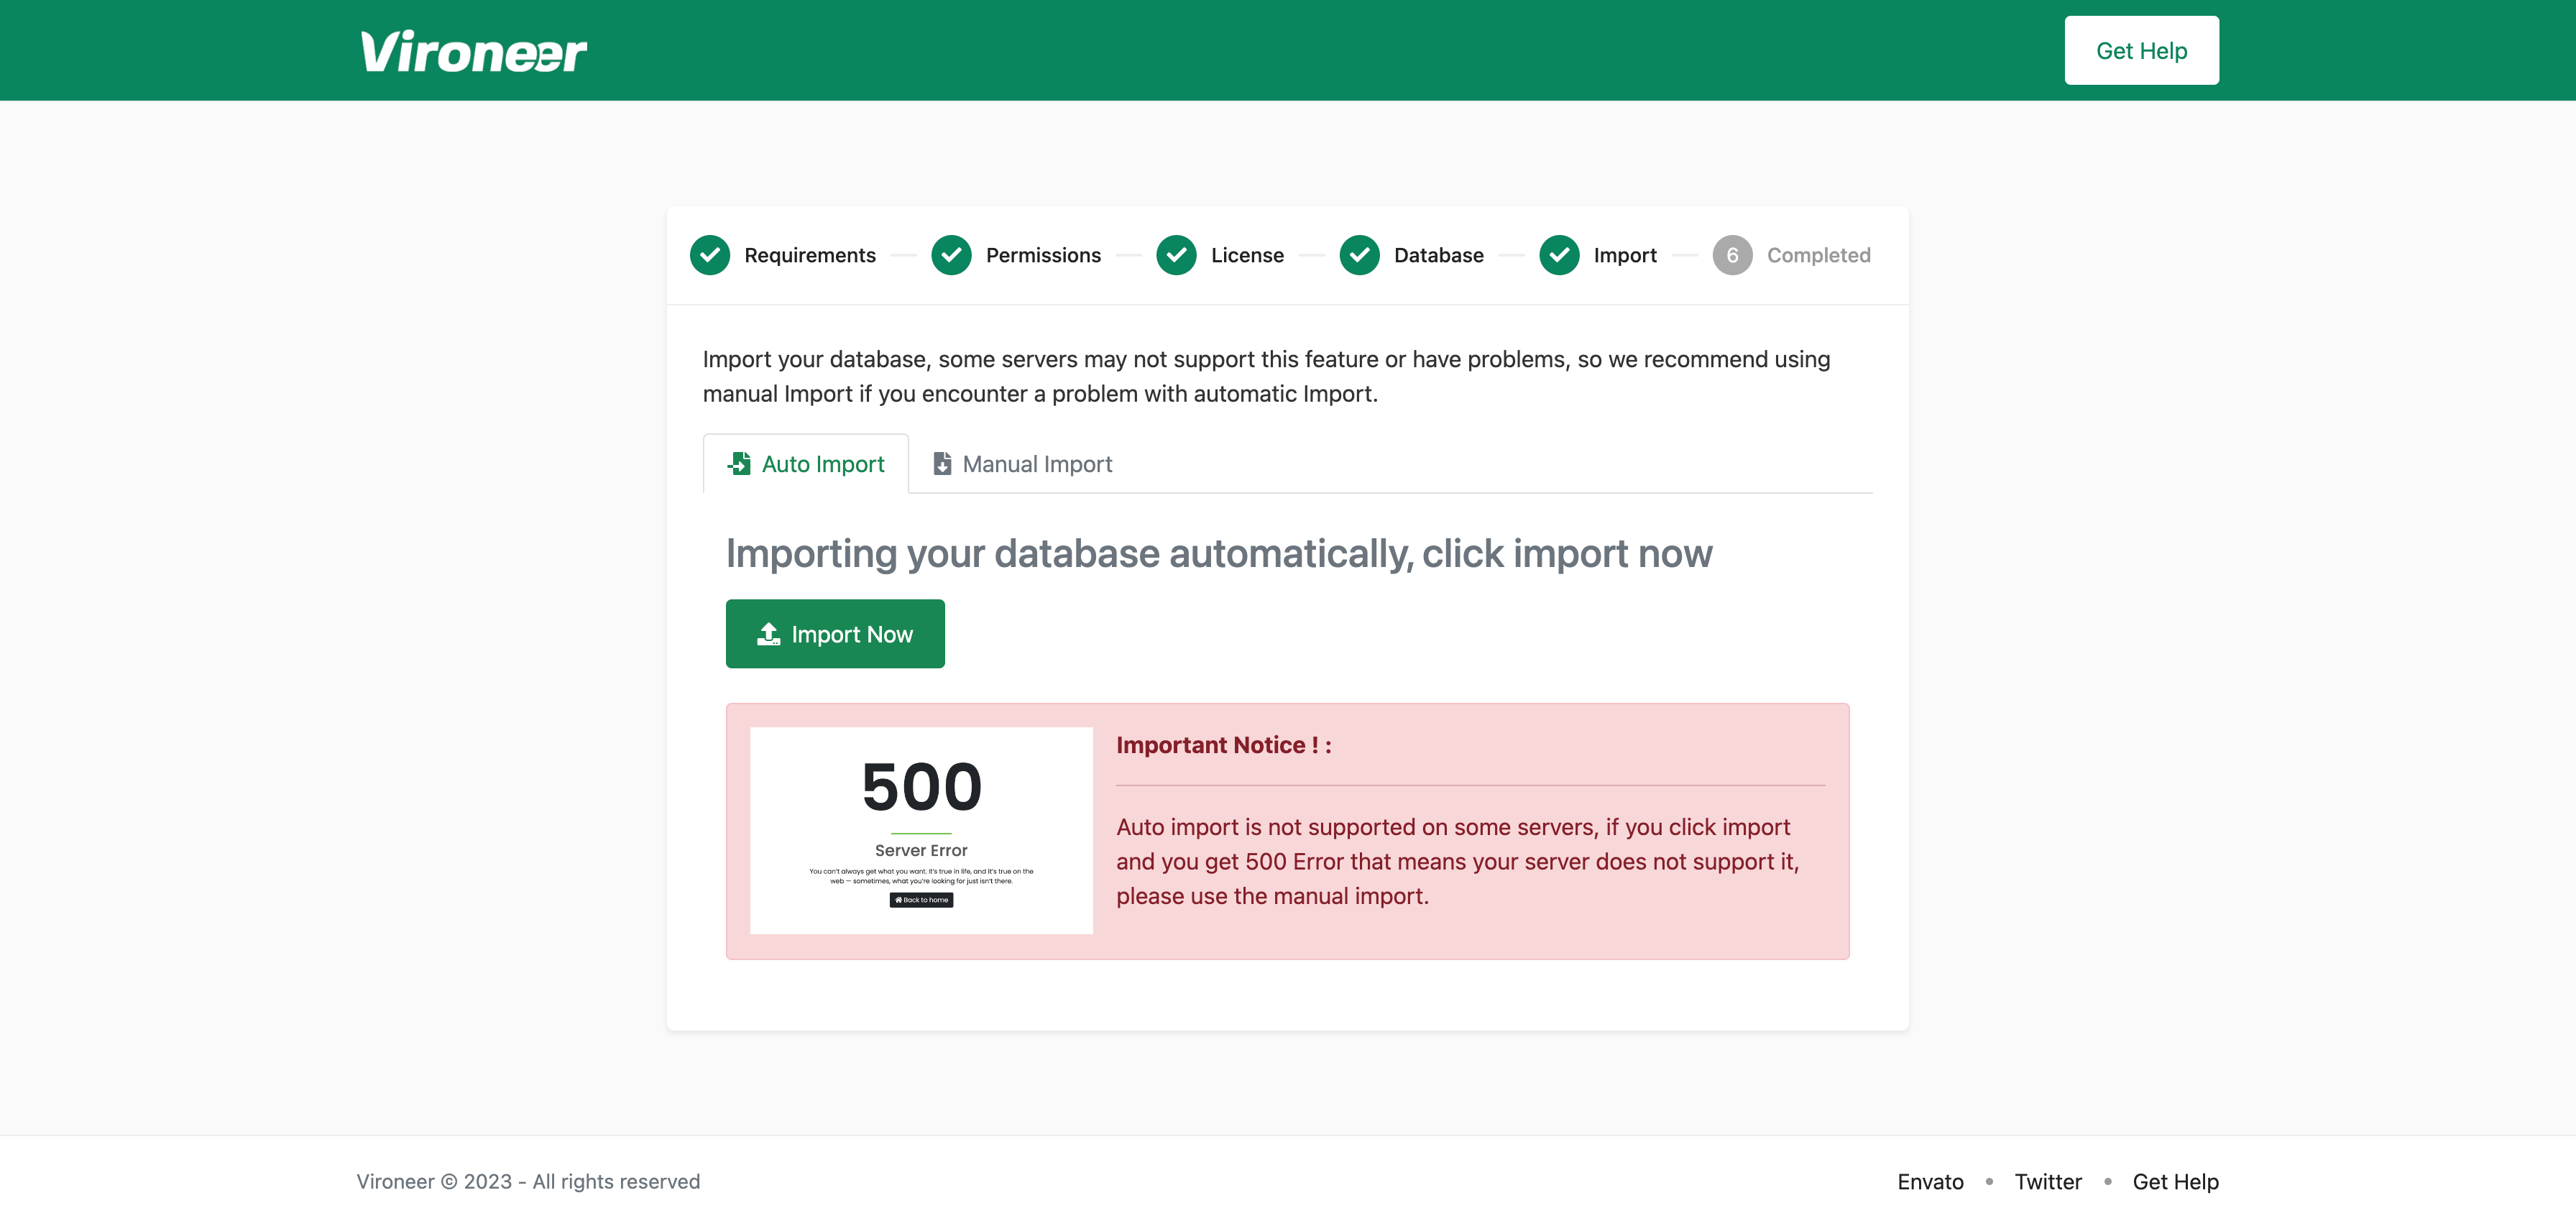
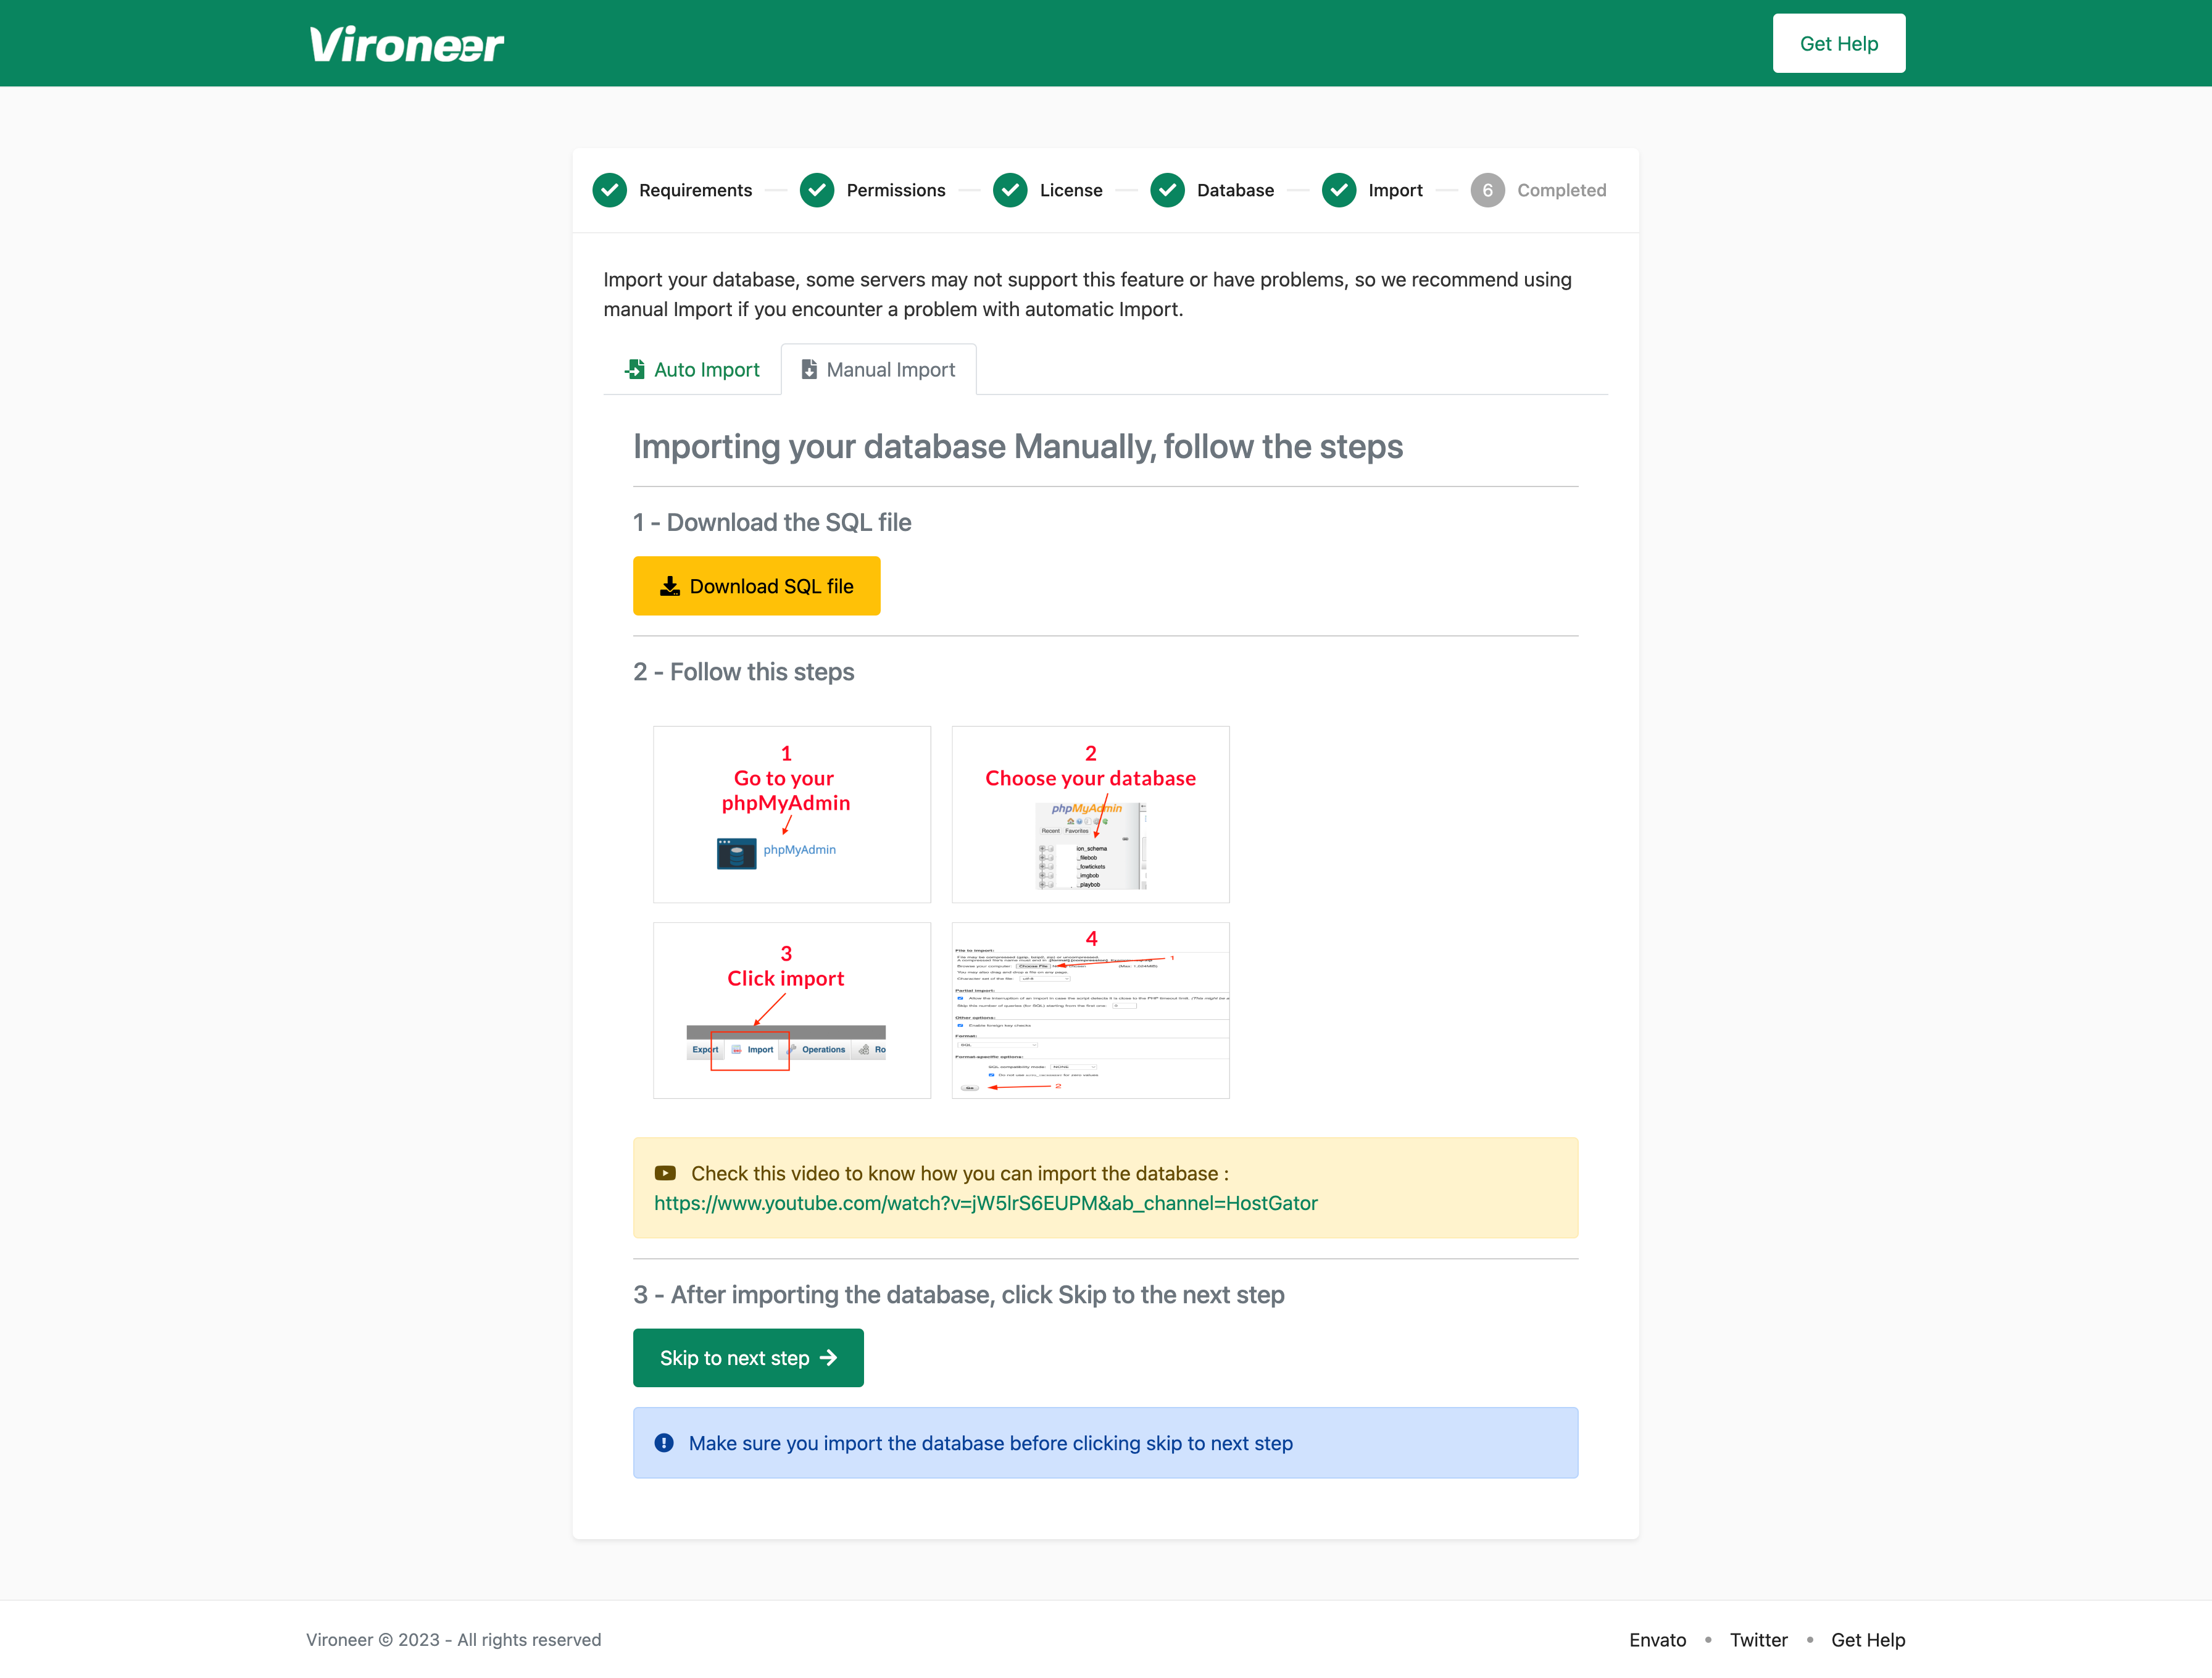
5 - Click import database file.
Some servers is disabling this option or they have a problem on mysql database if you get any problem or 500 Server Error please use manual import to import your database.
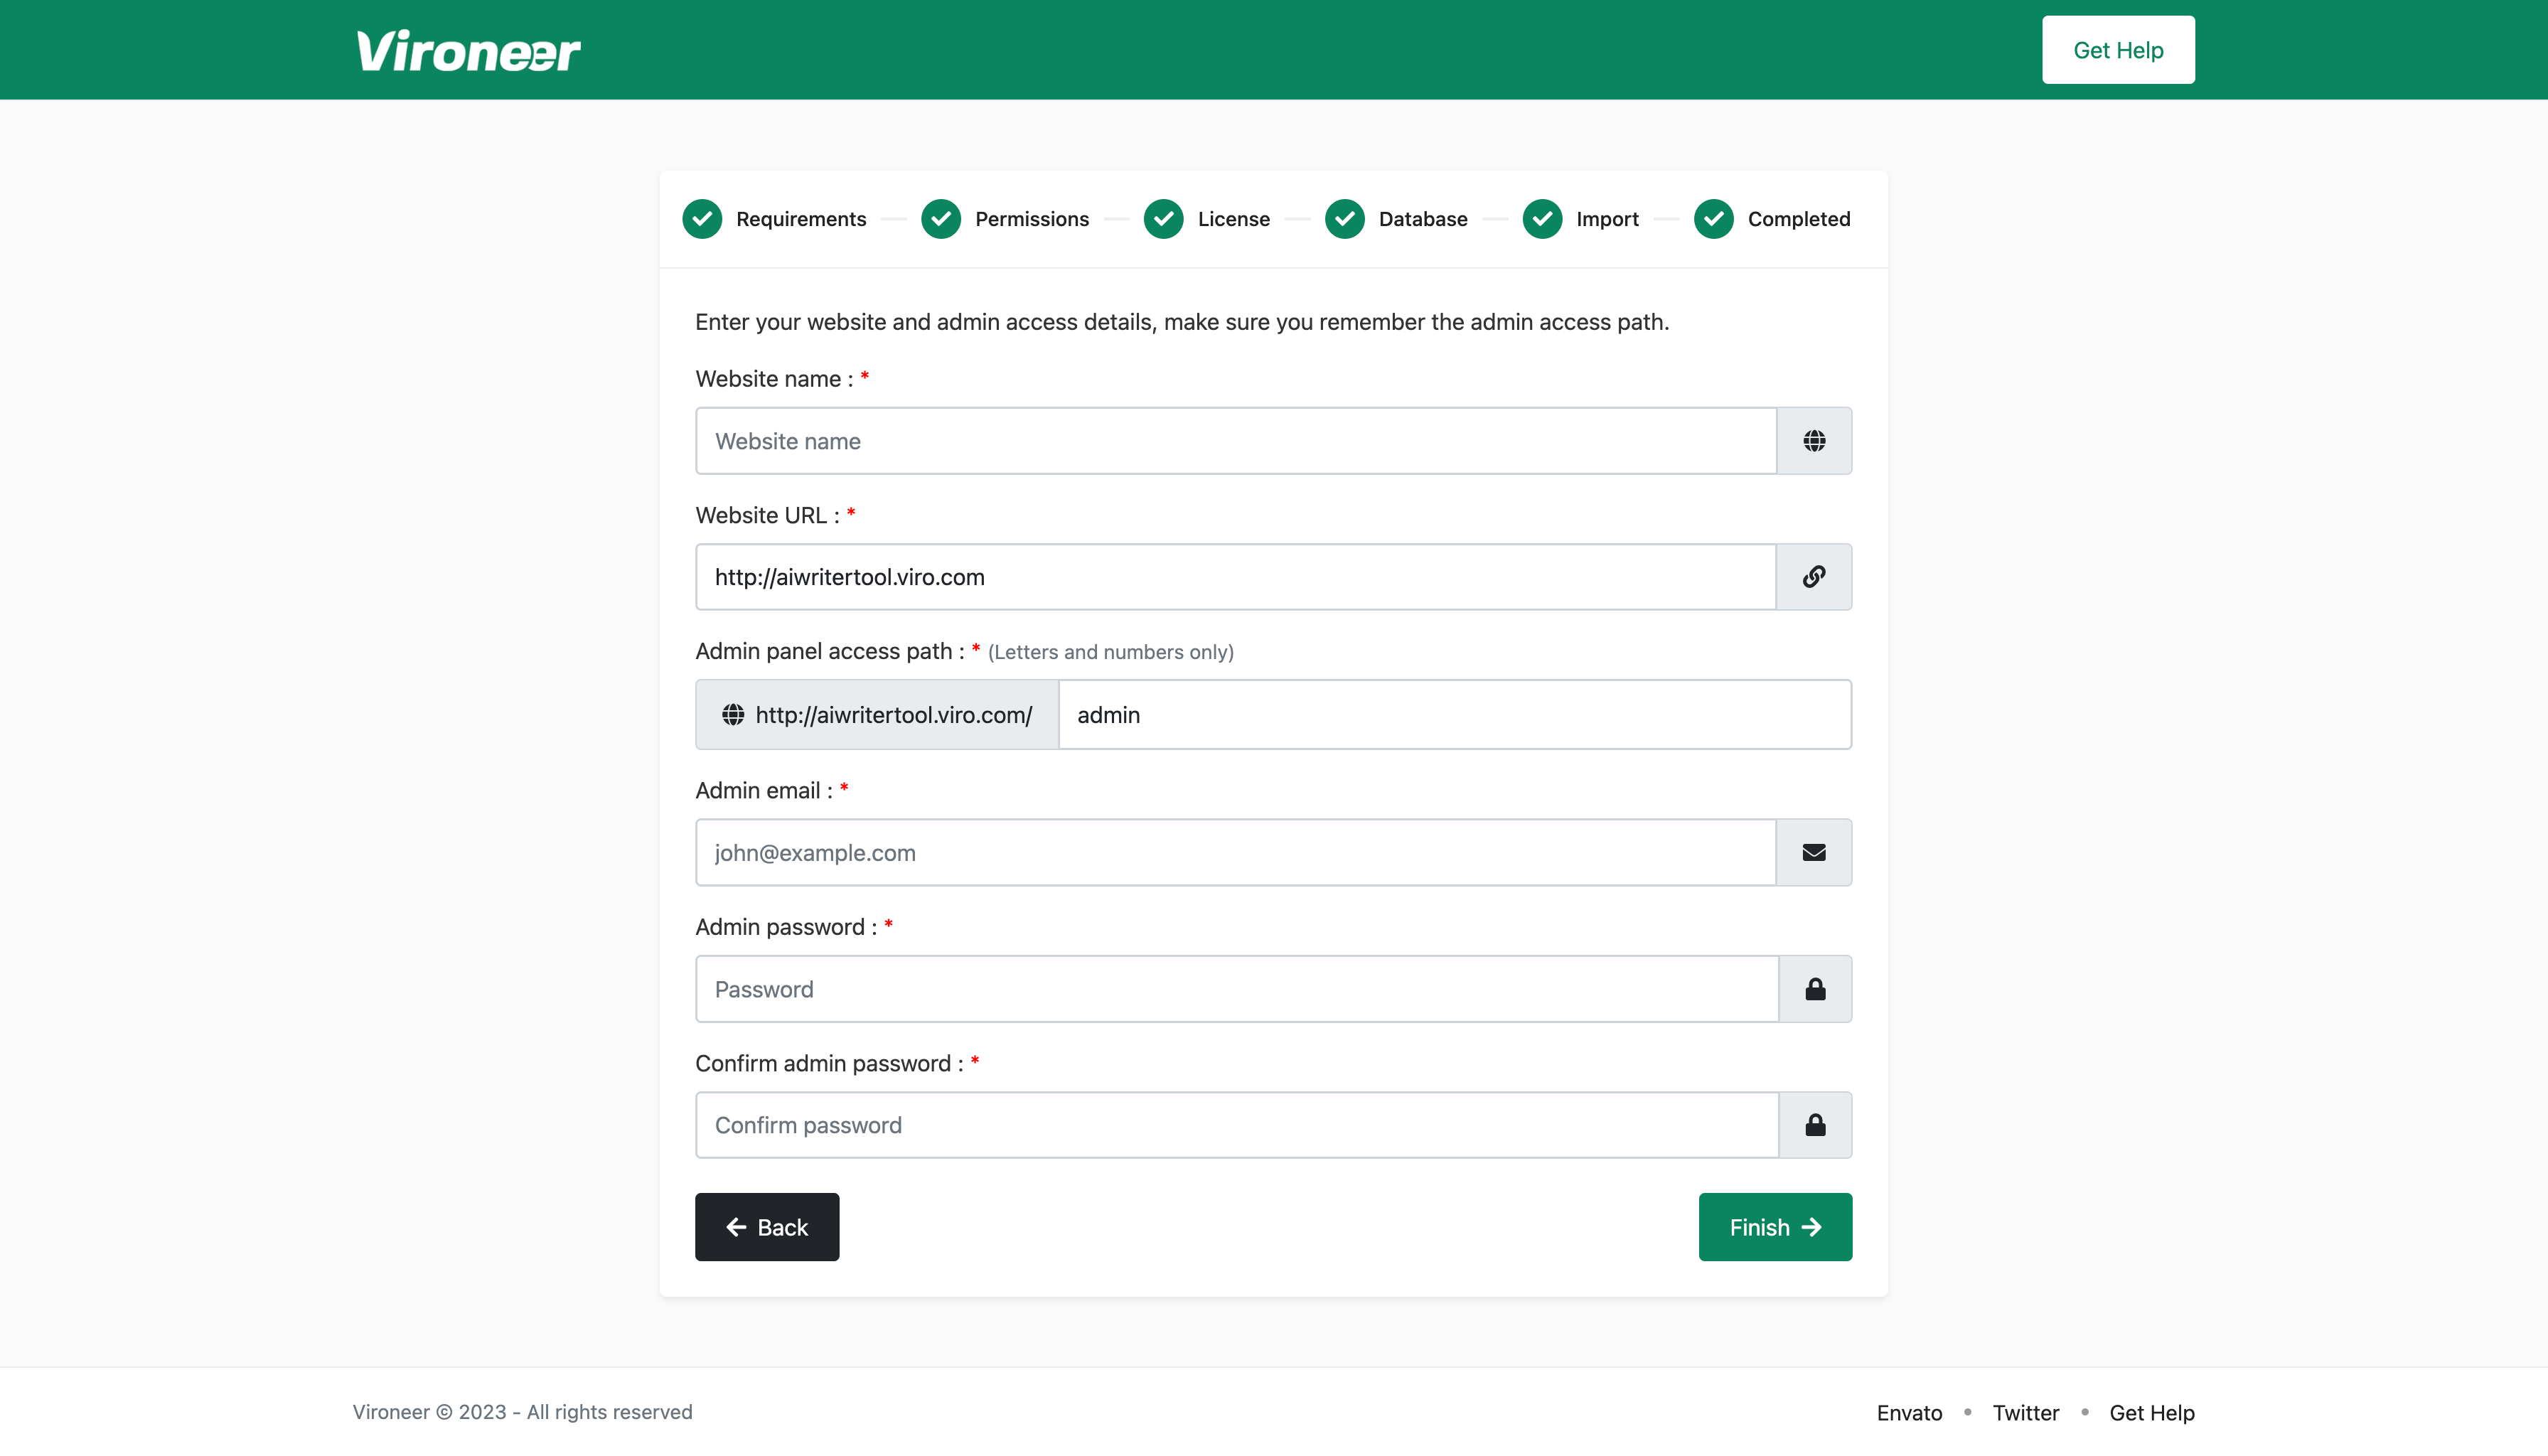
7 - Set your website details and admin details then click finish.
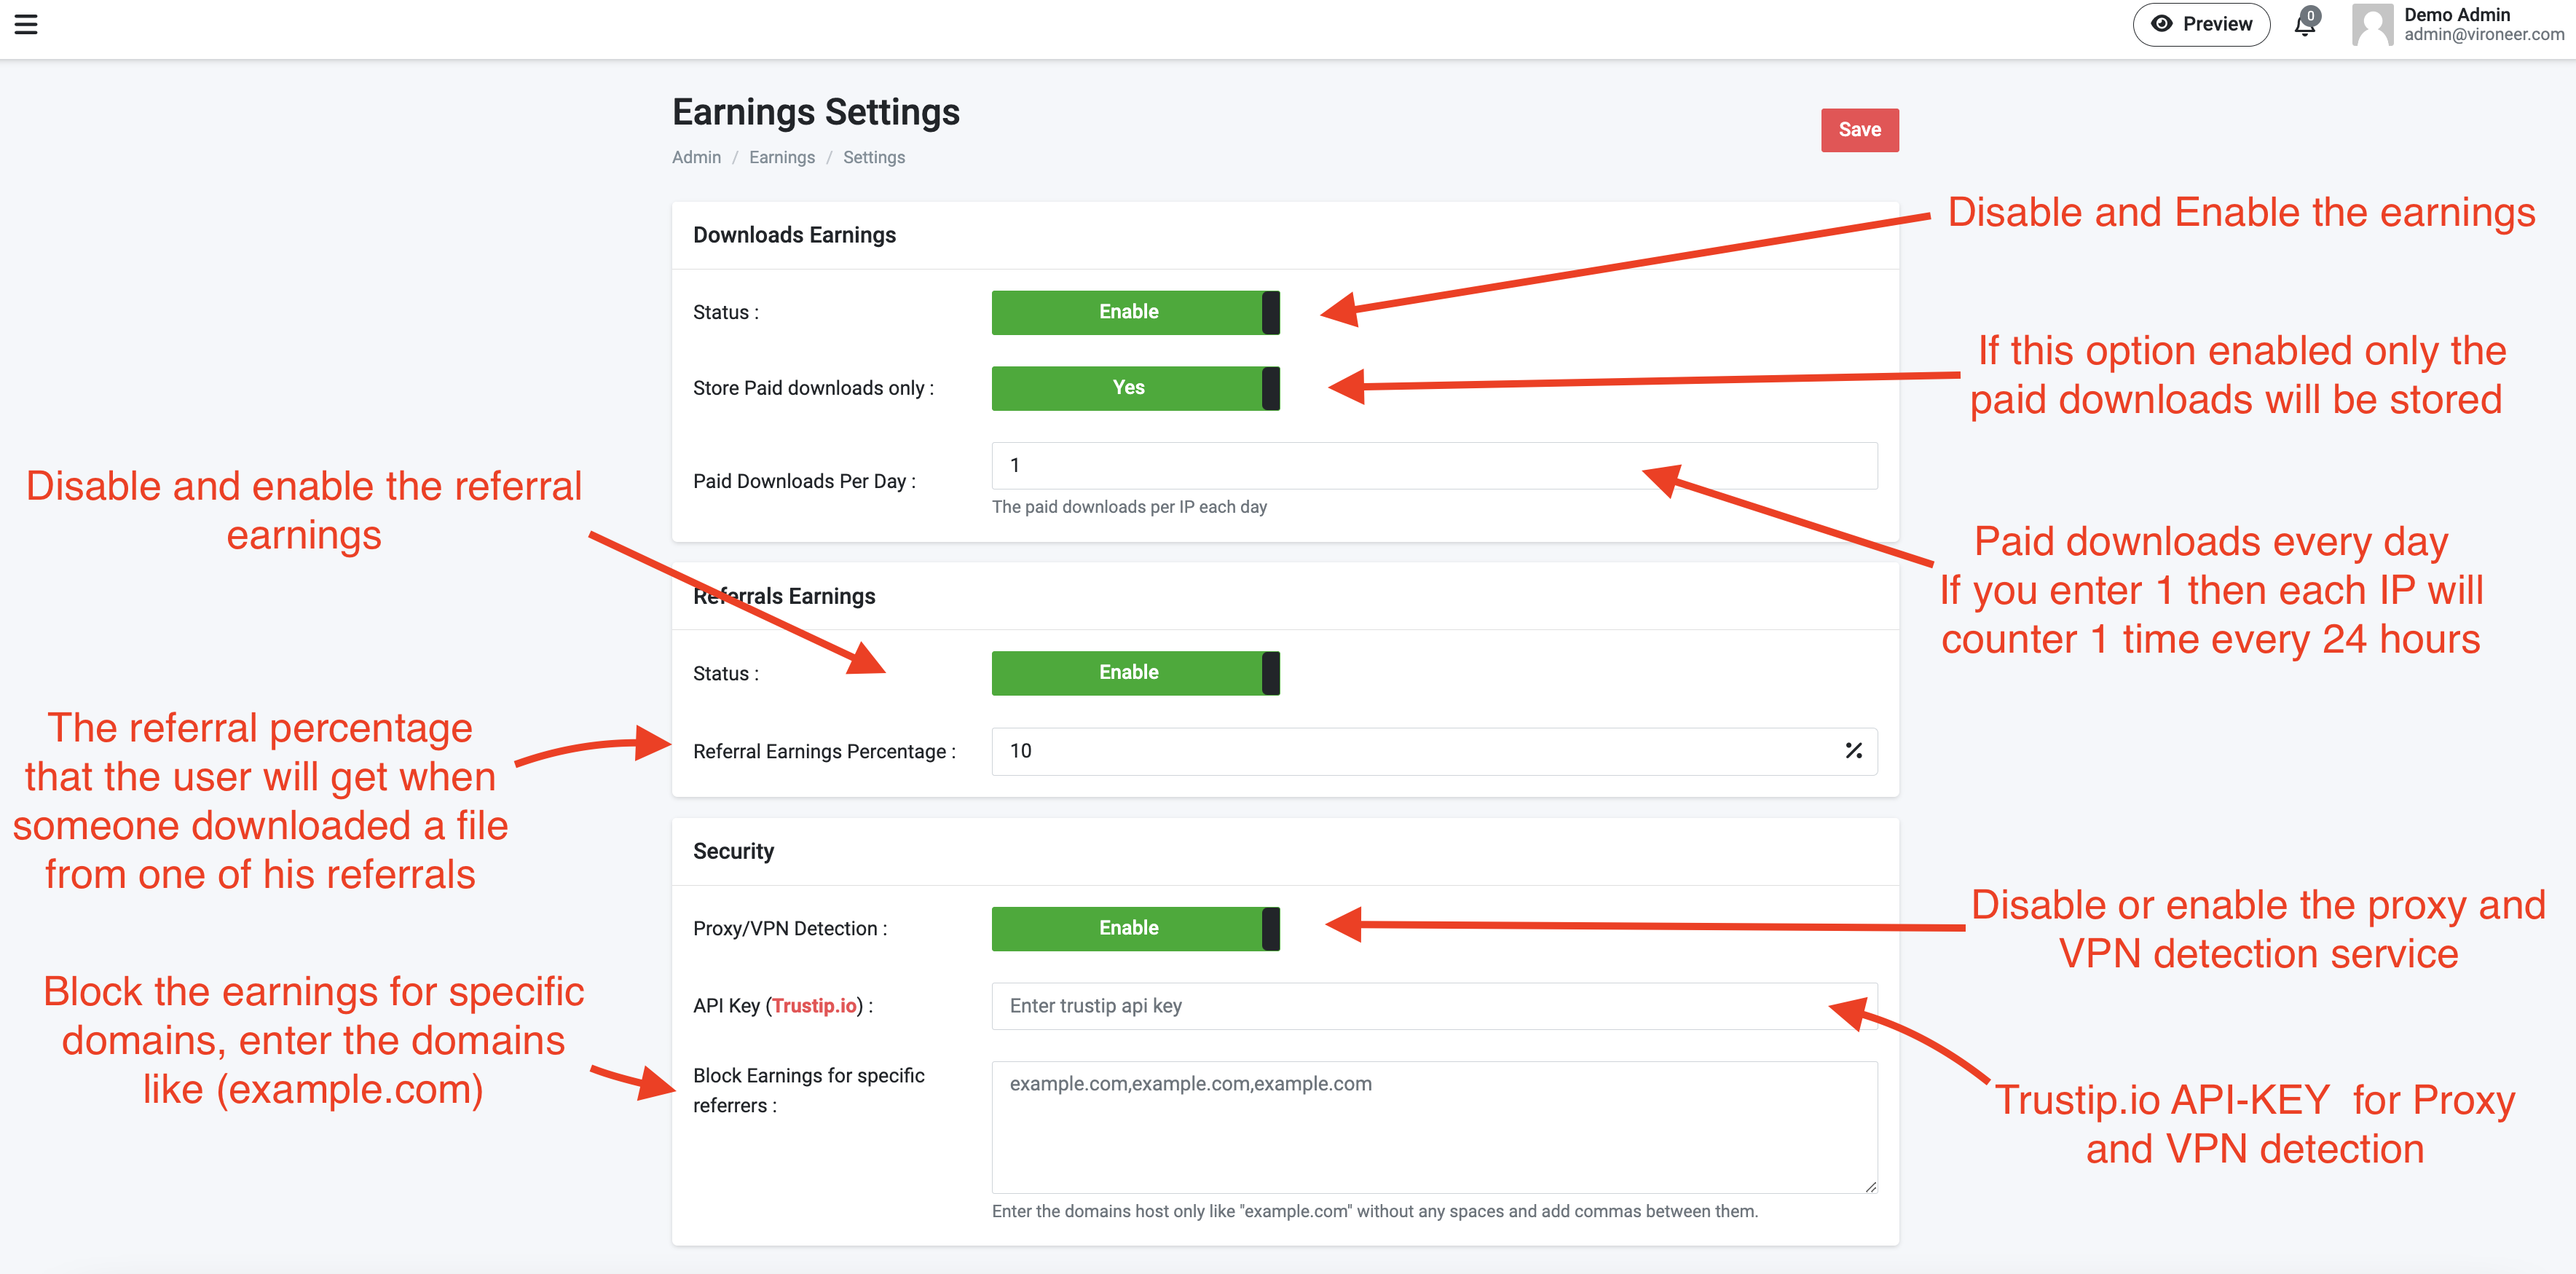
You can mange the earning settings by going to the admin panel then earnings then settings.
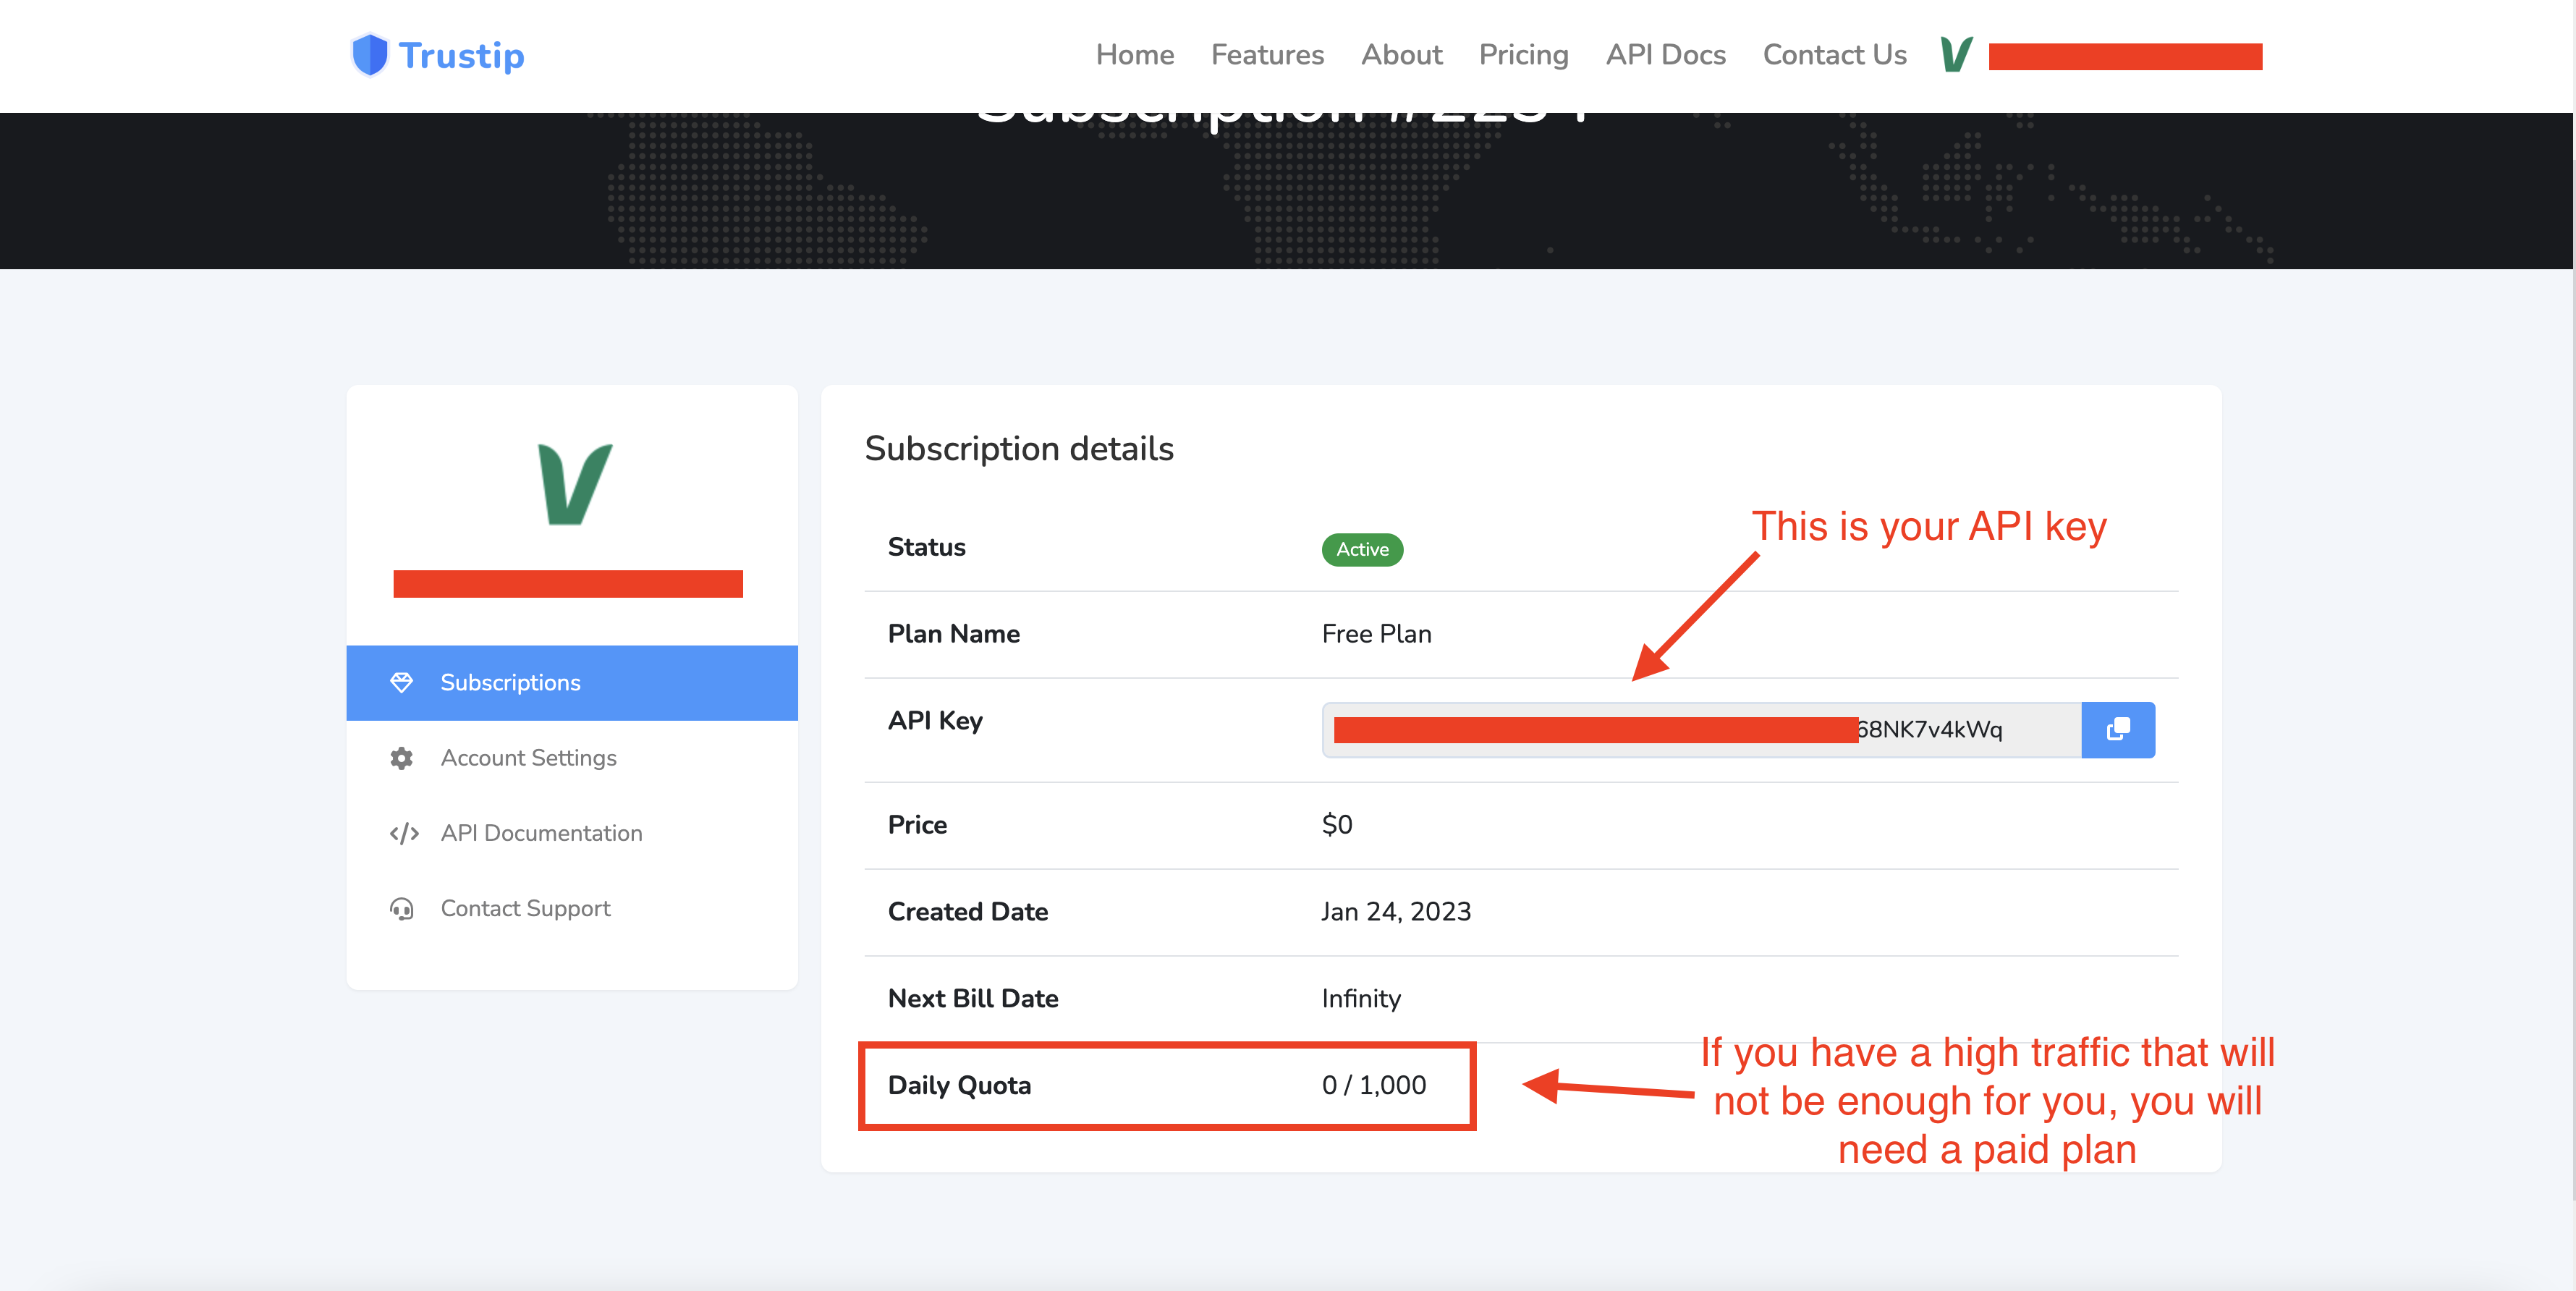
To get your trustip API Key go to https://trustip.io and create an account.
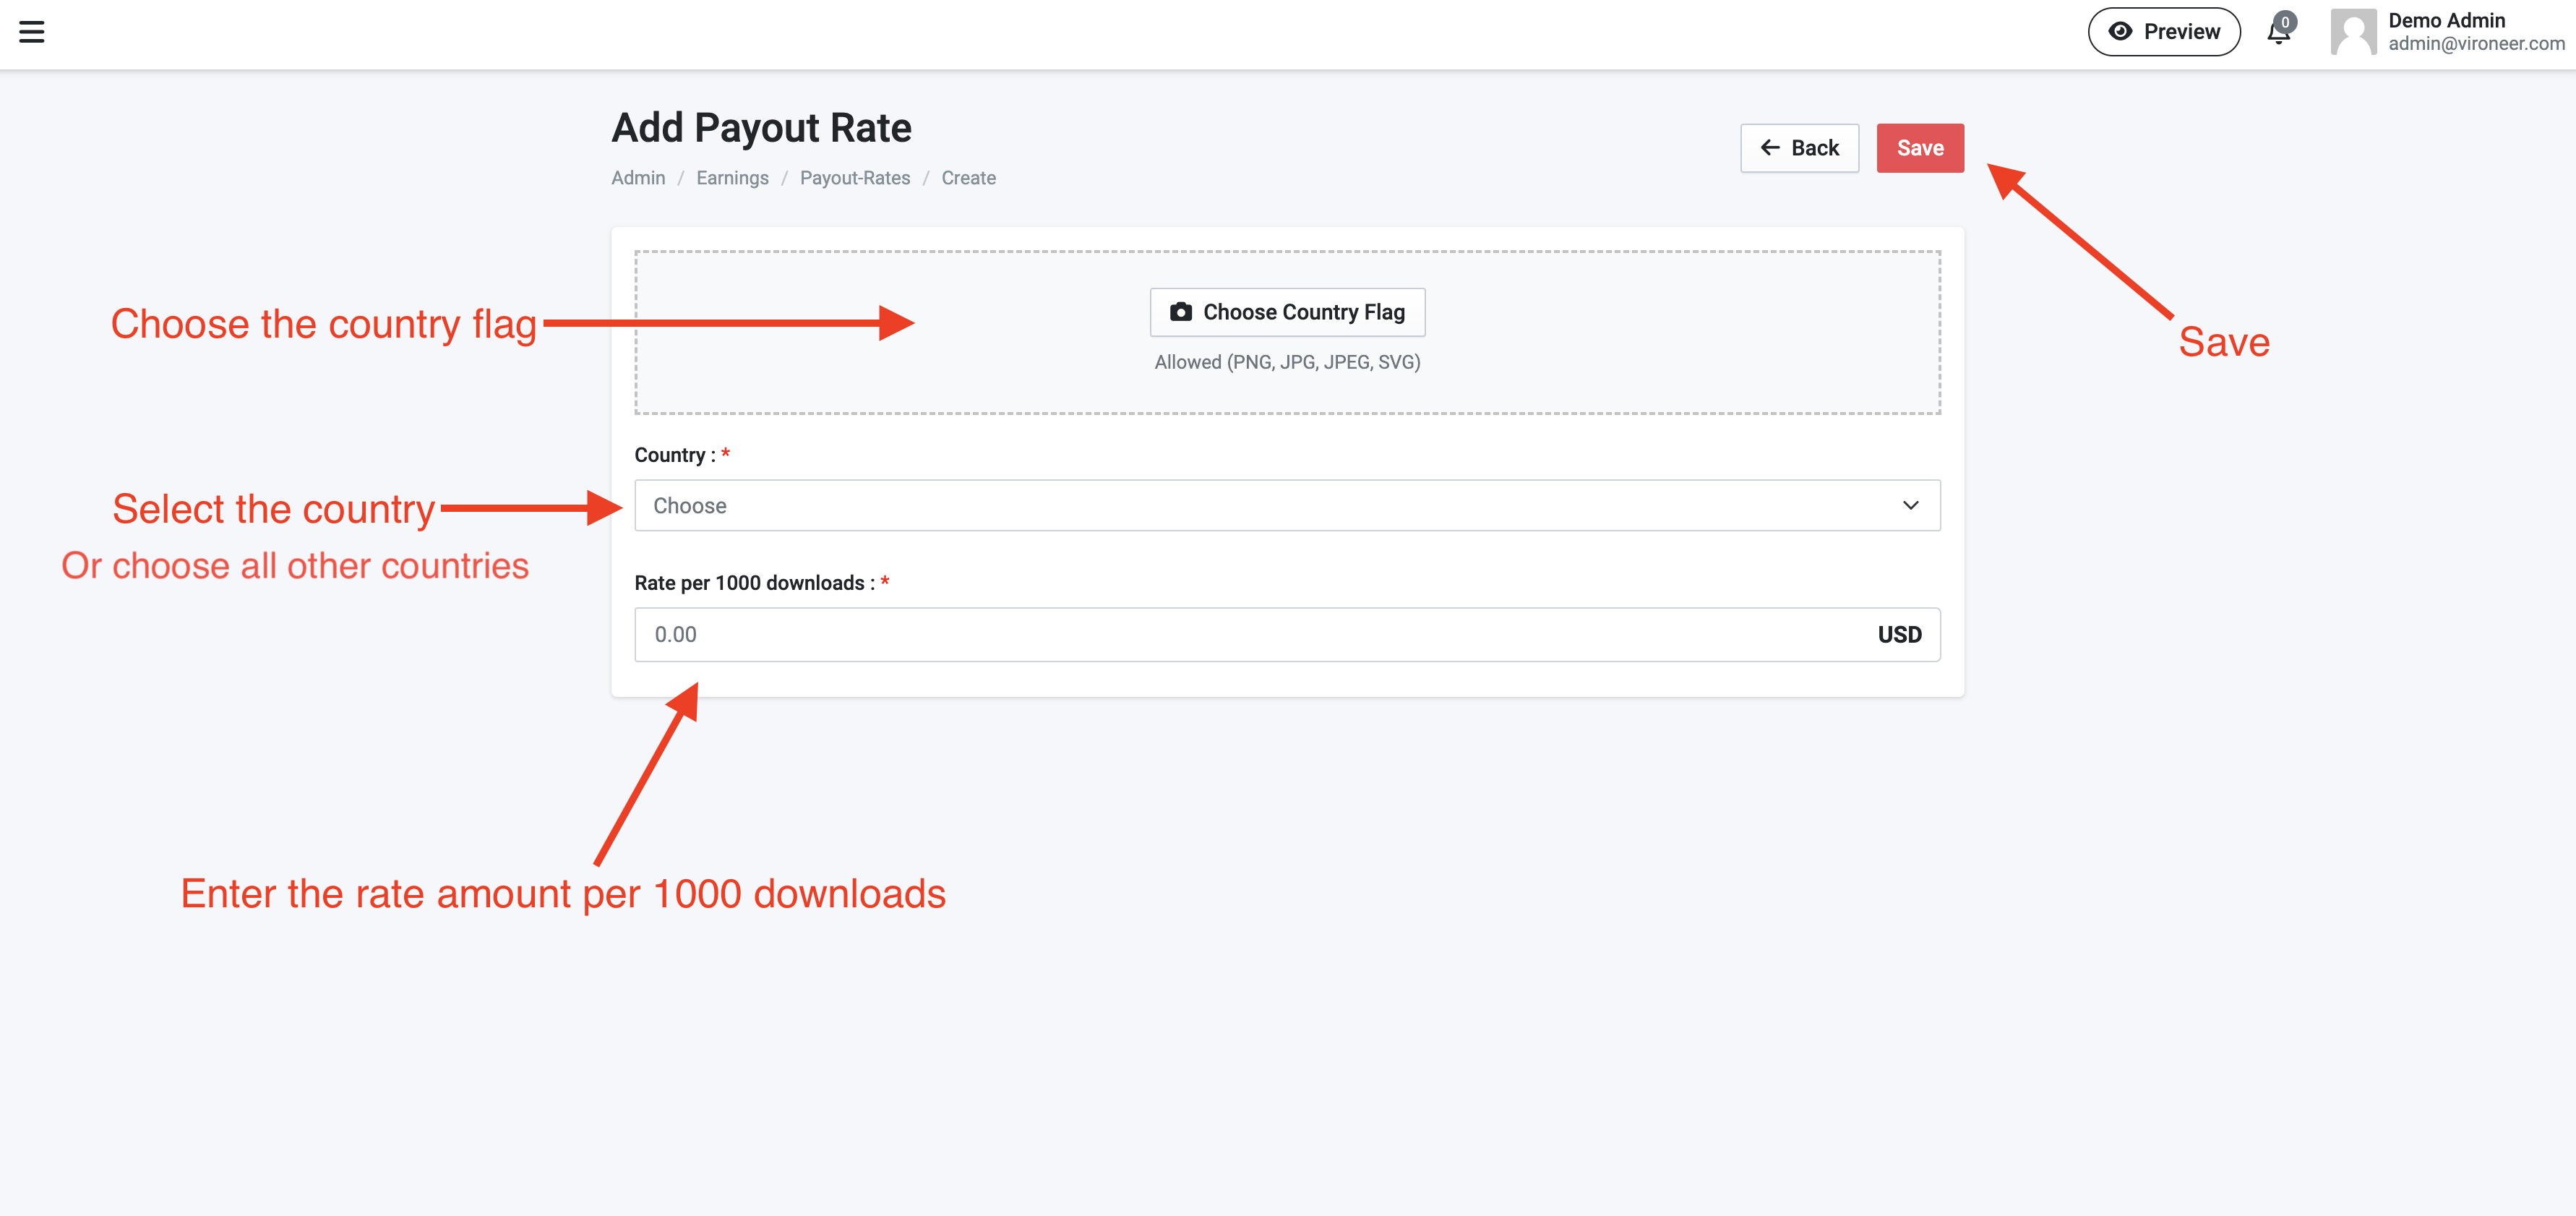
1 - Go to the admin panel the earnings the payout rates and click add new.
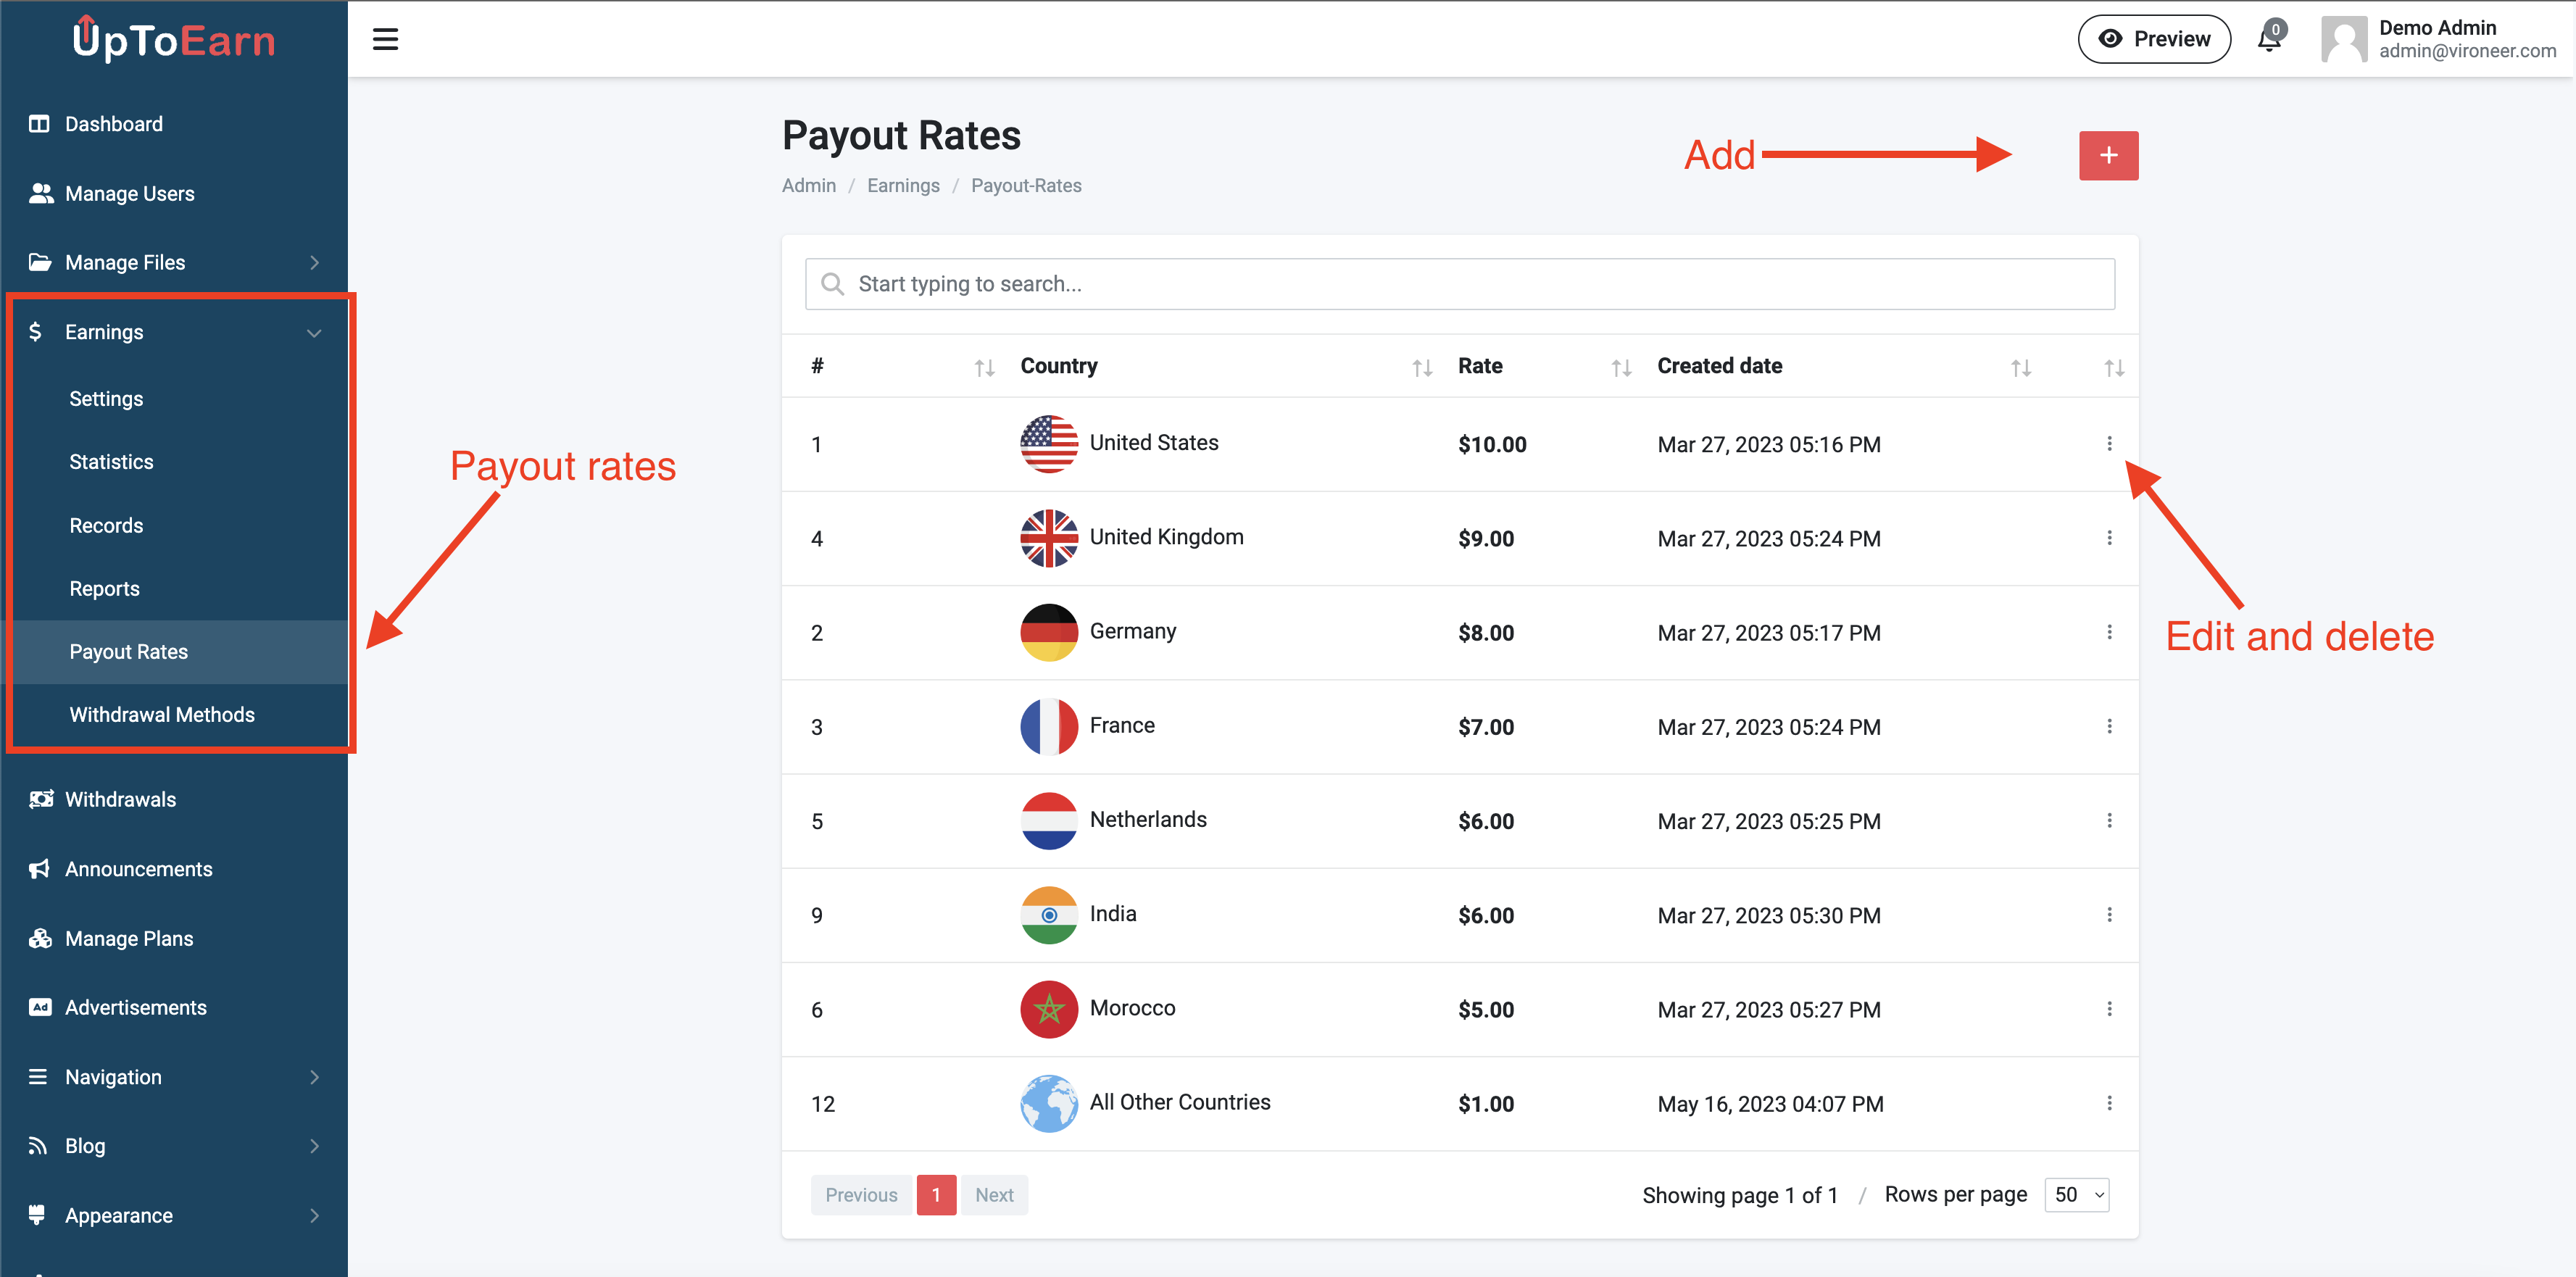
2 - Enter the details and click save.
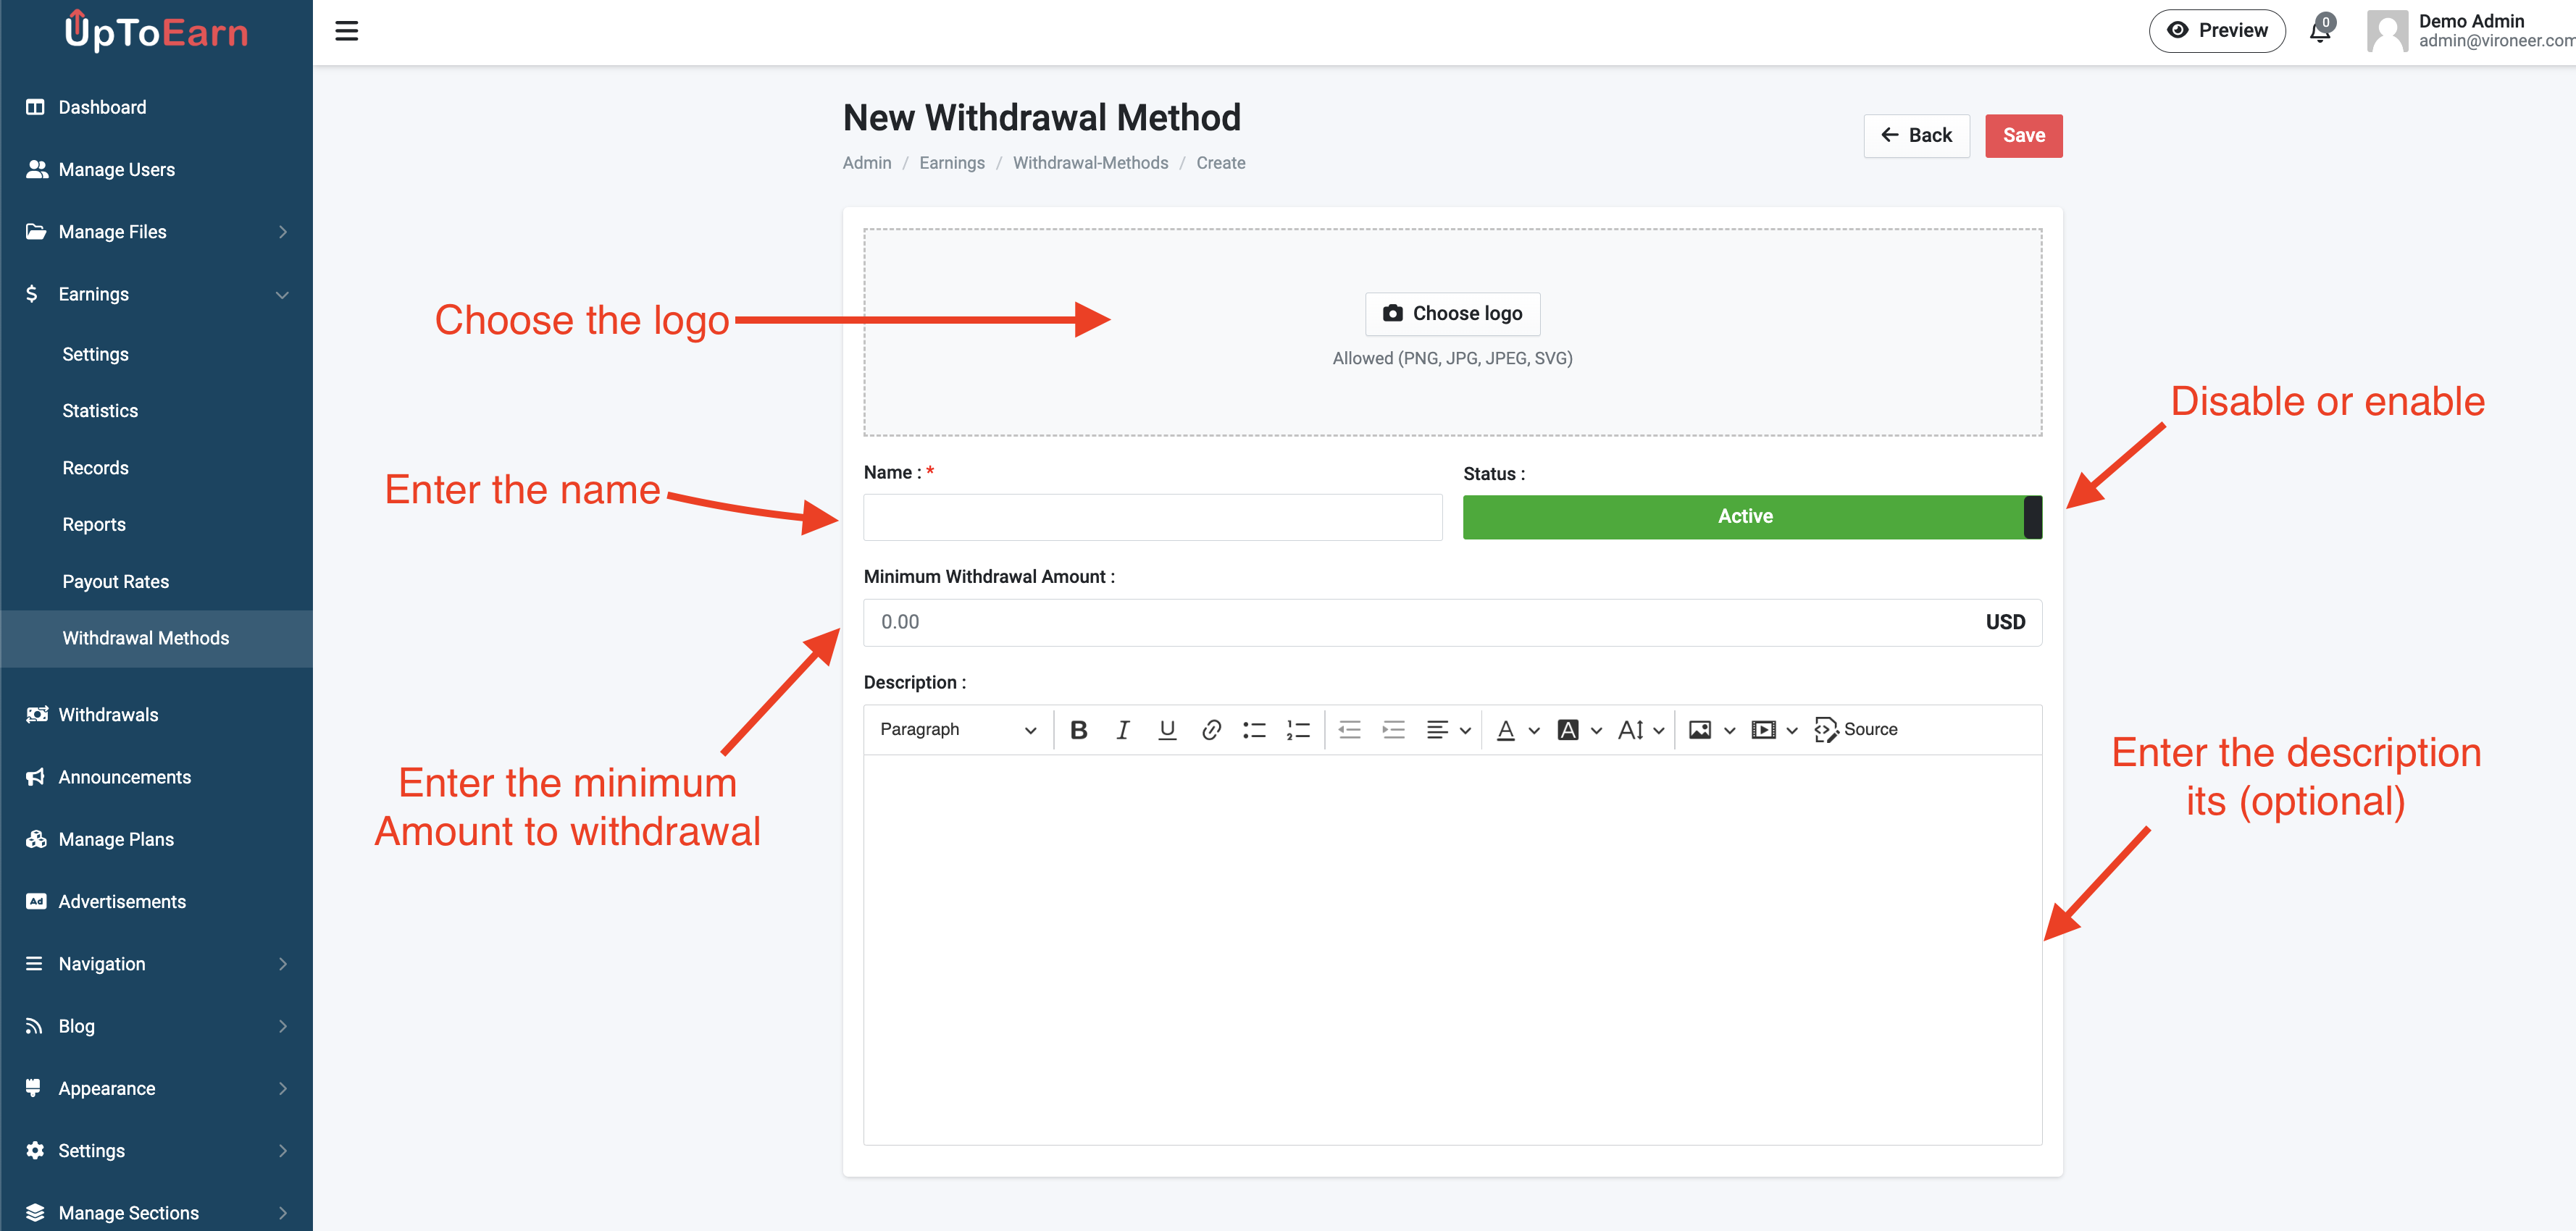
1 - Go to the admin panel the earnings the withdrawal methods and click add new.
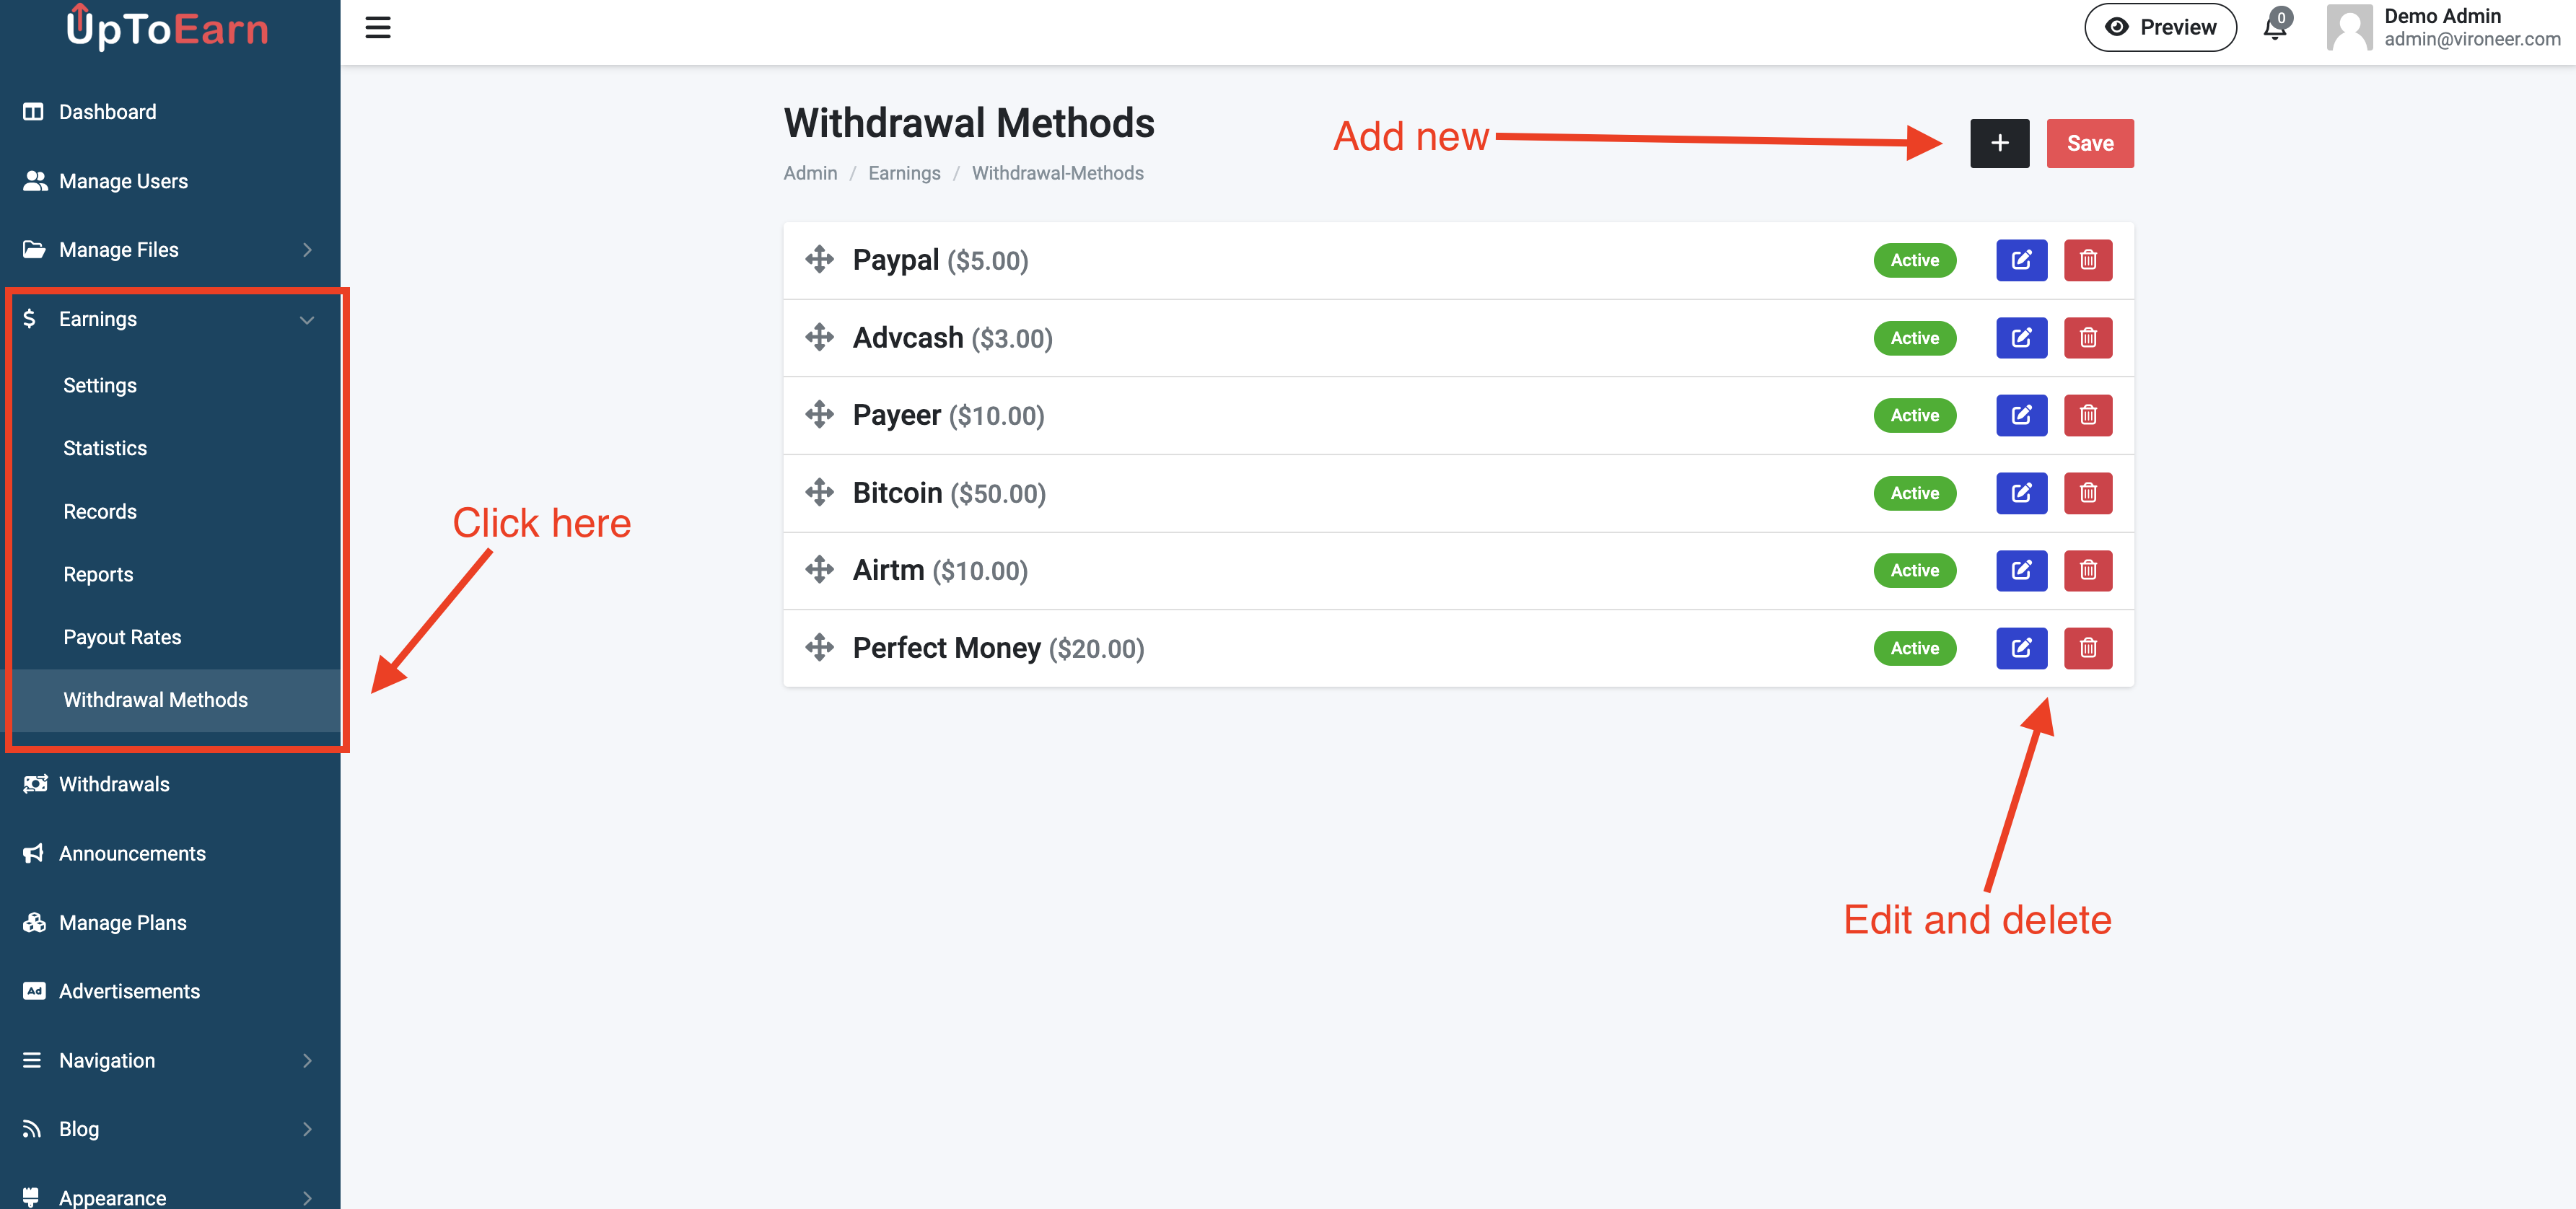
2 - Enter the details and click save.
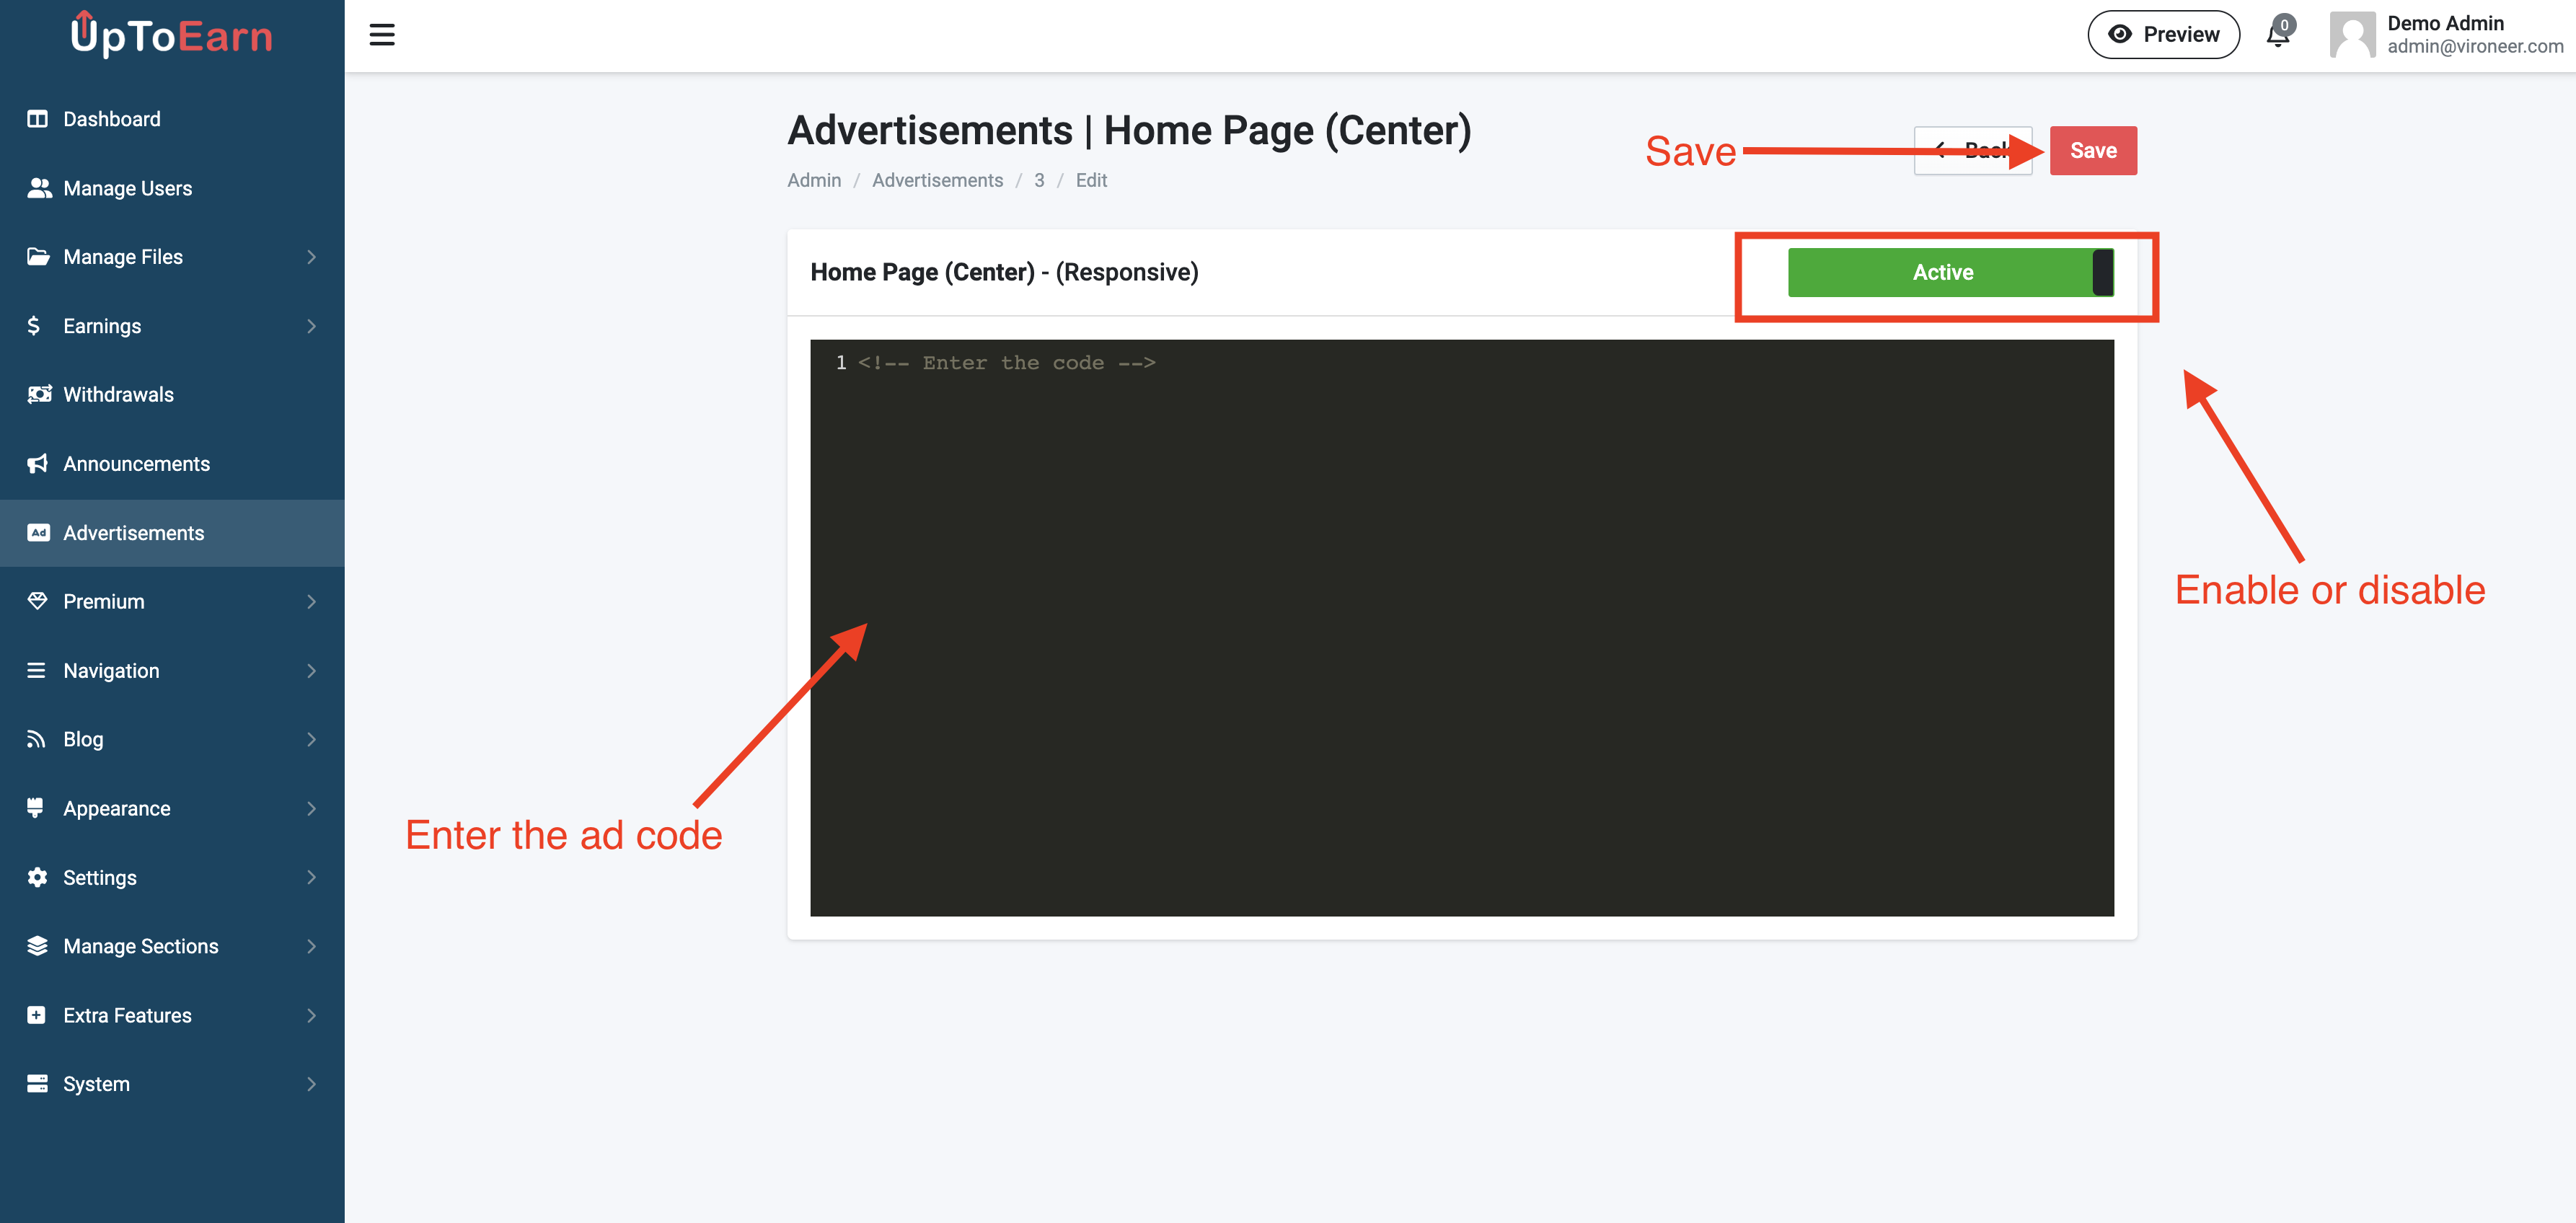
1 - Go to the admin panel the click on advertisements section.
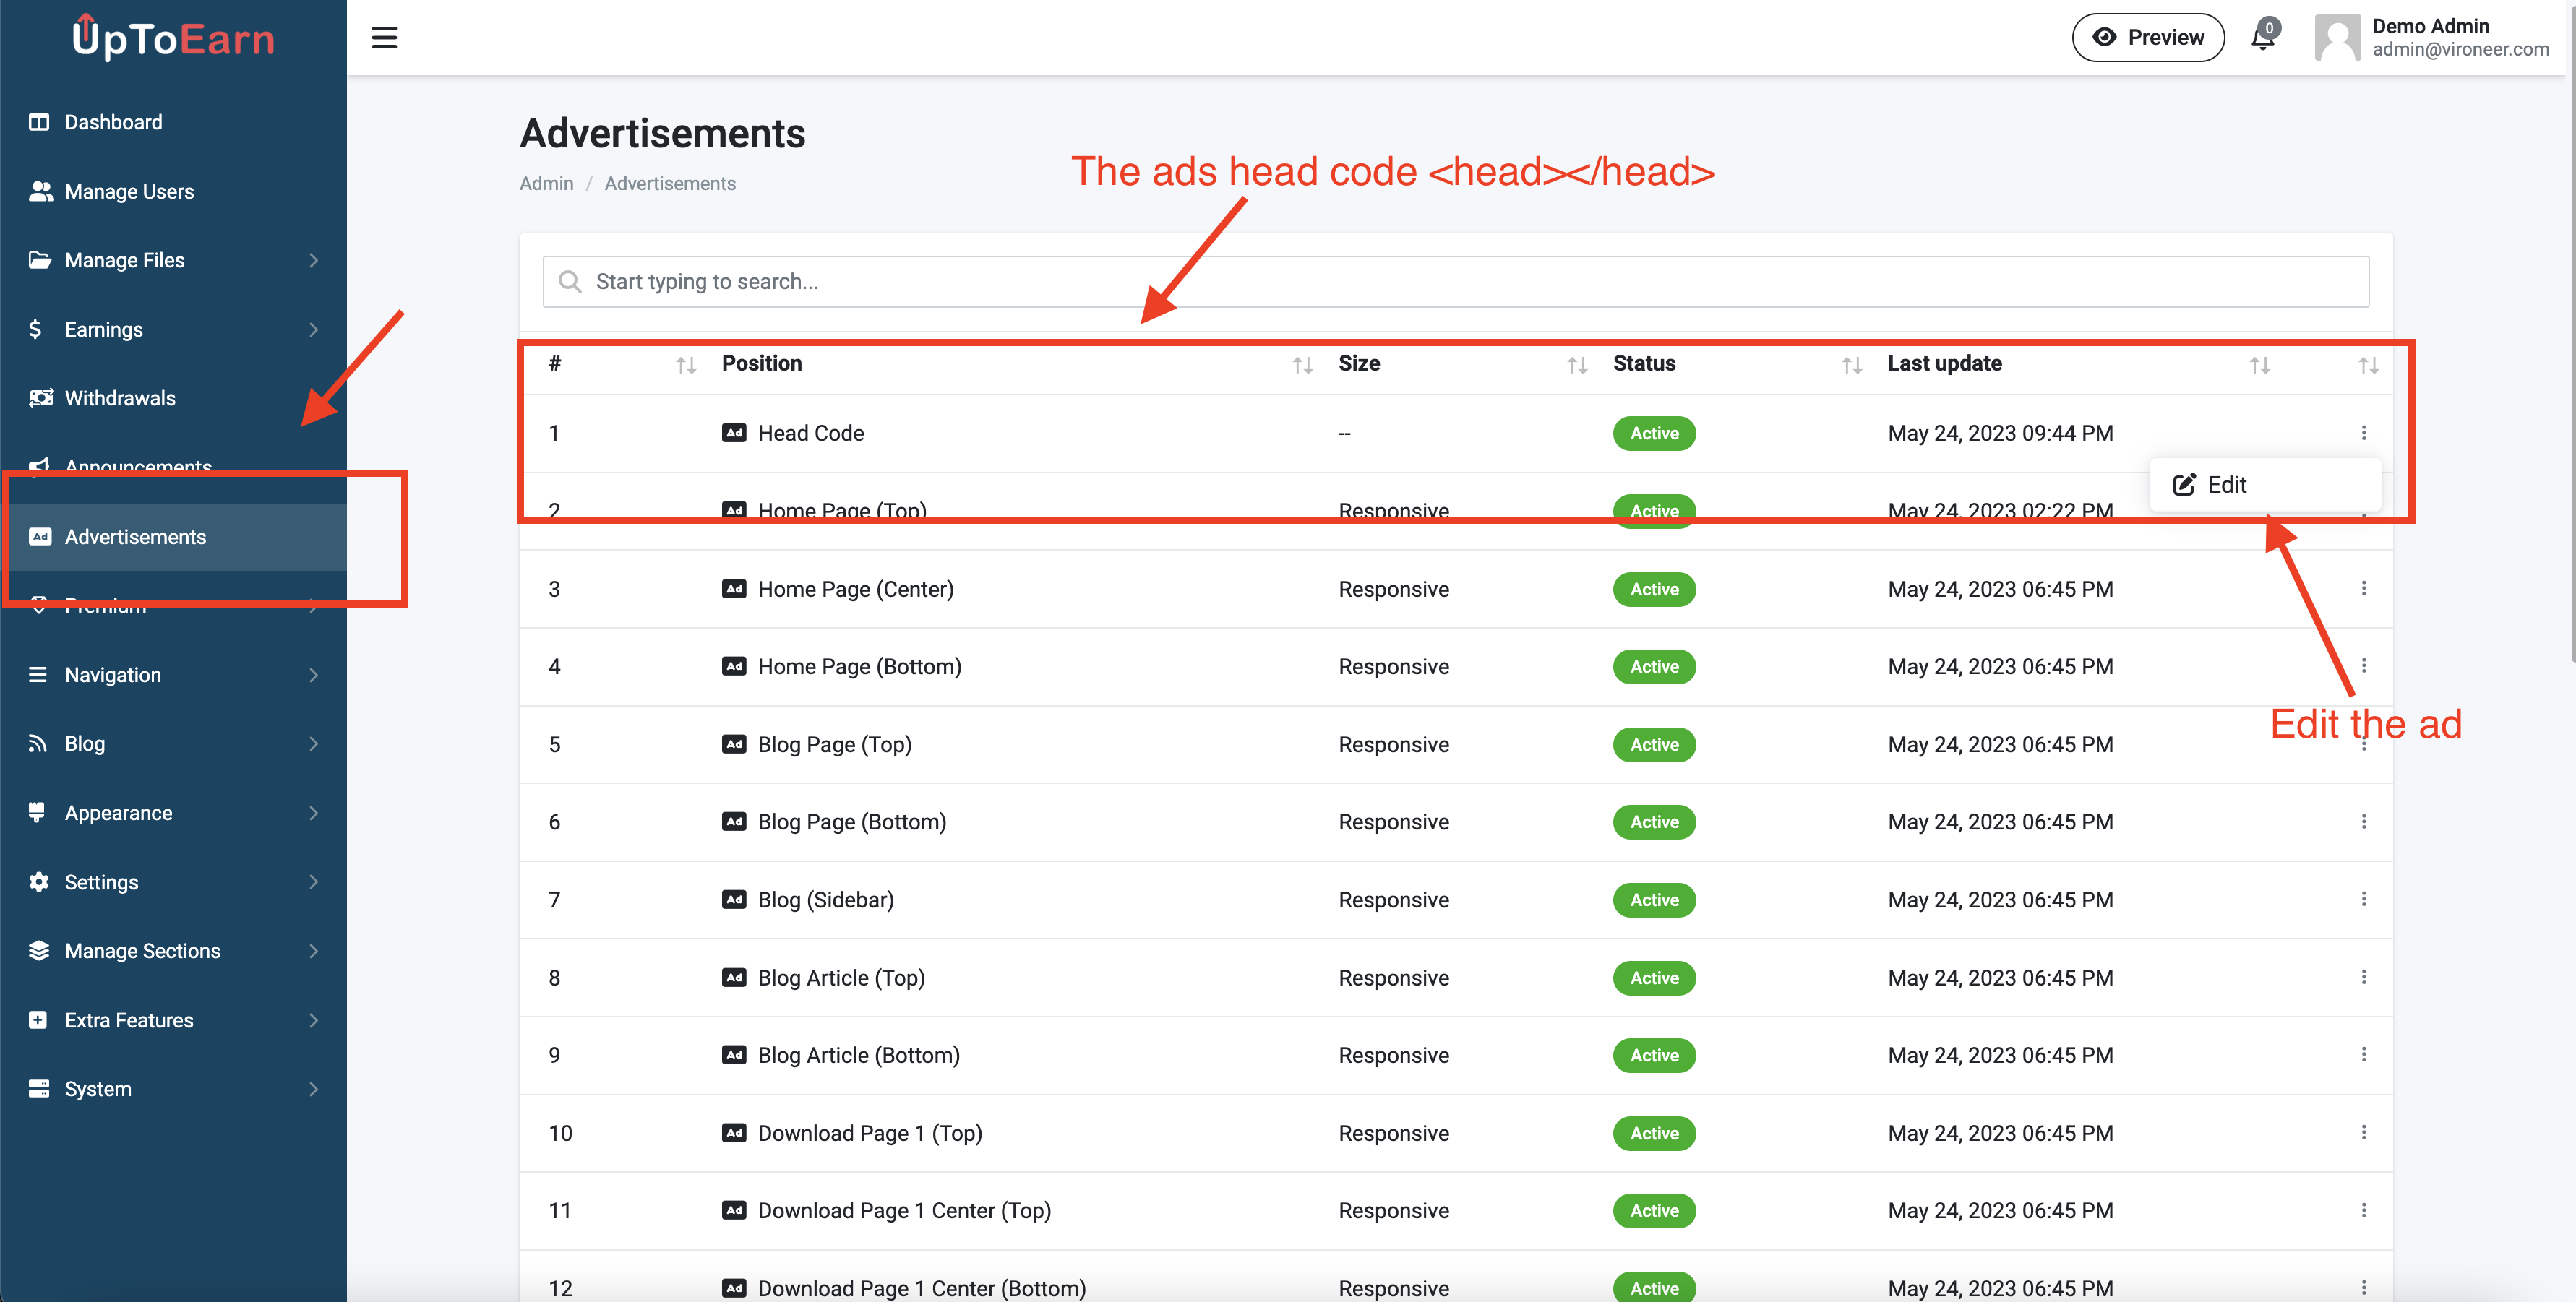
2 - Edit your advertisement code and save it.
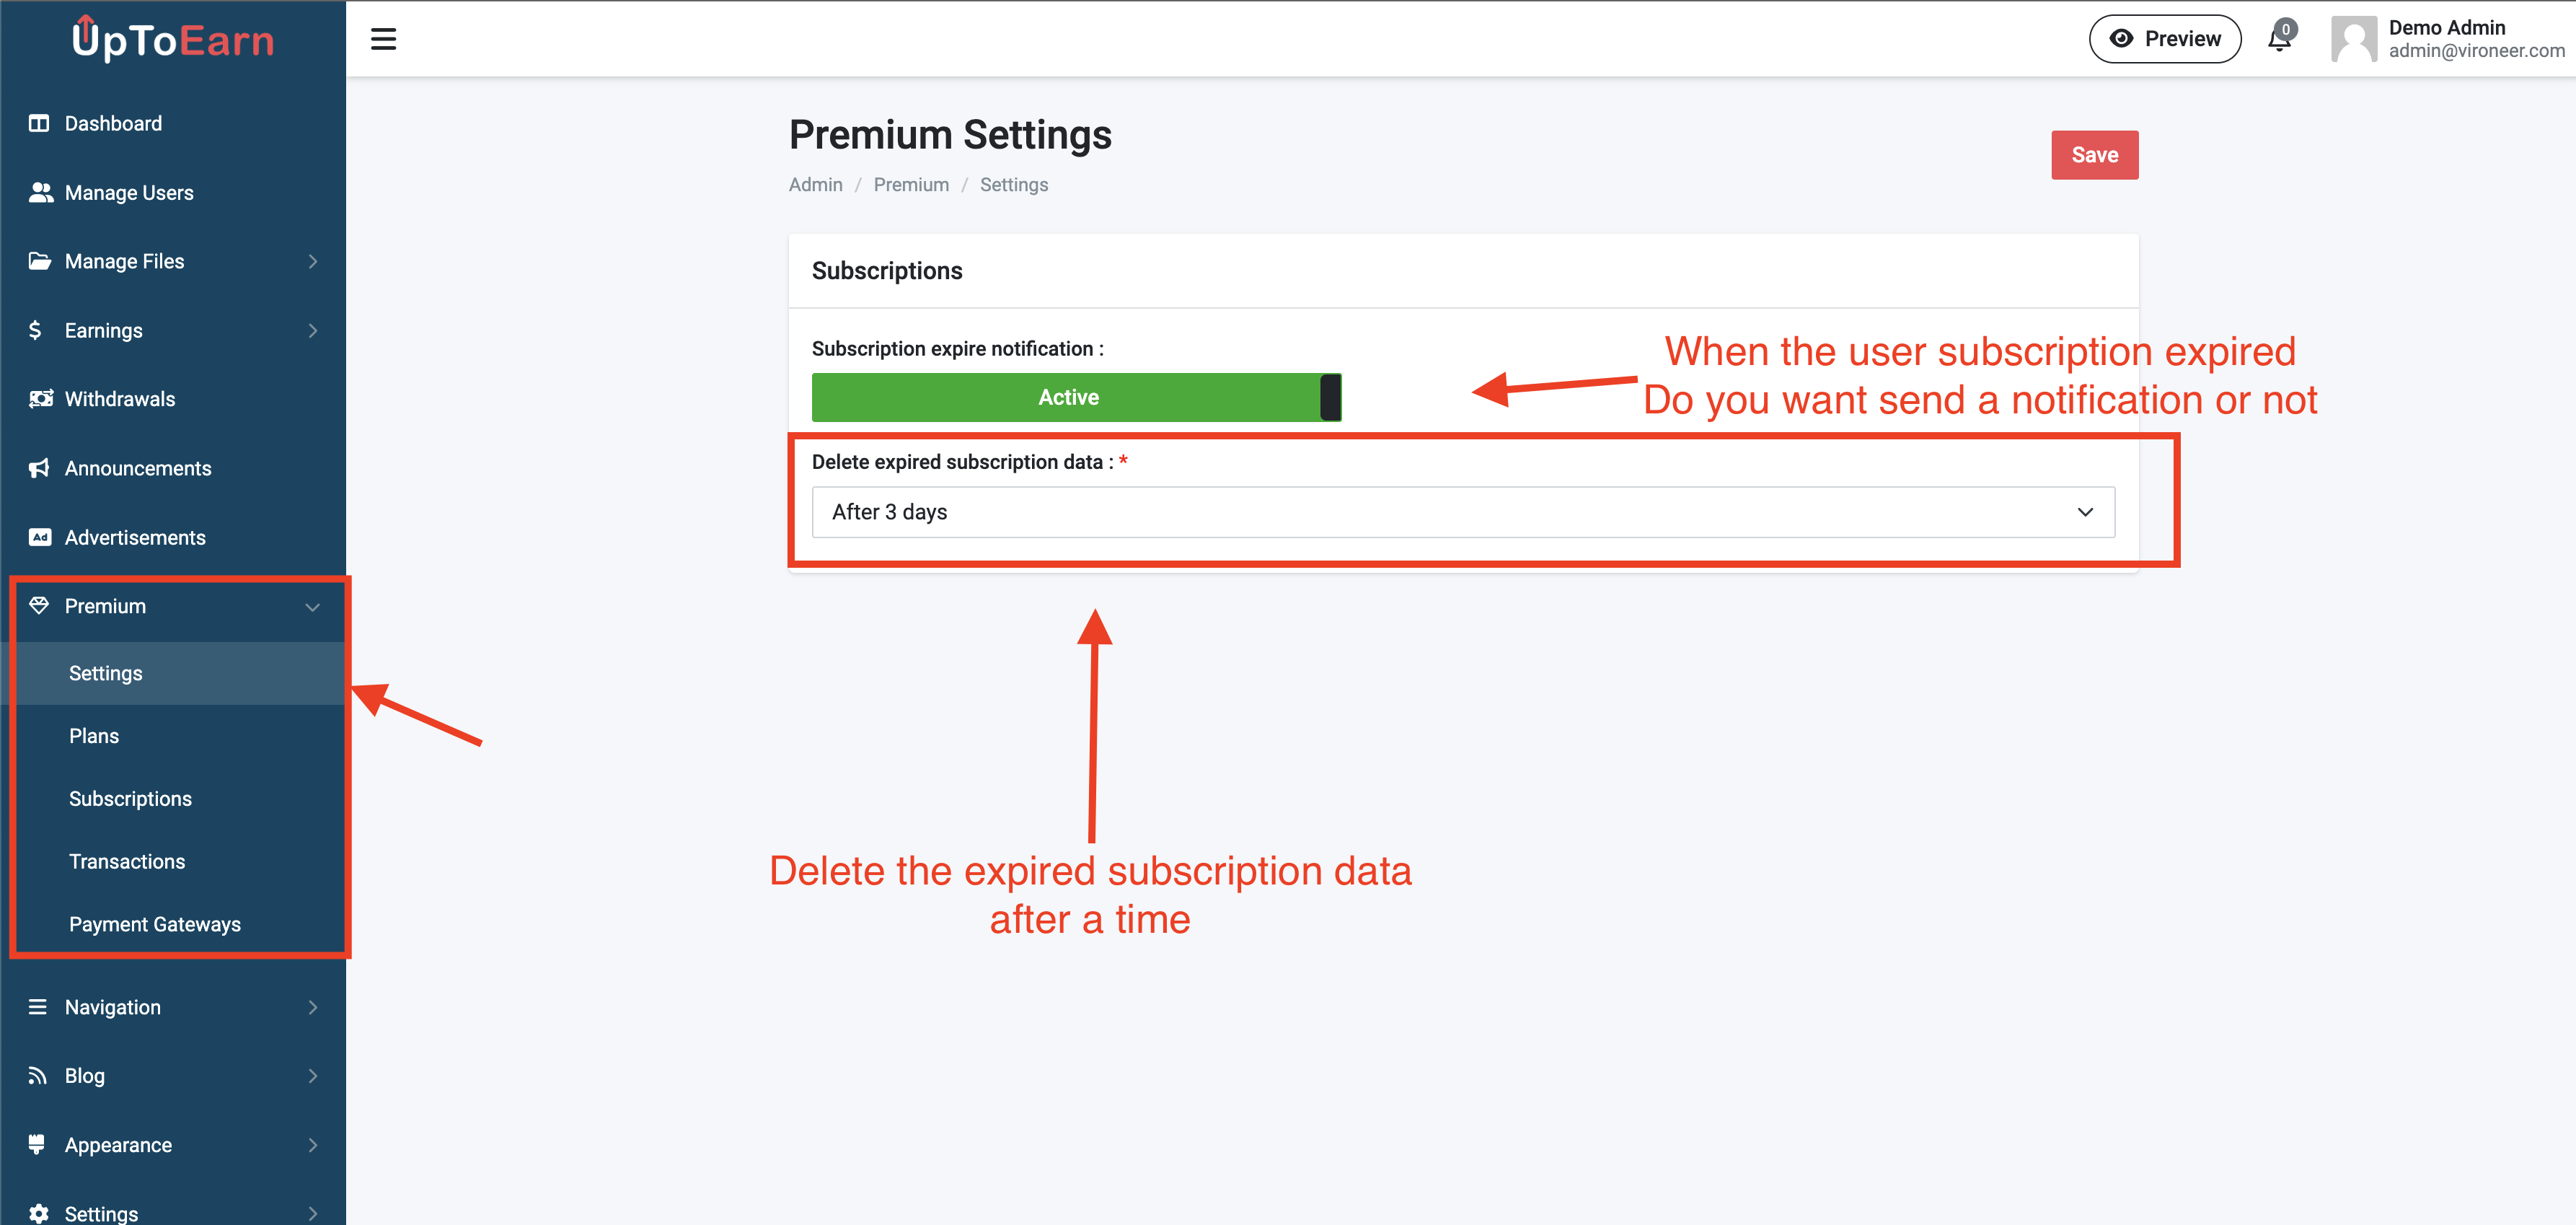
You can mange the premium settings by going to the admin panel then premium then settings.
You can mange the plans by going to premium then plans.
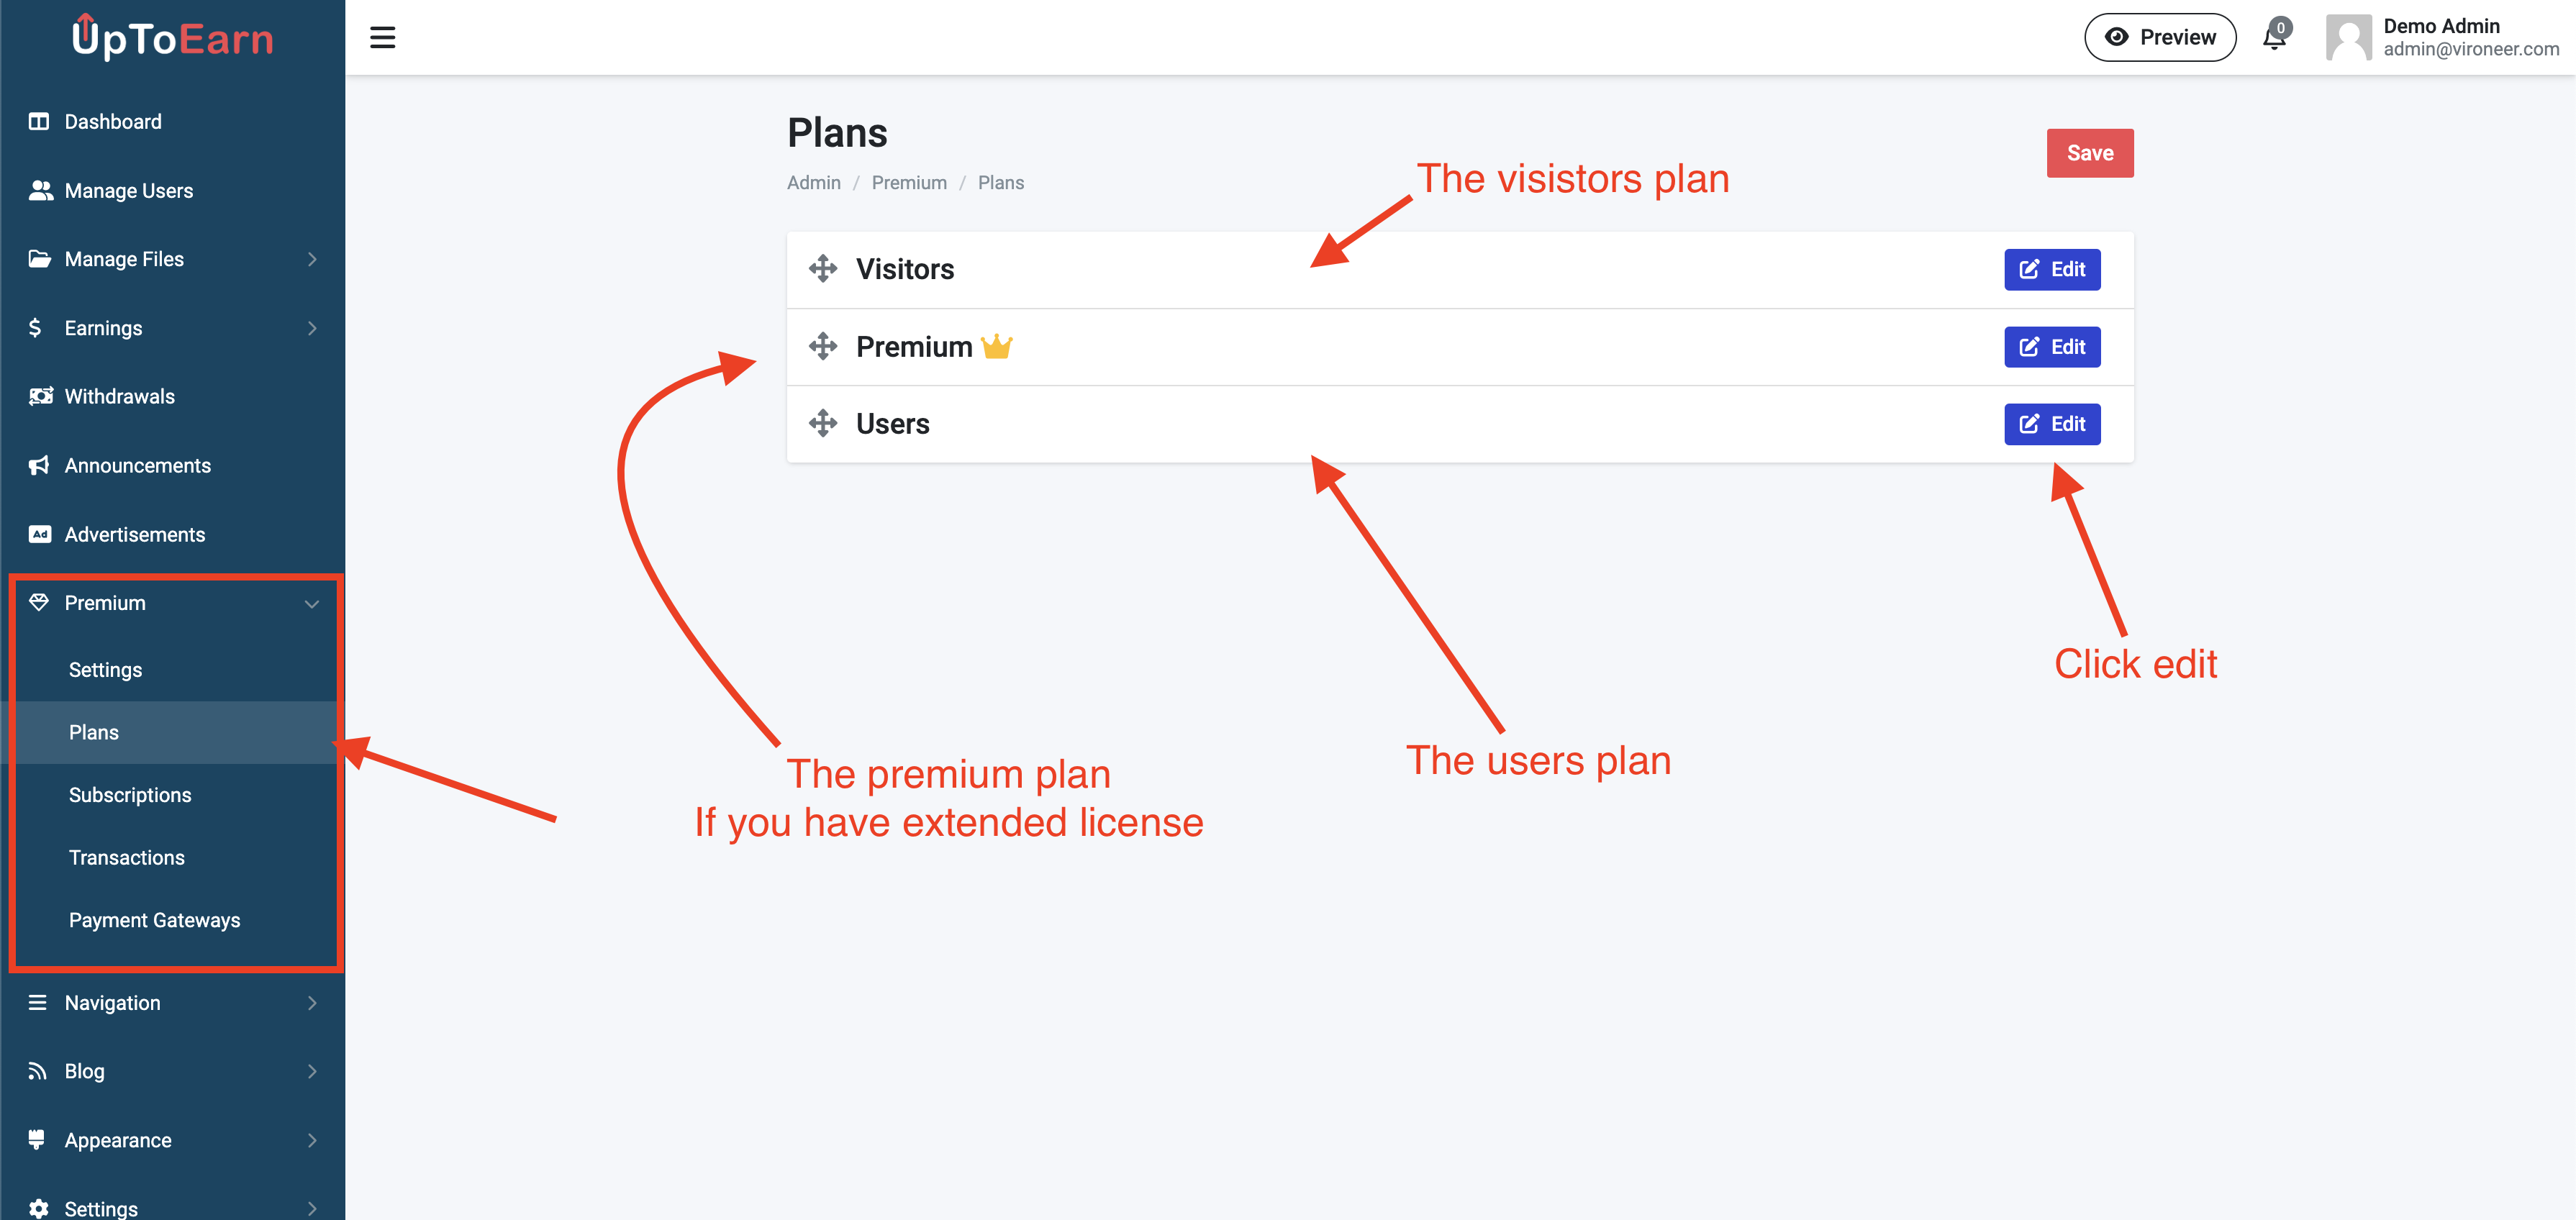
Edit the plan details and disable the upload for visitors if you want.

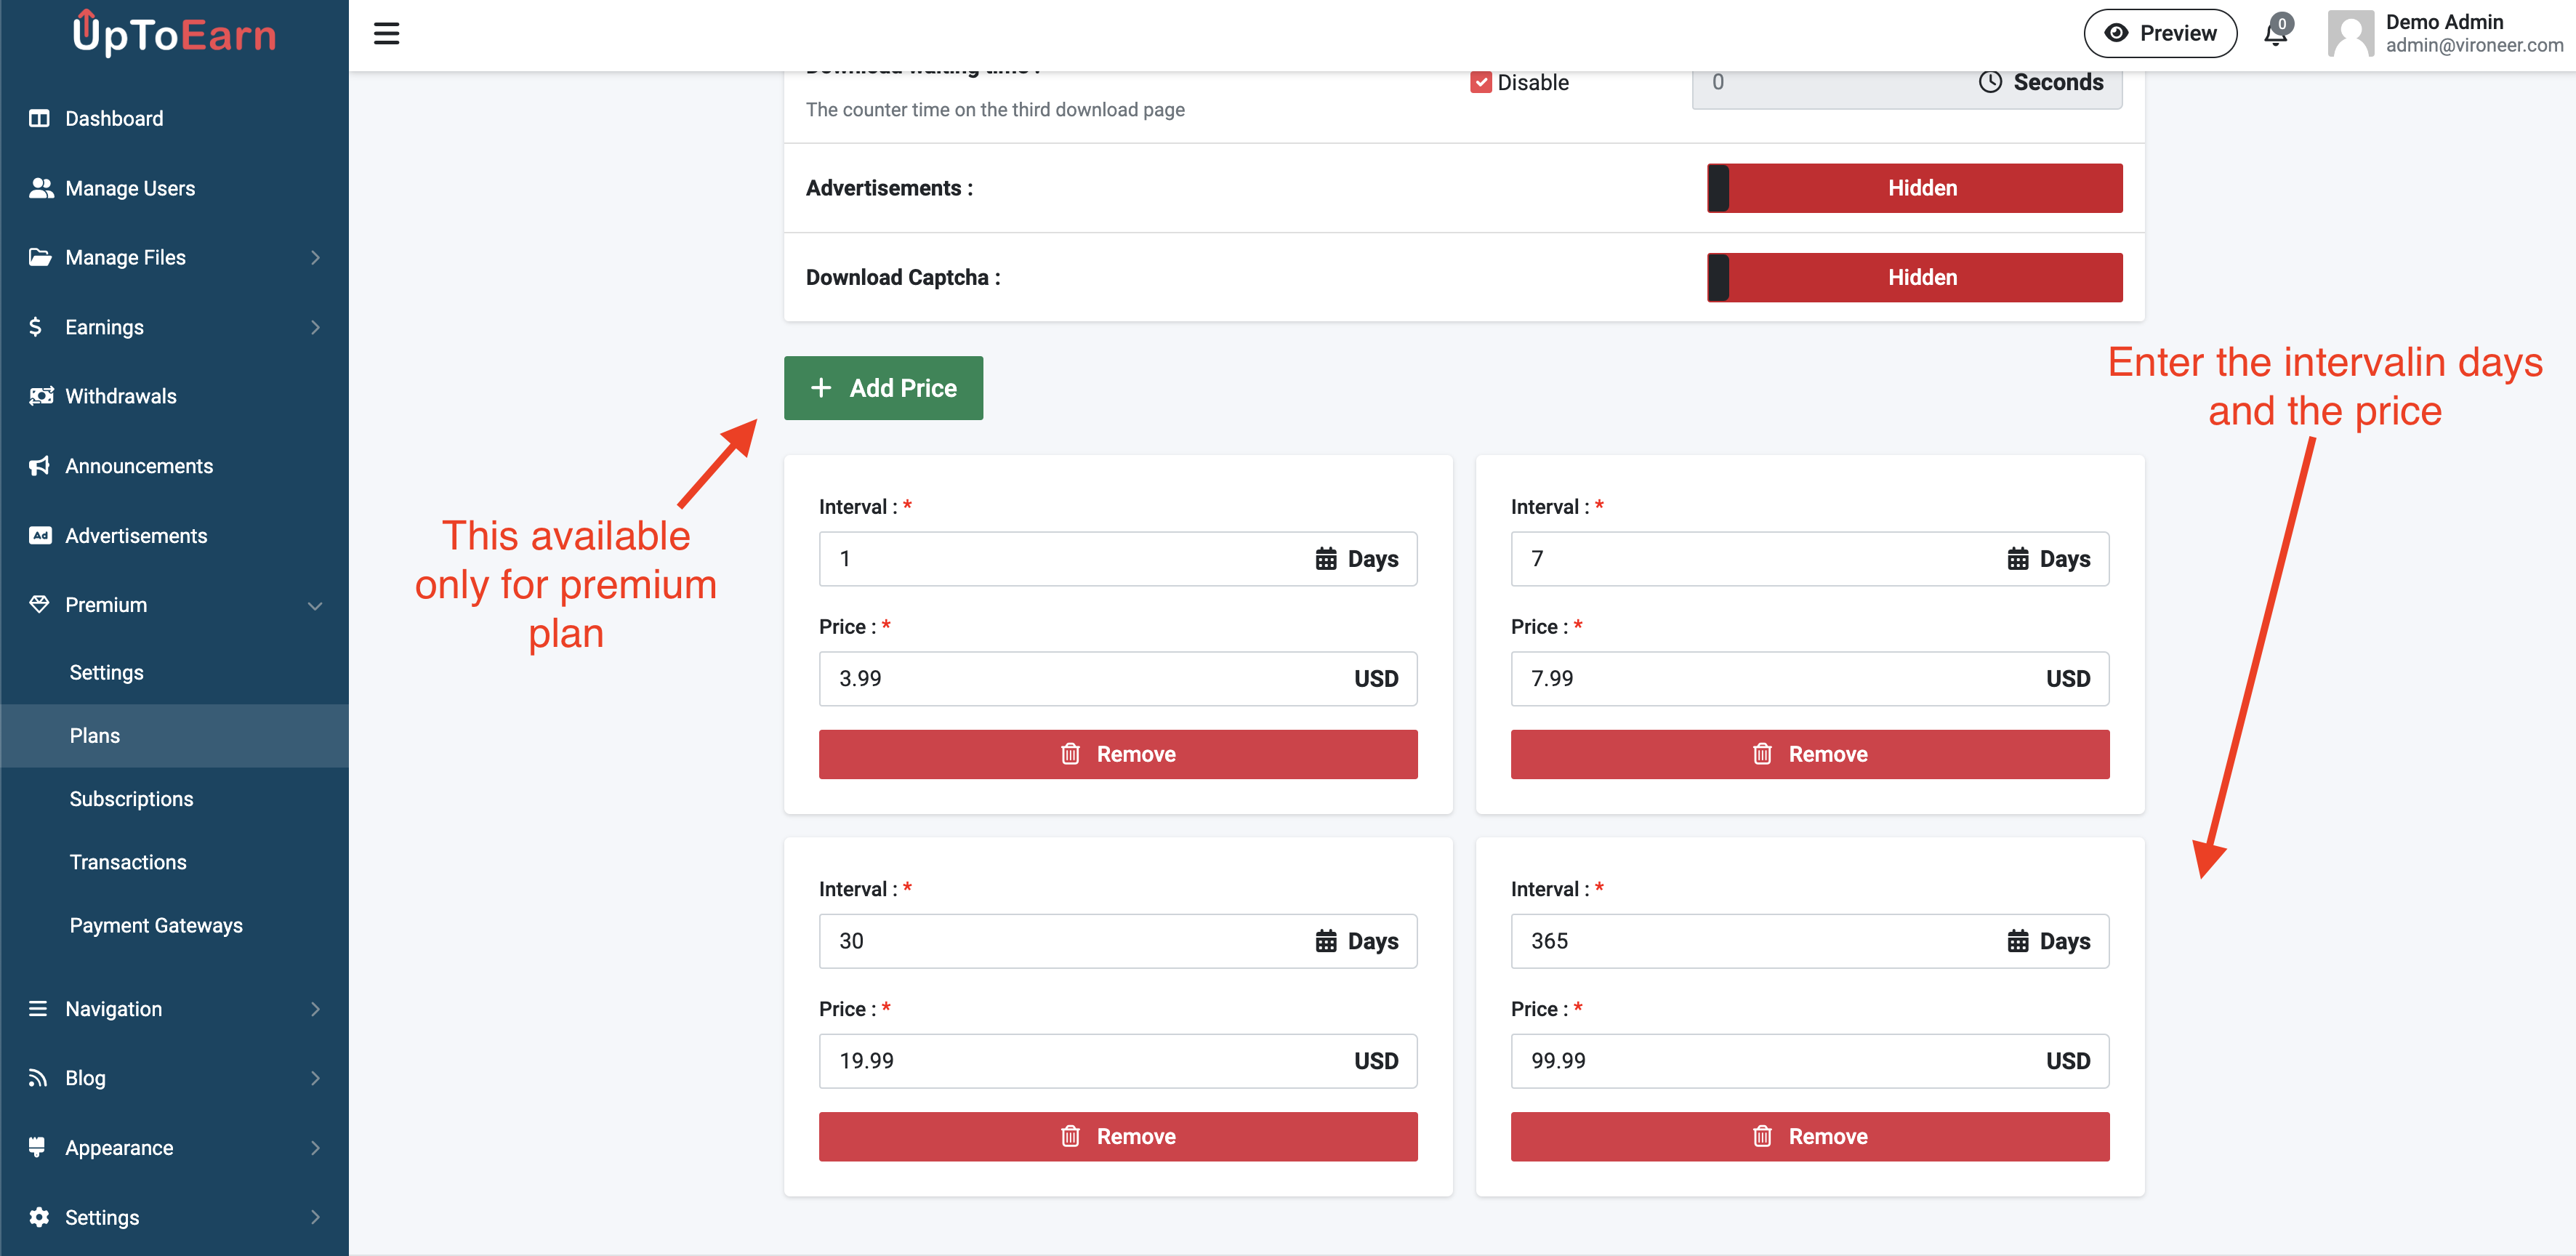
In premium plan you can add the prices like this.
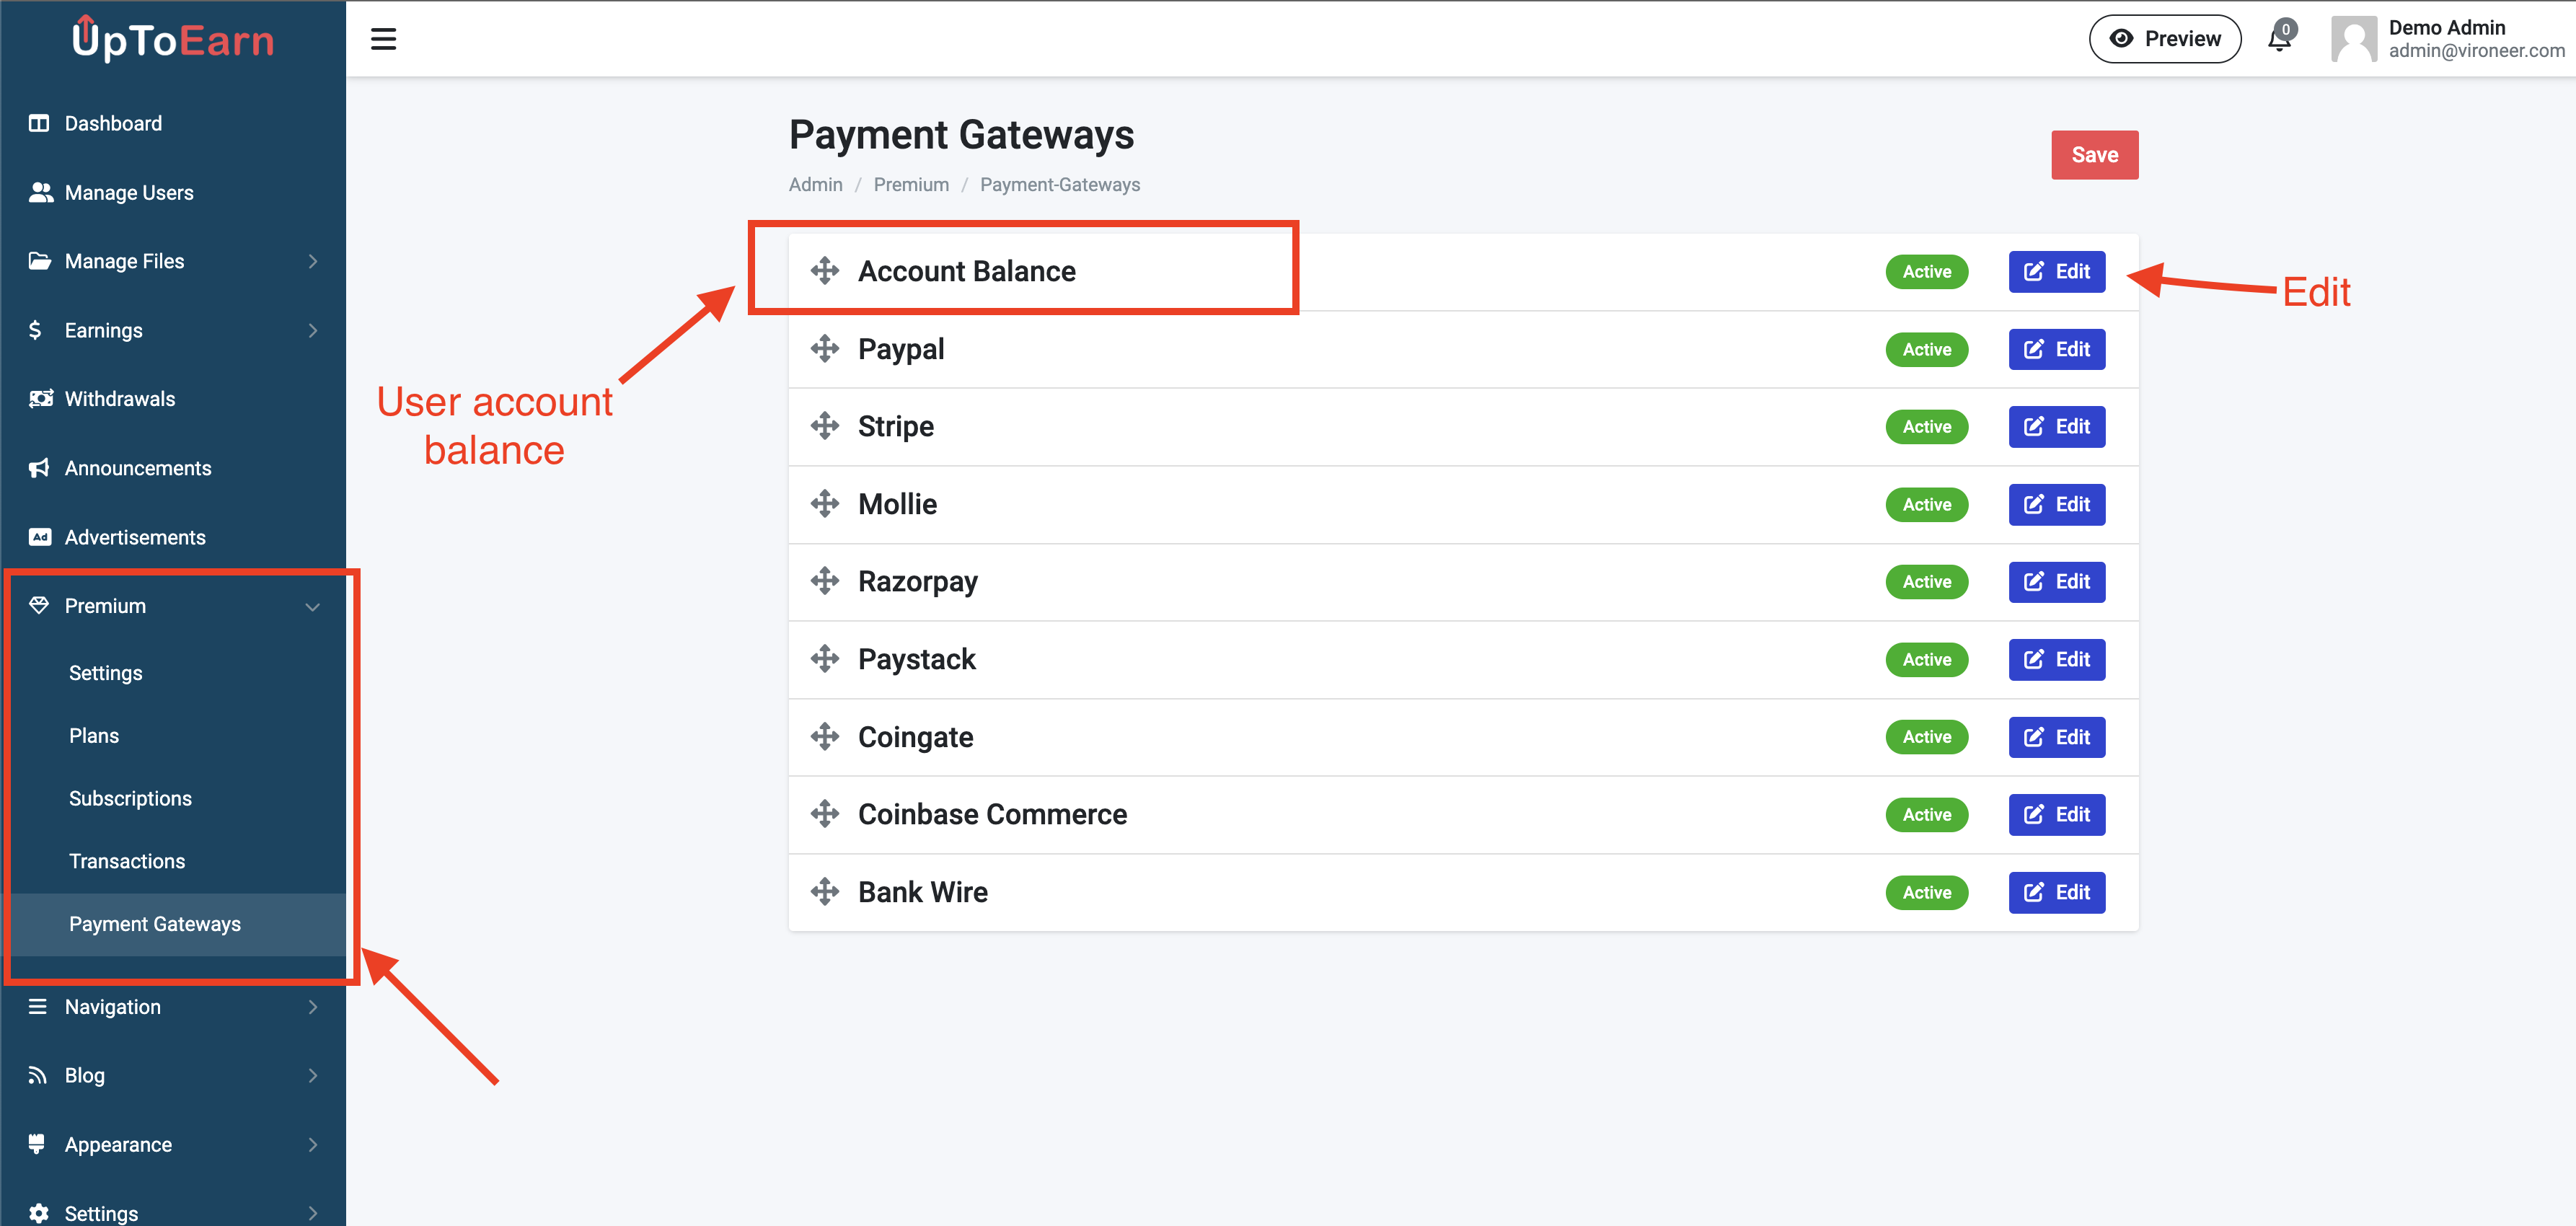
You can mange the payment gateways by going to premium then payment gateways.
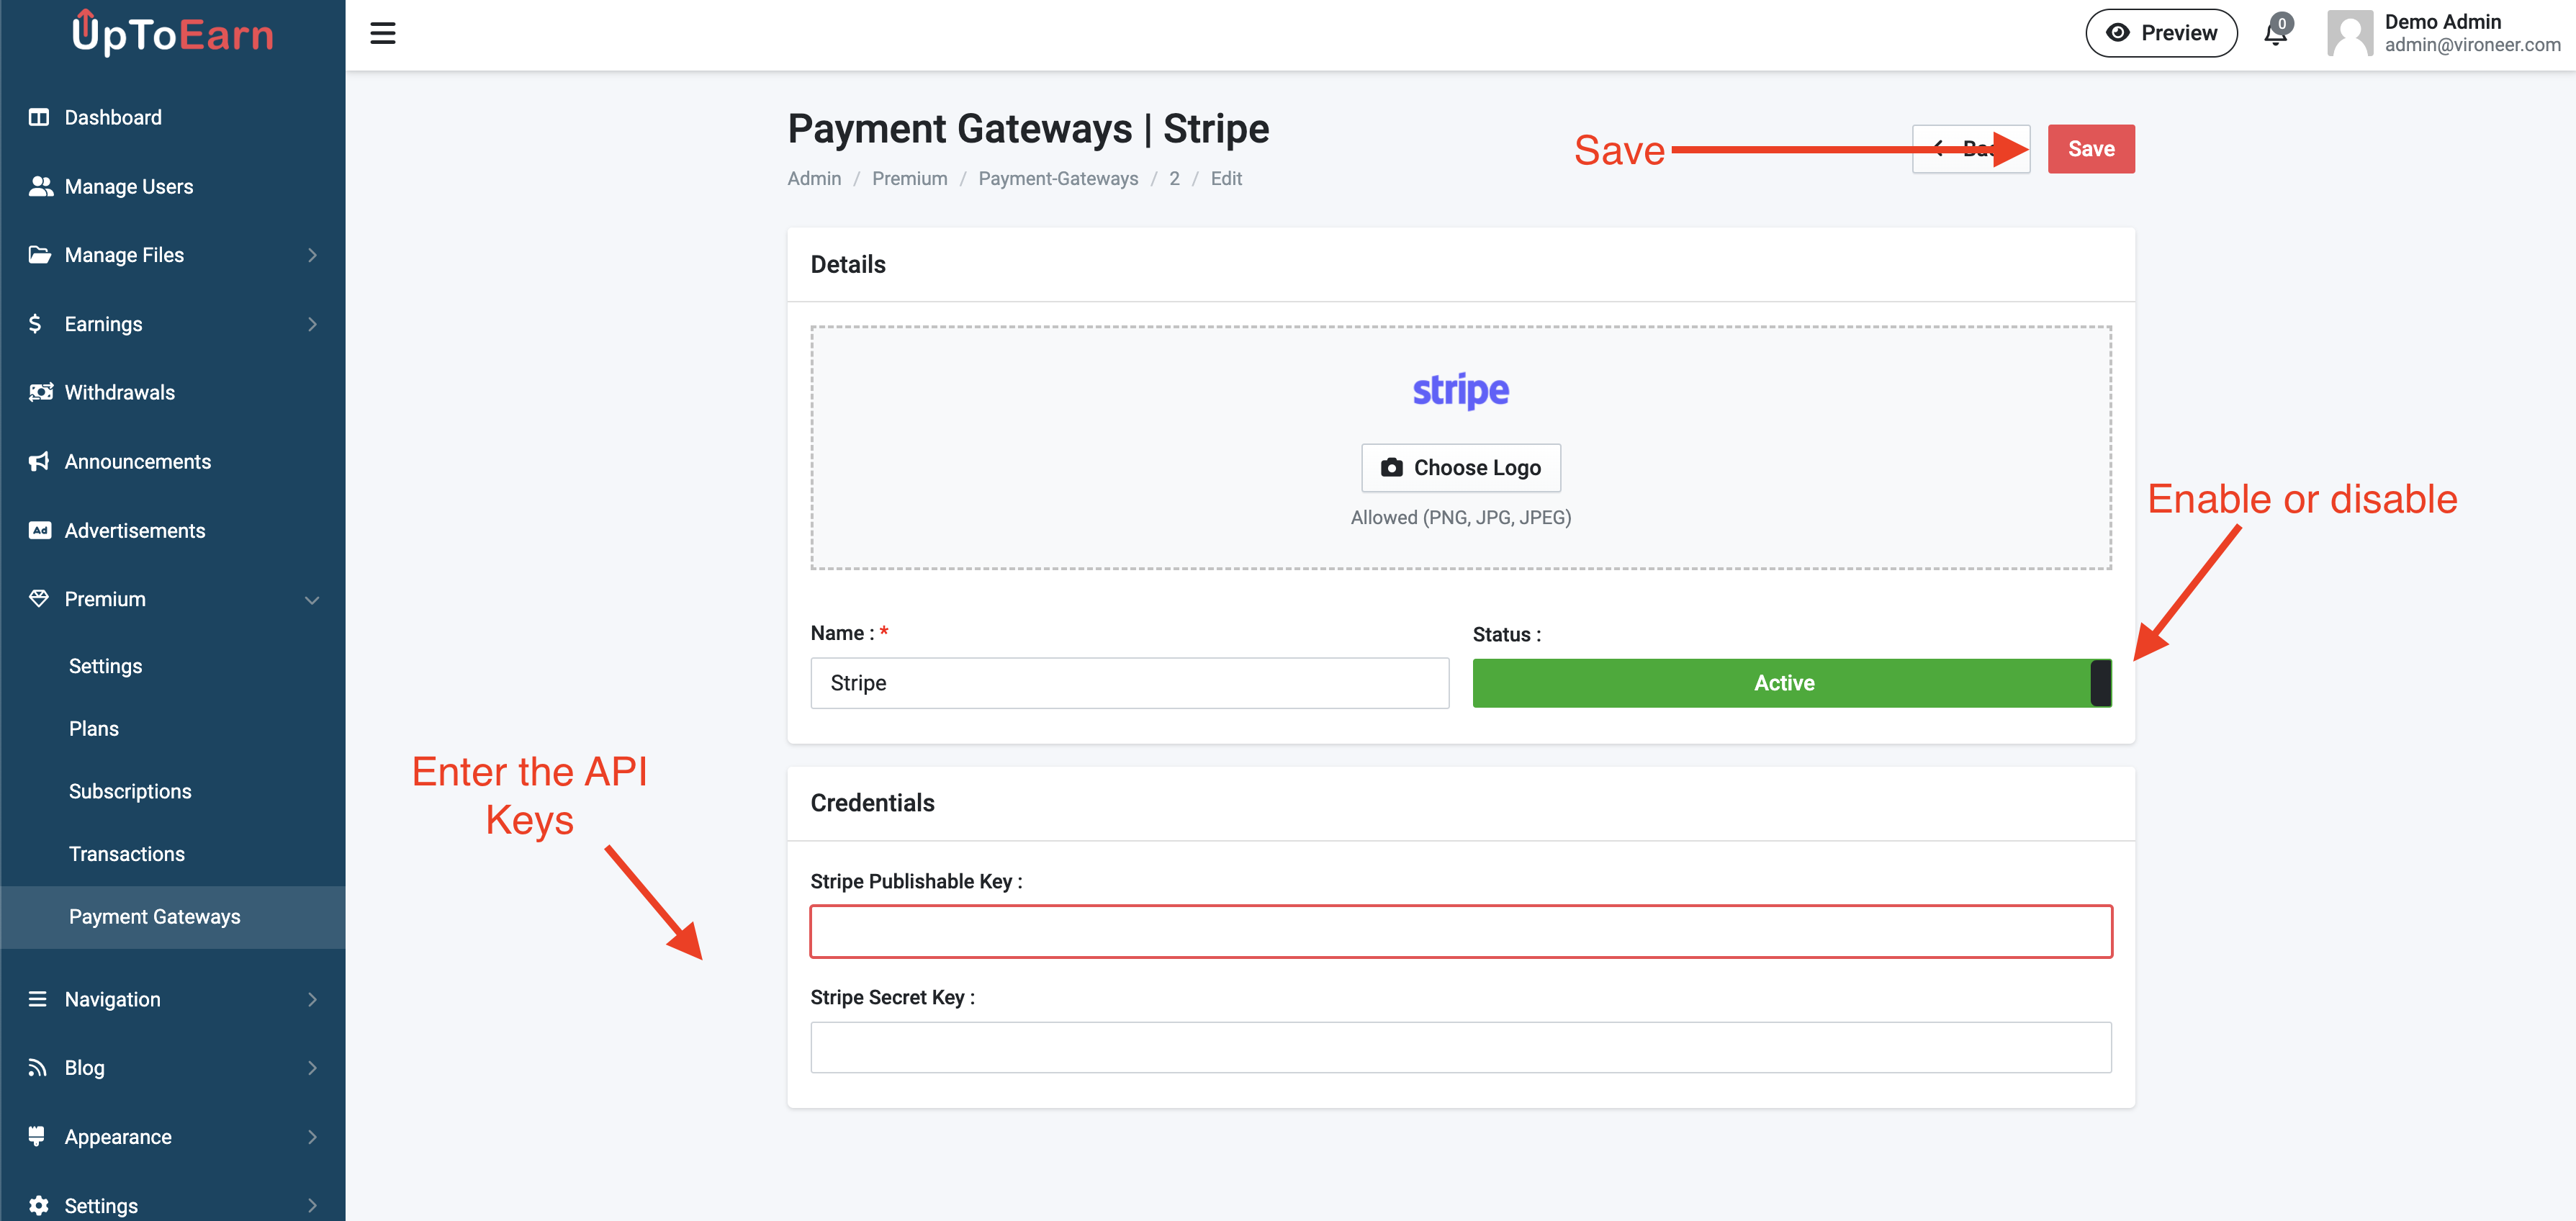
Edit the payment gateway details and enter you API Keys.
You can mange the themes by going to appearance then themes.
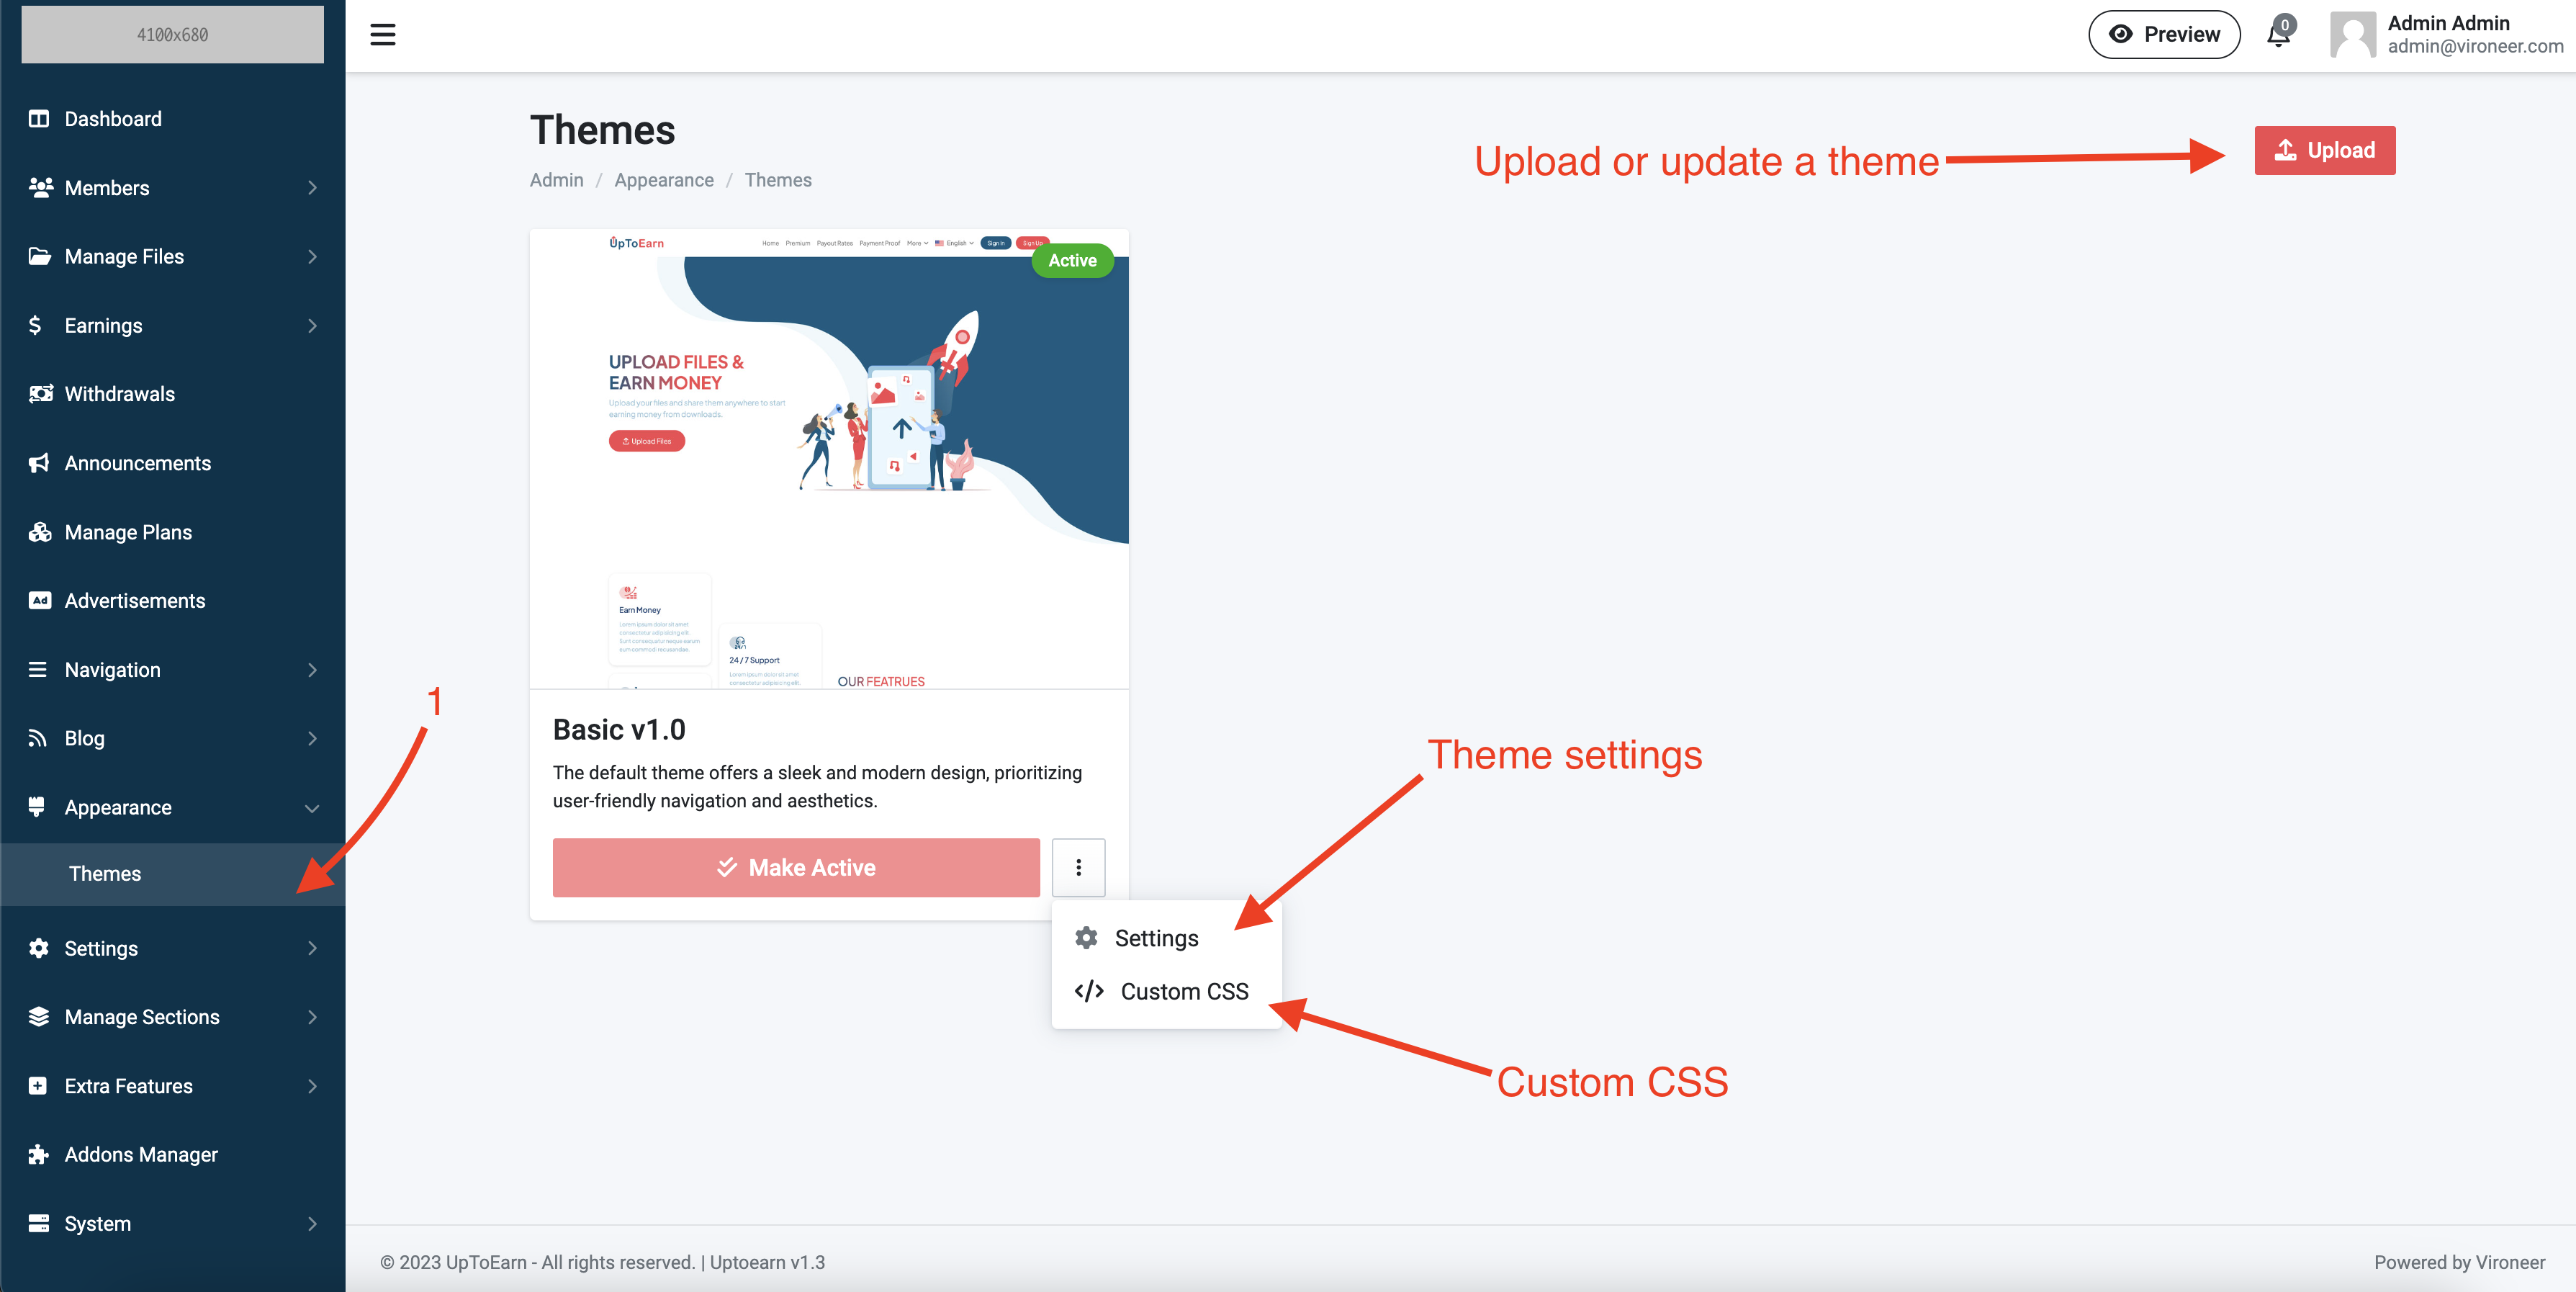
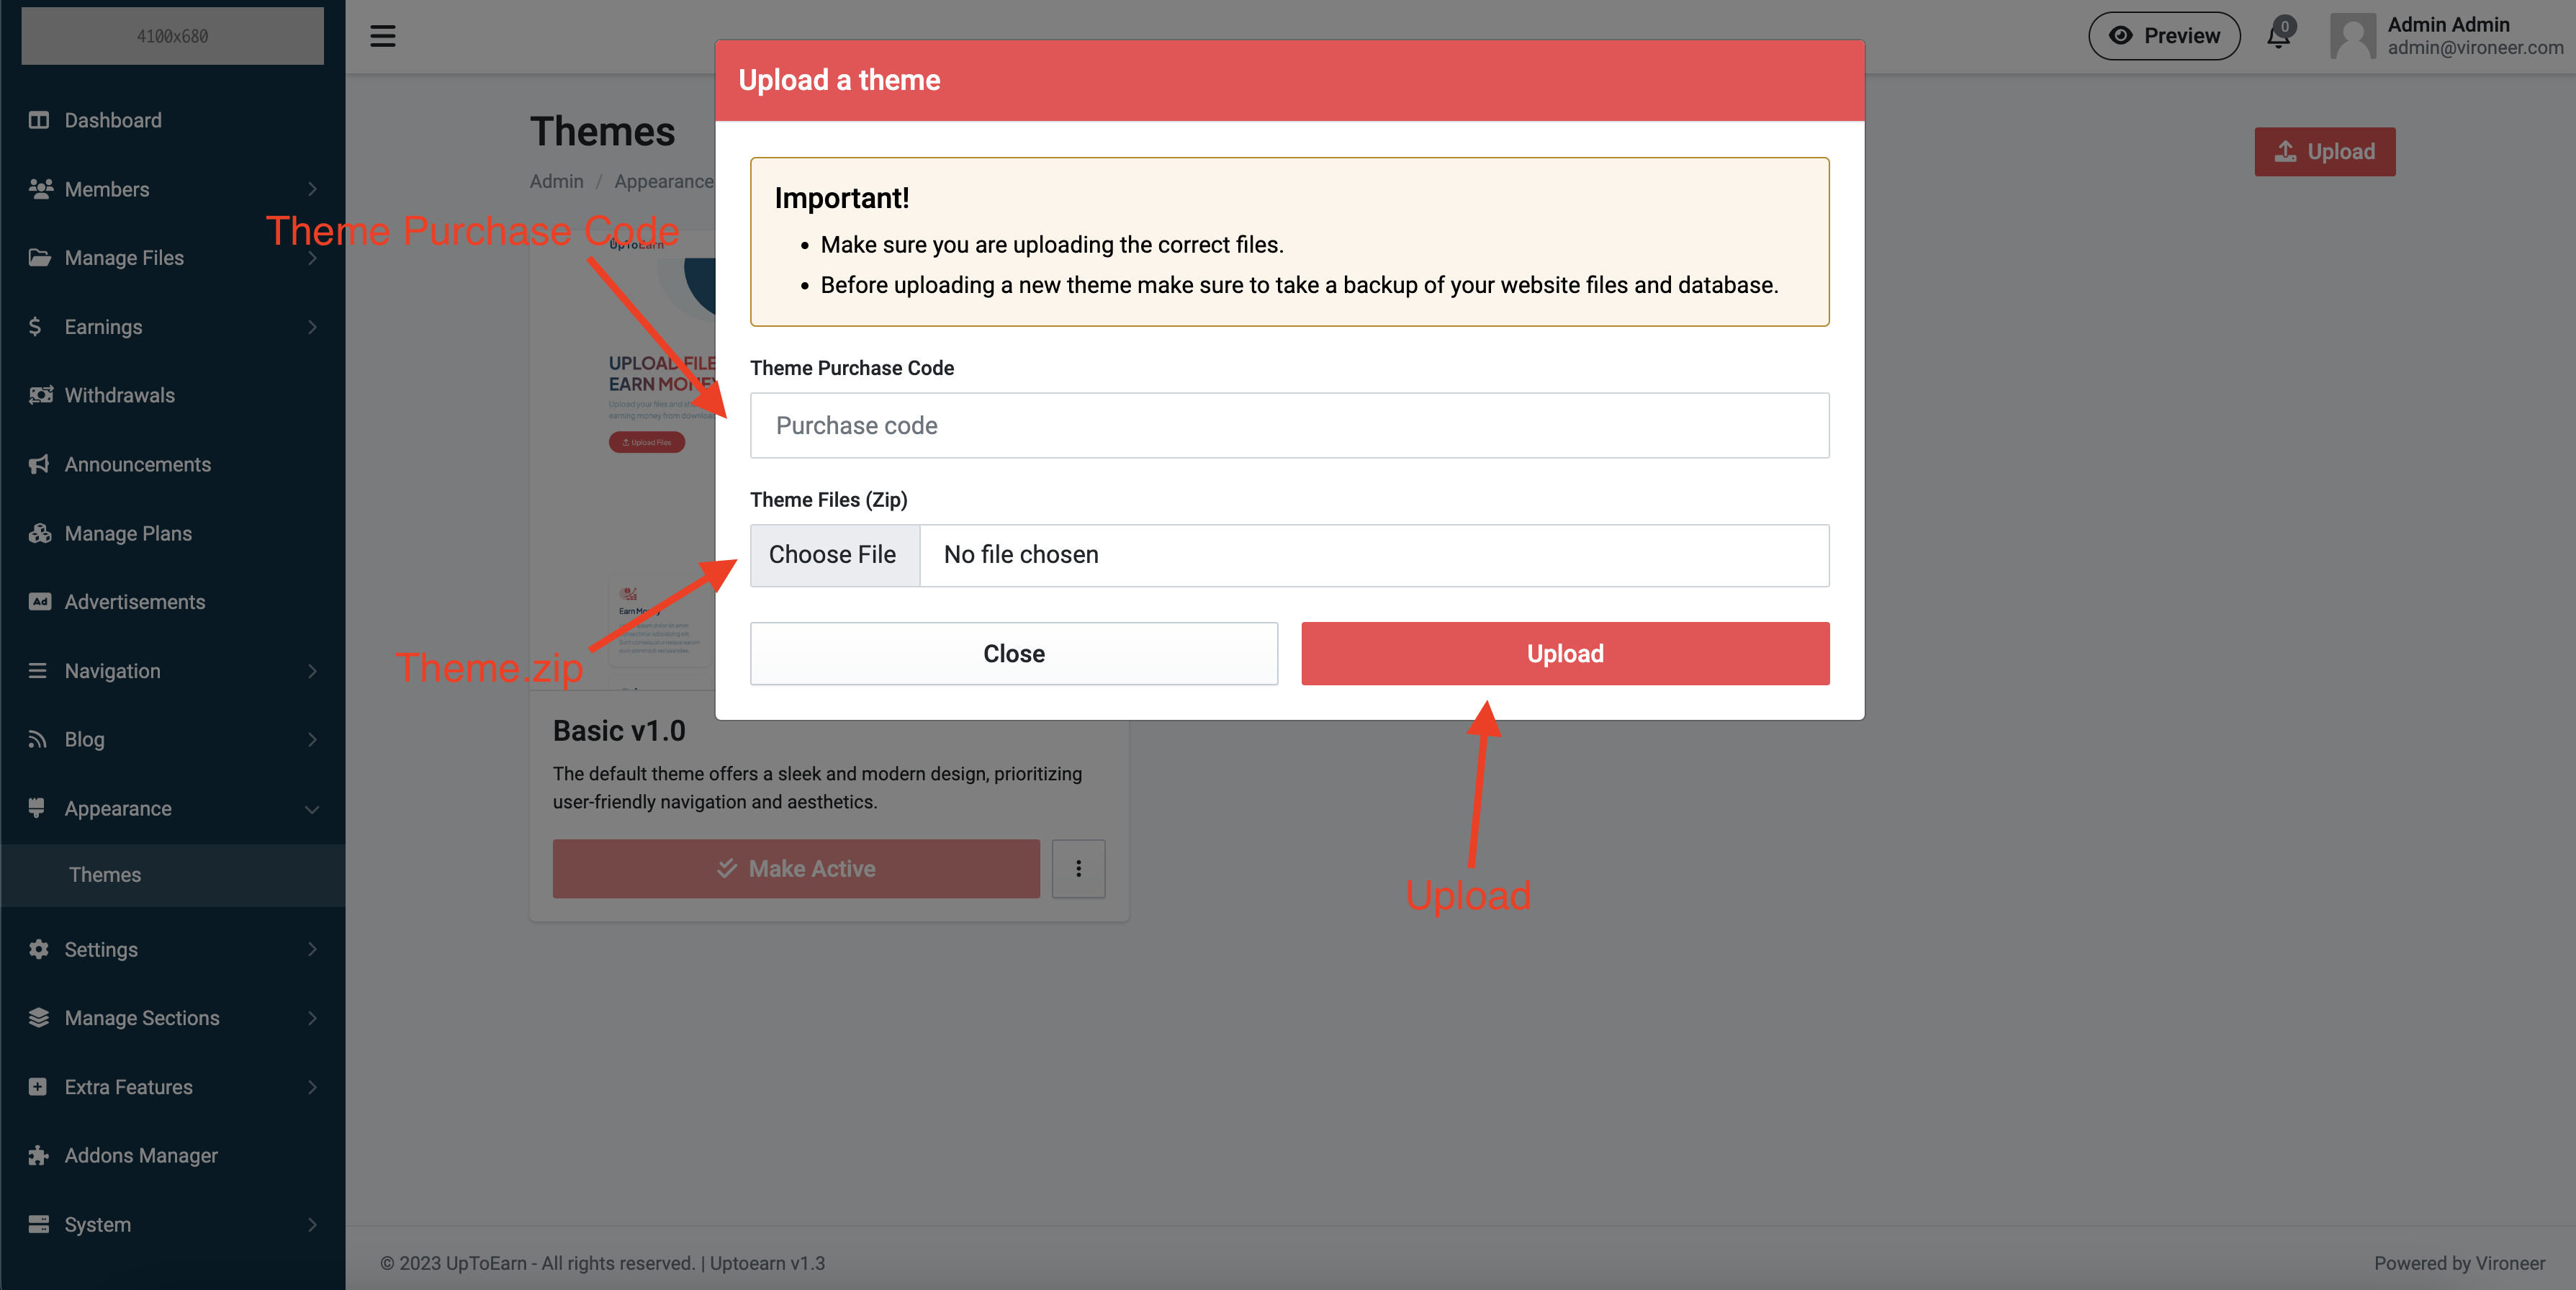
Upload or update a theme.
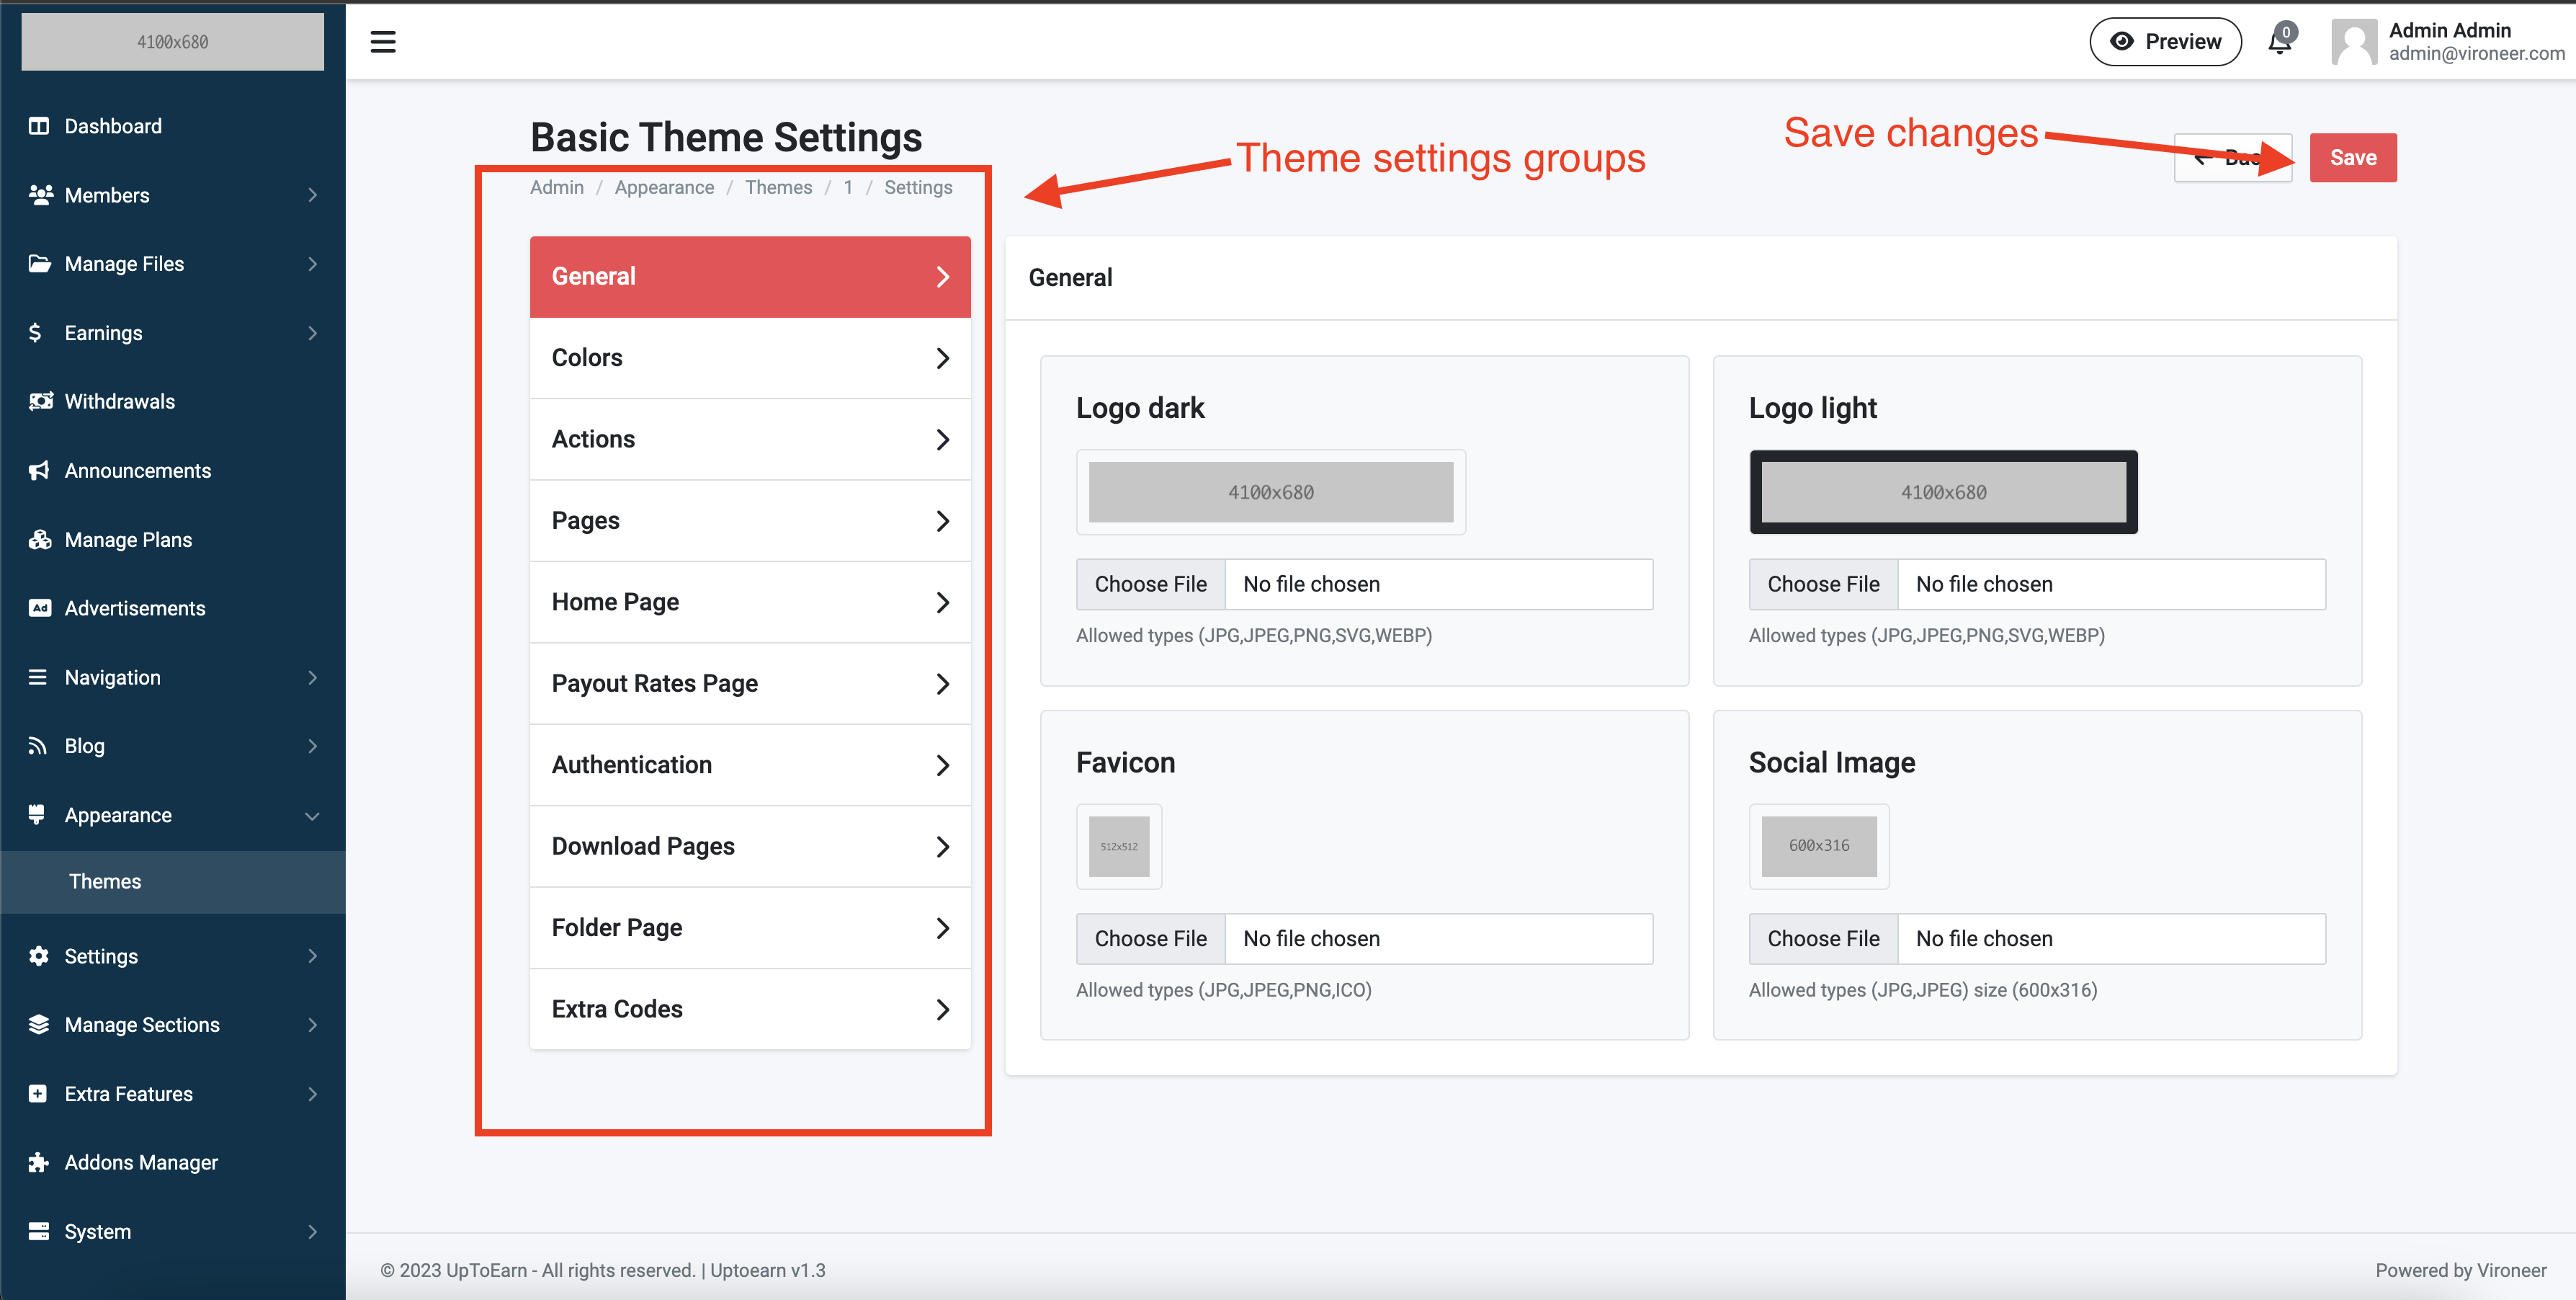
Manage the theme settings.
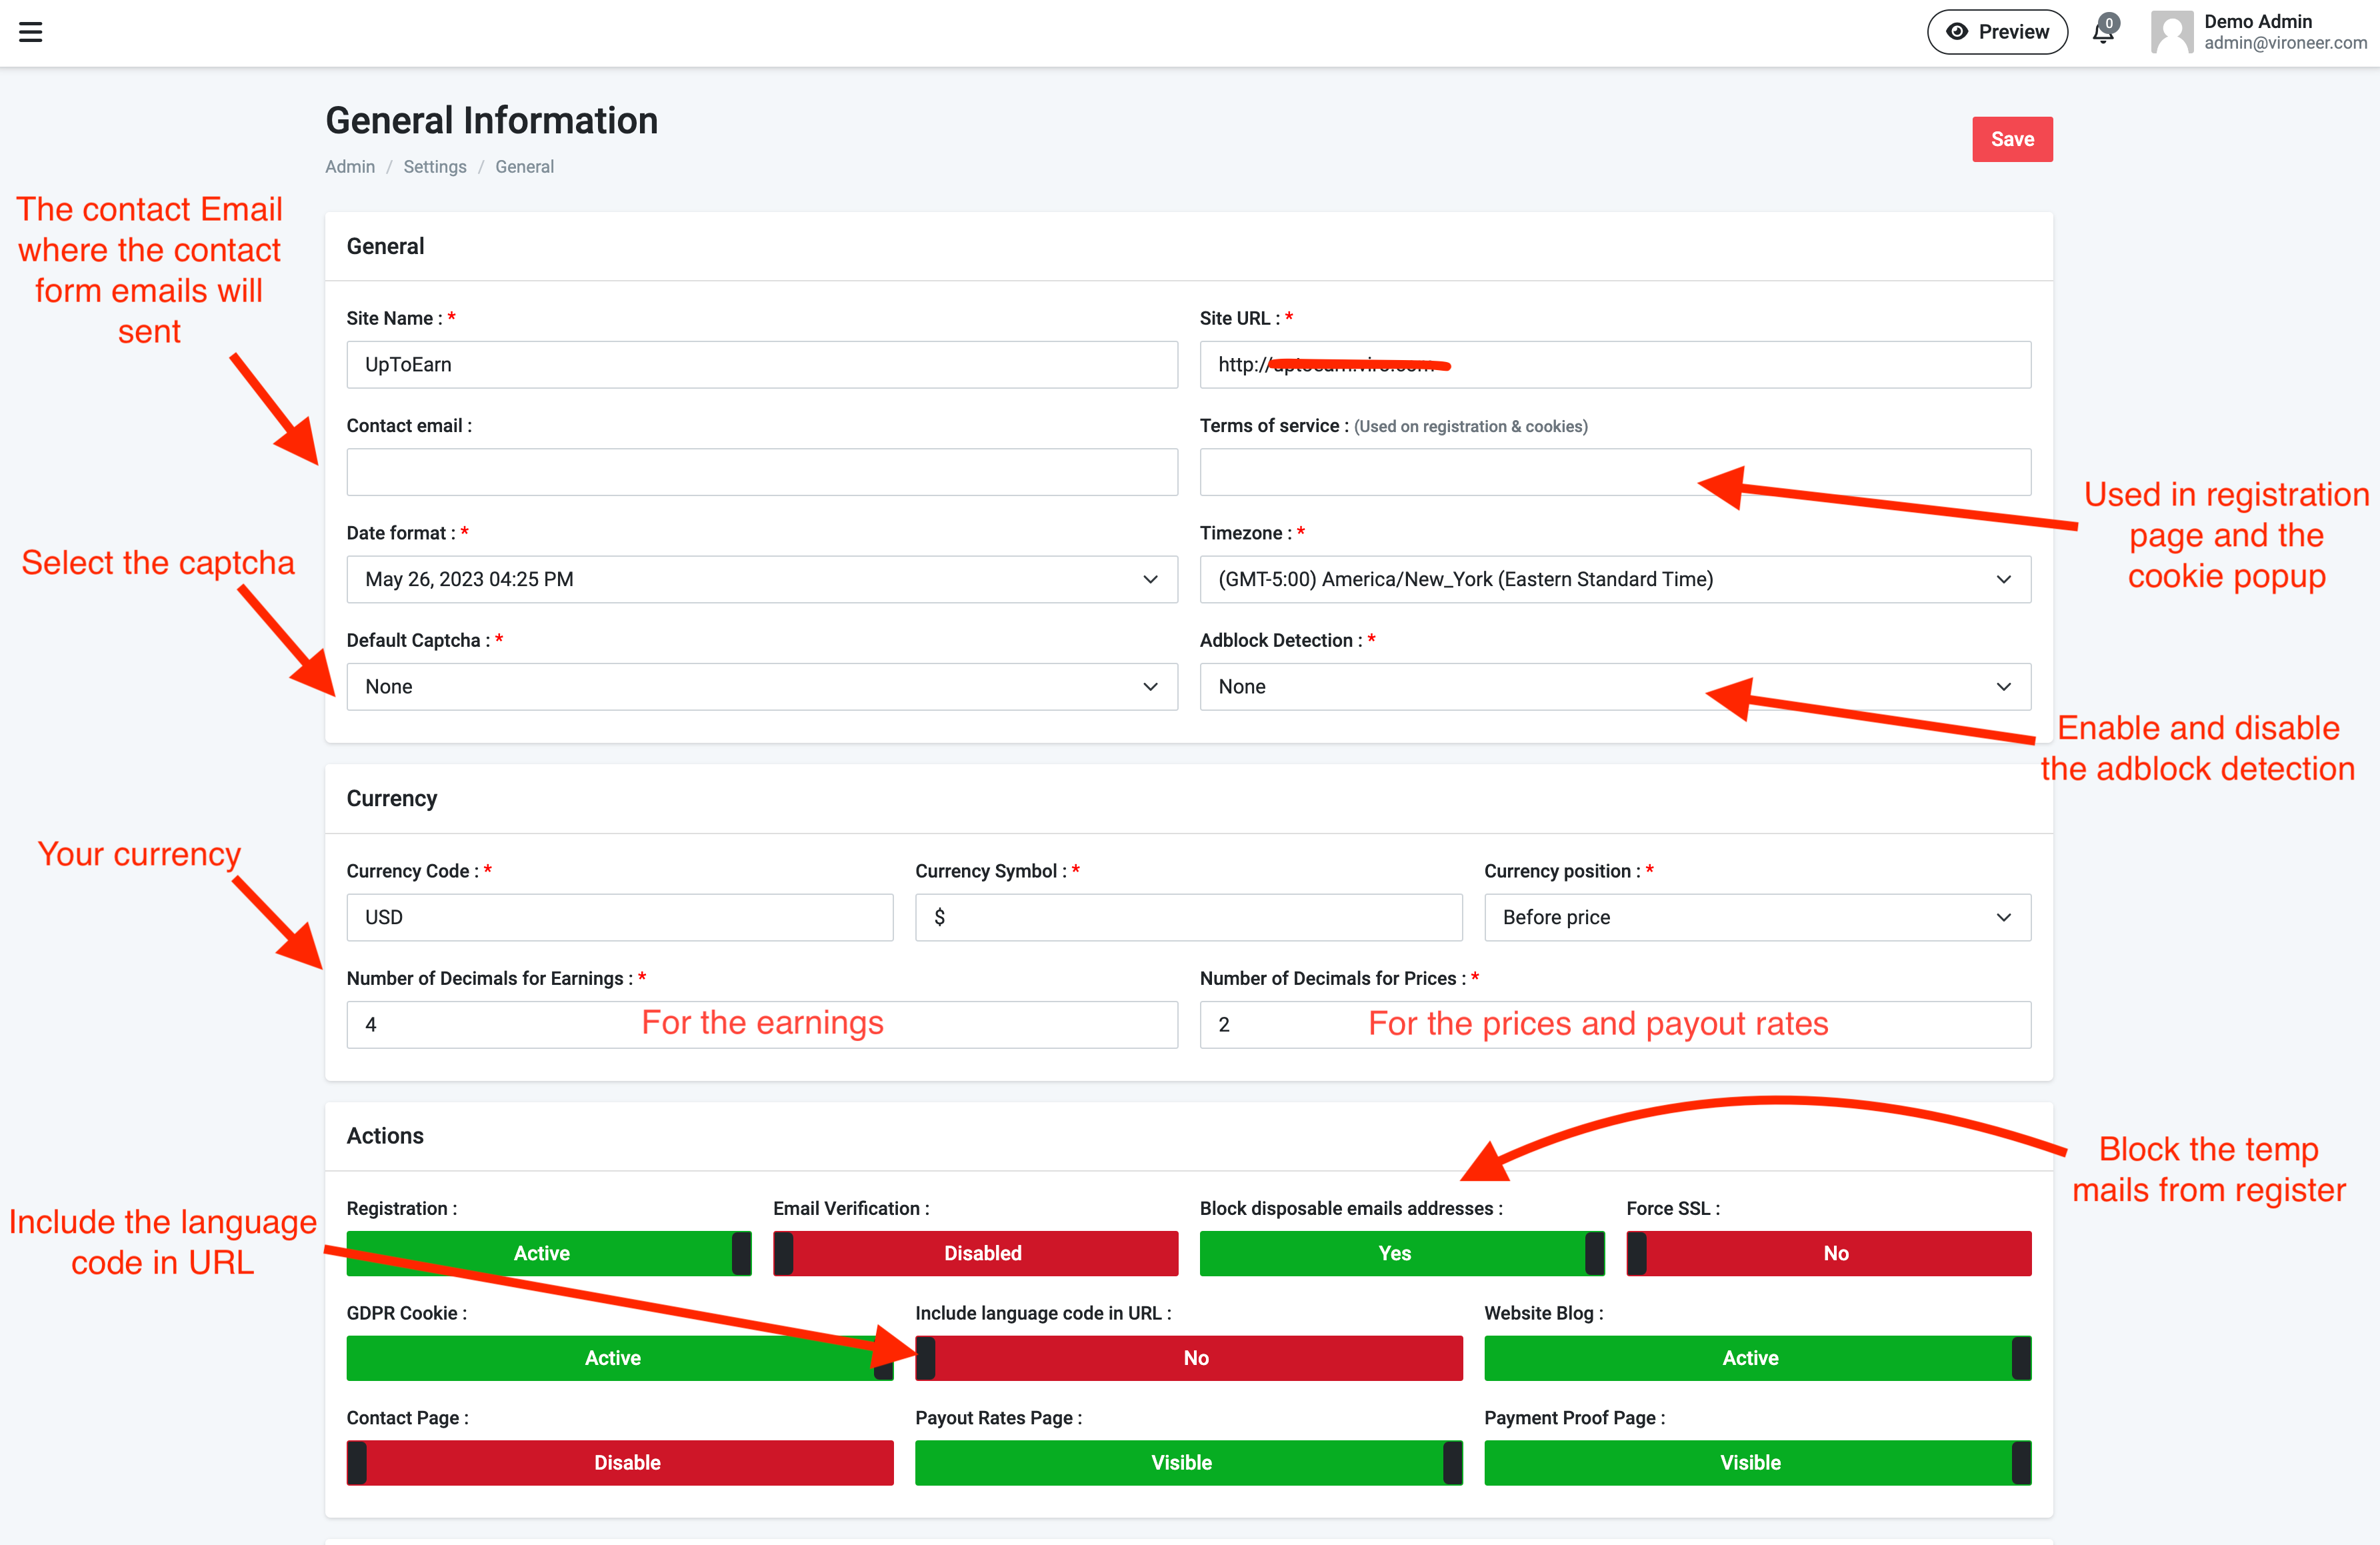
Manage your website general settings.
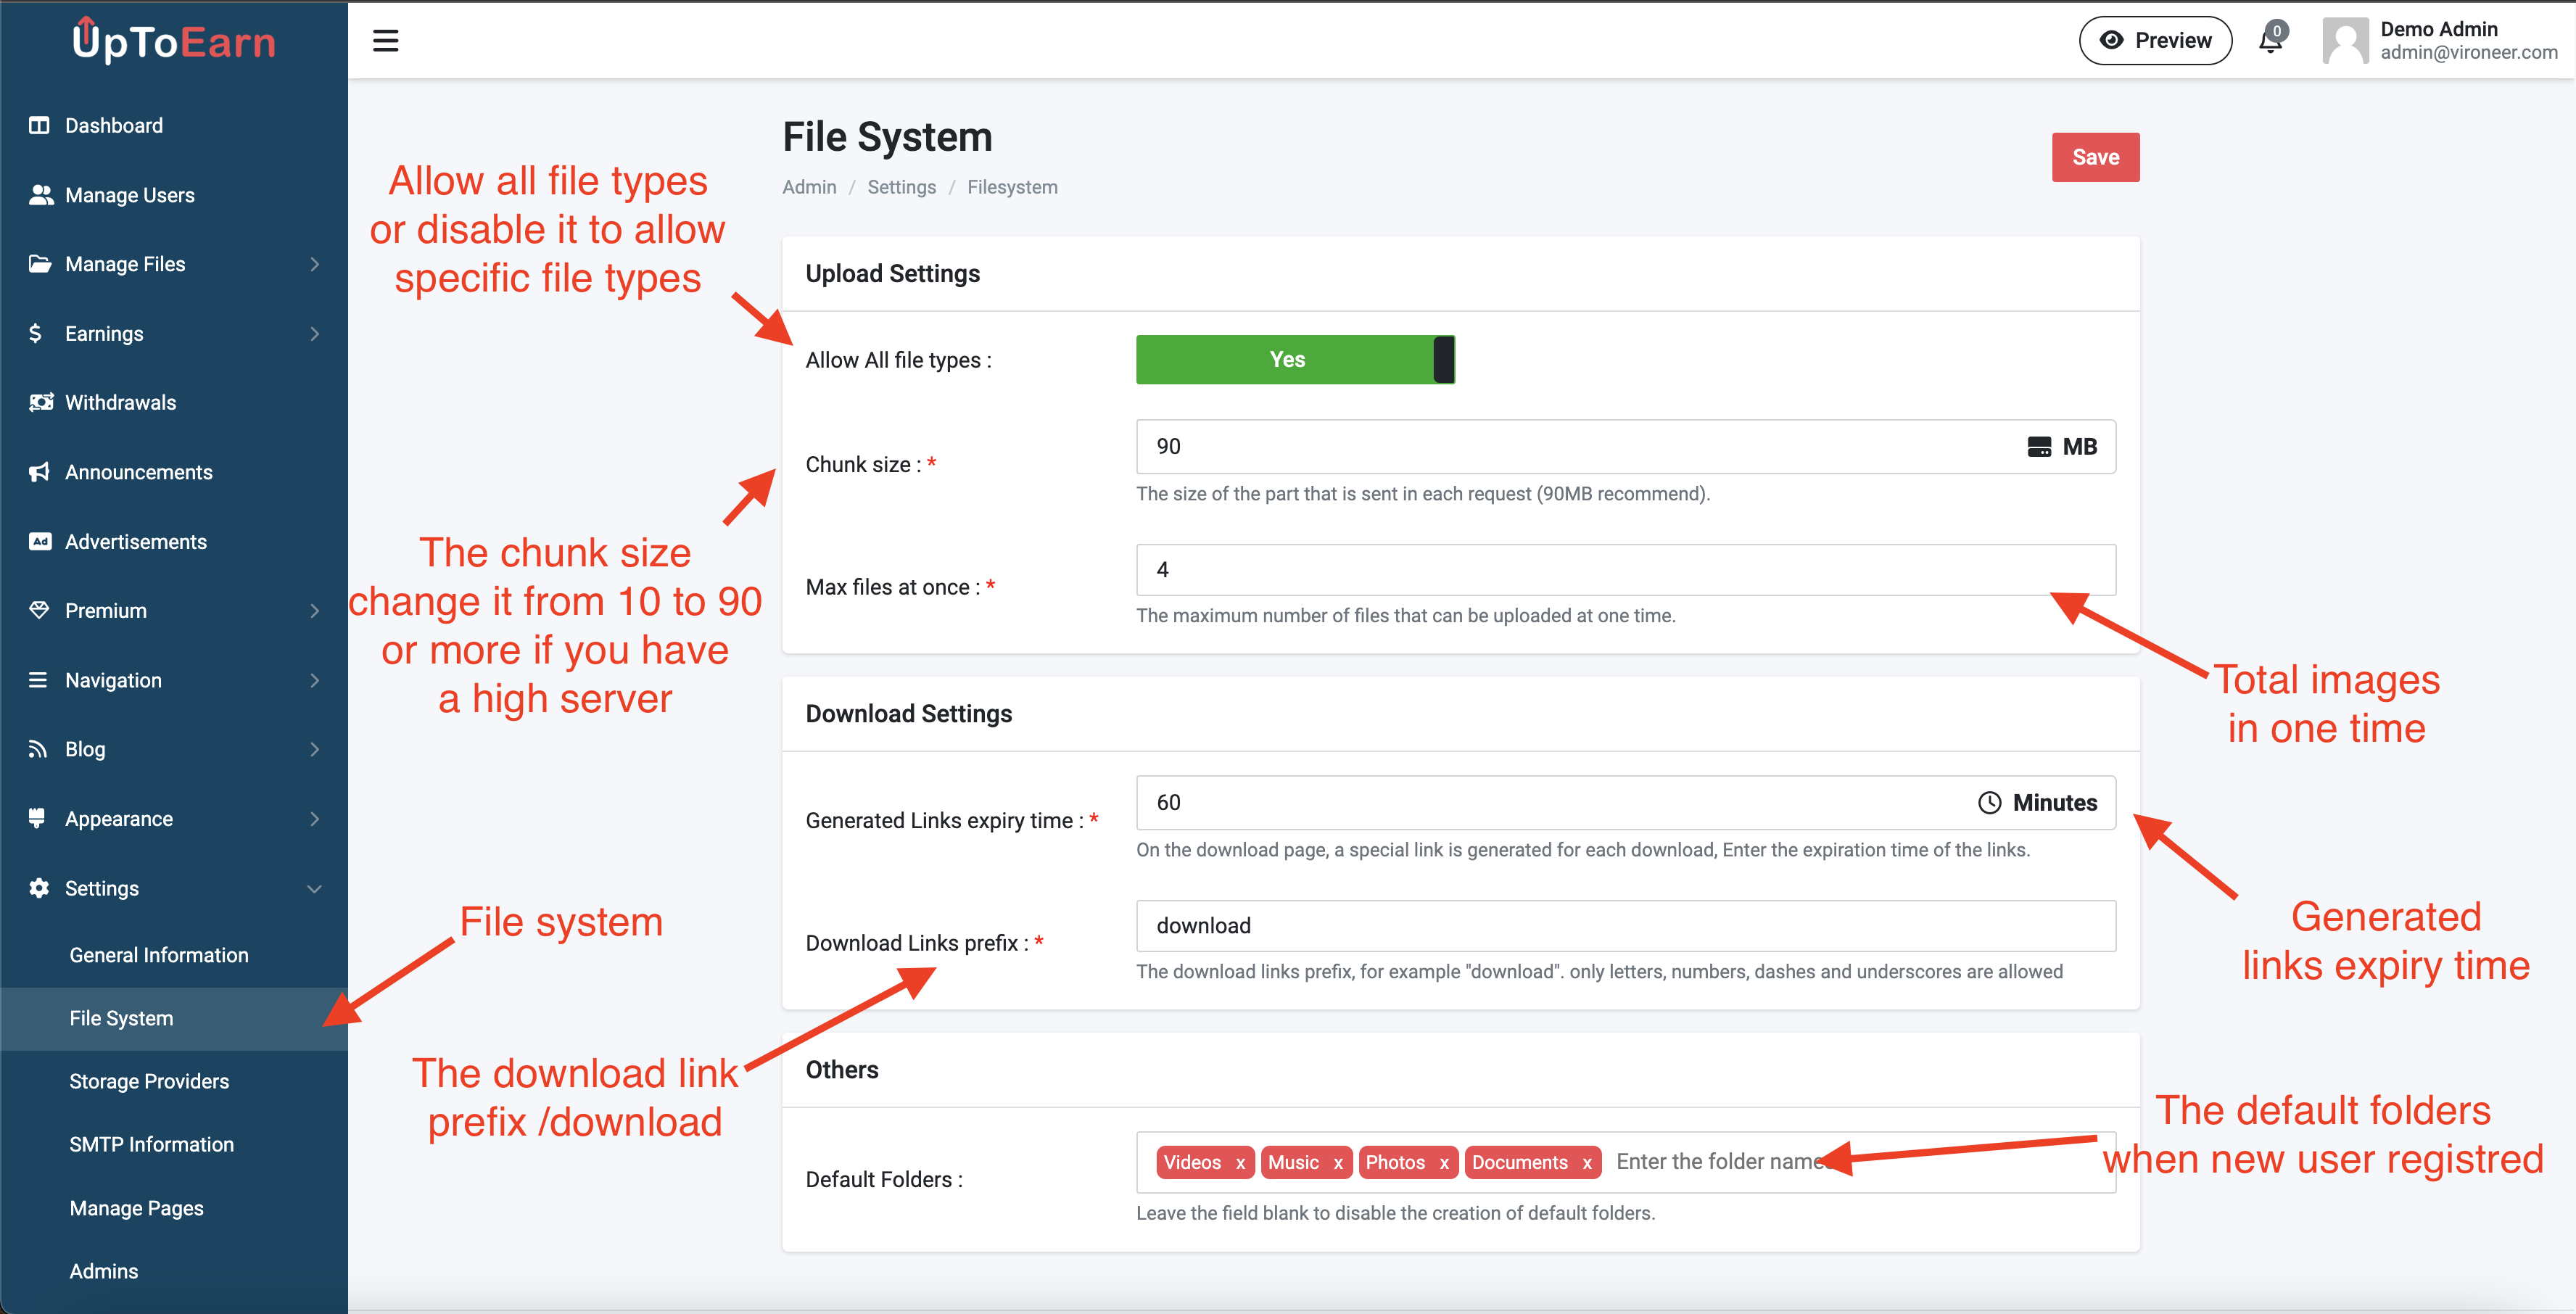
Manage your file system settings.
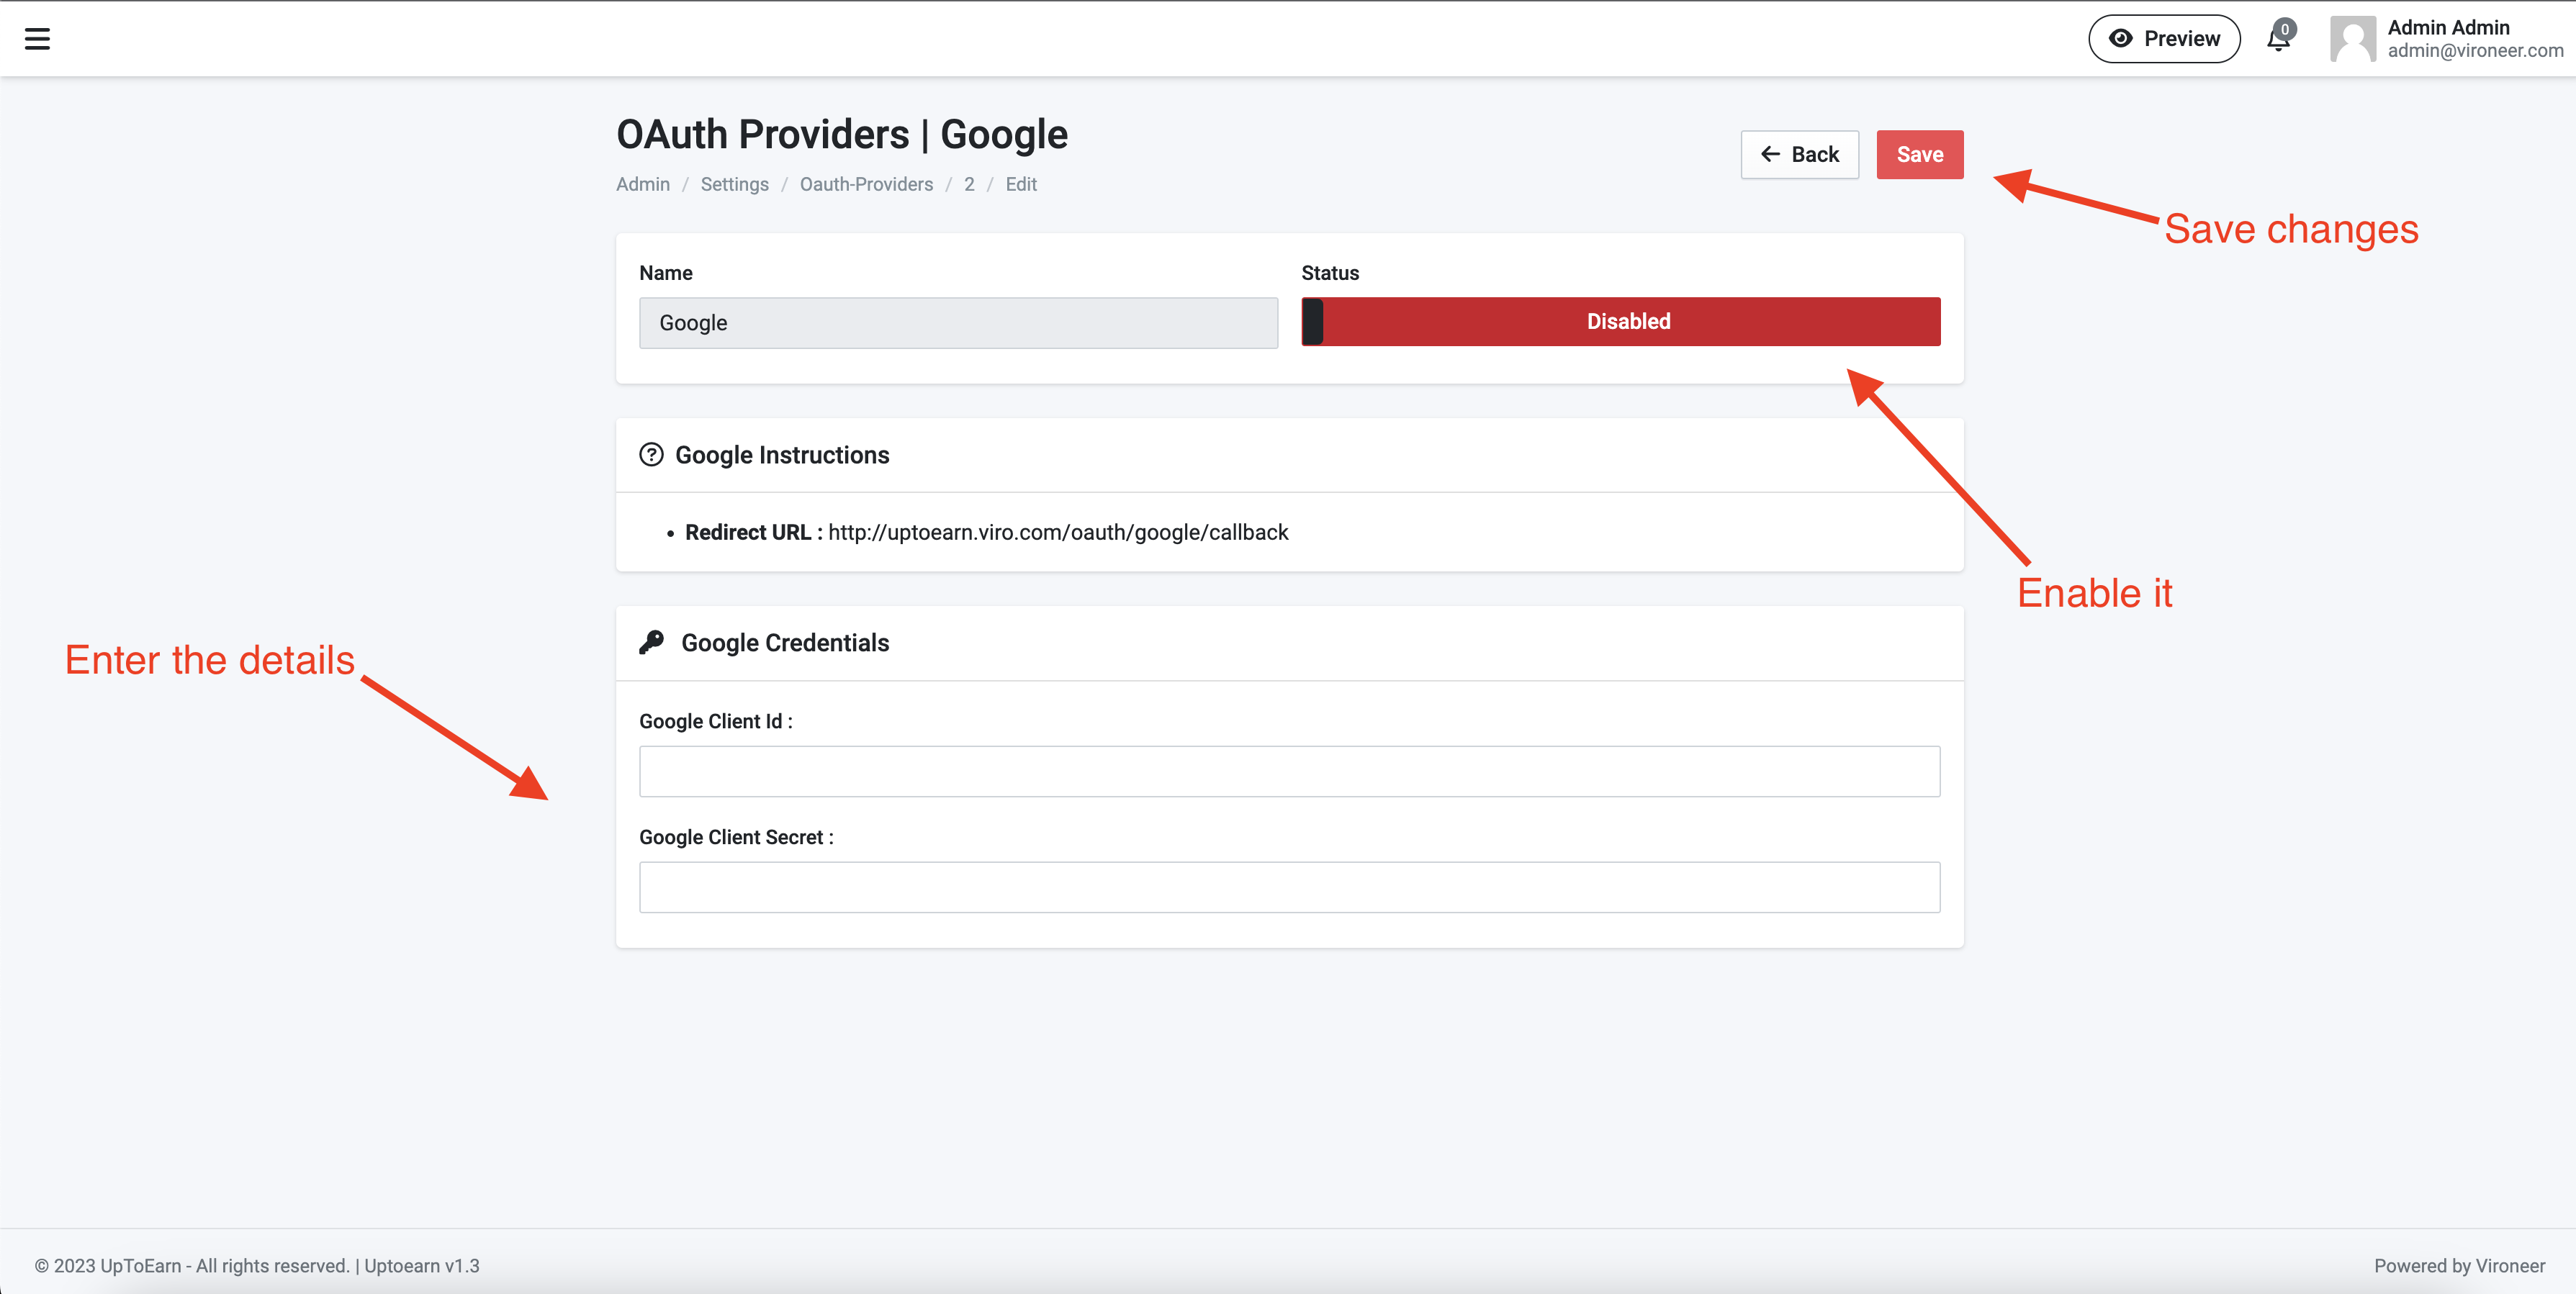
Go to settings then oauth providers.
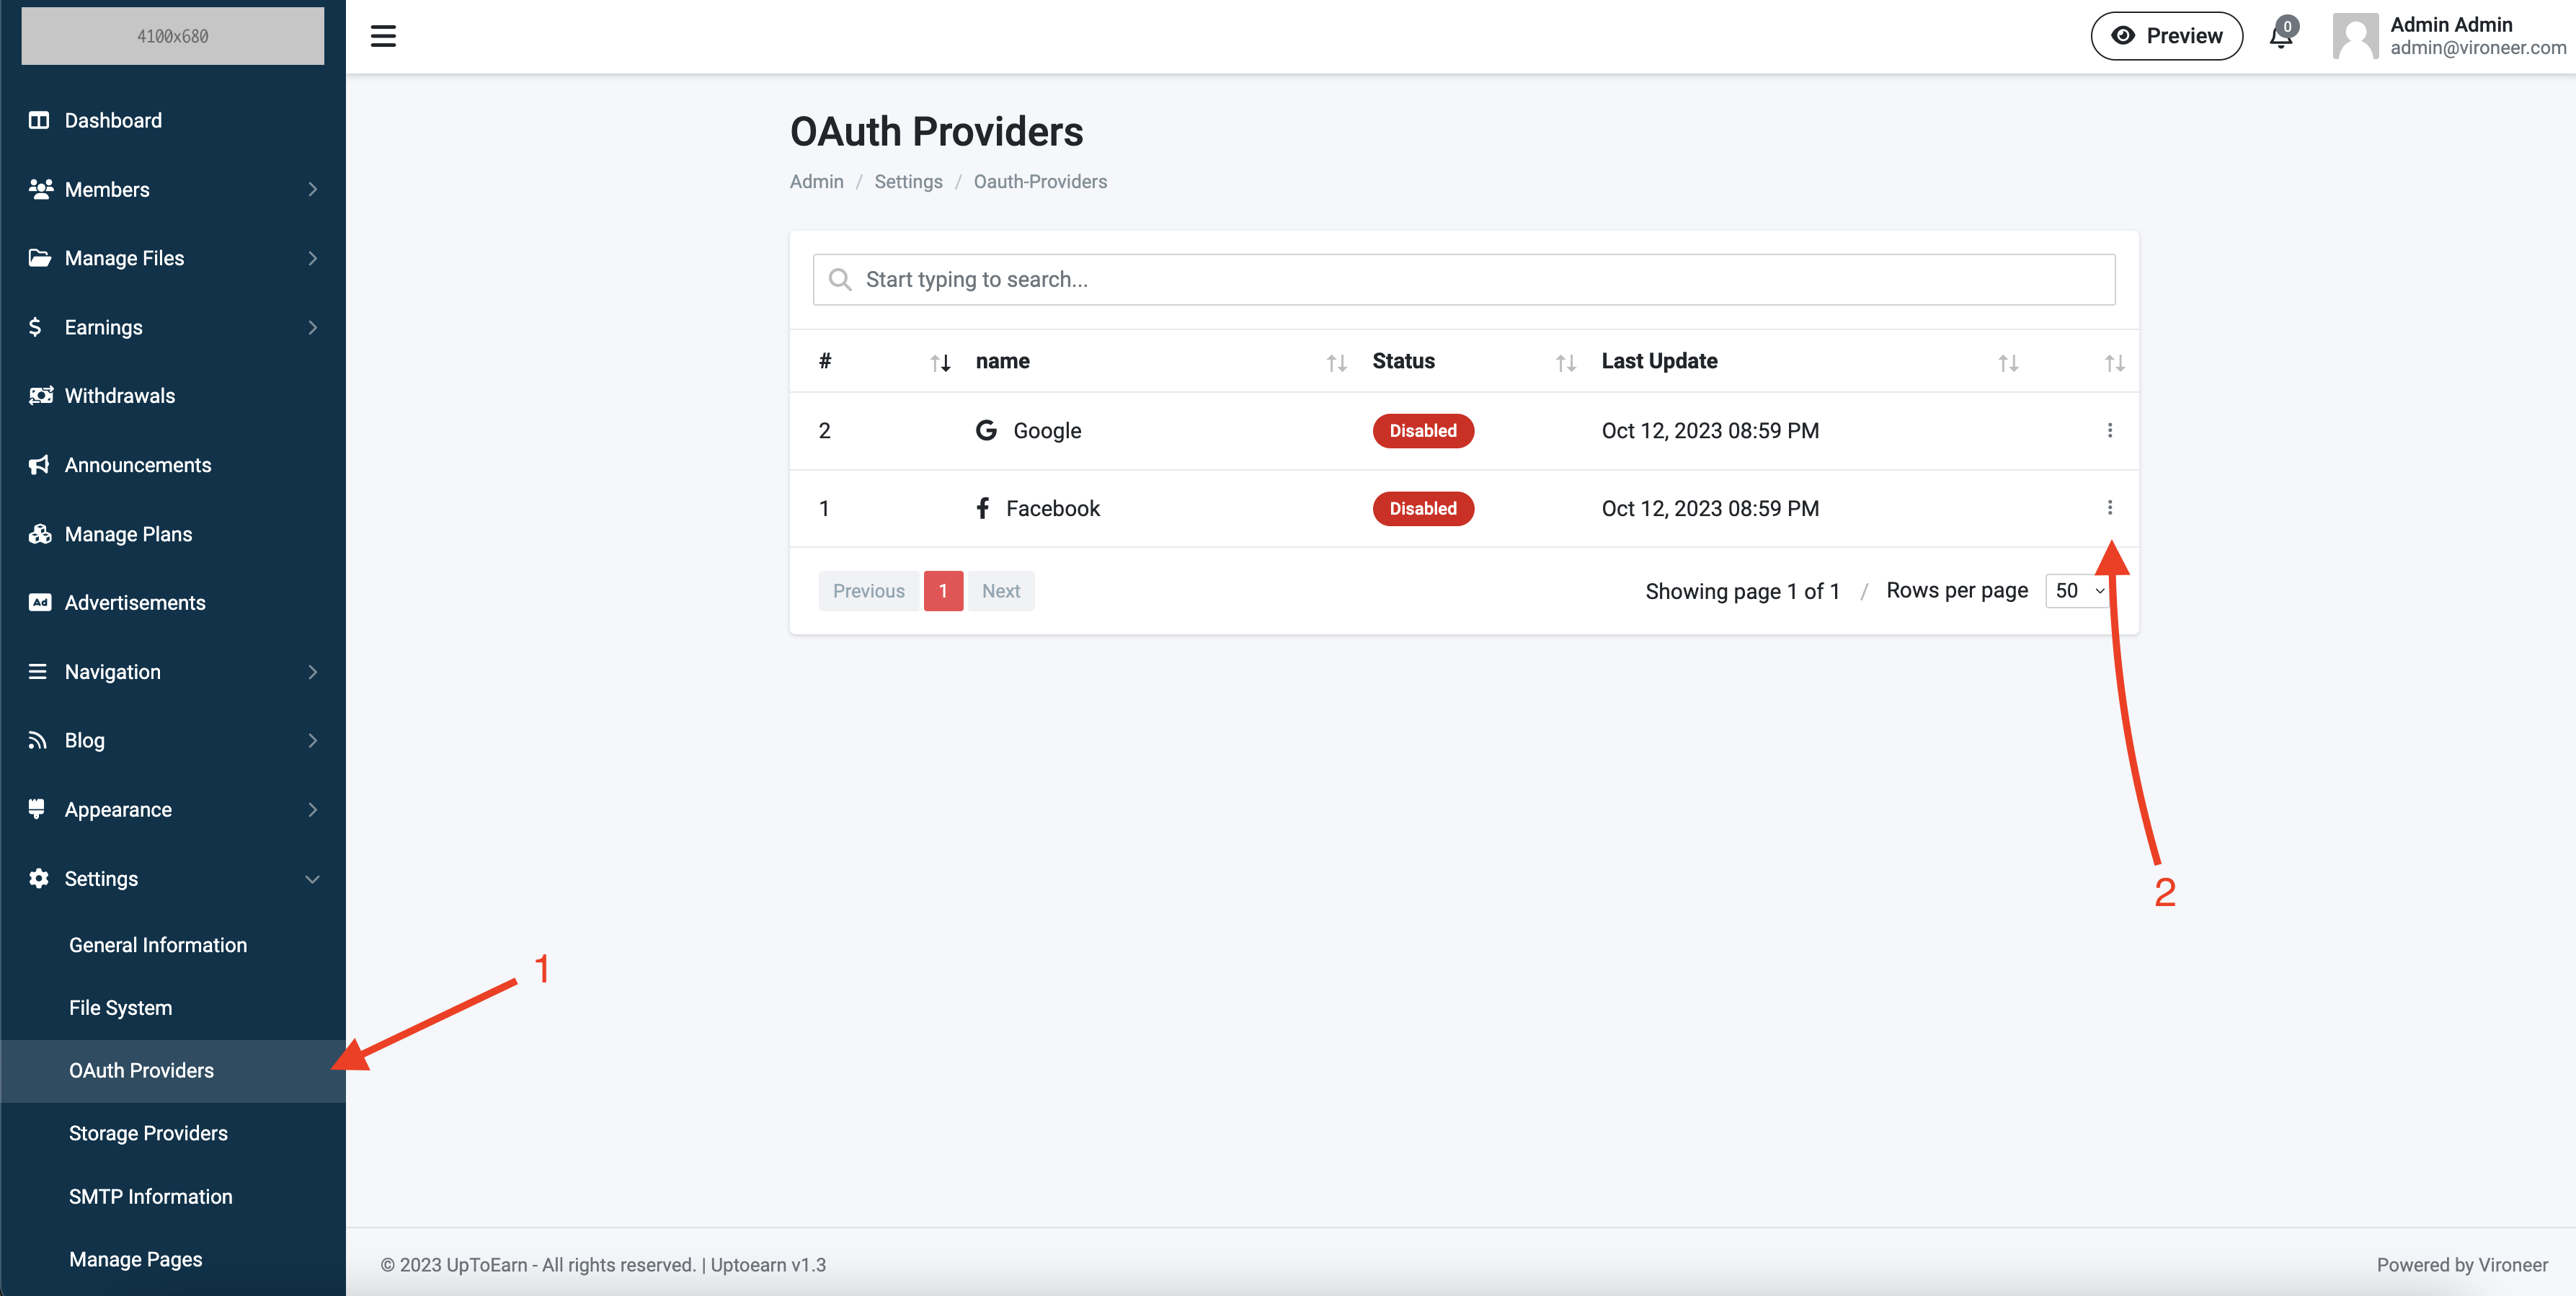
Enter the oauth provider details and save.
Go to settings then storage providers.
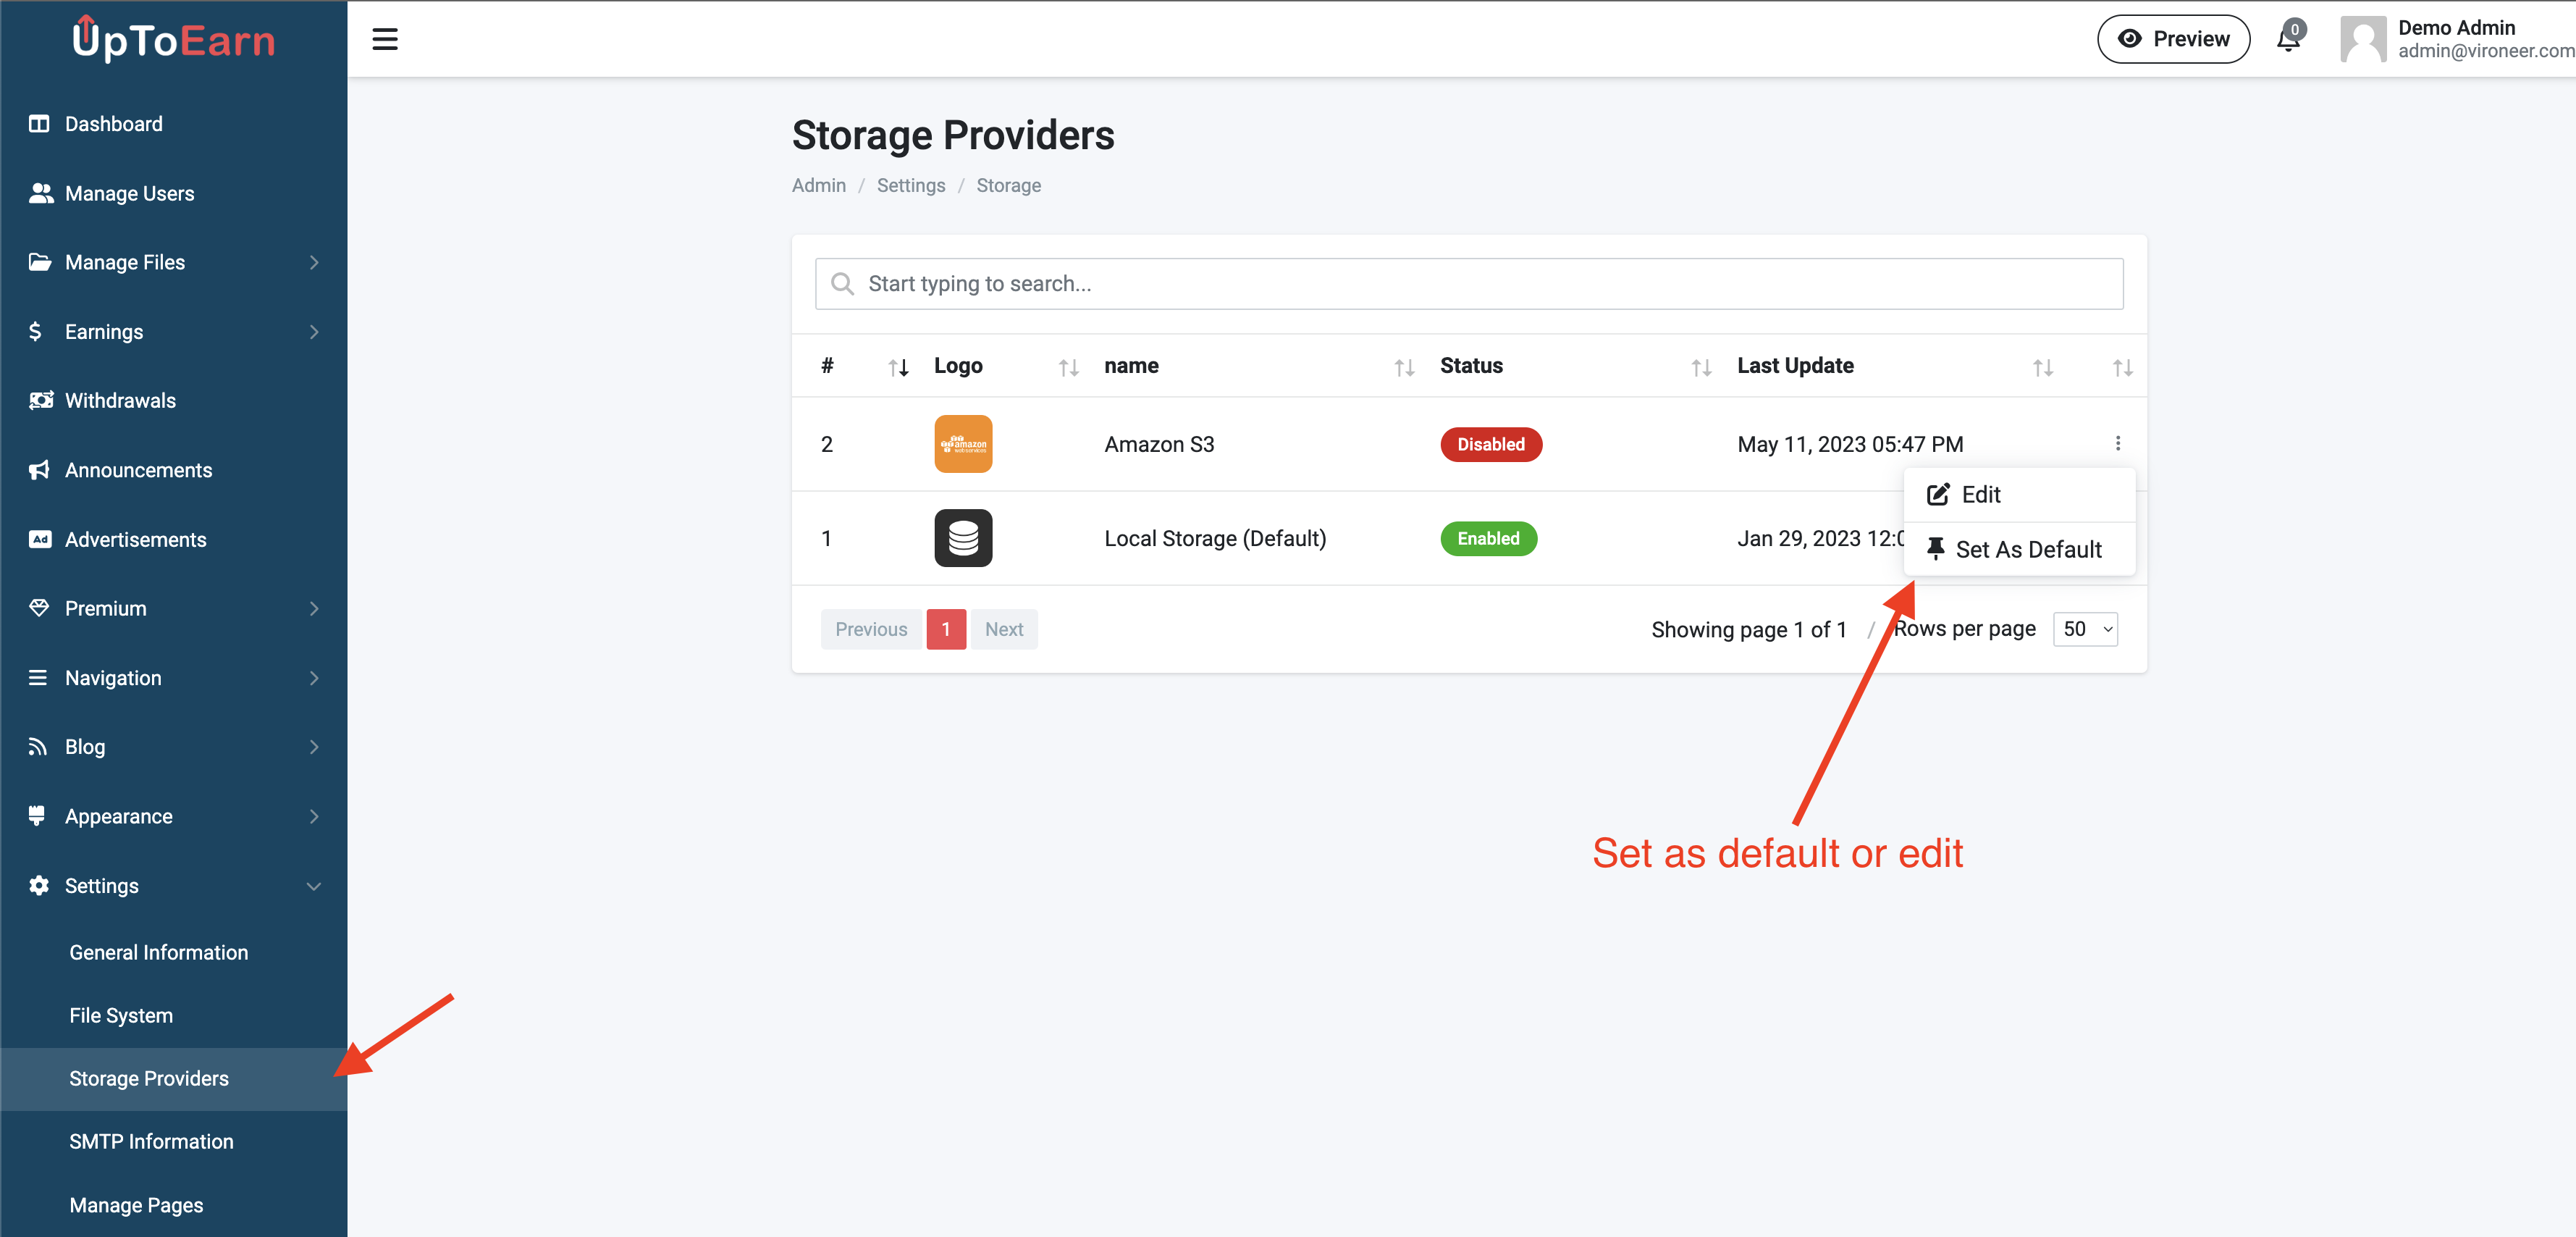
Enter the storage provider details and save.
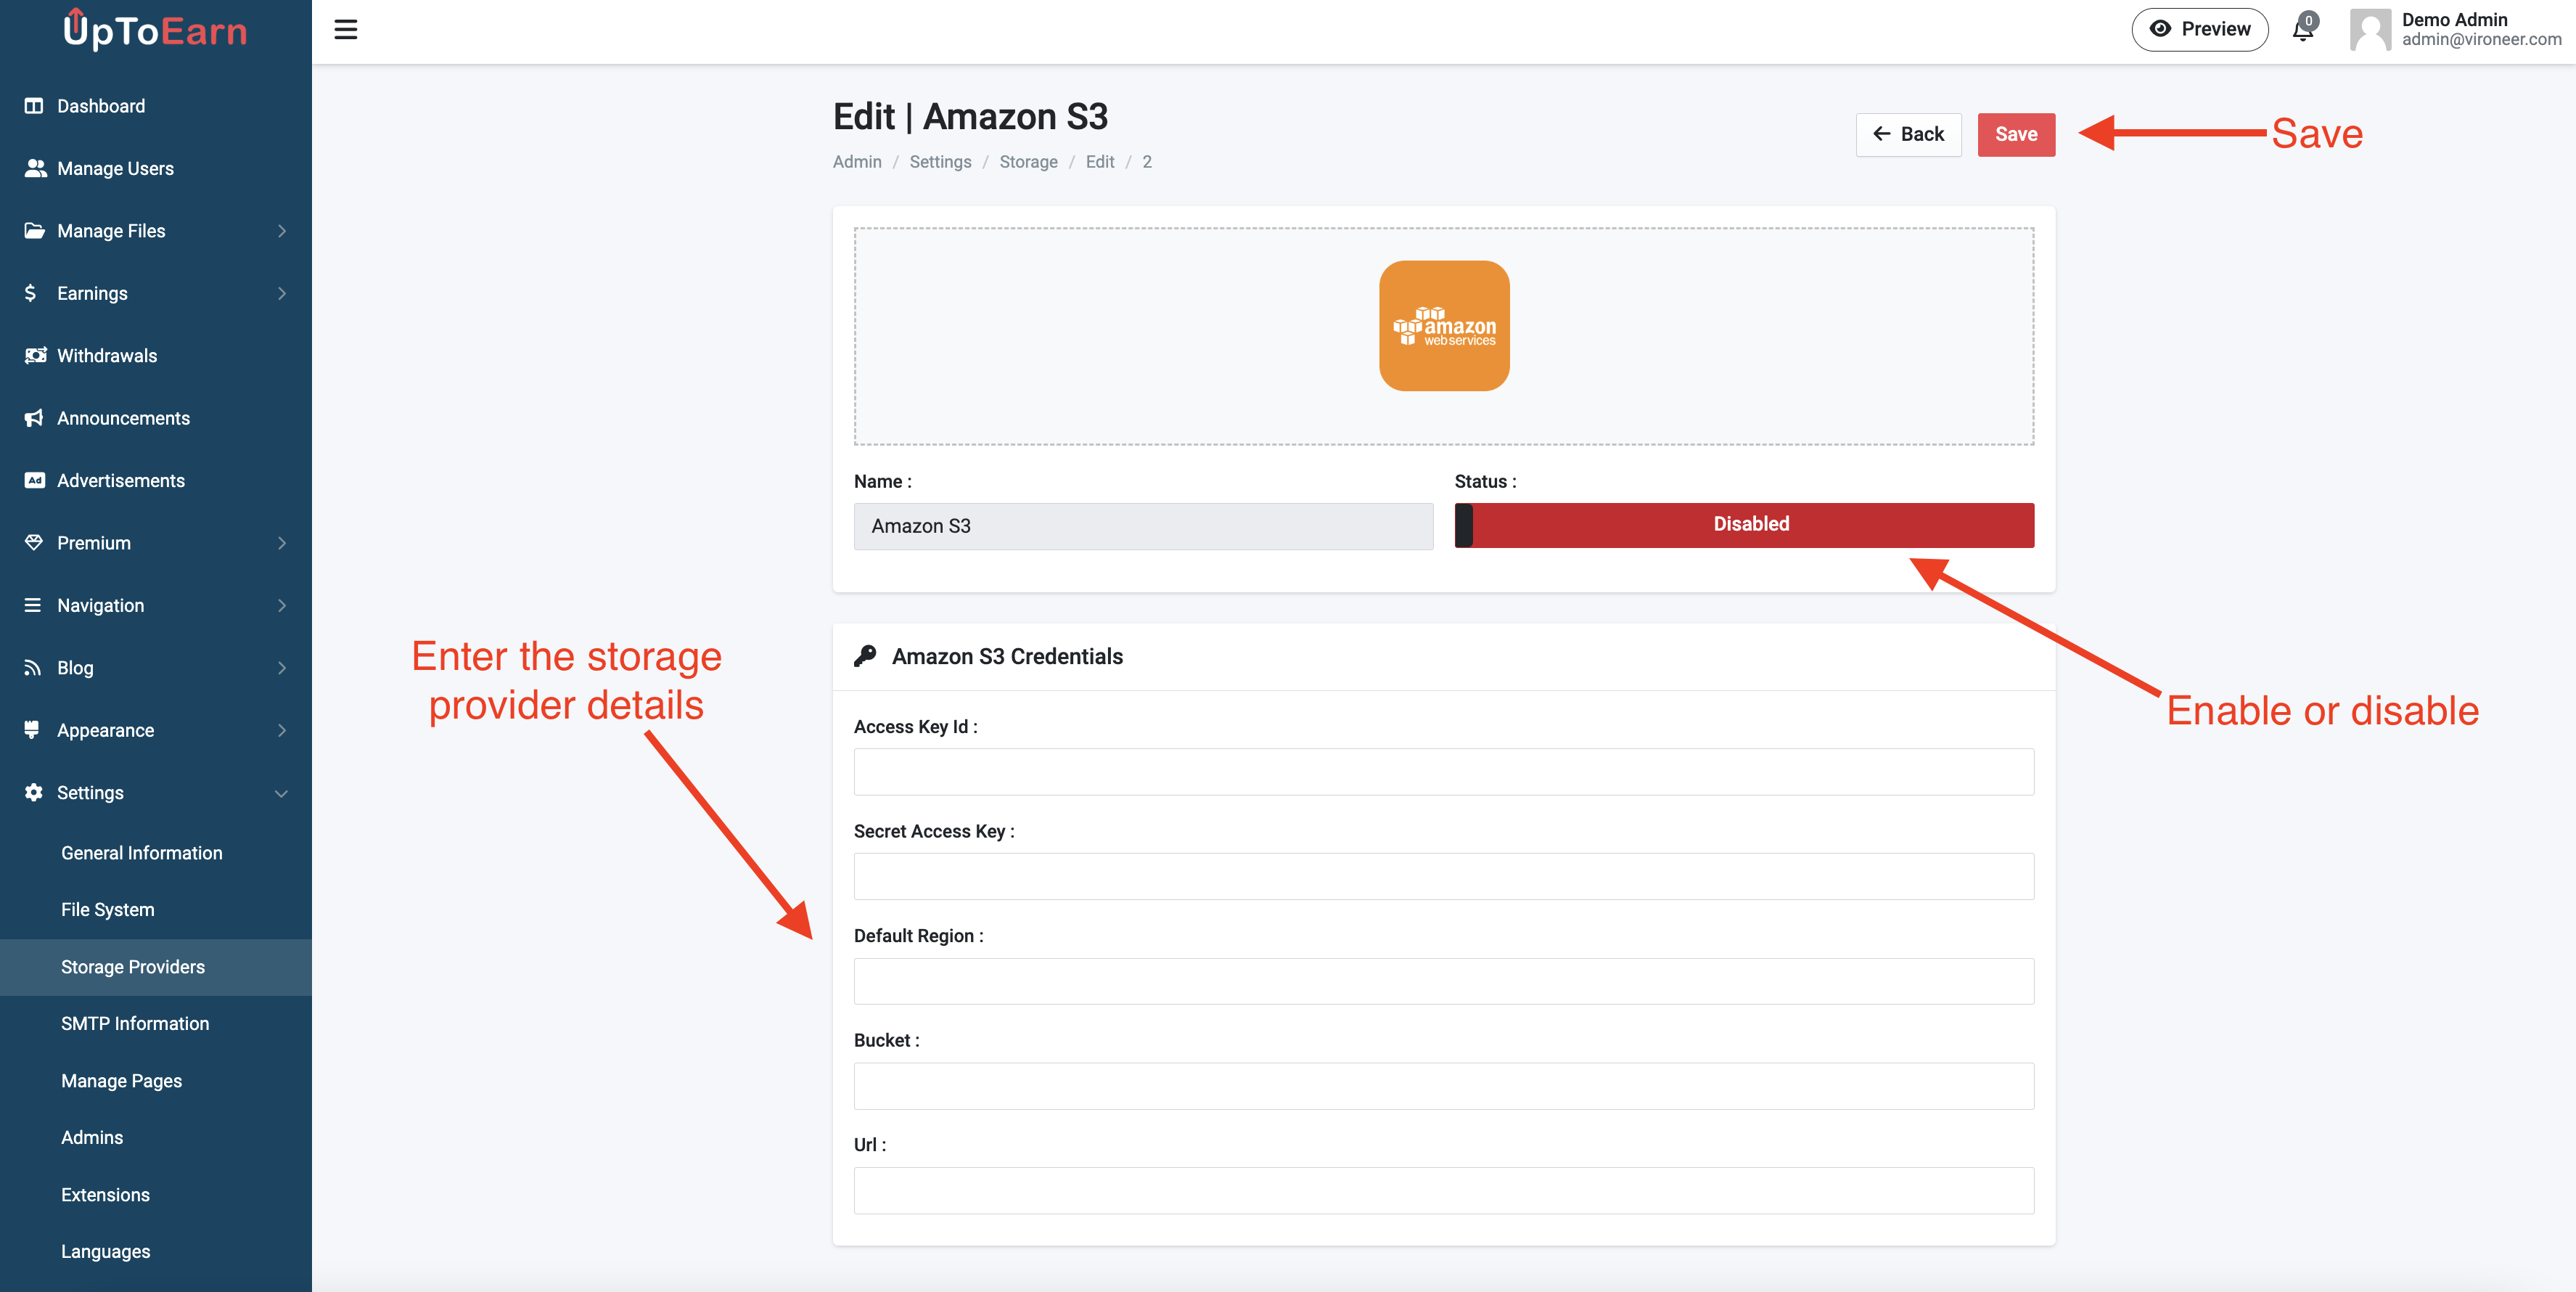
Setup the Amazon s3.
Go to settings then SMTP information the enter your details and test it.

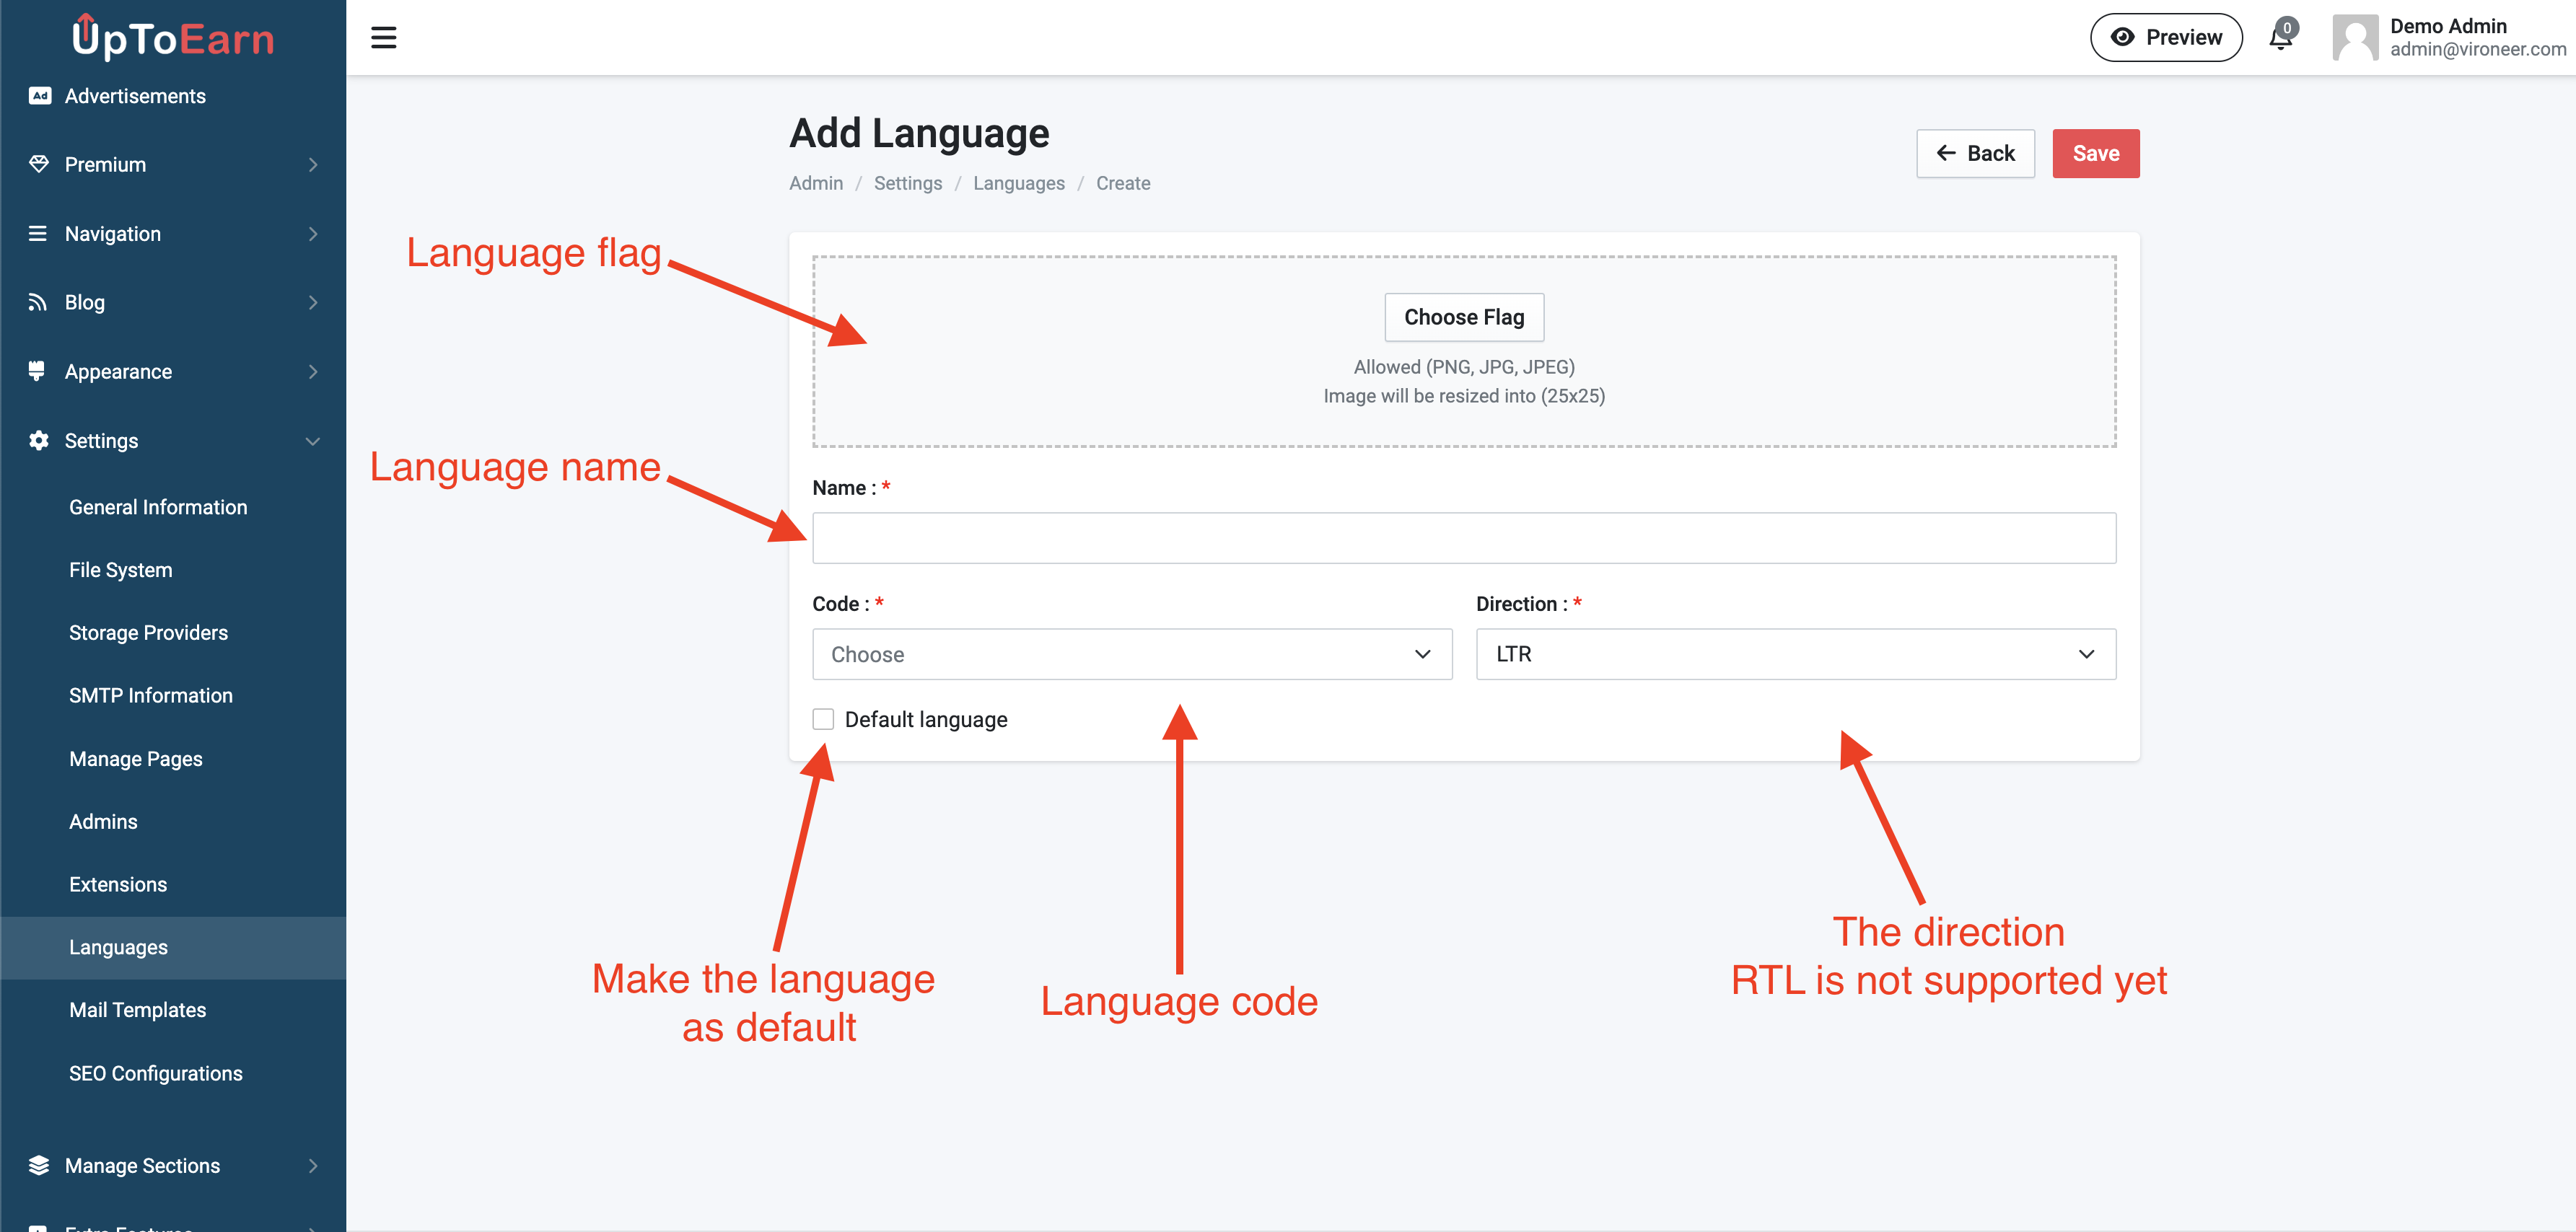
Go to the settings the click languages.
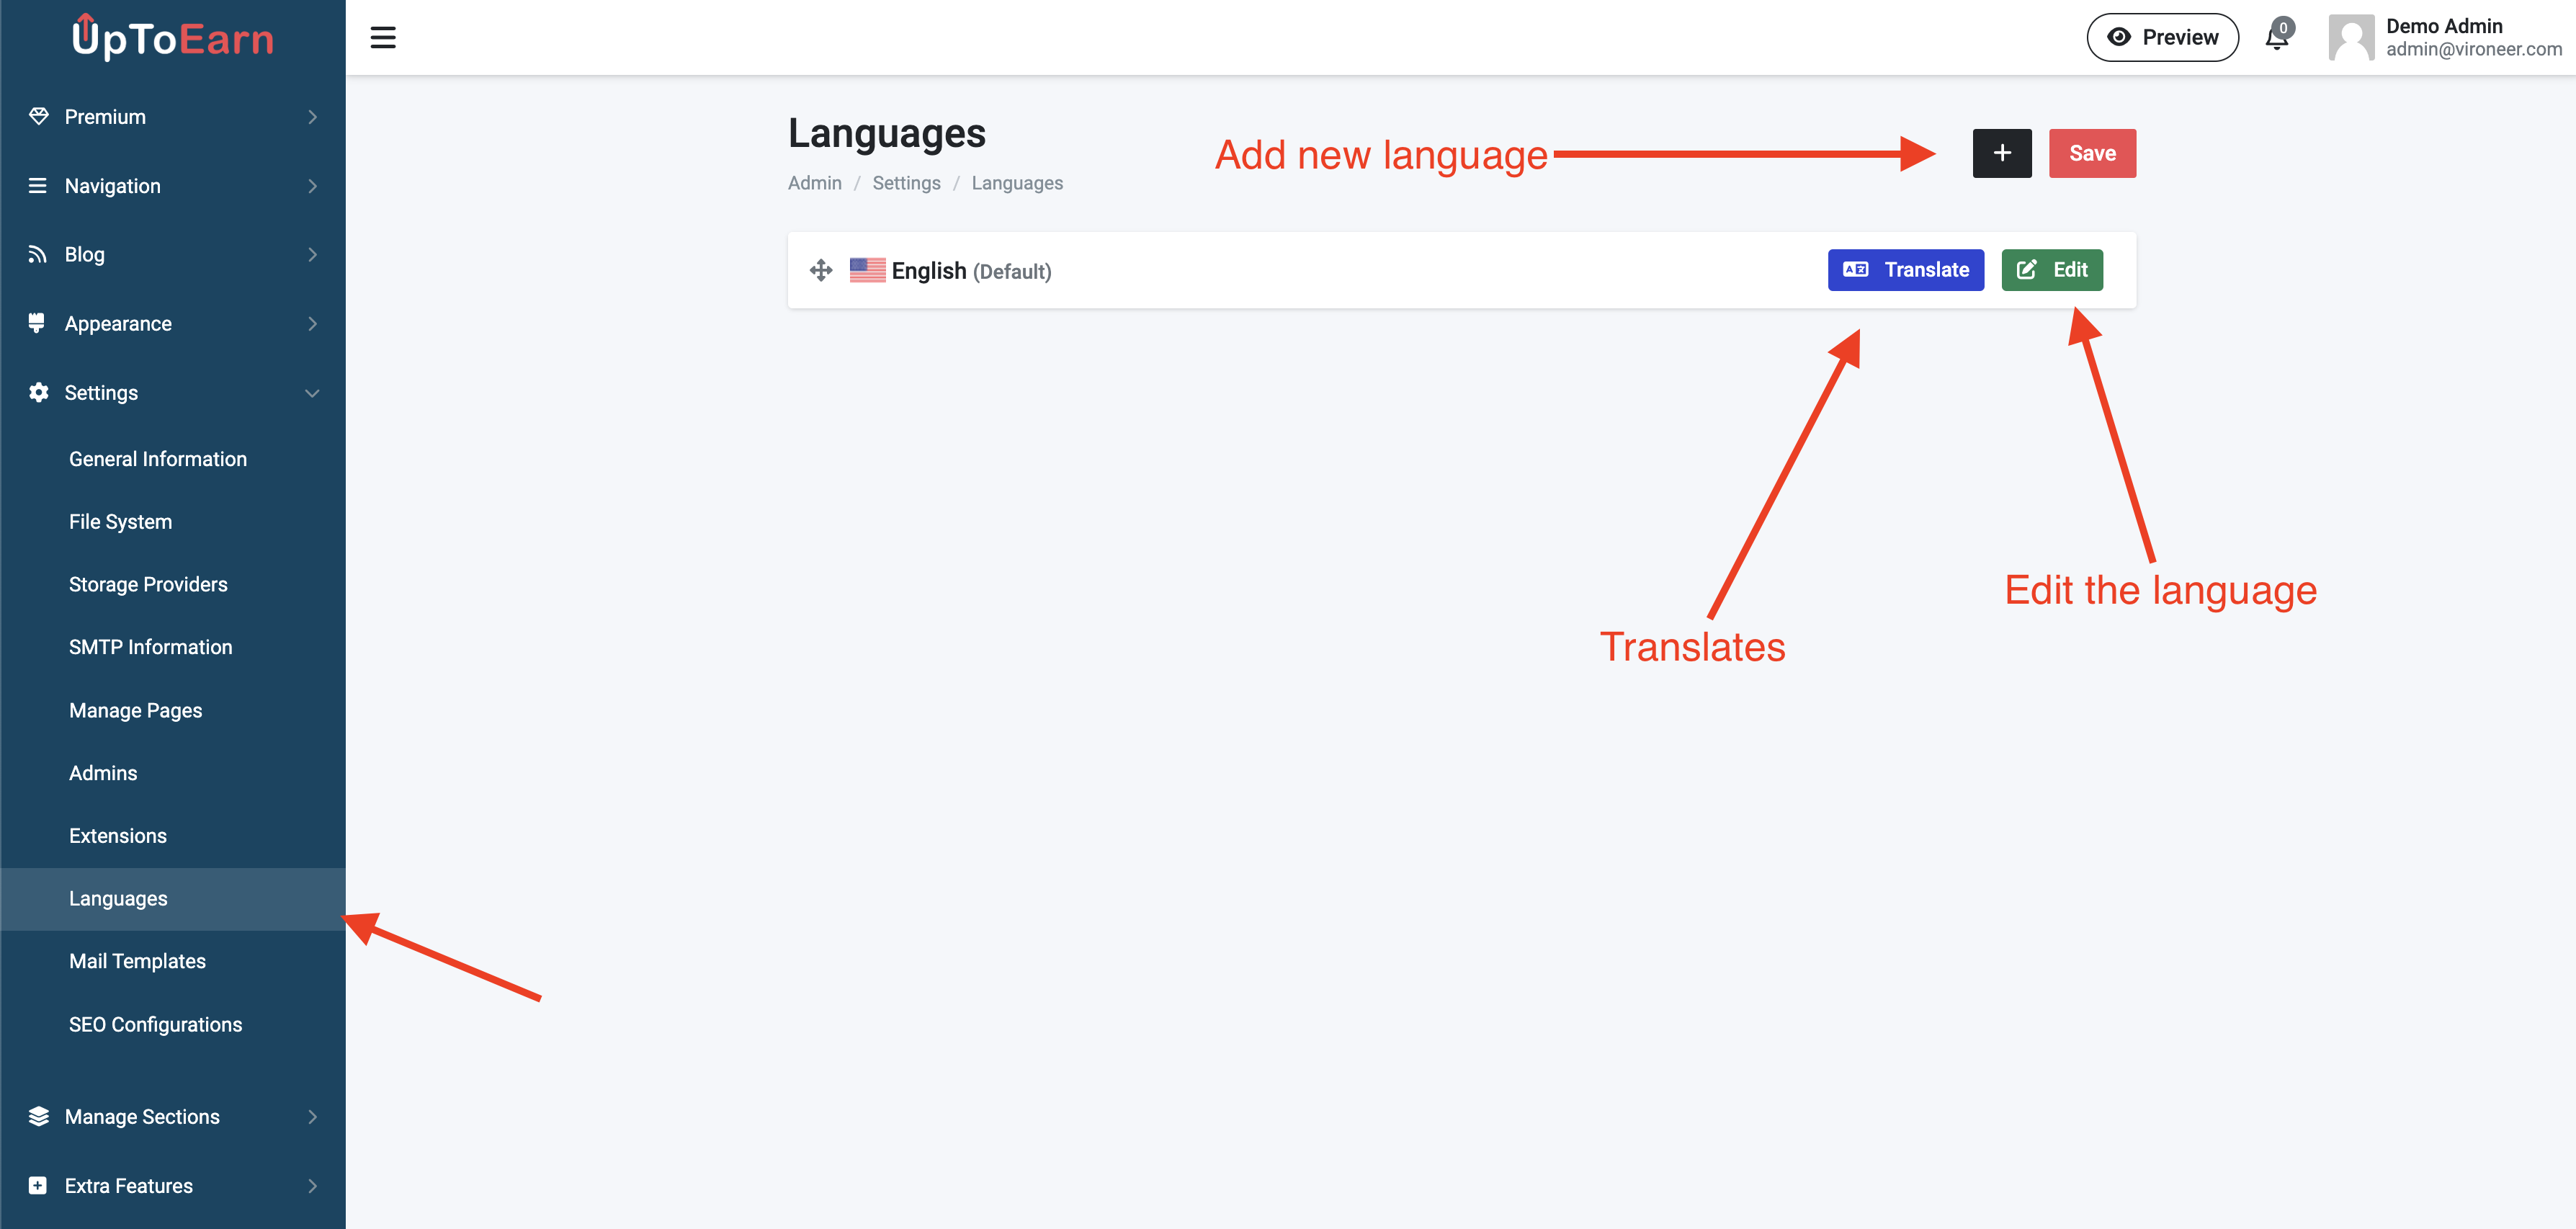
Add new language.
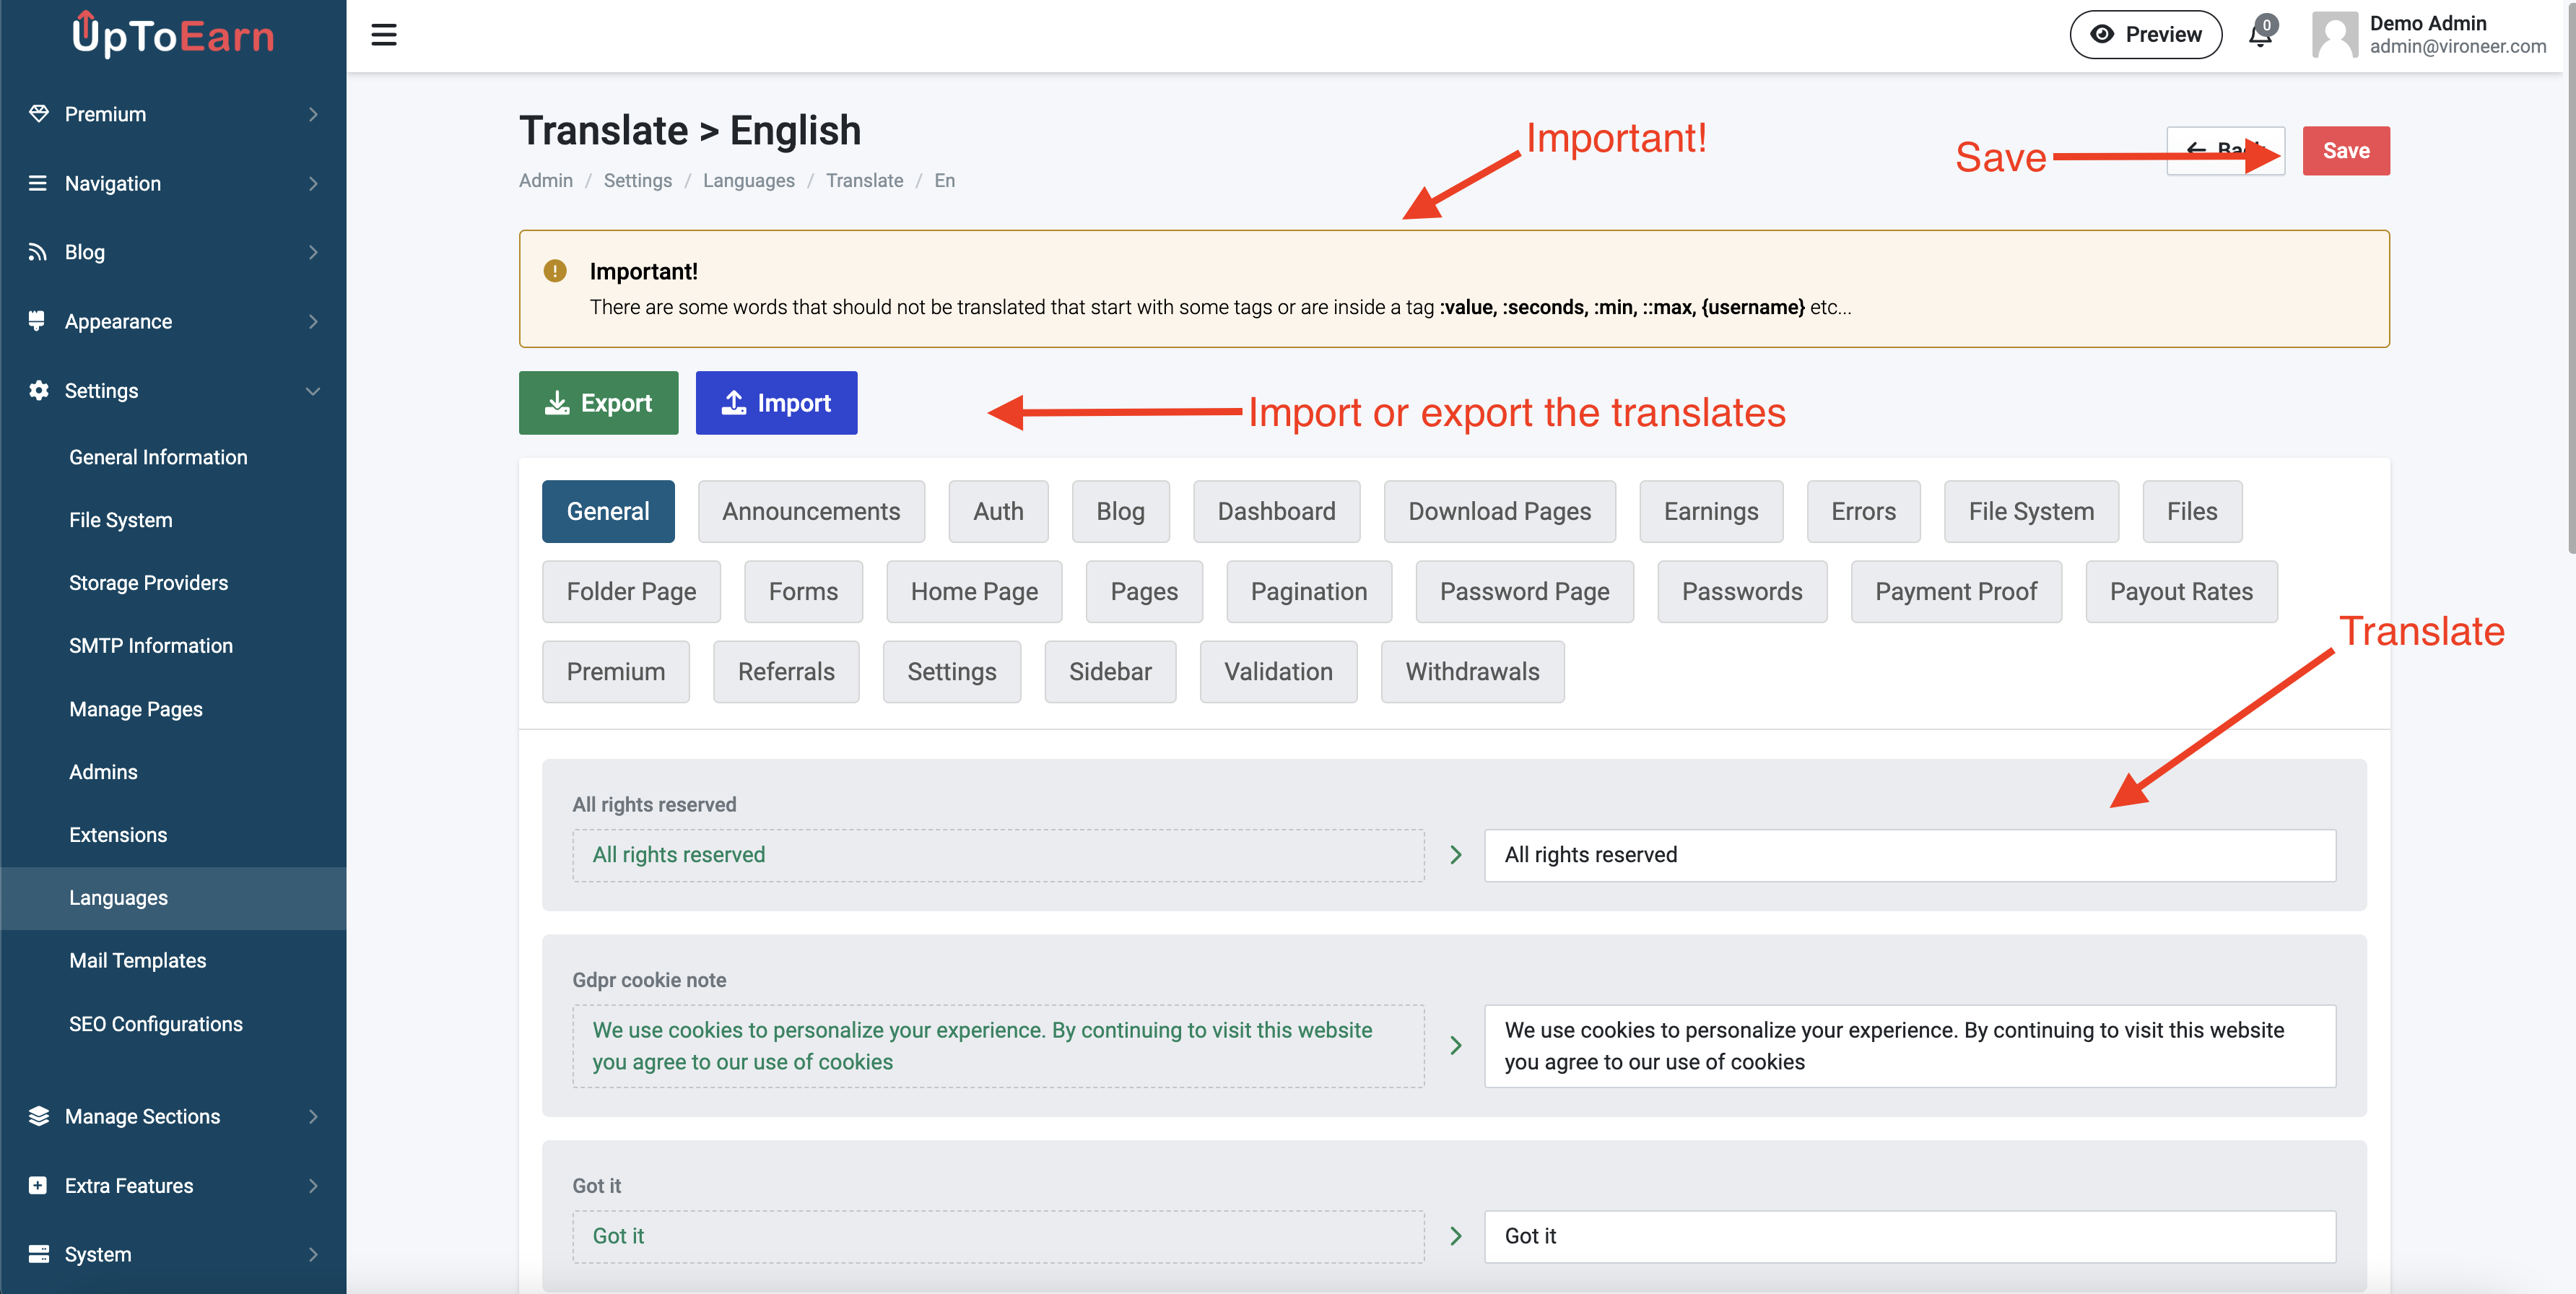
Translate your website.
Go to the settings the click extensions.

You can mange the plans by going to manage plans.
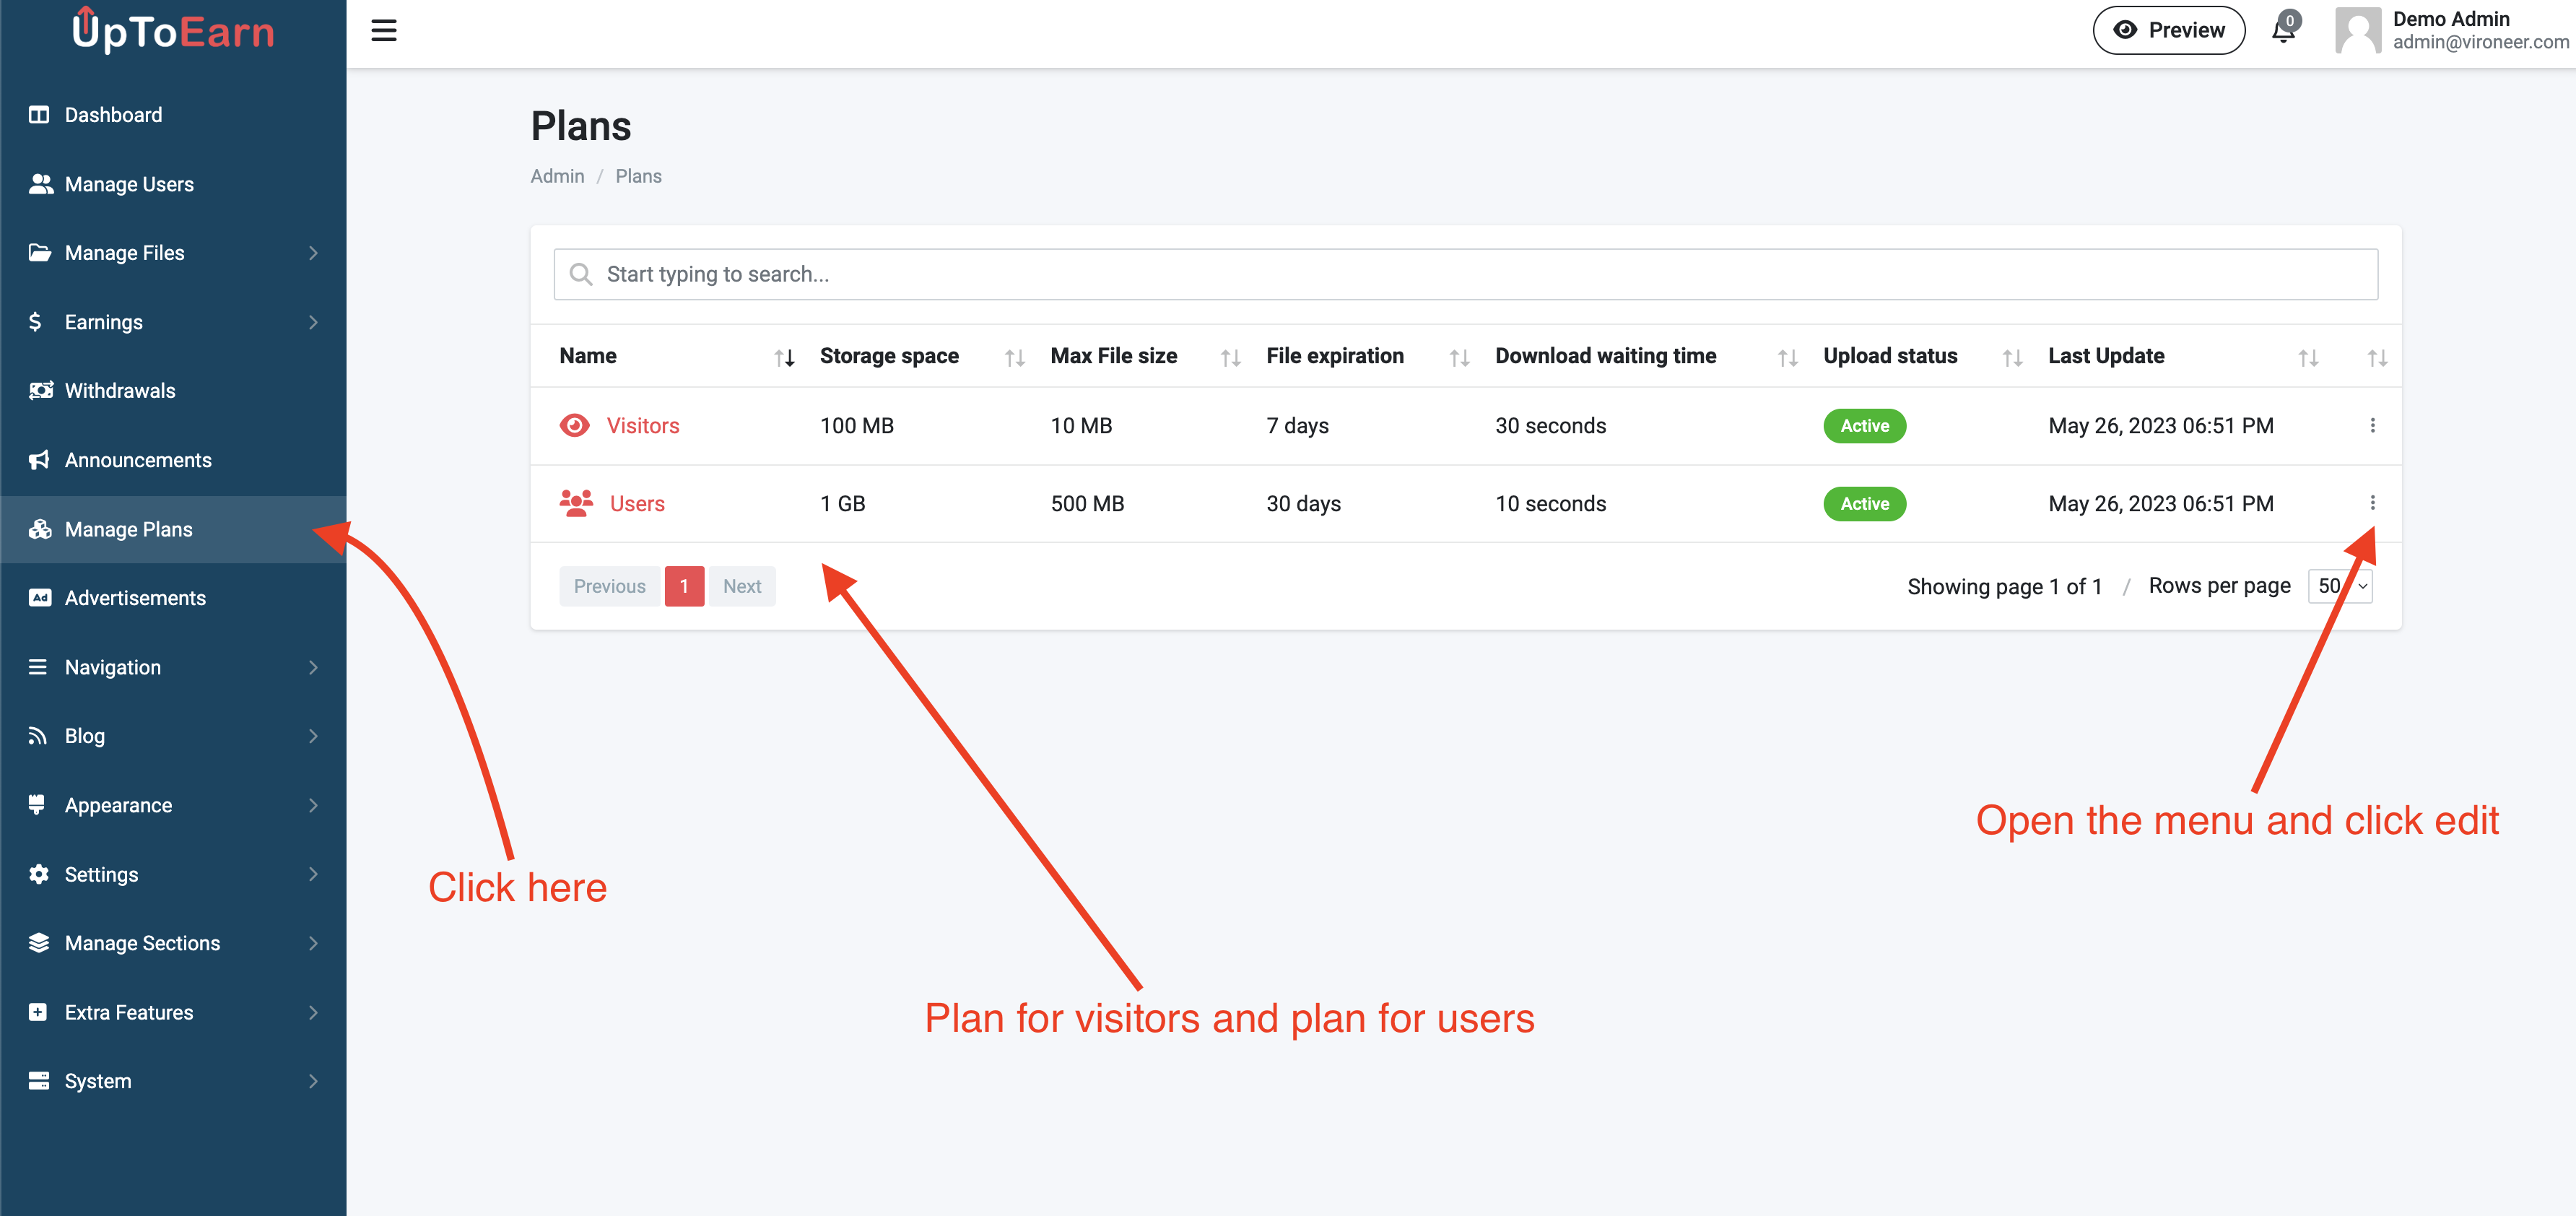
Edit the plan details and disable the upload for visitors if you want.

The addons are not included in the script, we are selling them in our profile in Codecanyon and you can visit it by following this link.
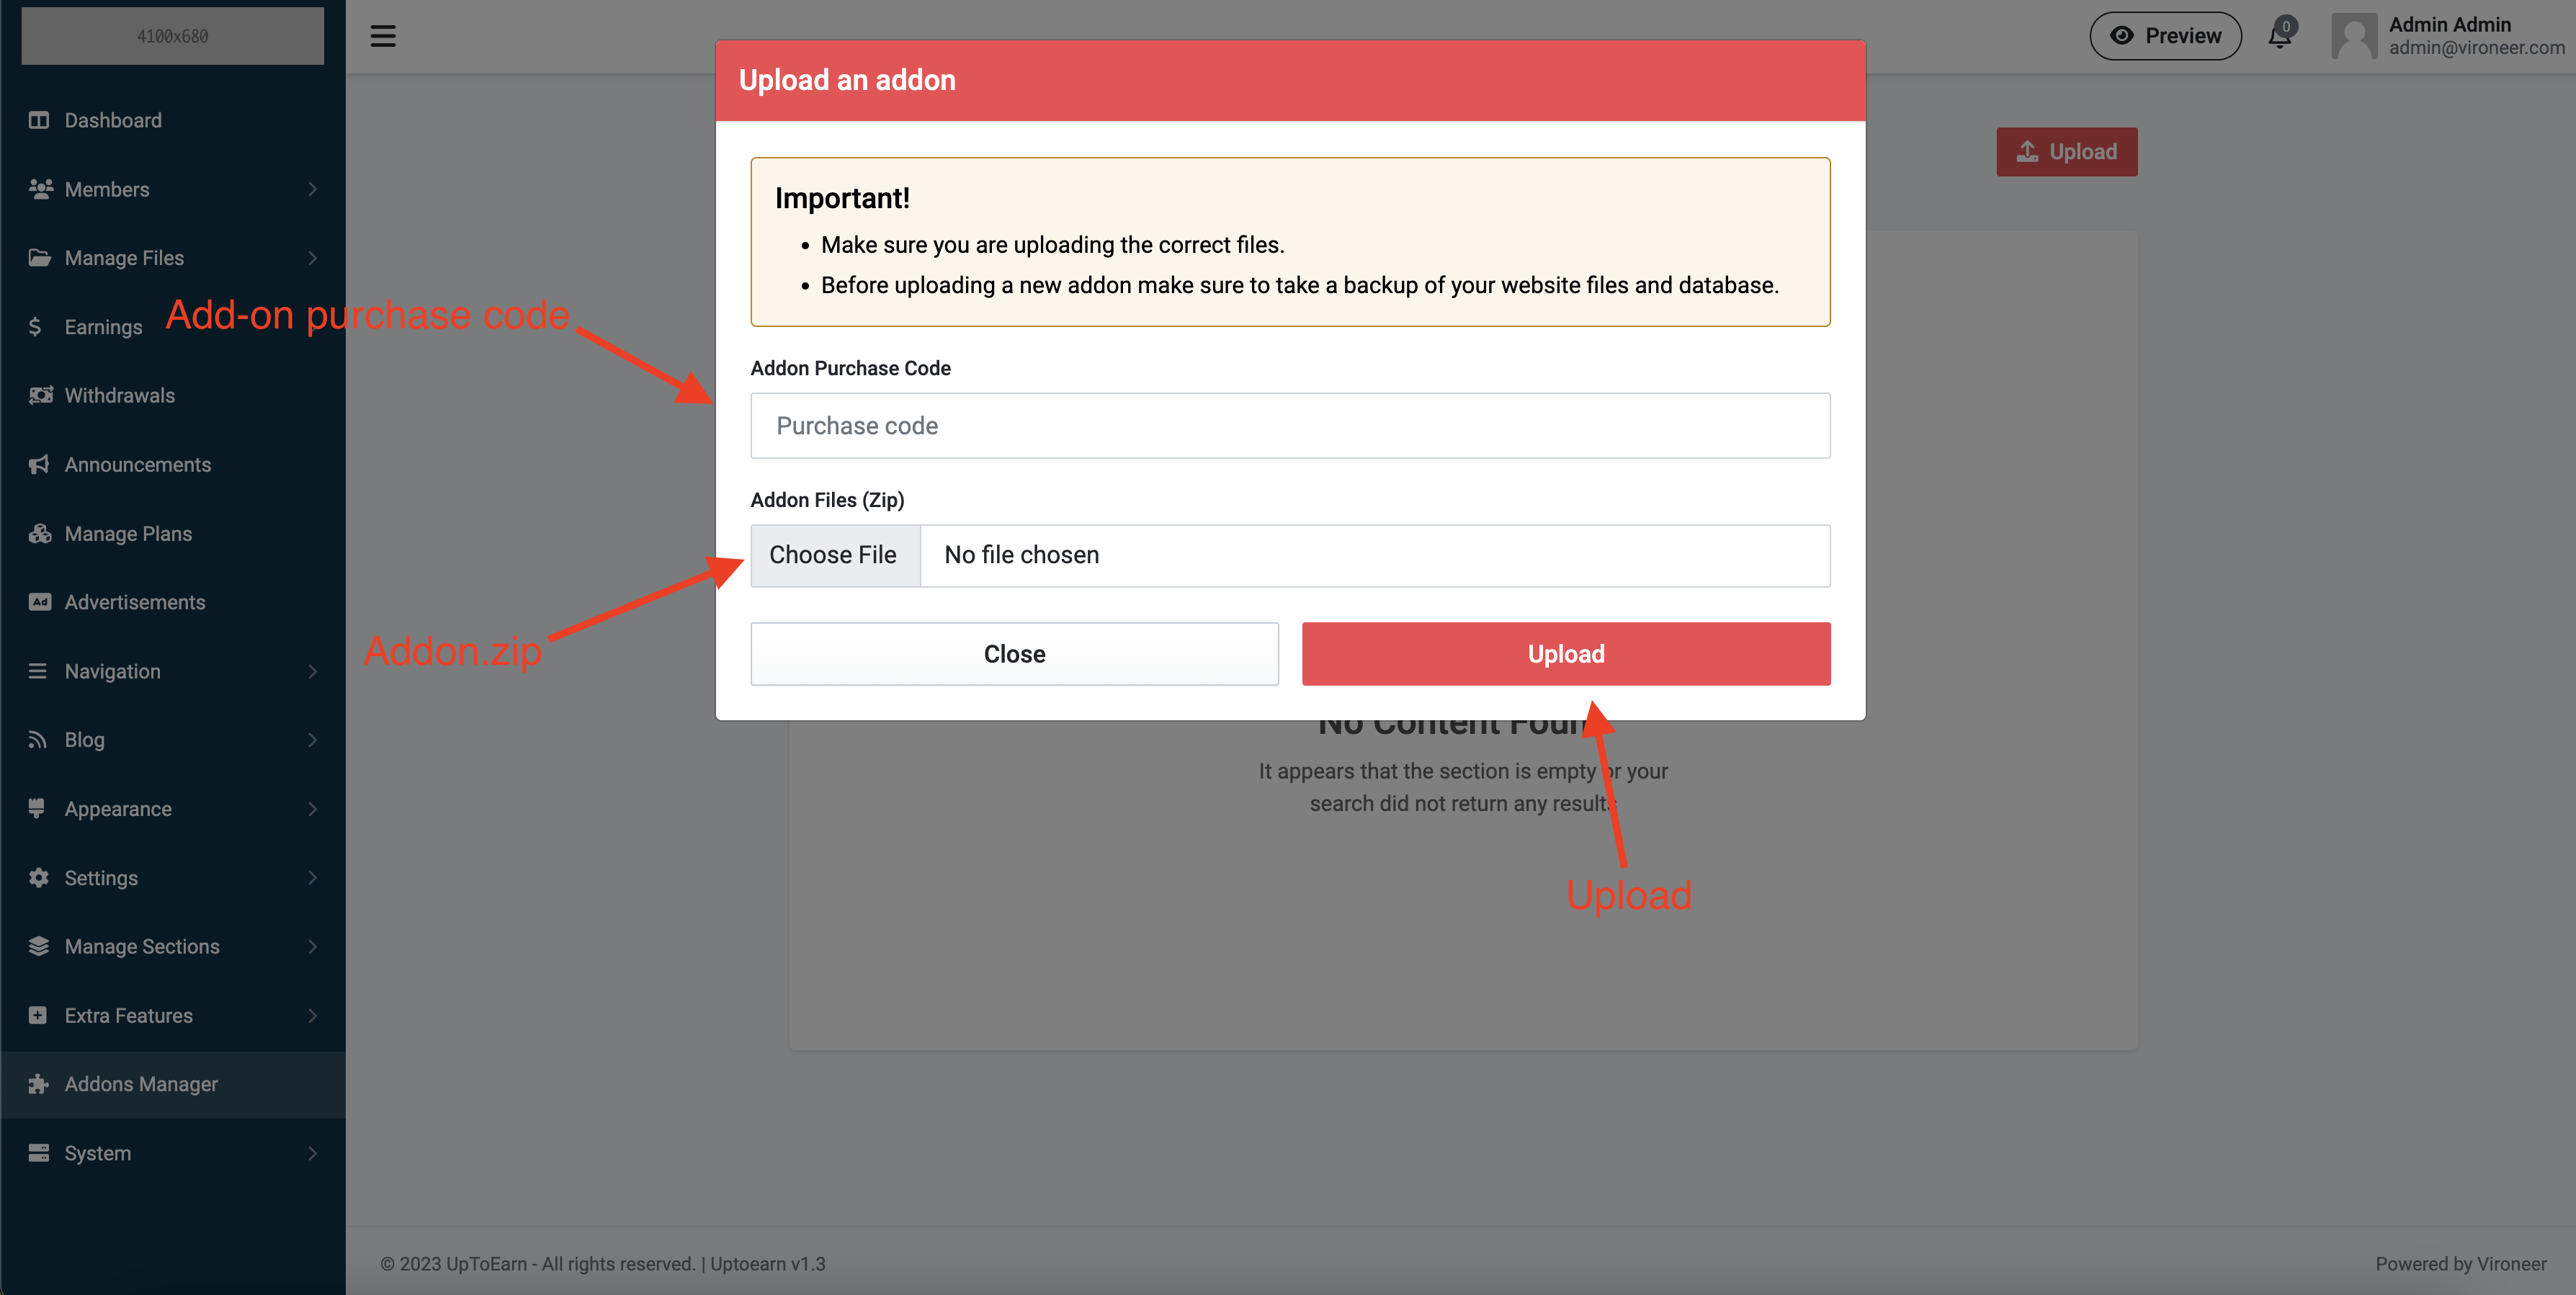
Go to the admin panel then Addons Manager and click upload.
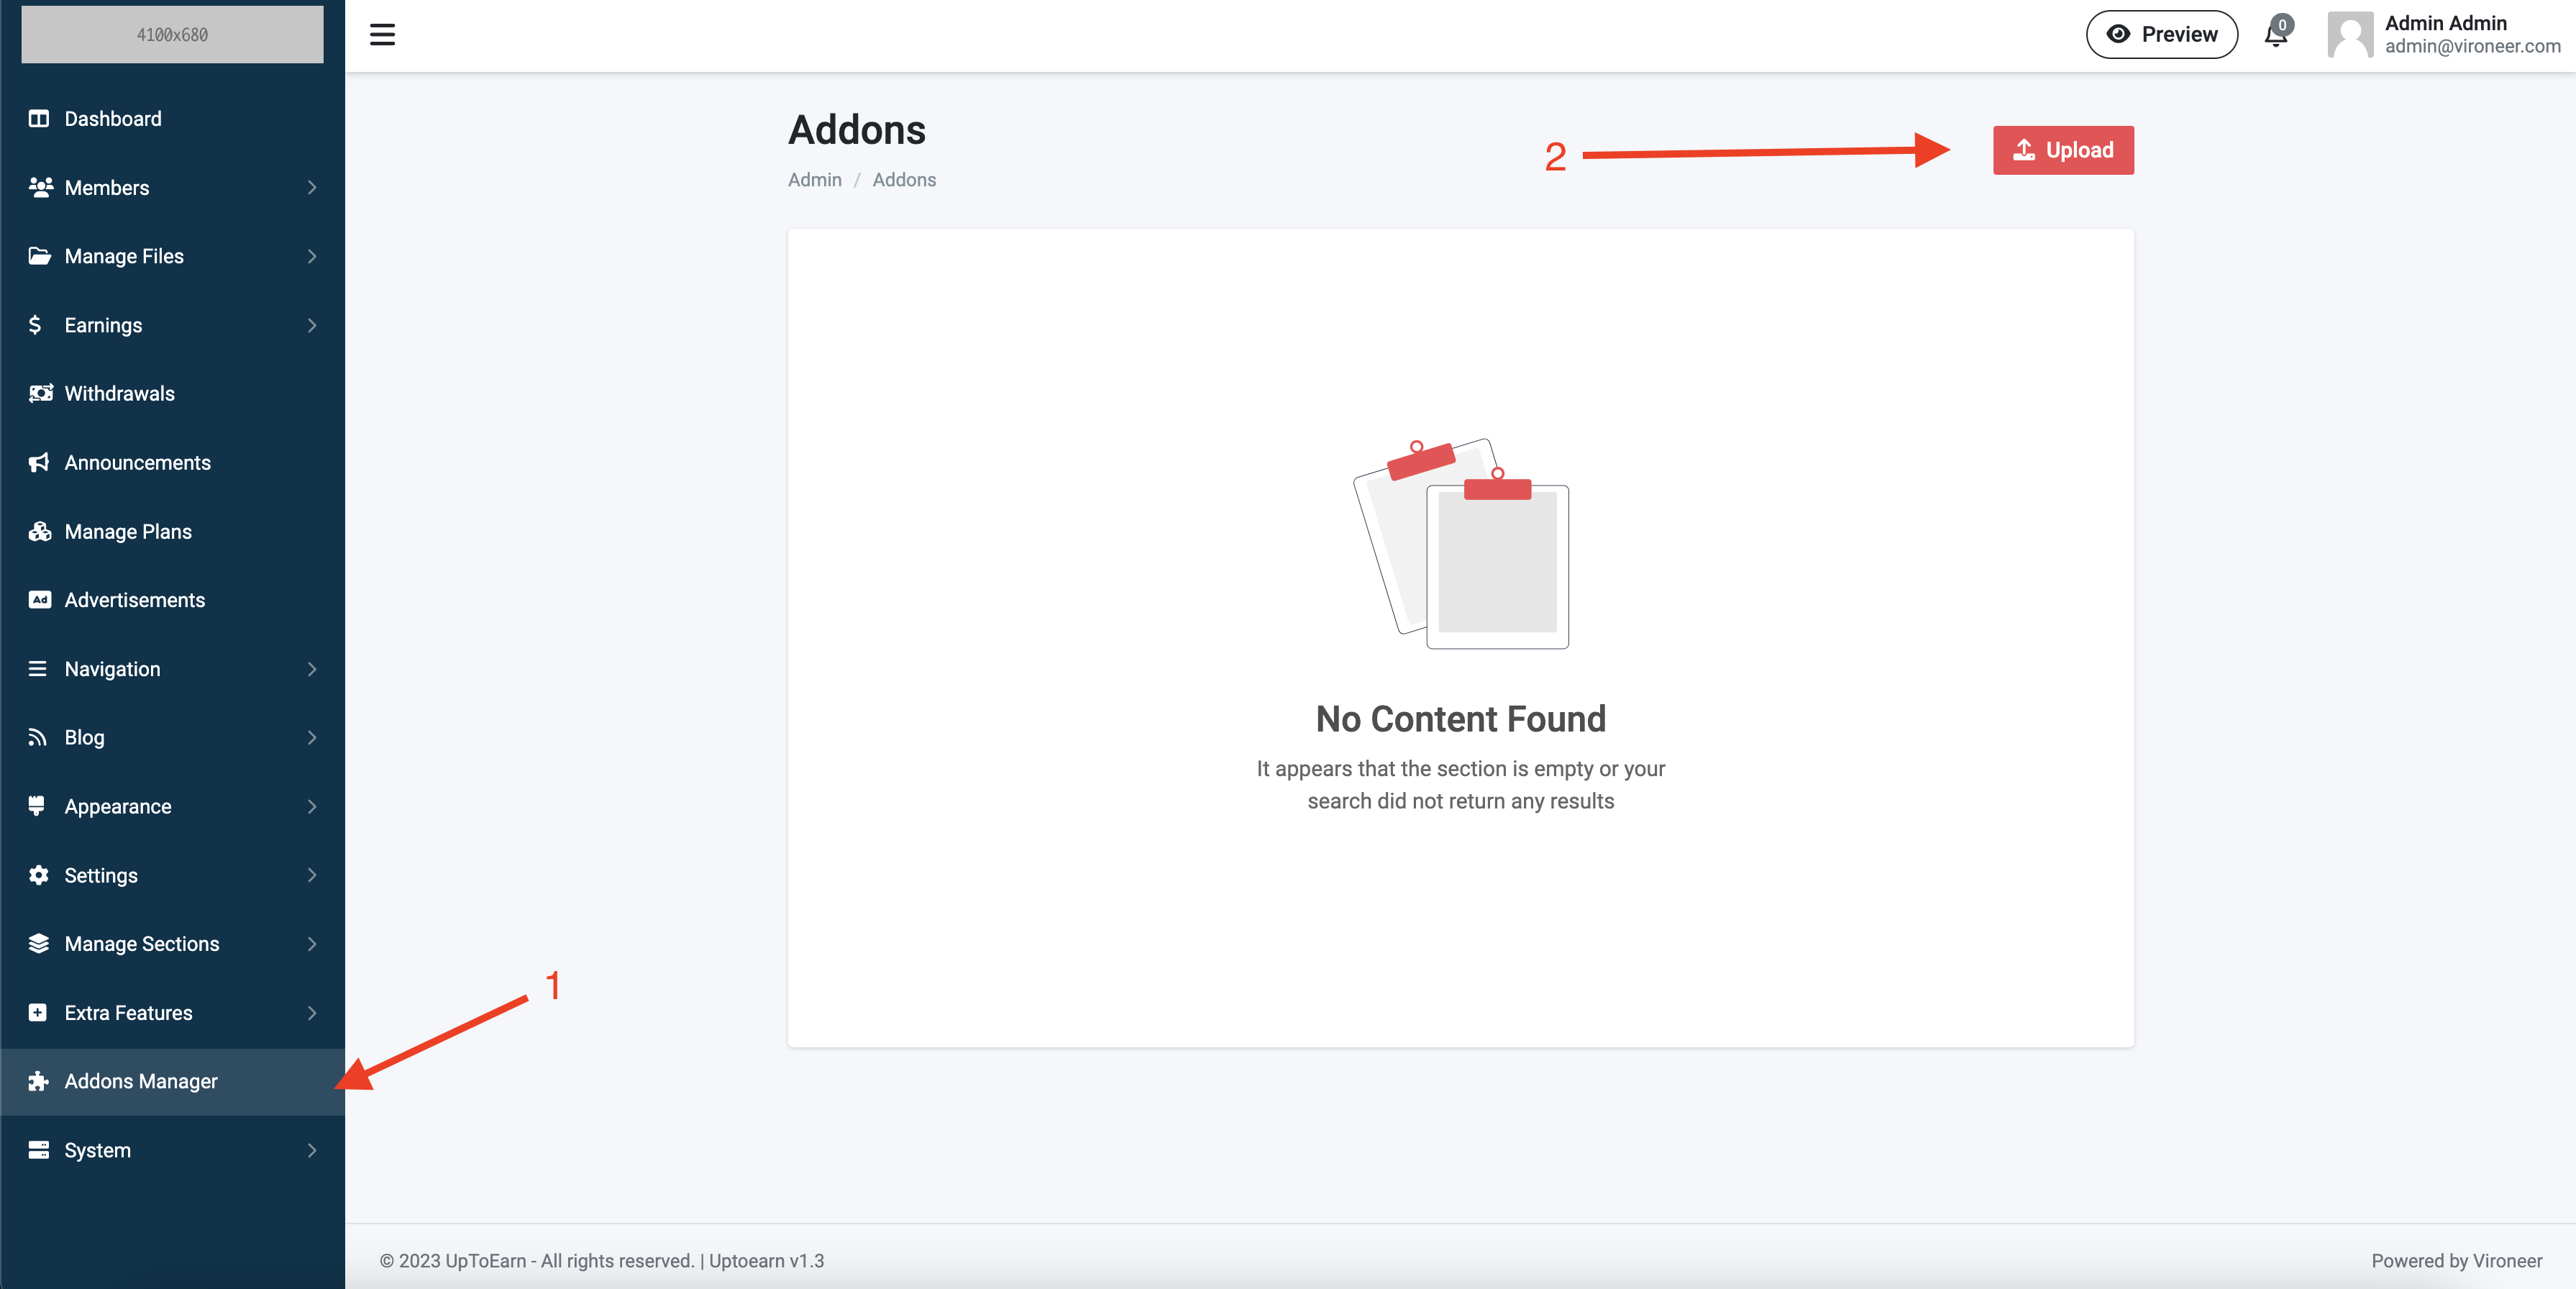
Enter your purchase code and upload the addon zip files Addon.zip.
* * * * *
/usr/local/bin/php /home/[SERVER_PATH]/artisan schedule:run >> /dev/null 2>&1
A cron job is a Linux command used for scheduling tasks to be executed sometime in the future. This is normally used to schedule a job that is executed periodically – for example, to send out a notice every morning etc...
UpToEarn script uses the cron job for multiple tasks like (delete the inactive files, delete unpaid transactions, delete the chunks etc...)