Get Started
Thank you for being one of our buyers. We are glad that you have joined us and that you are a user of our products. We hope you like it. As part of our support for our products, we have provided a complete user guide for our products. All you have to do is follow this guide step by step to install your site.
This item made by Vironeer under Envato Extended & Regular License
What Vironeer Support Include?
We don't provide free customizations or installations or server problems fixing, we can provide them as paid services.
Requirements
- Server Requirements
- PHP 8.1x
- Operating System : Linux or Windows
- Shared, VPS or Dedicated Server
- MySql: 5.1+
- Required Upgrades
- Enabling of allow_url_fopen
- Increasing of max_execution_time
- Increasing of max_input_time
- Increasing of post_max_size
- Increasing of memory_limit
- Increasing of upload_max_filesize
- PHP Extensions
- BCMath
- Ctype
- Fileinfo
- JSON
- Mbstring
- OpenSSL
- PDO
- pdo_mysql
- Tokenizer
- XML
- cURL
- GD
- zip
Note !
We are not required to provide the installation instructions for each server there is 1000+ server provider over the internetCreate New Database
Get Started
Login to your server and click MYSQL DATABASE
Create database name
Enter database name and click create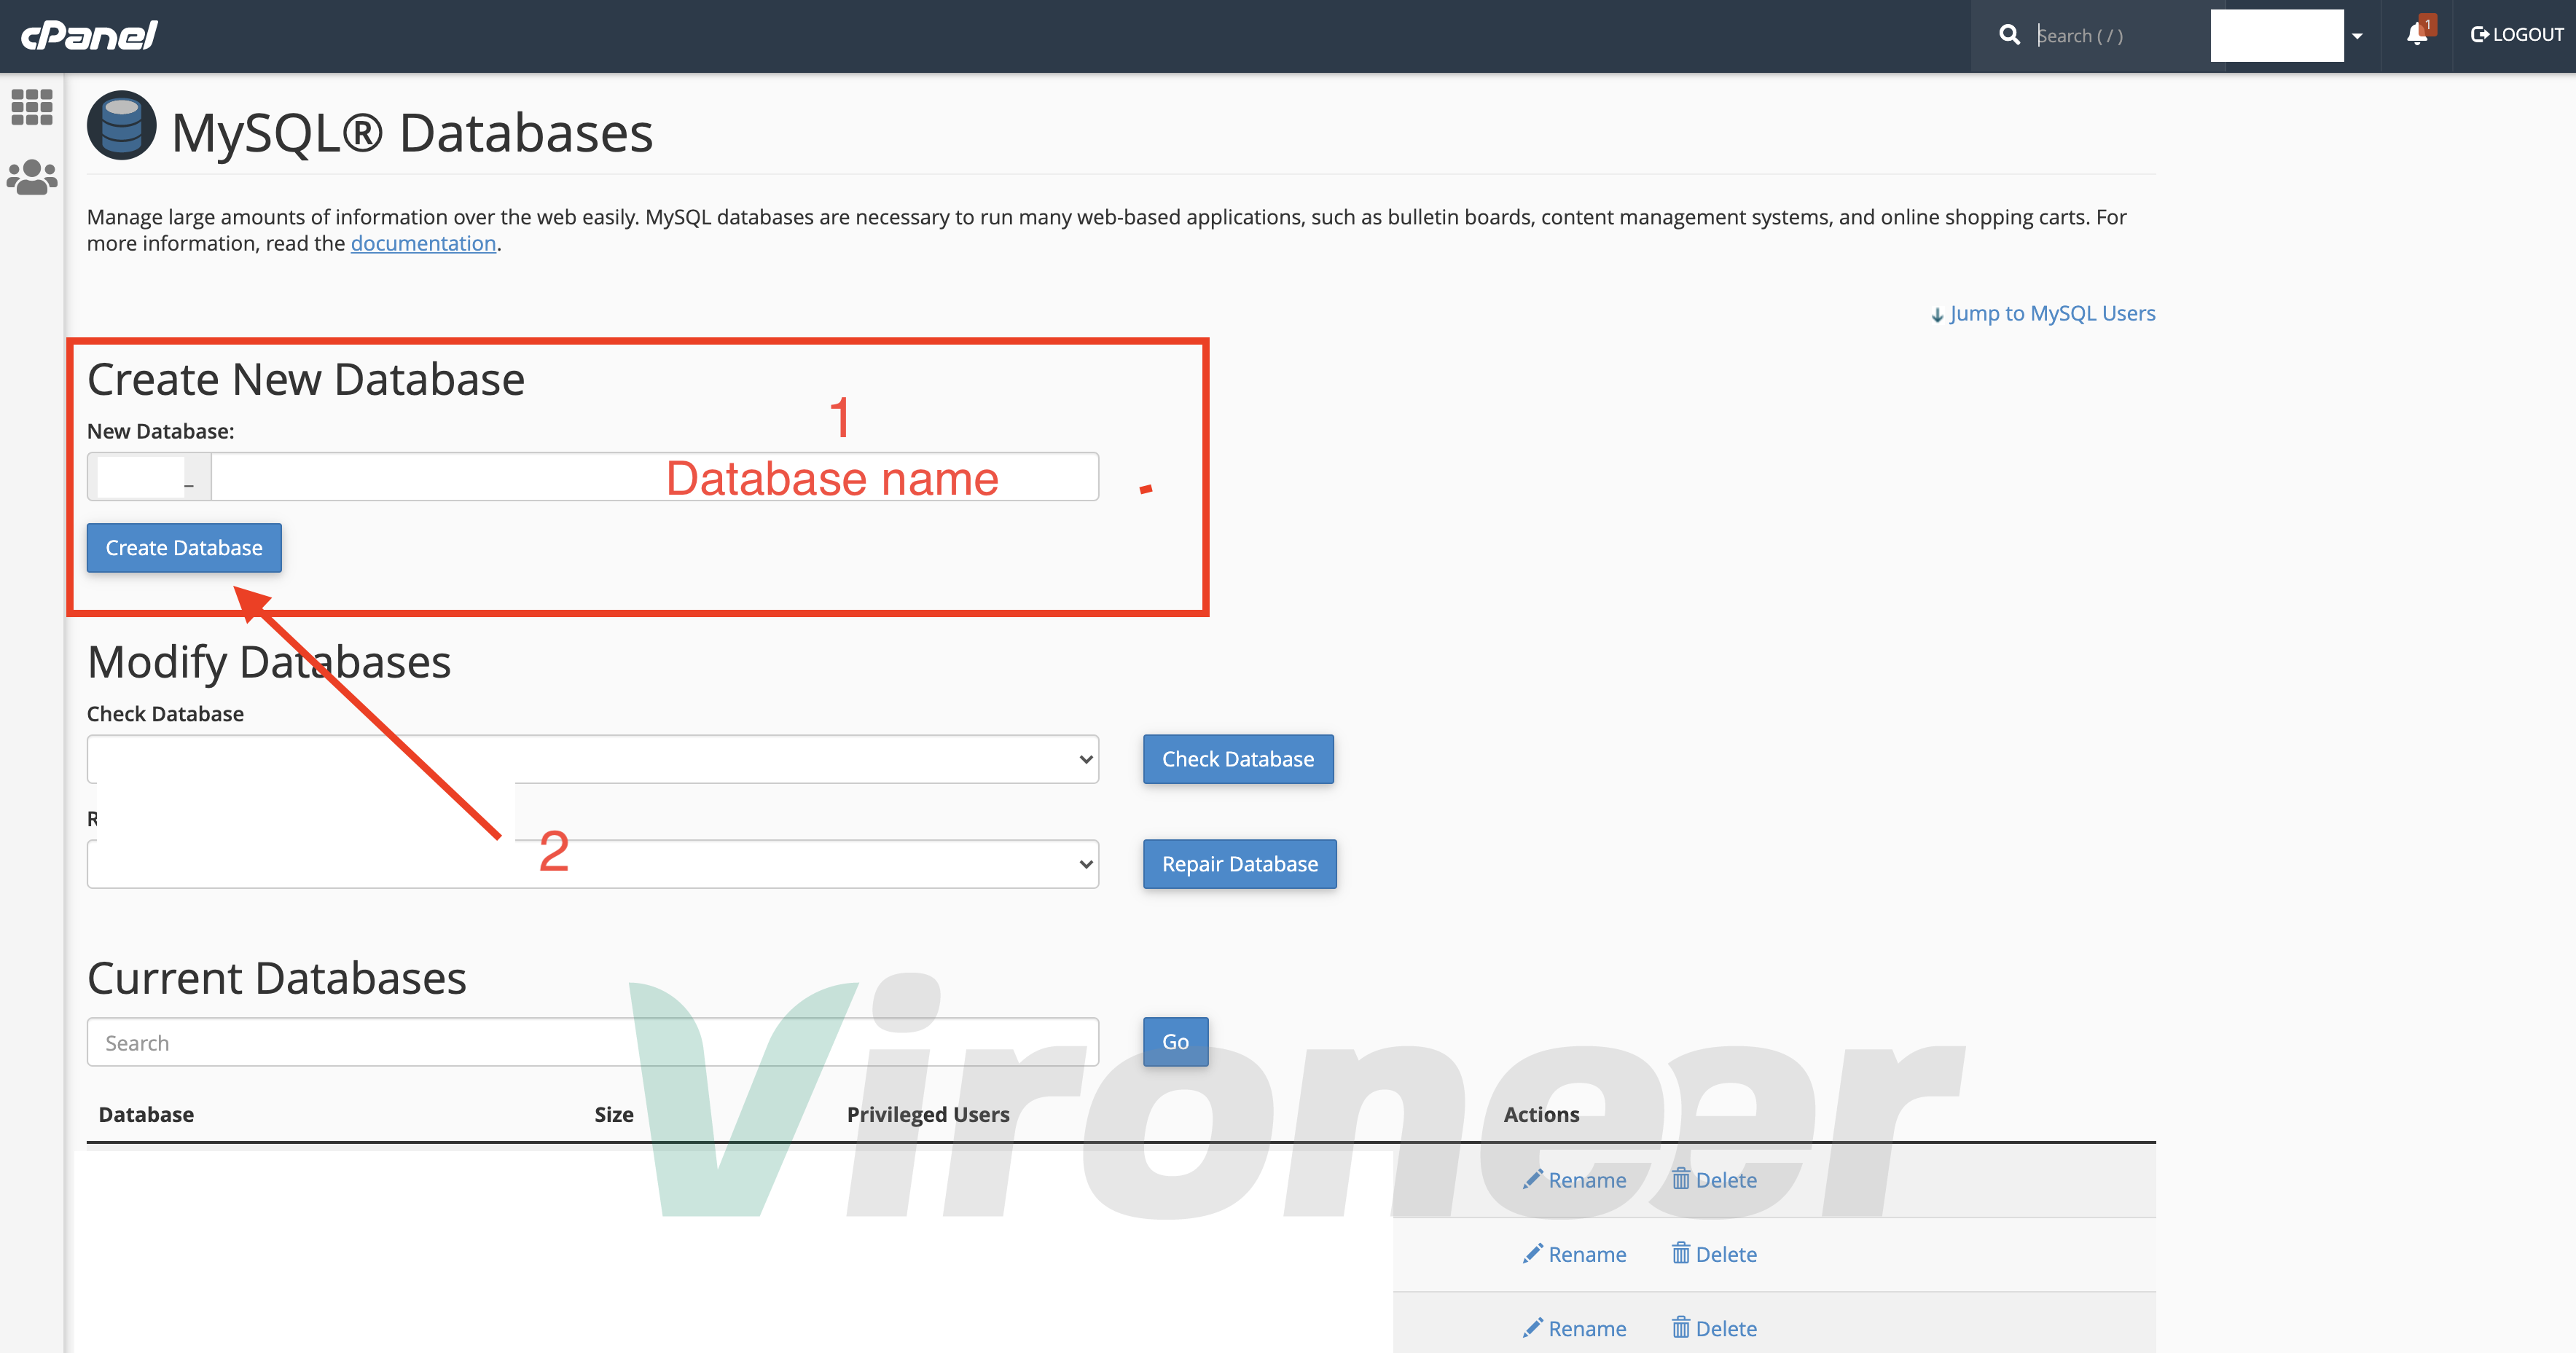
Create database user
Enter your details and click create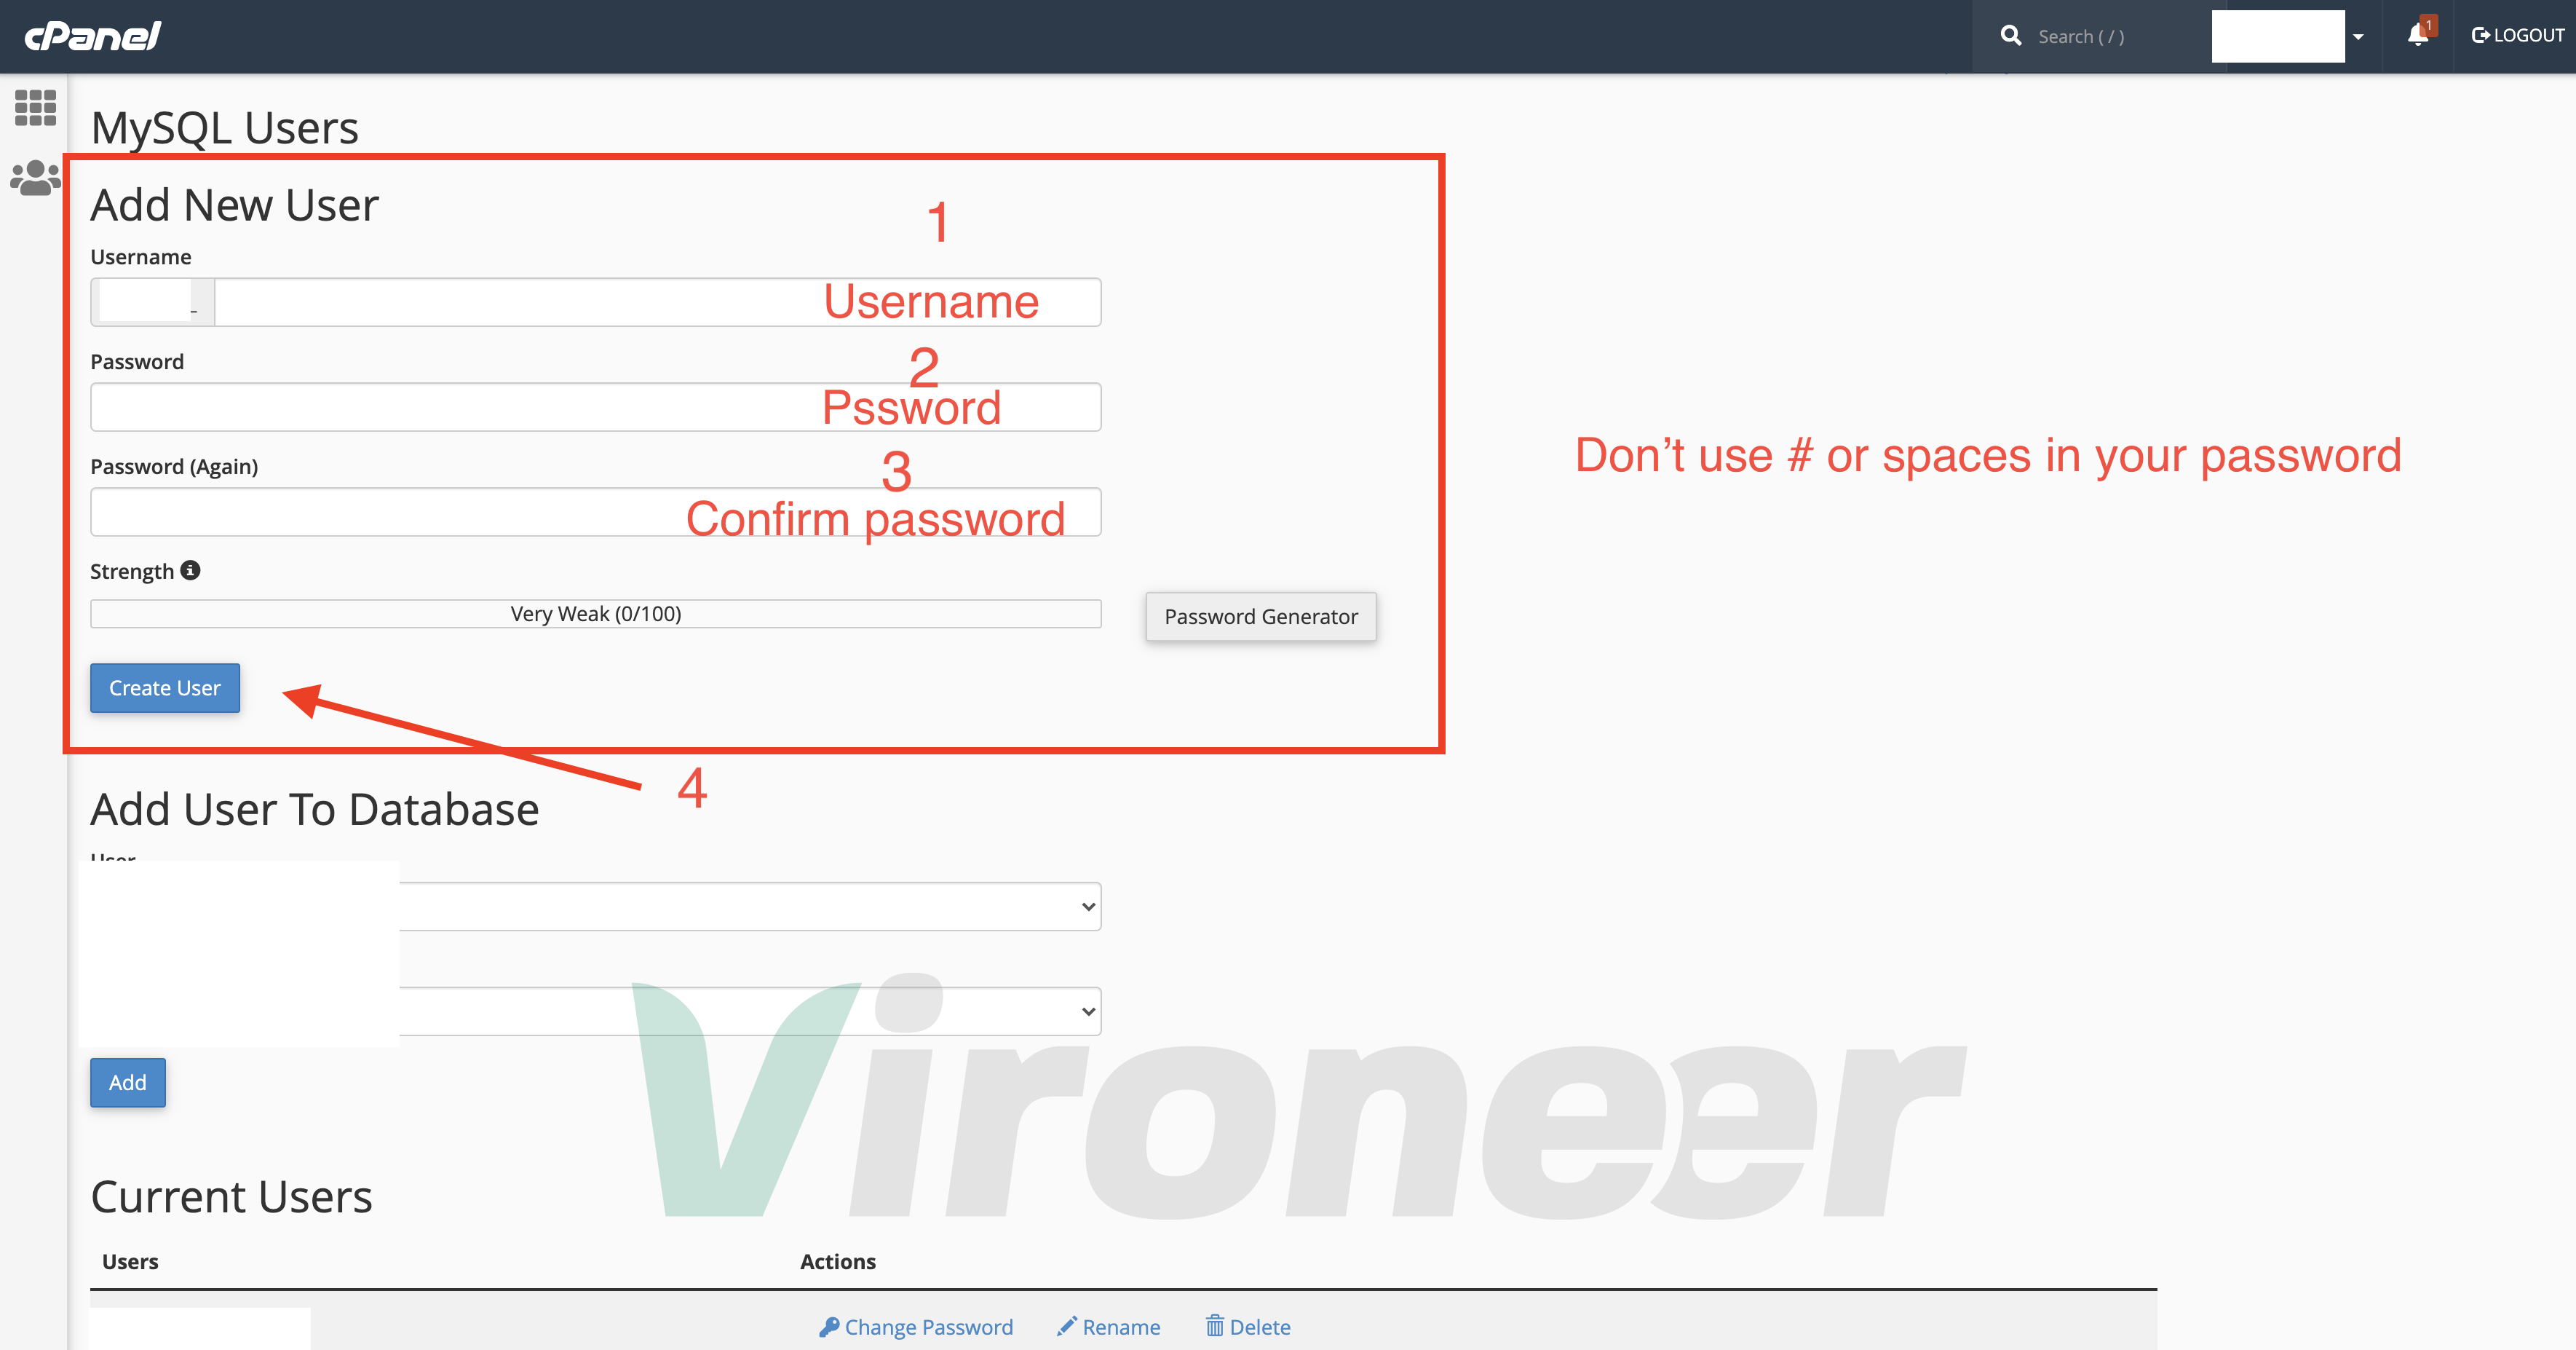
Add User To Database
Choose database name and database user then click add
Manage User Privileges
Choose All privileges then click make changes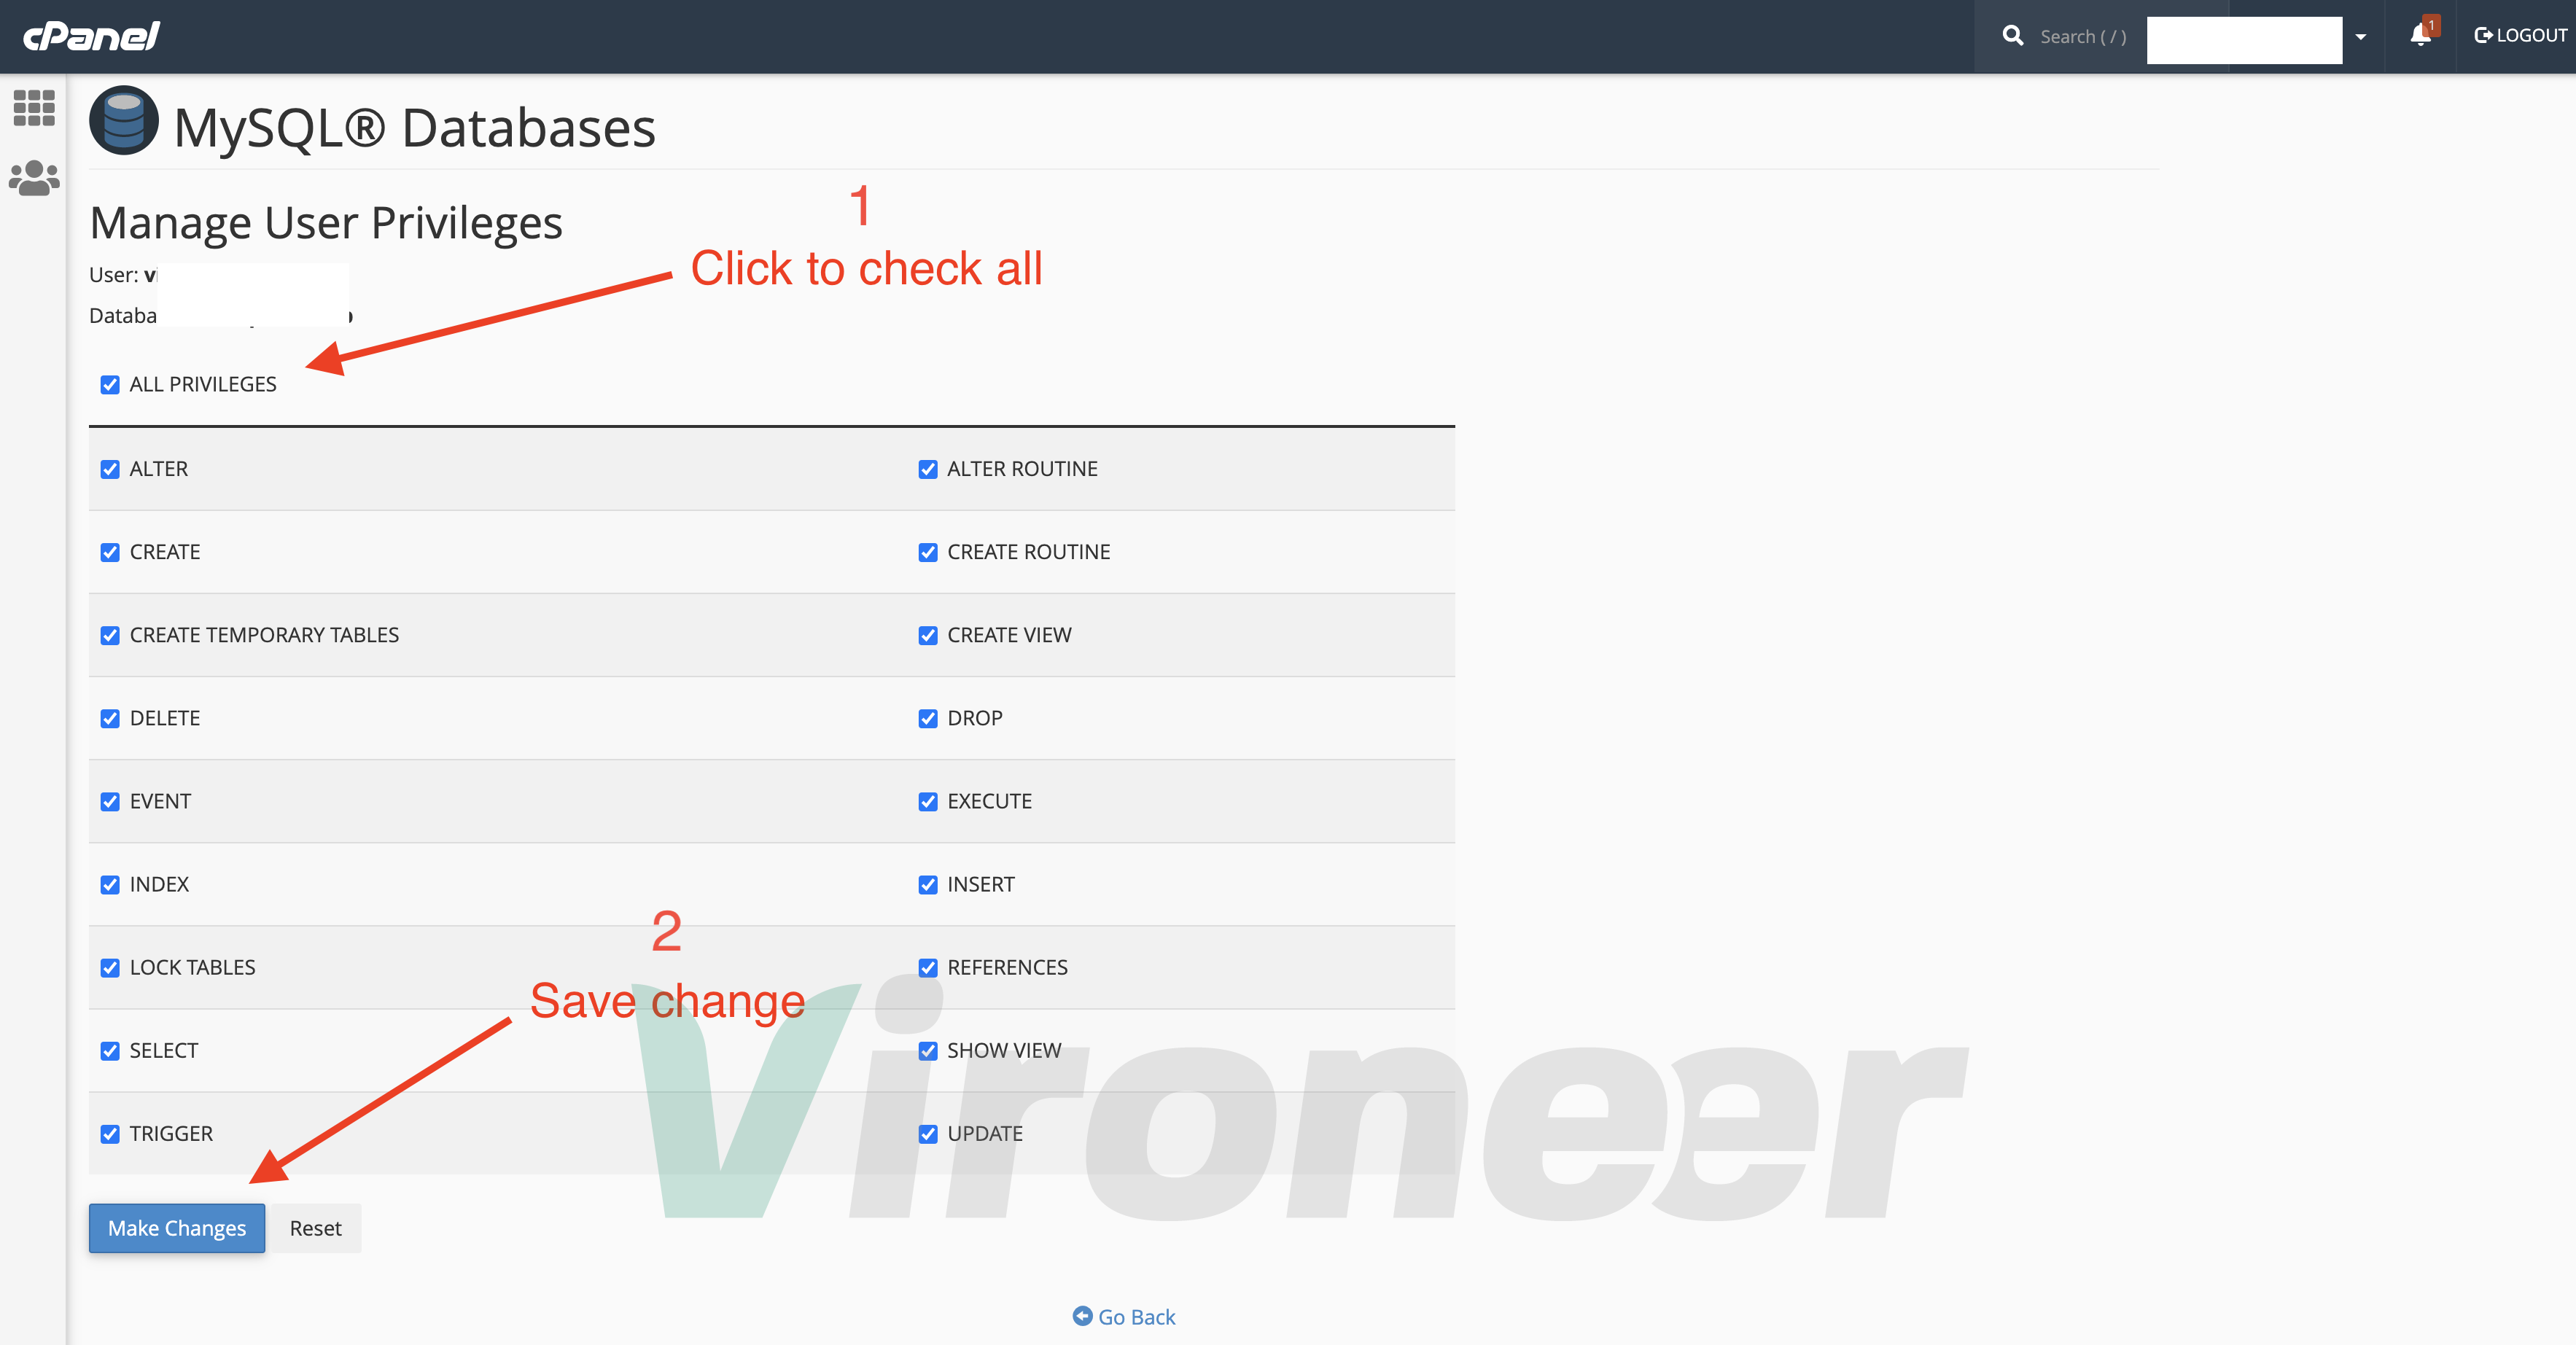
Upload Script Files
First download the files from CodeCanyon and extract them in your computer
Script.zip
Get Started
Go to your server file manager
Choose directory
Open your directory then click on upload
Upload files
Click select file then choose theScript.zip

Extracting
ChooseScript.zip then click extract

Finish Extracting
Click extract file(s)
After all files has been extracted now open your website URL and start installing
if your website URL cannot open or you see Error with code 500, its coming from your server side, please contact your server support, or check your server logs to know where is the problem.
Installation
Server requirements
Make sure all the requirements are enabled, if its disabled please enable it or contact your server support to enabled it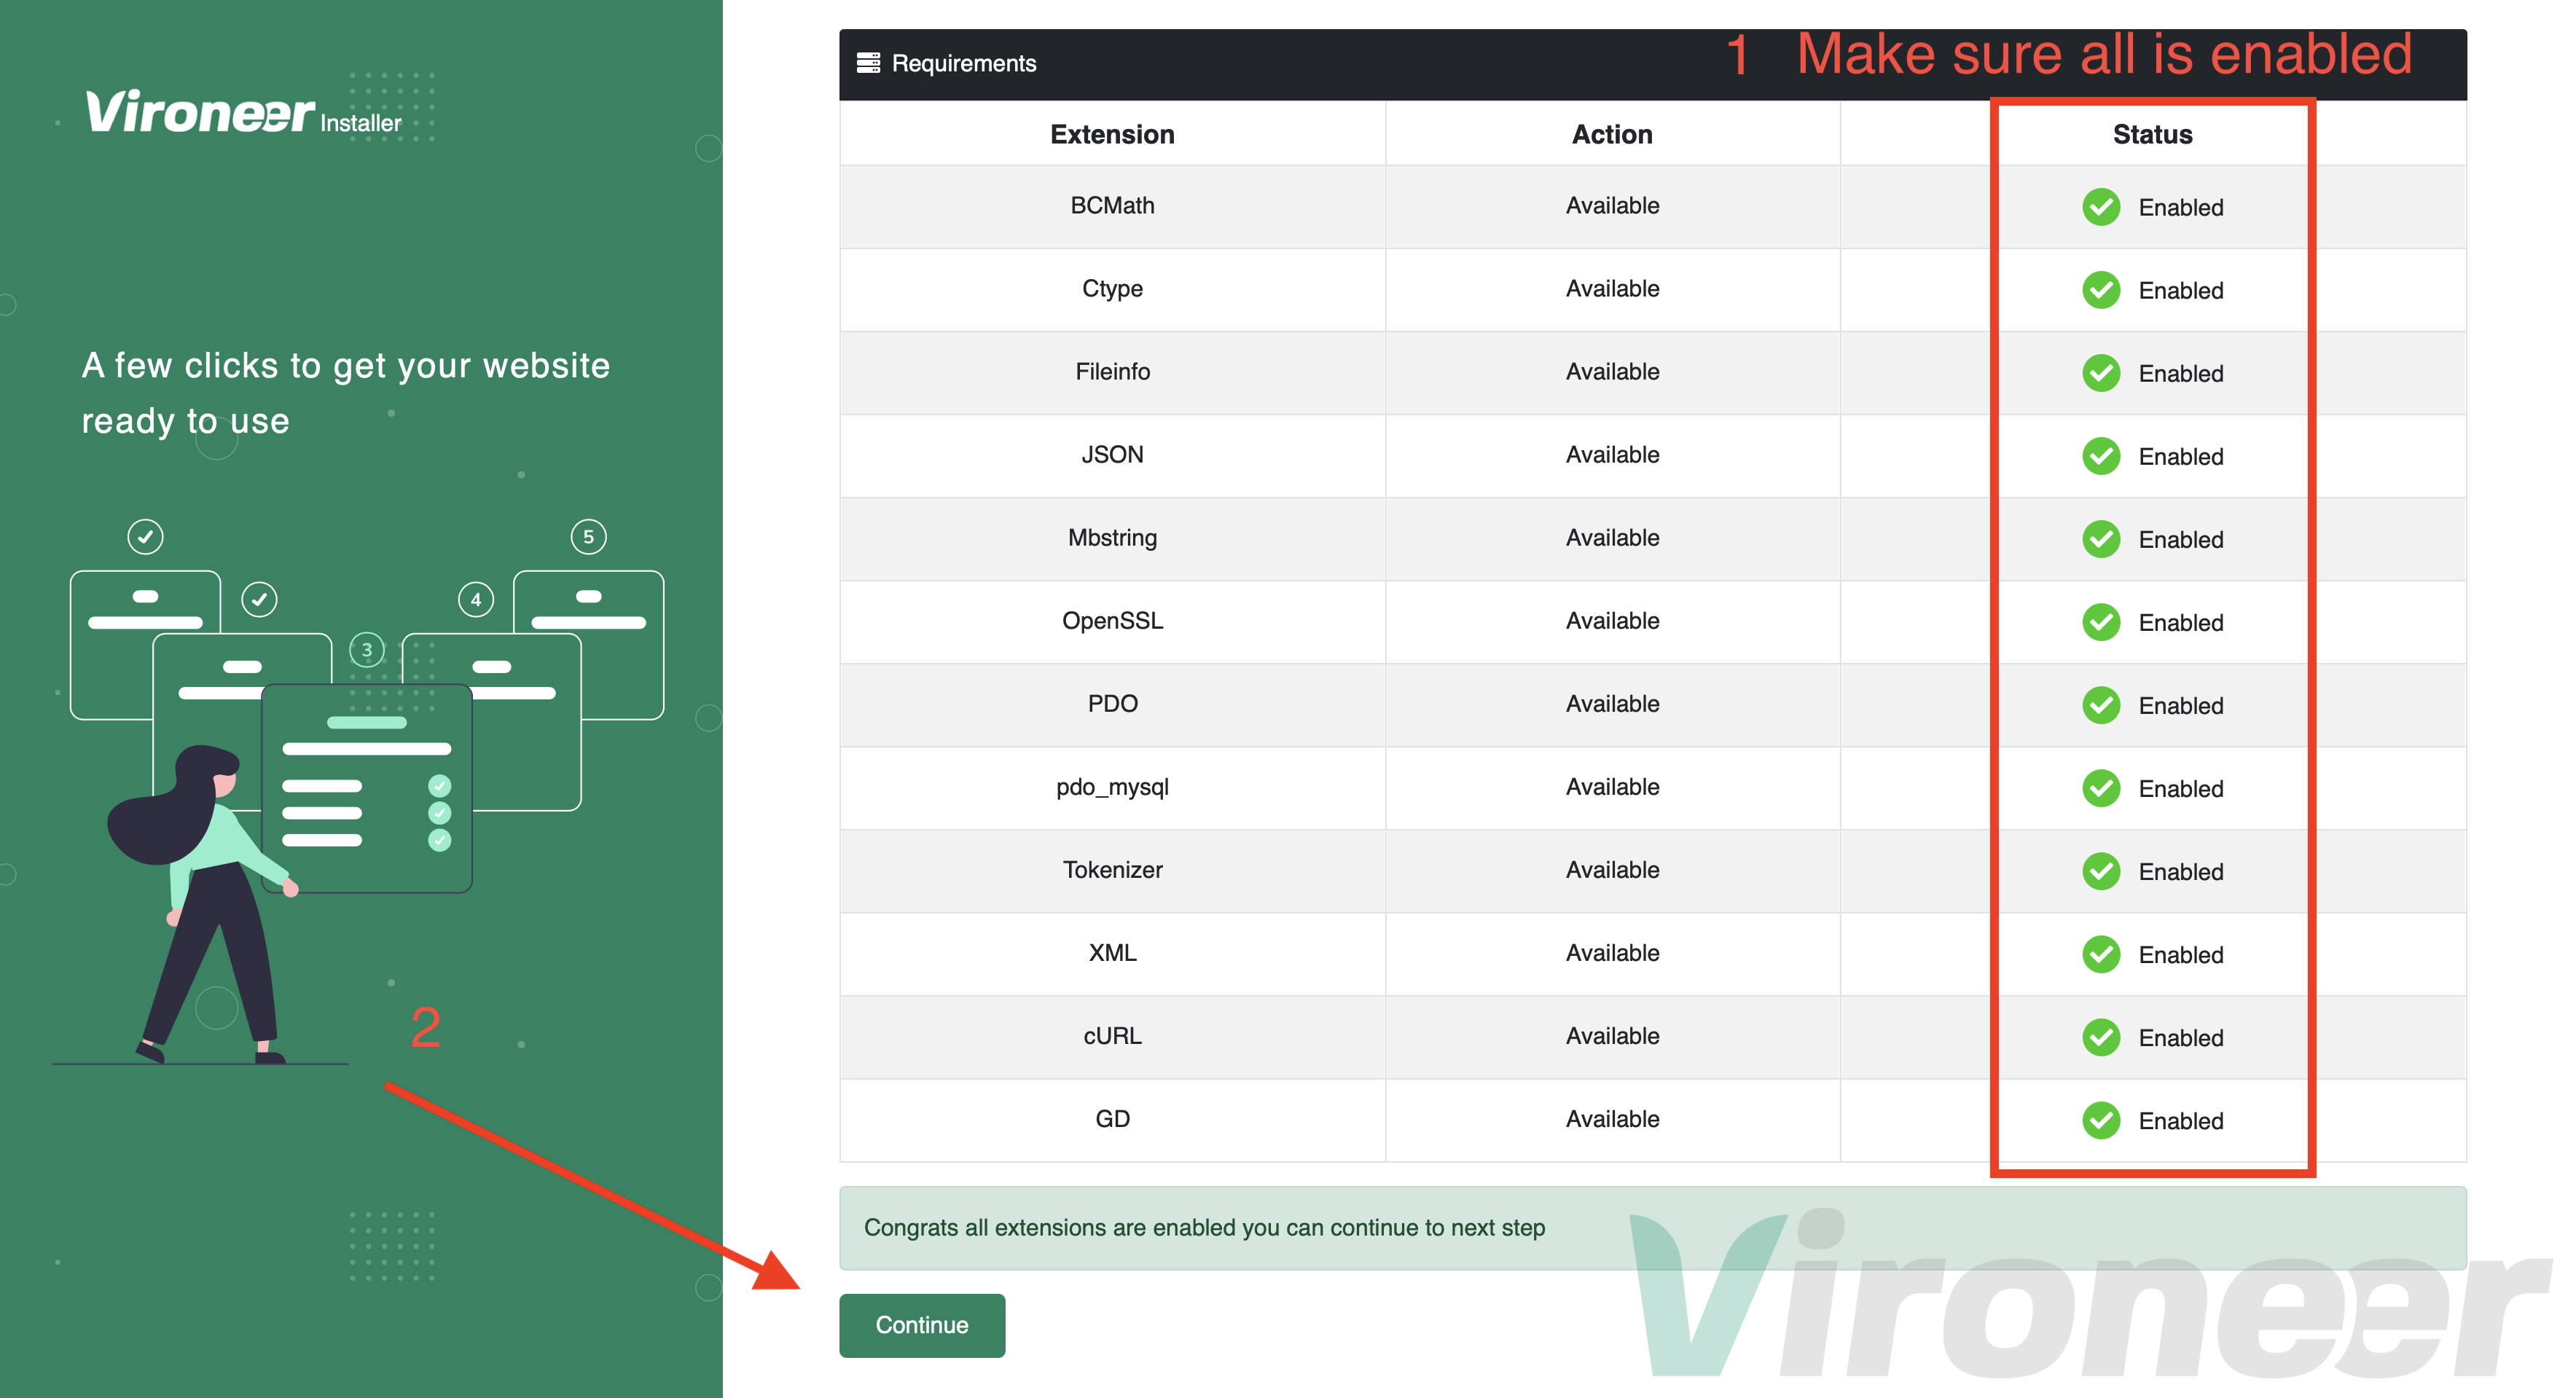
File Permissions
All those files must have a 0775 permission or above, its 0775 by default but some servers is change the permisssion when the files uploaded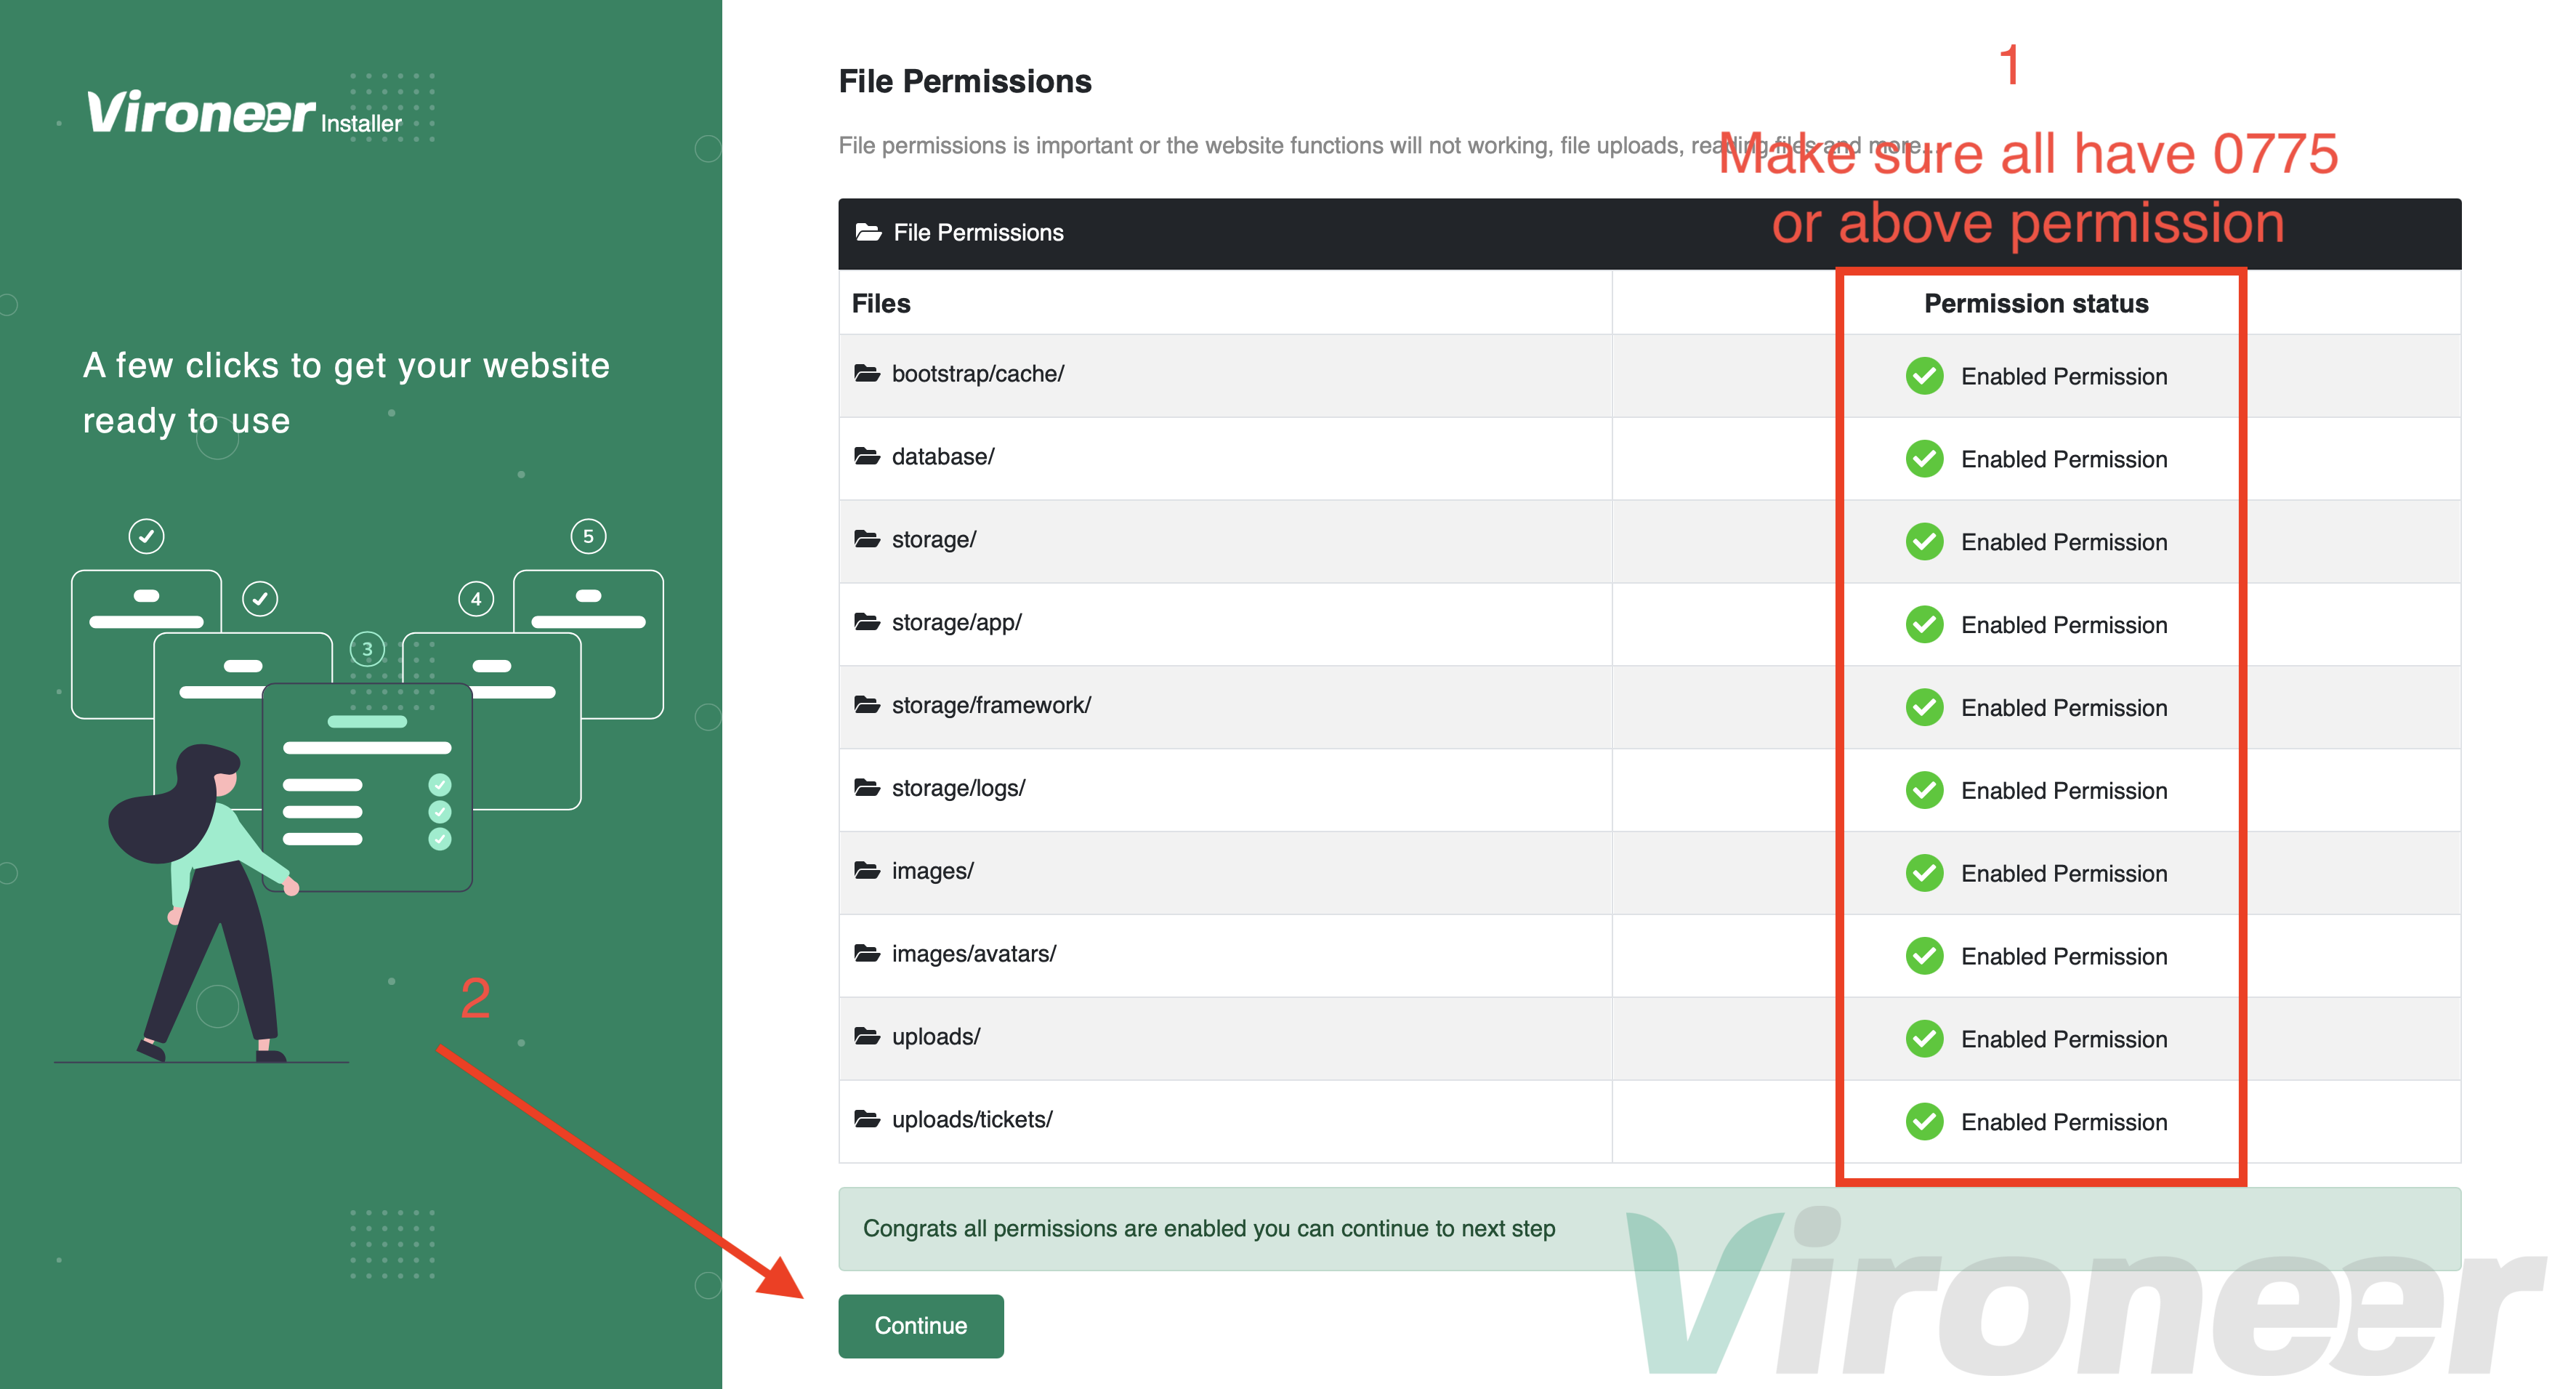
Licence Validation
Enter your purchase code and click validate, you can follow this link to know how you can get it.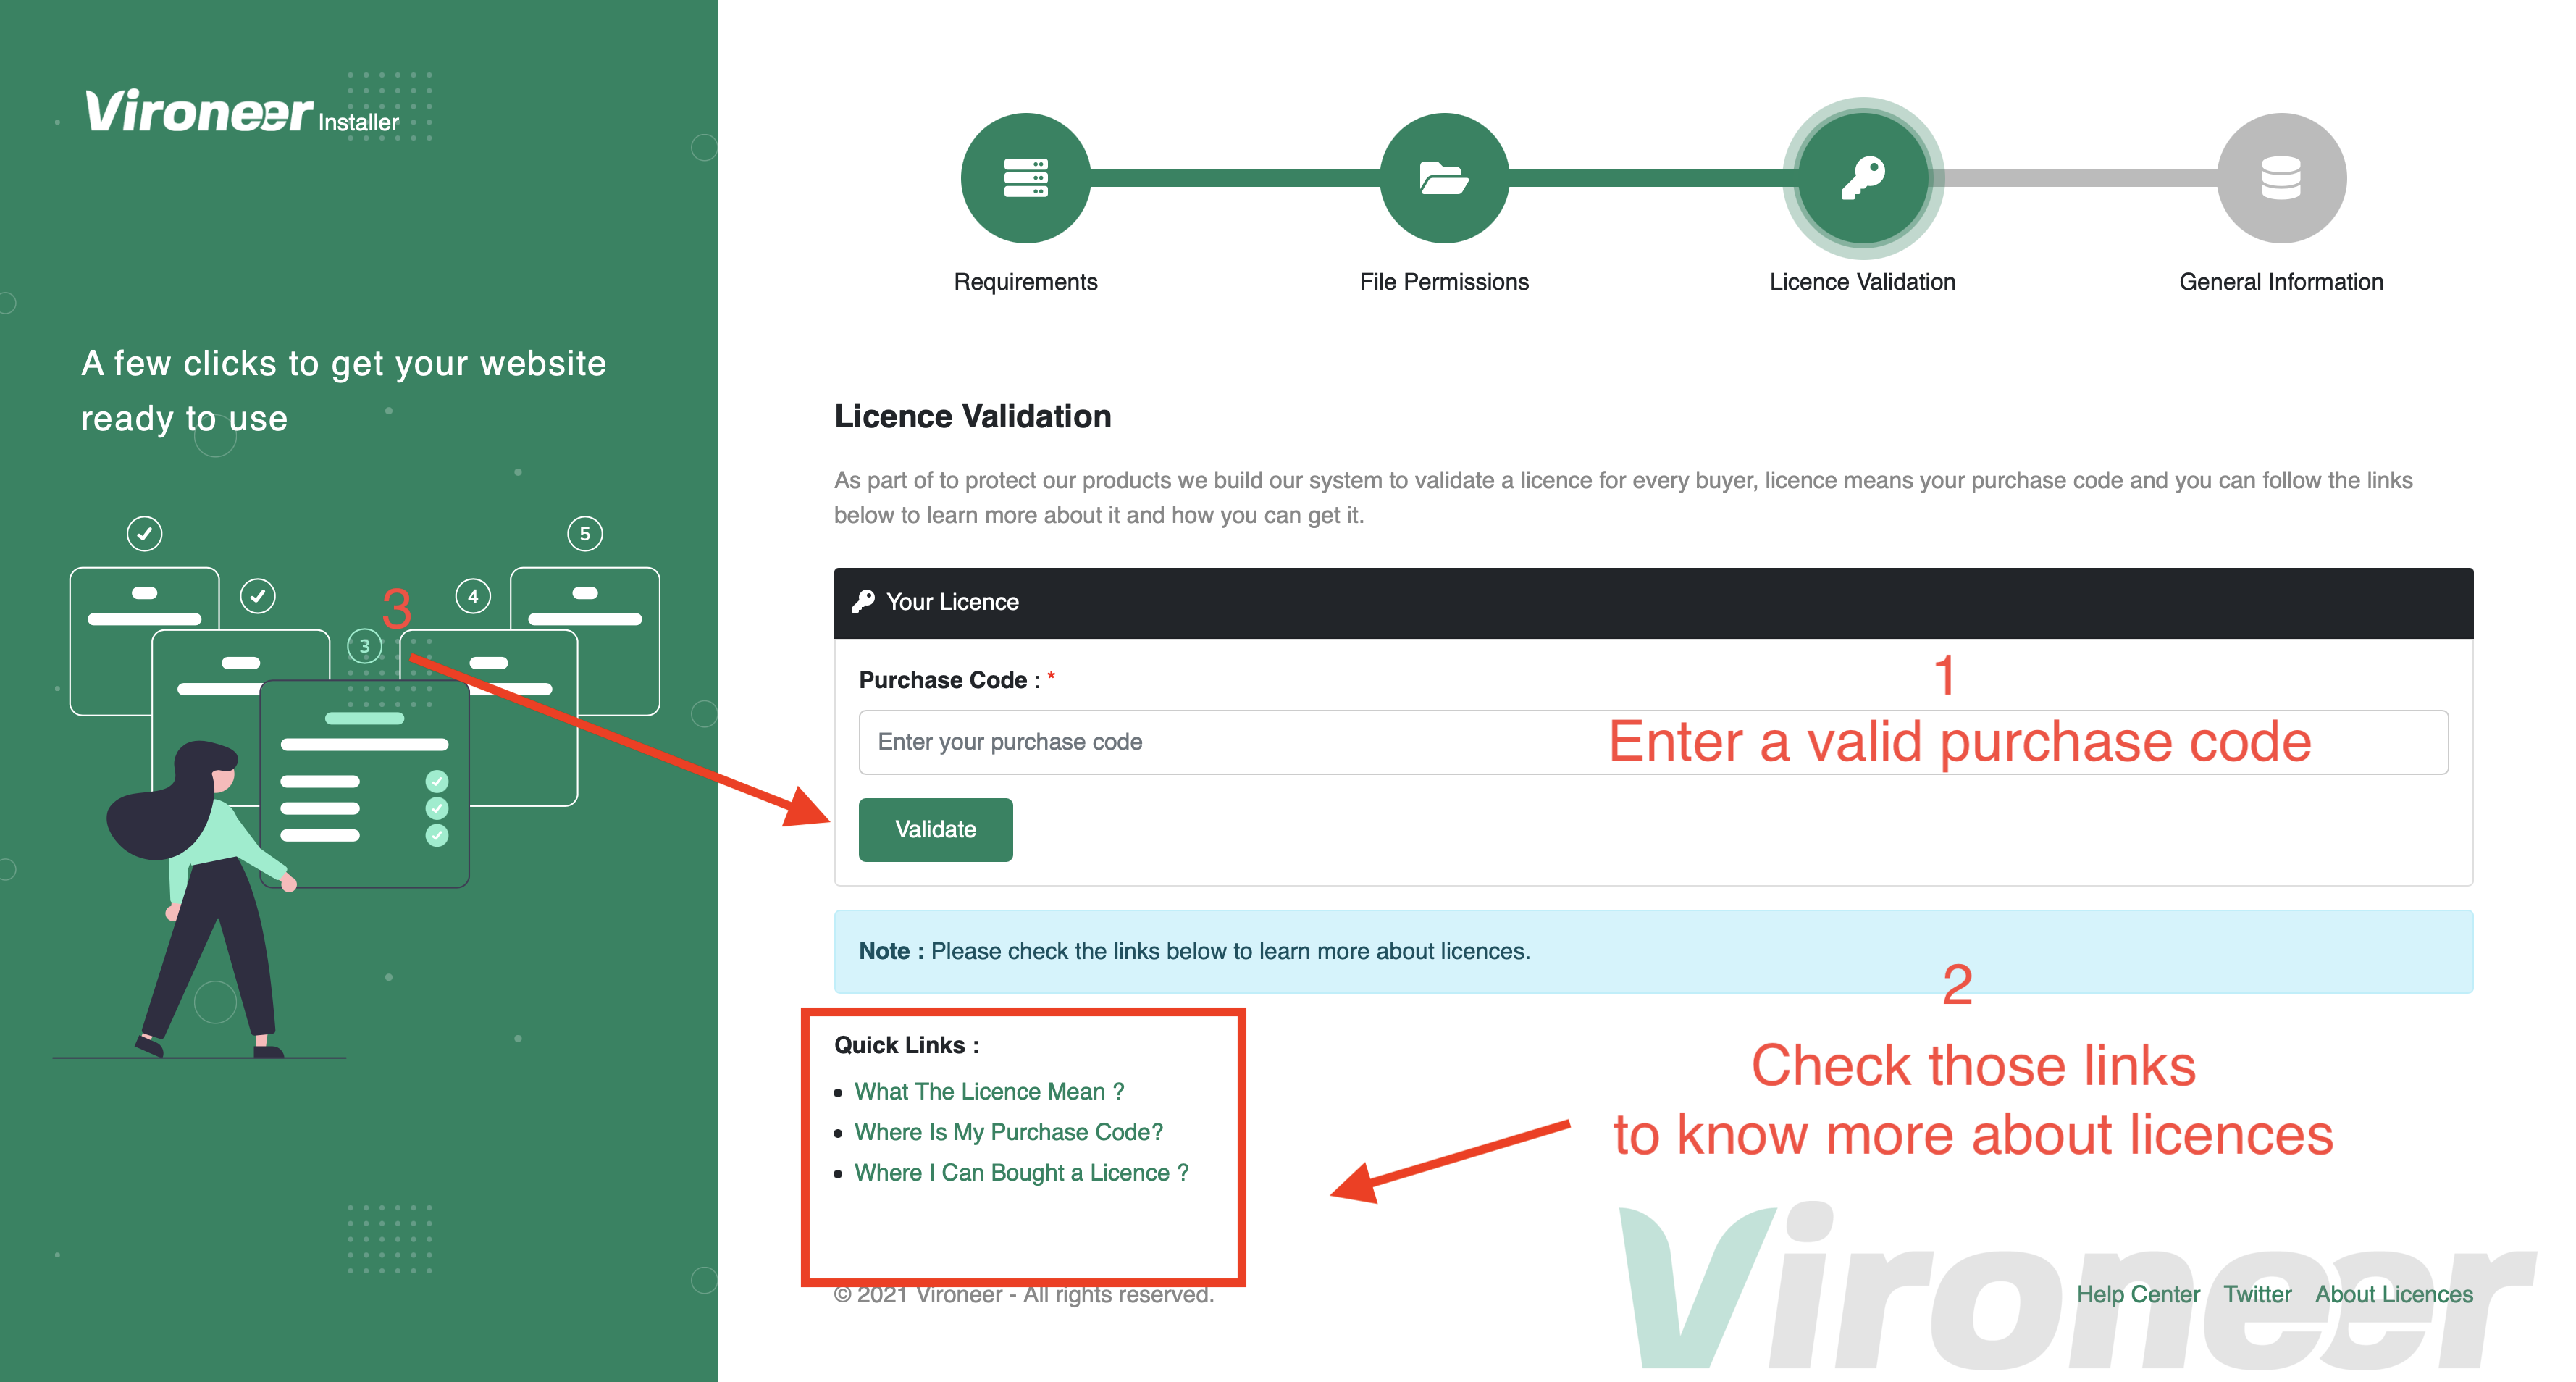
General Information > Database Details
Enter your database details and click continue.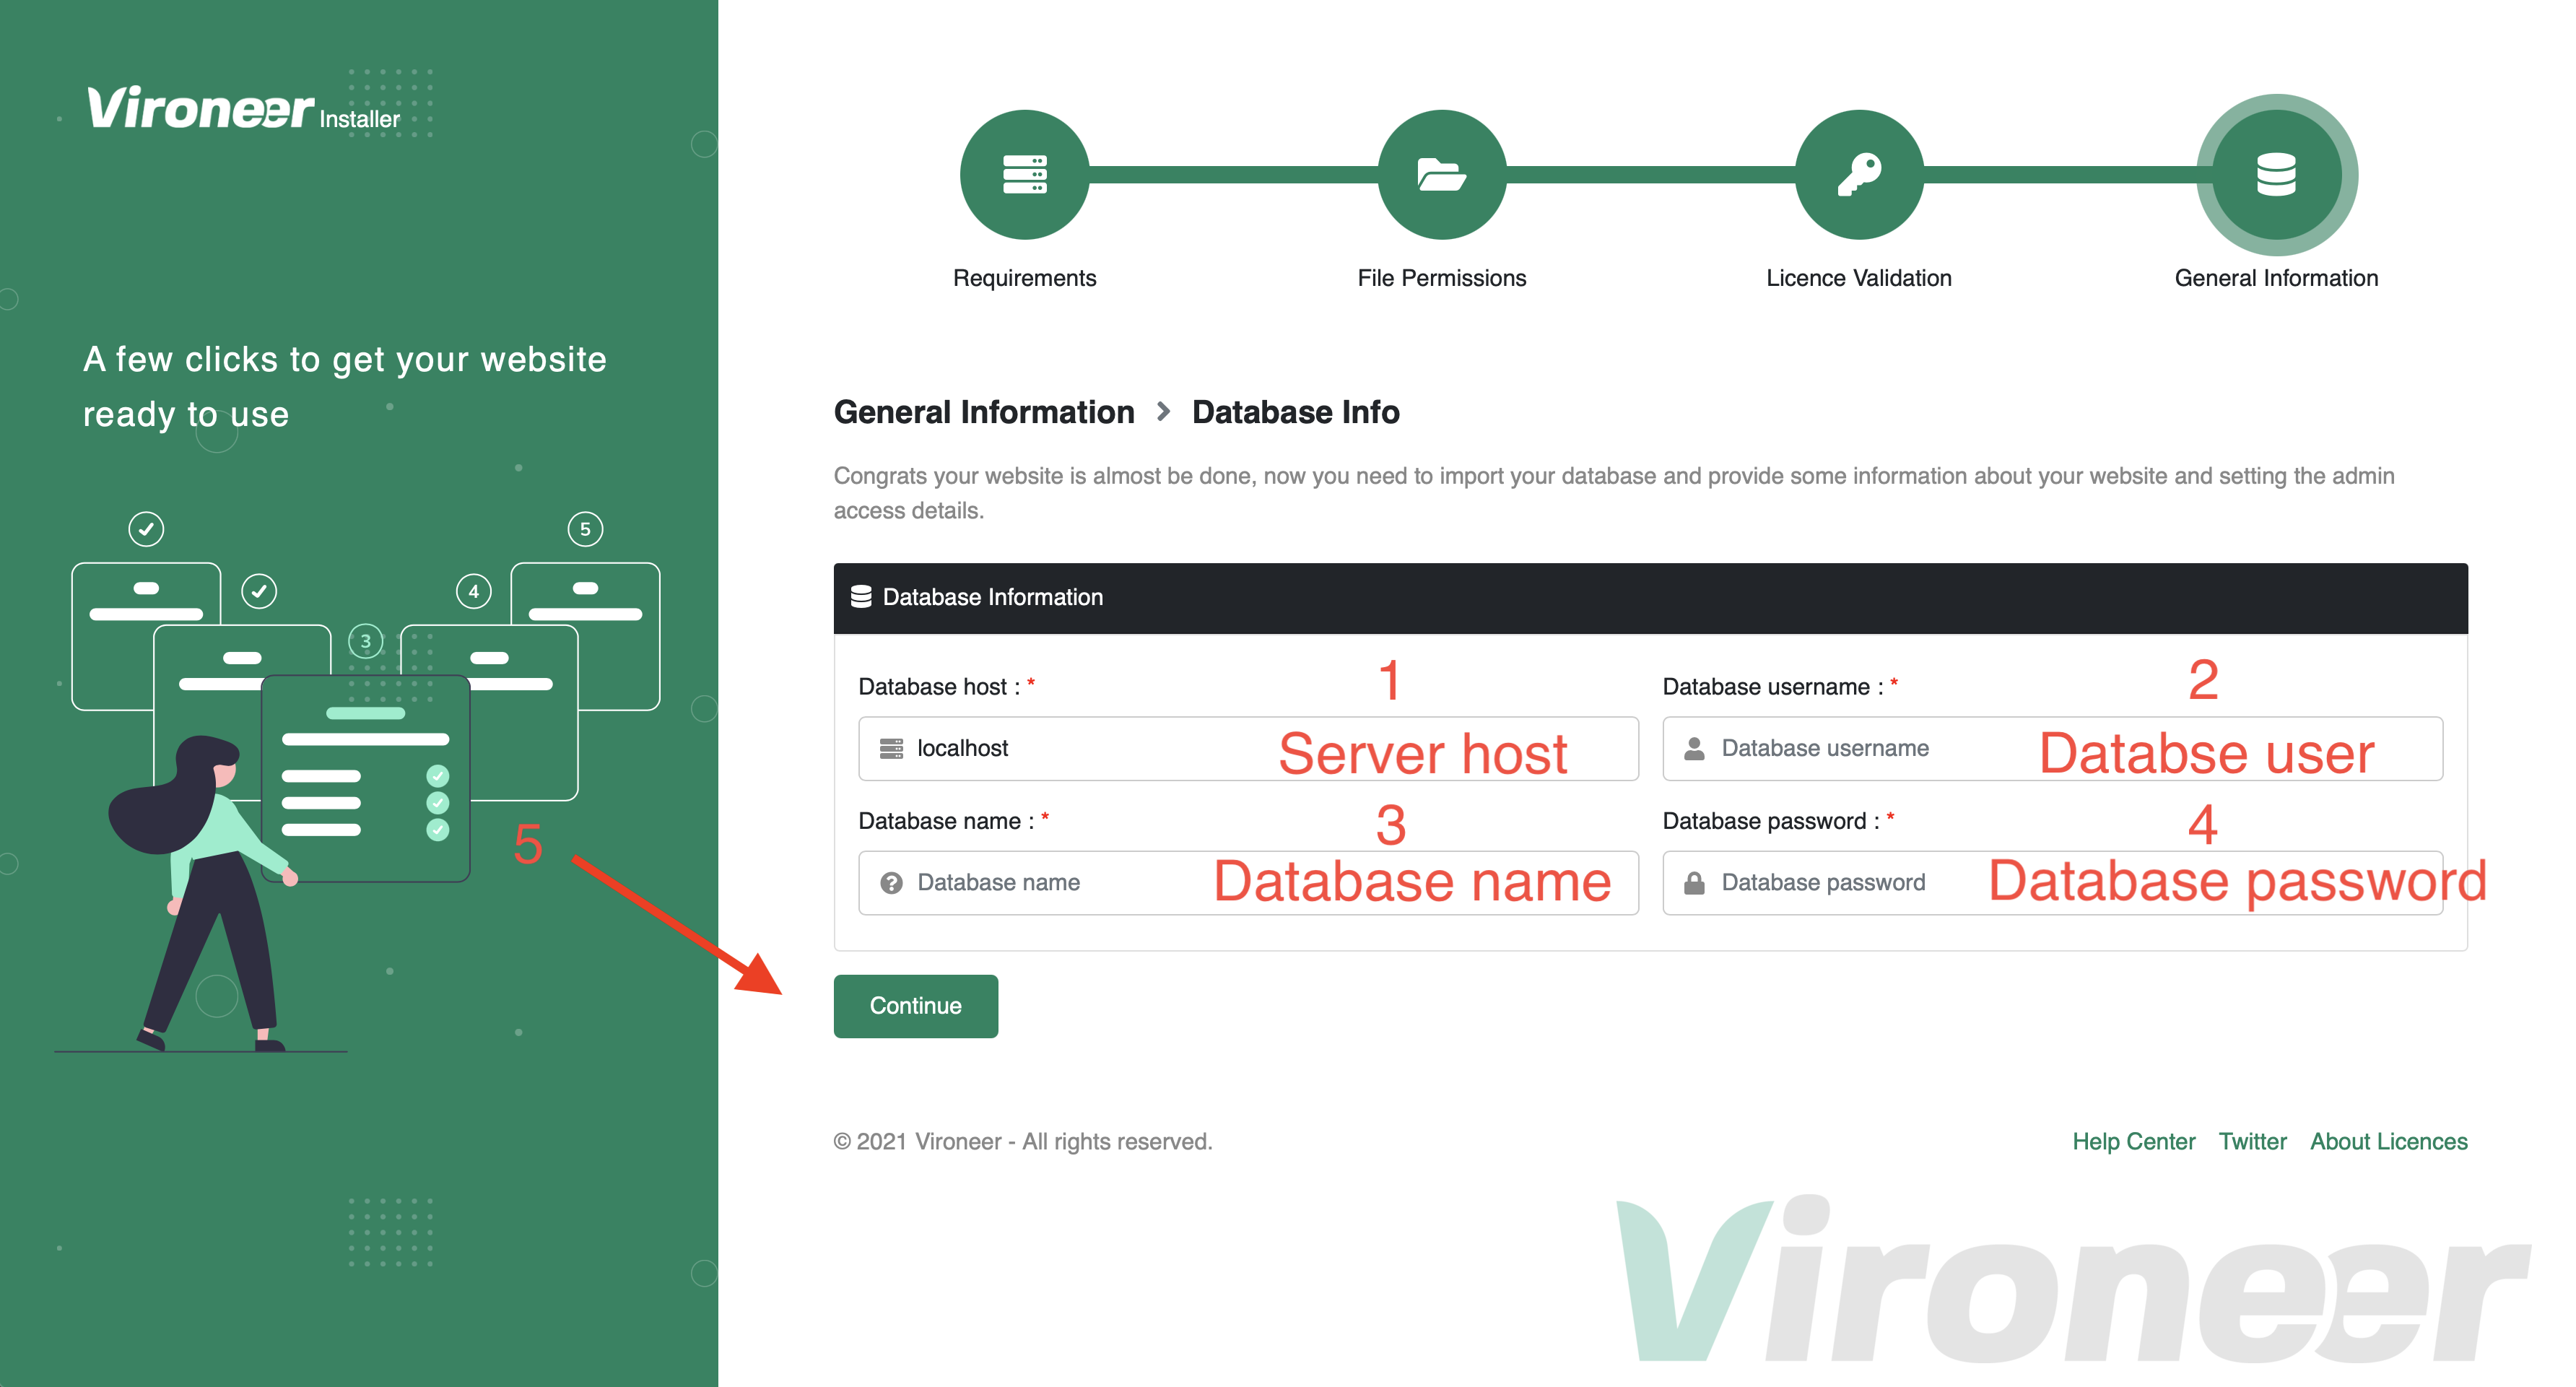
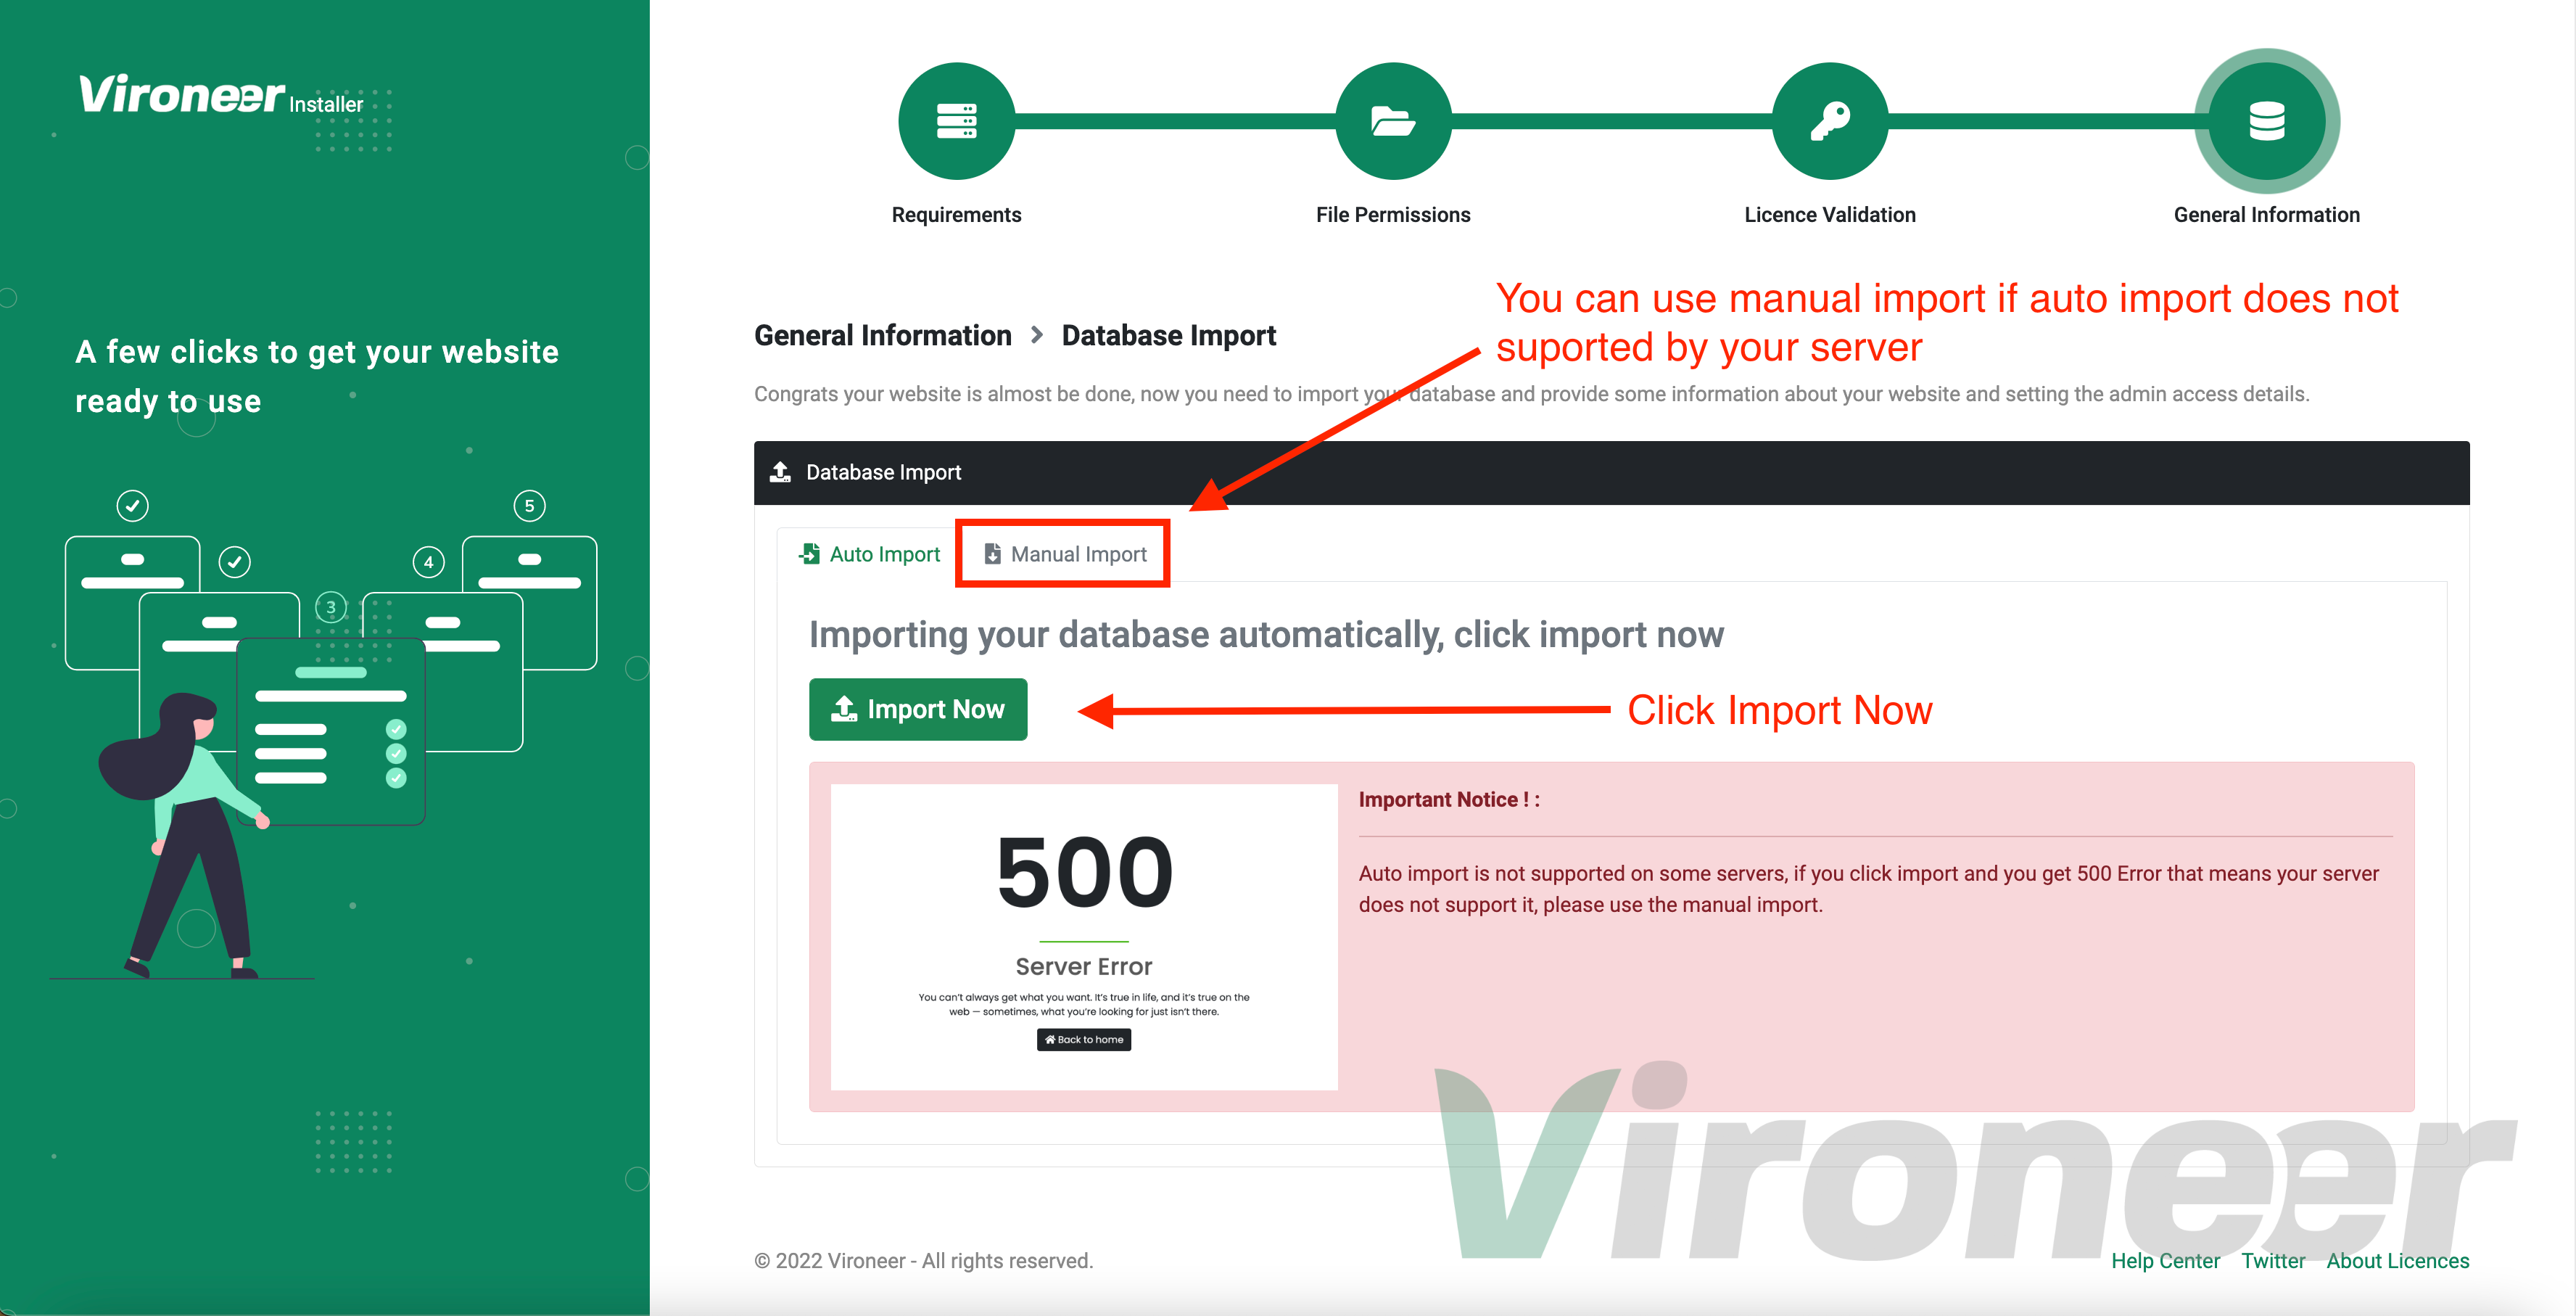
General Information > Database Import
Click import database file.Some servers is disabling this option or they have a problem on mysql database if you get any problem or 500 Server Error please use manual import to import your database.
General Information > Necessary Details
Now just enter your website name and URL, and setUp your admin access details.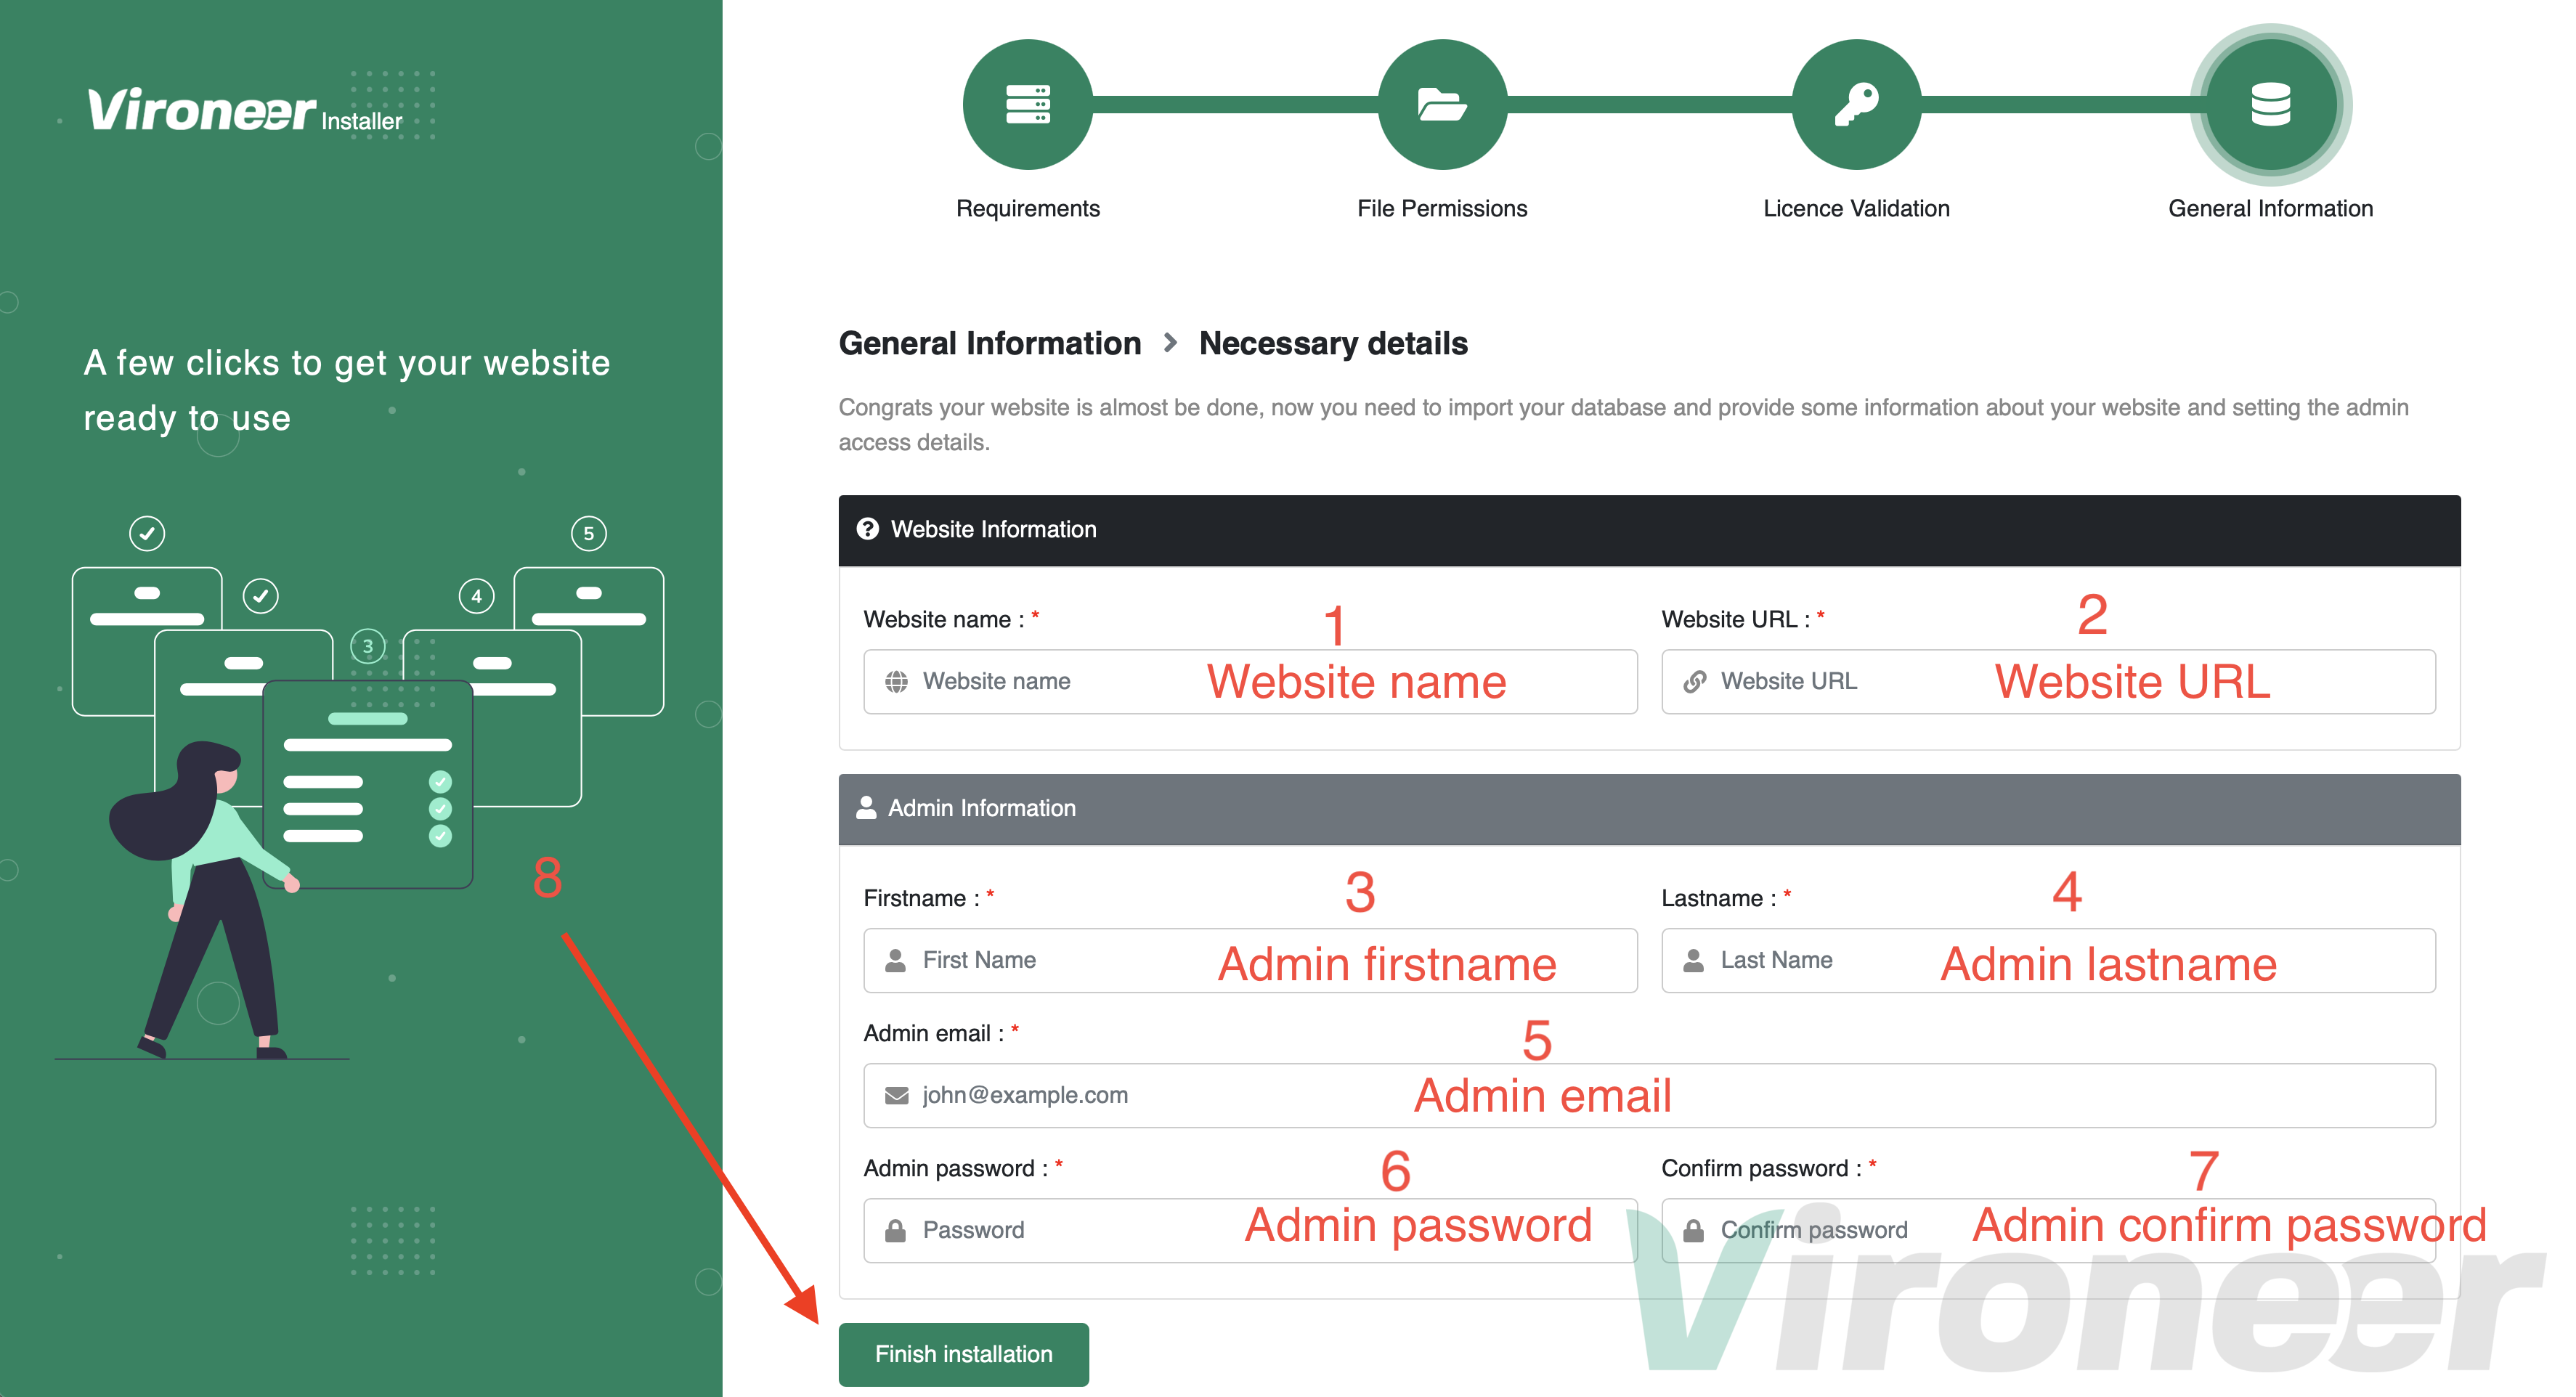
Home Page Slide Show
SlideShow
Go to Admin > Manage Sections > slide Show
Home Page Features
Features
Go to Admin > Manage Sections > Home Features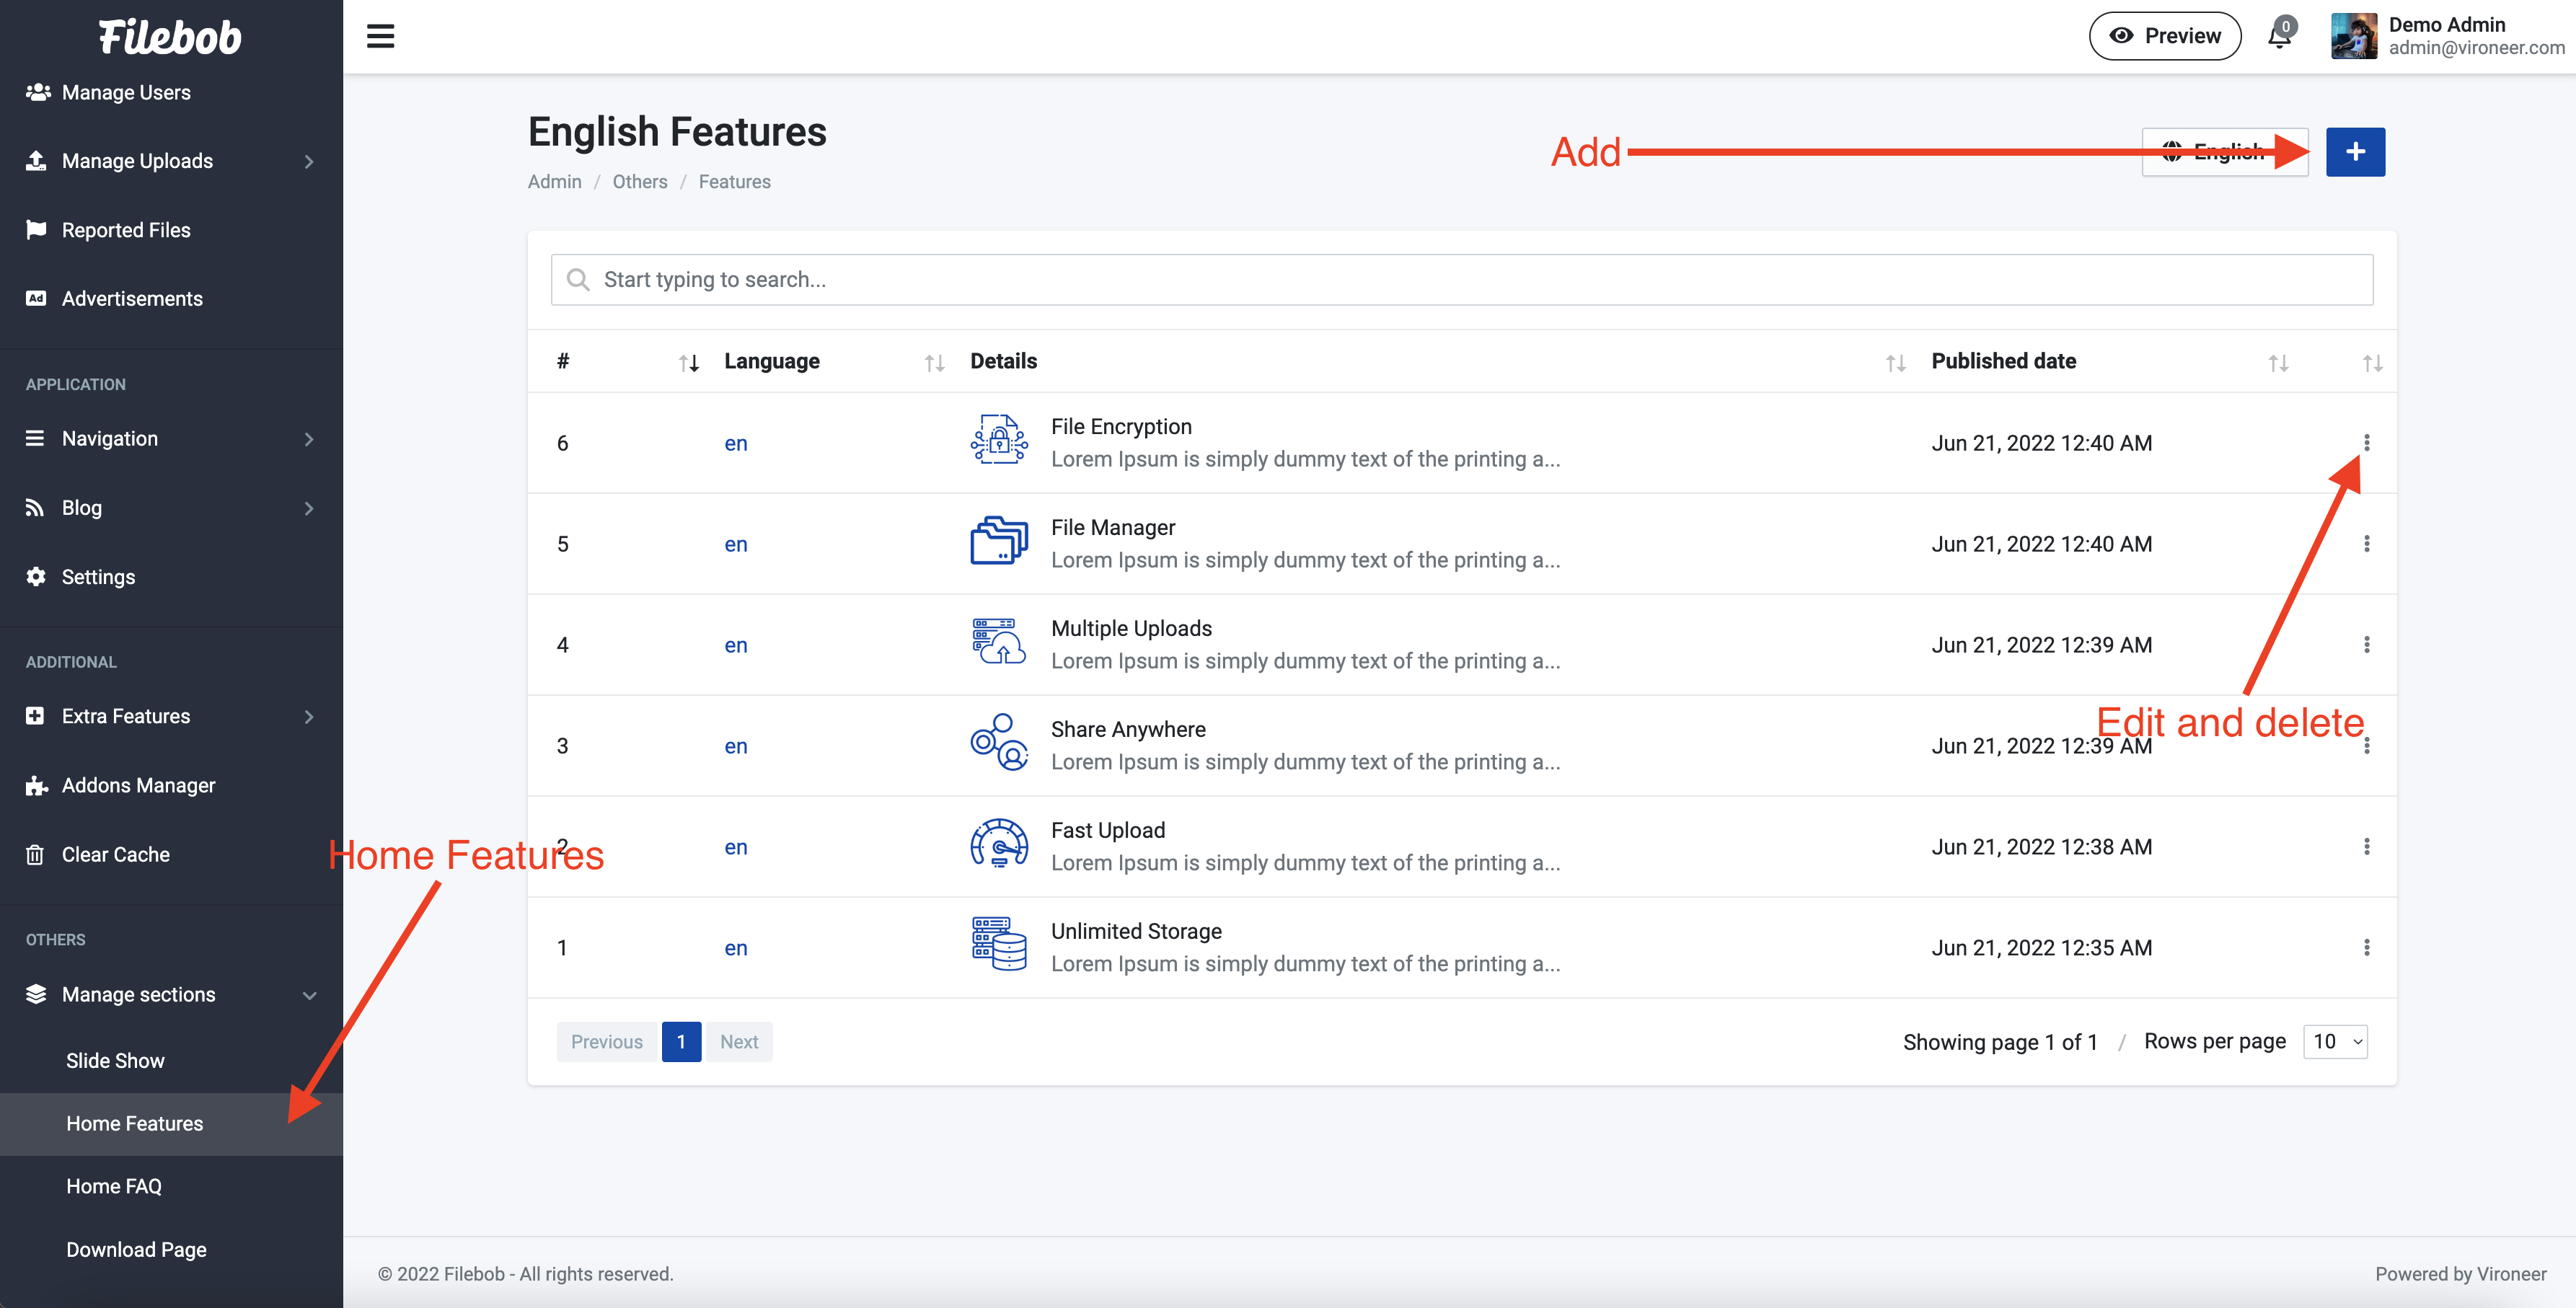
Home Page FAQ
FAQ
Go to Admin > Manage Sections > Home FAQ
Download Page
Download Page
Go to Admin > Manage Sections > Download Page
Advertisements
Advertisements Section
Go to Admin > Advertisements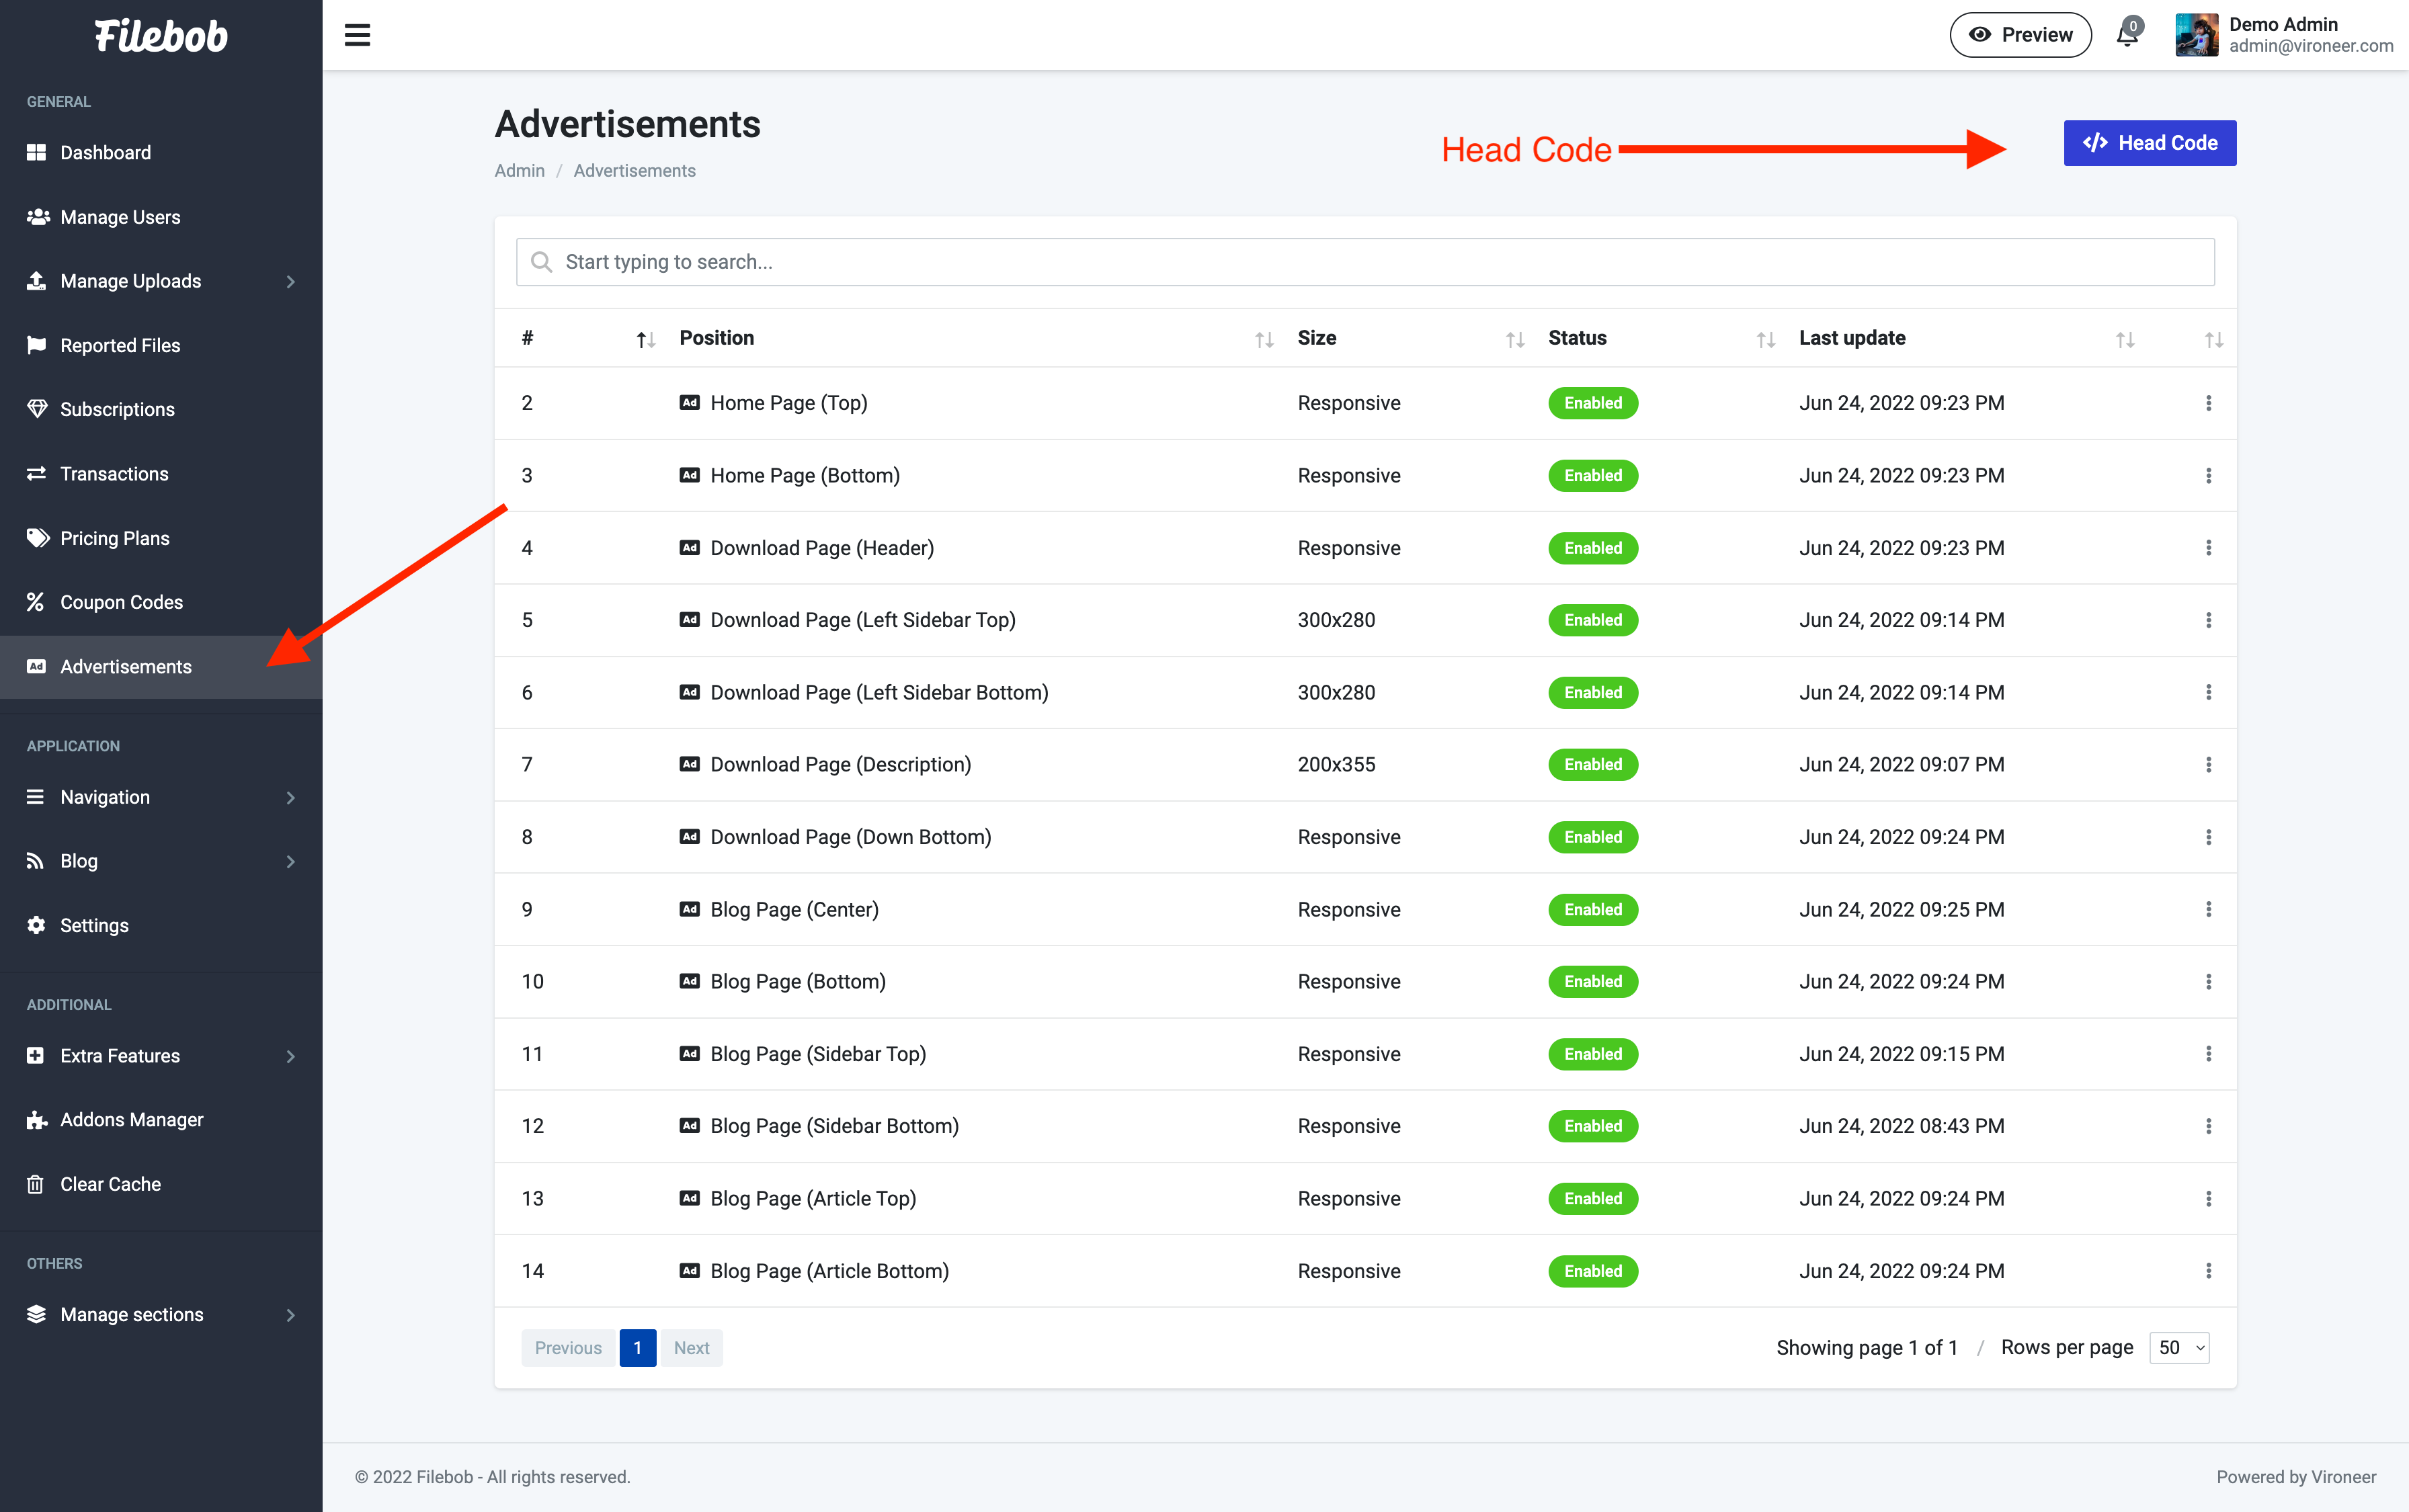
Edit you advertisement code
Enter the advertisements code then enable it and click save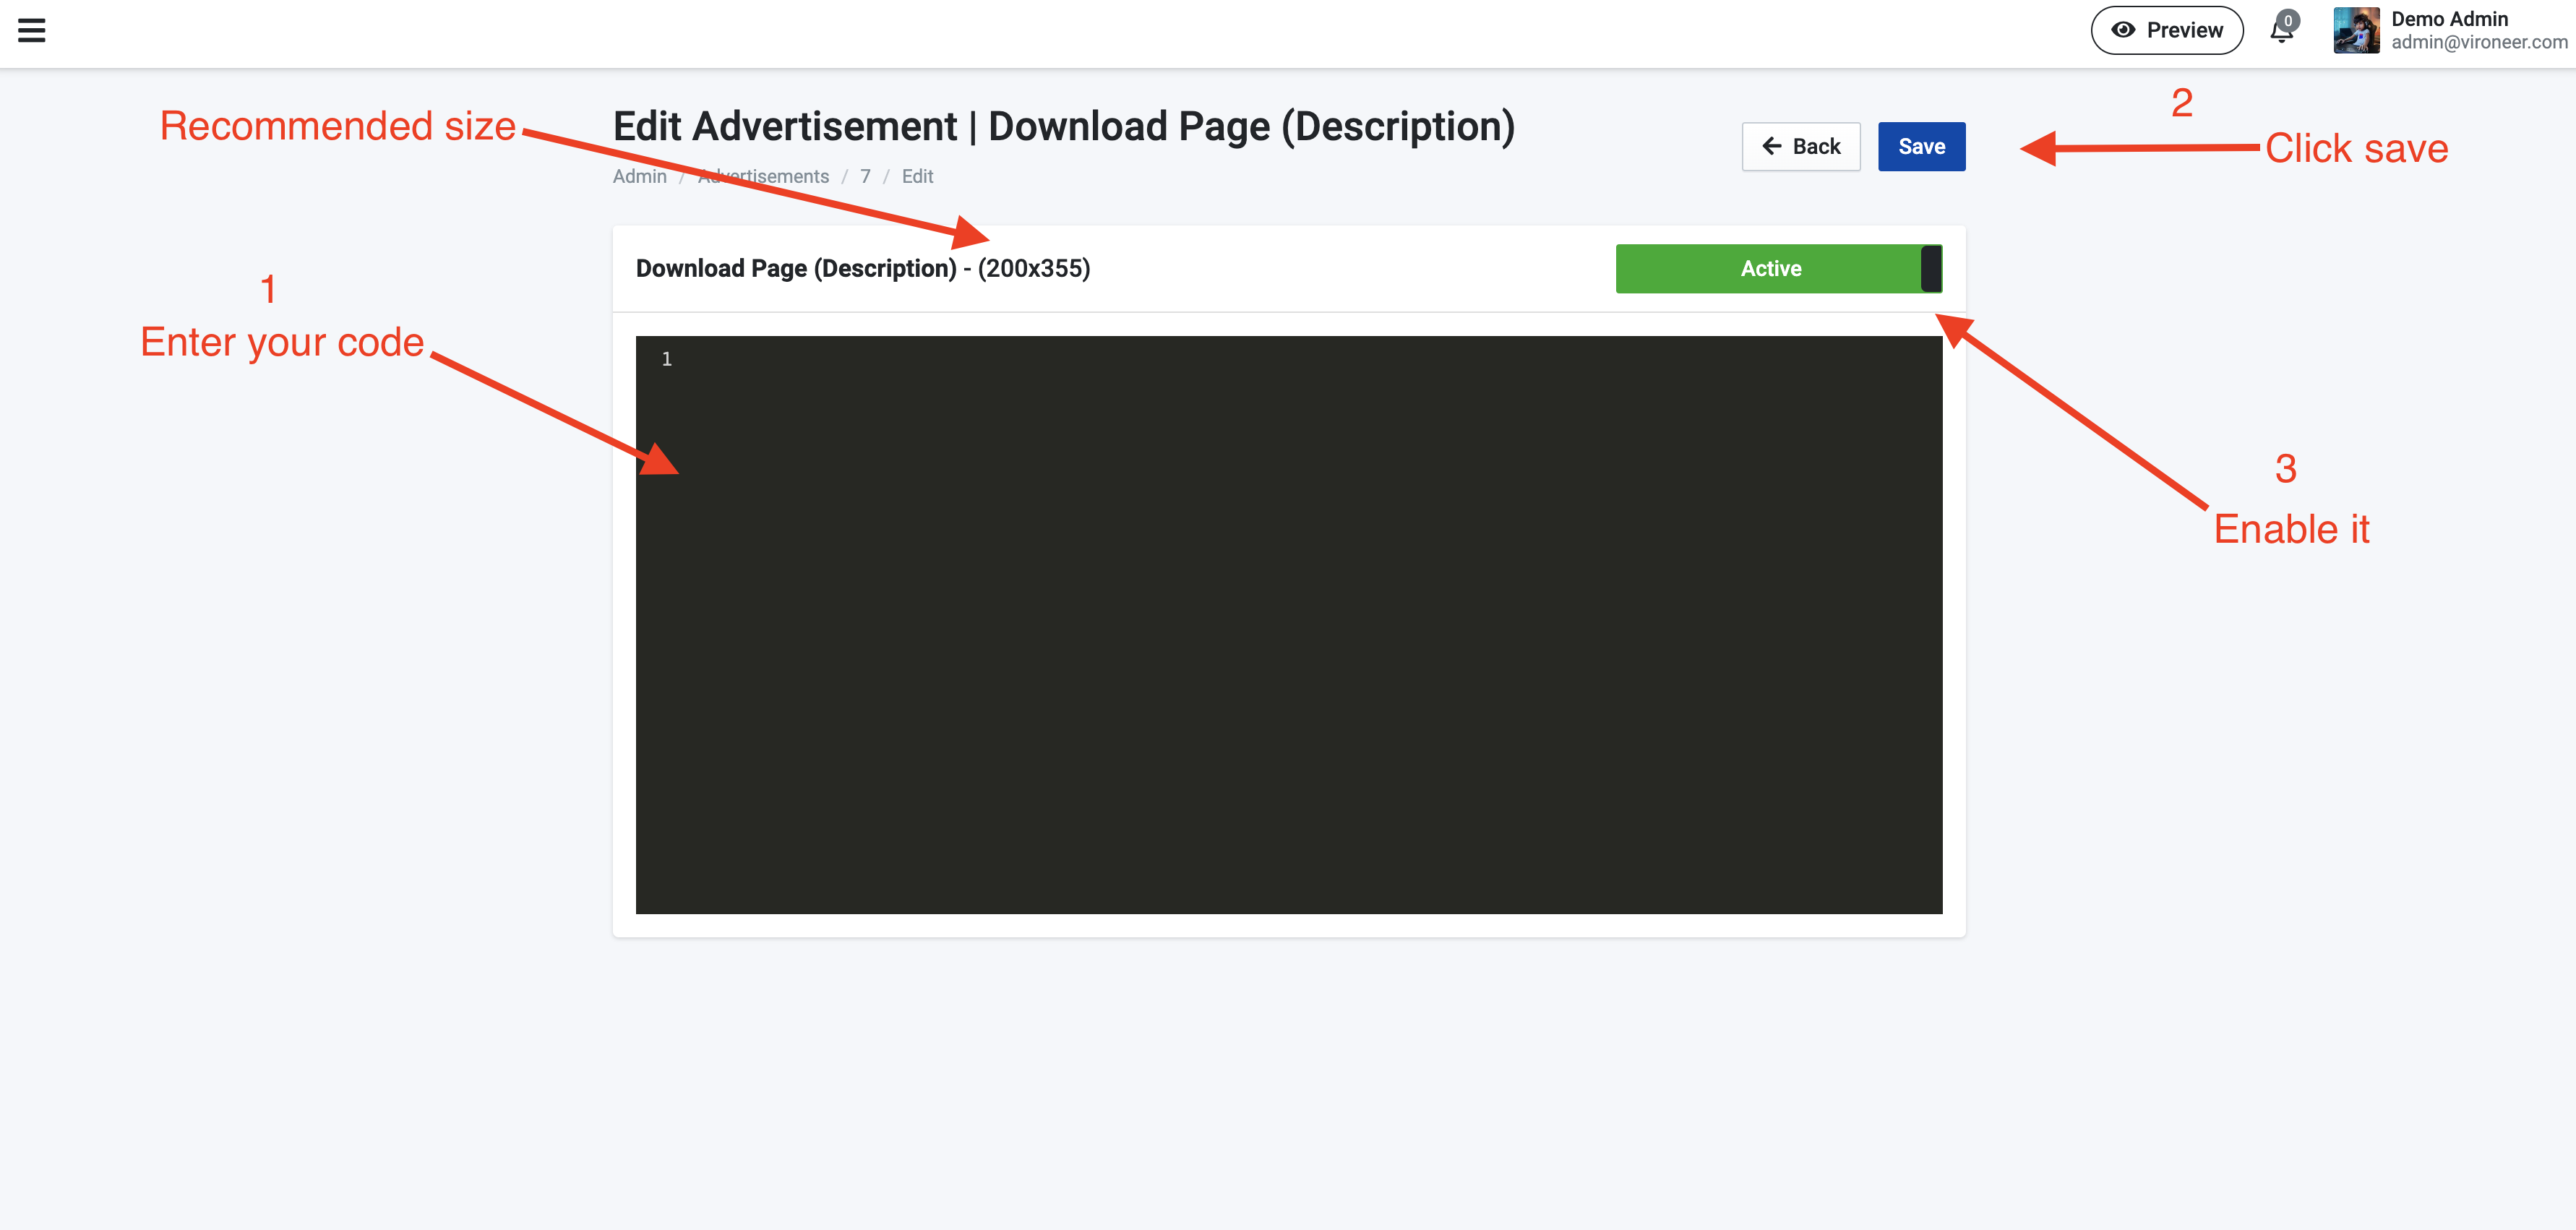
General Information
Genaral Information Section
Go to Admin panel > Settings > general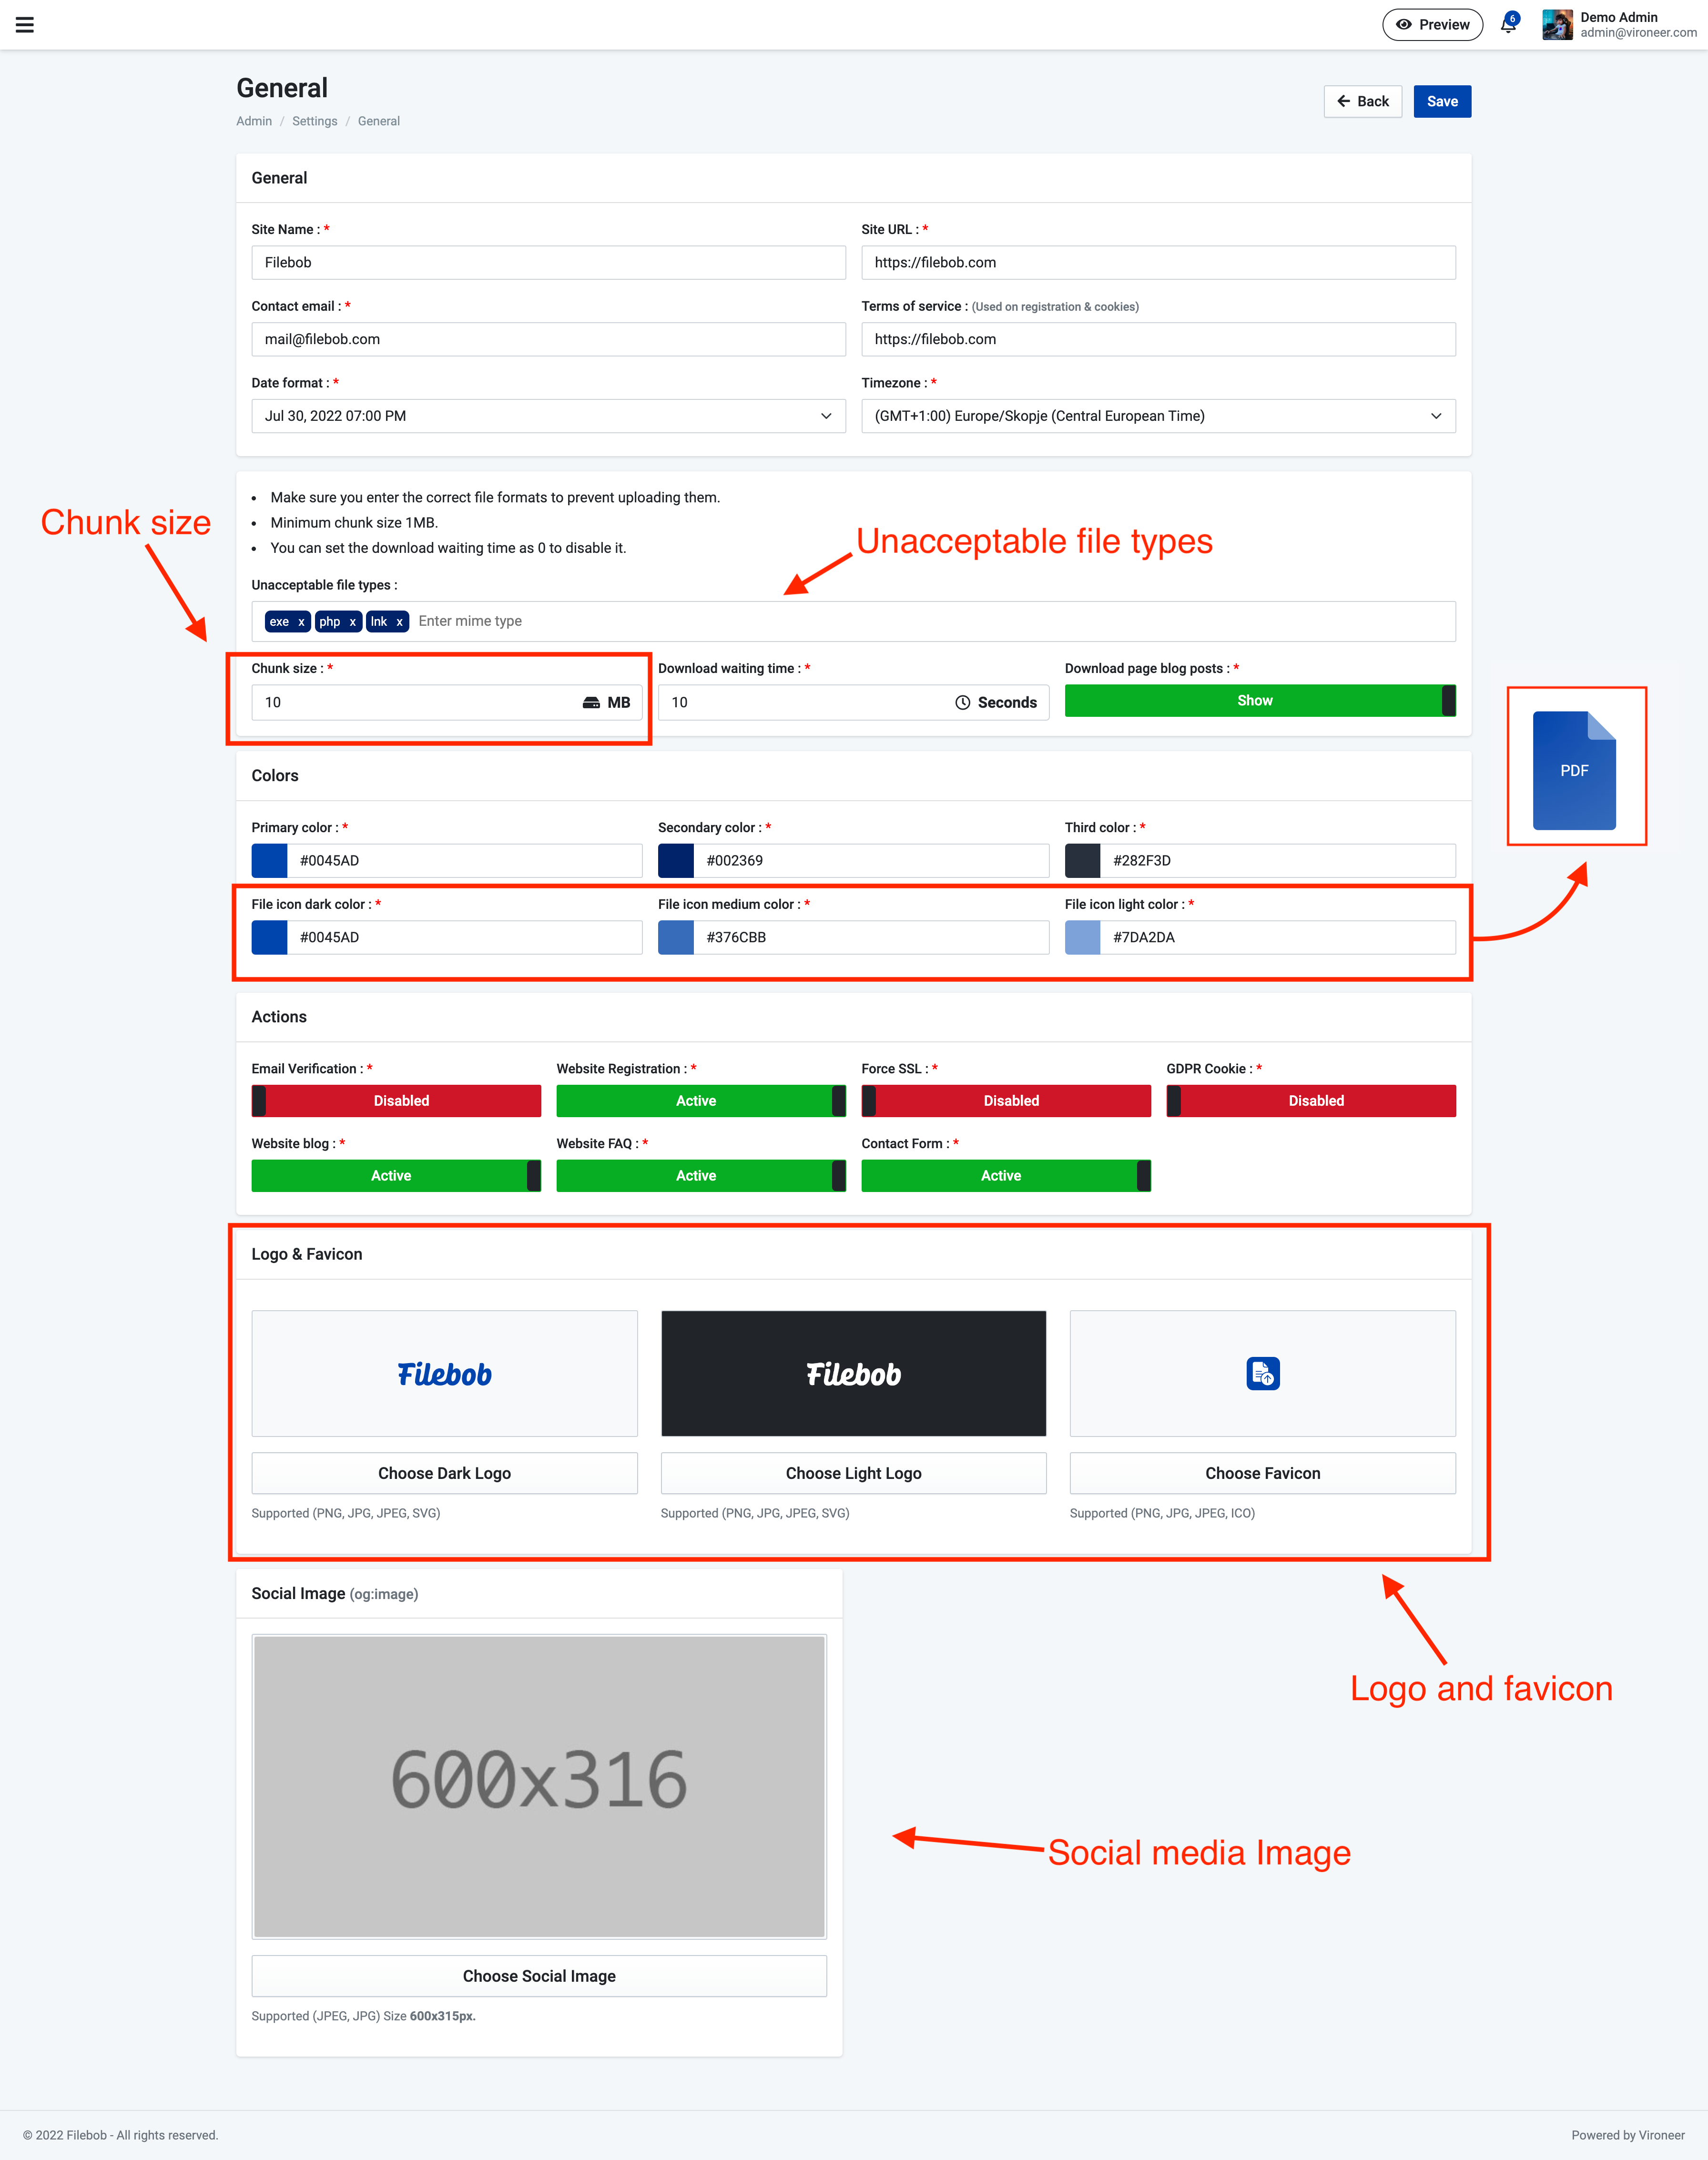
General Information
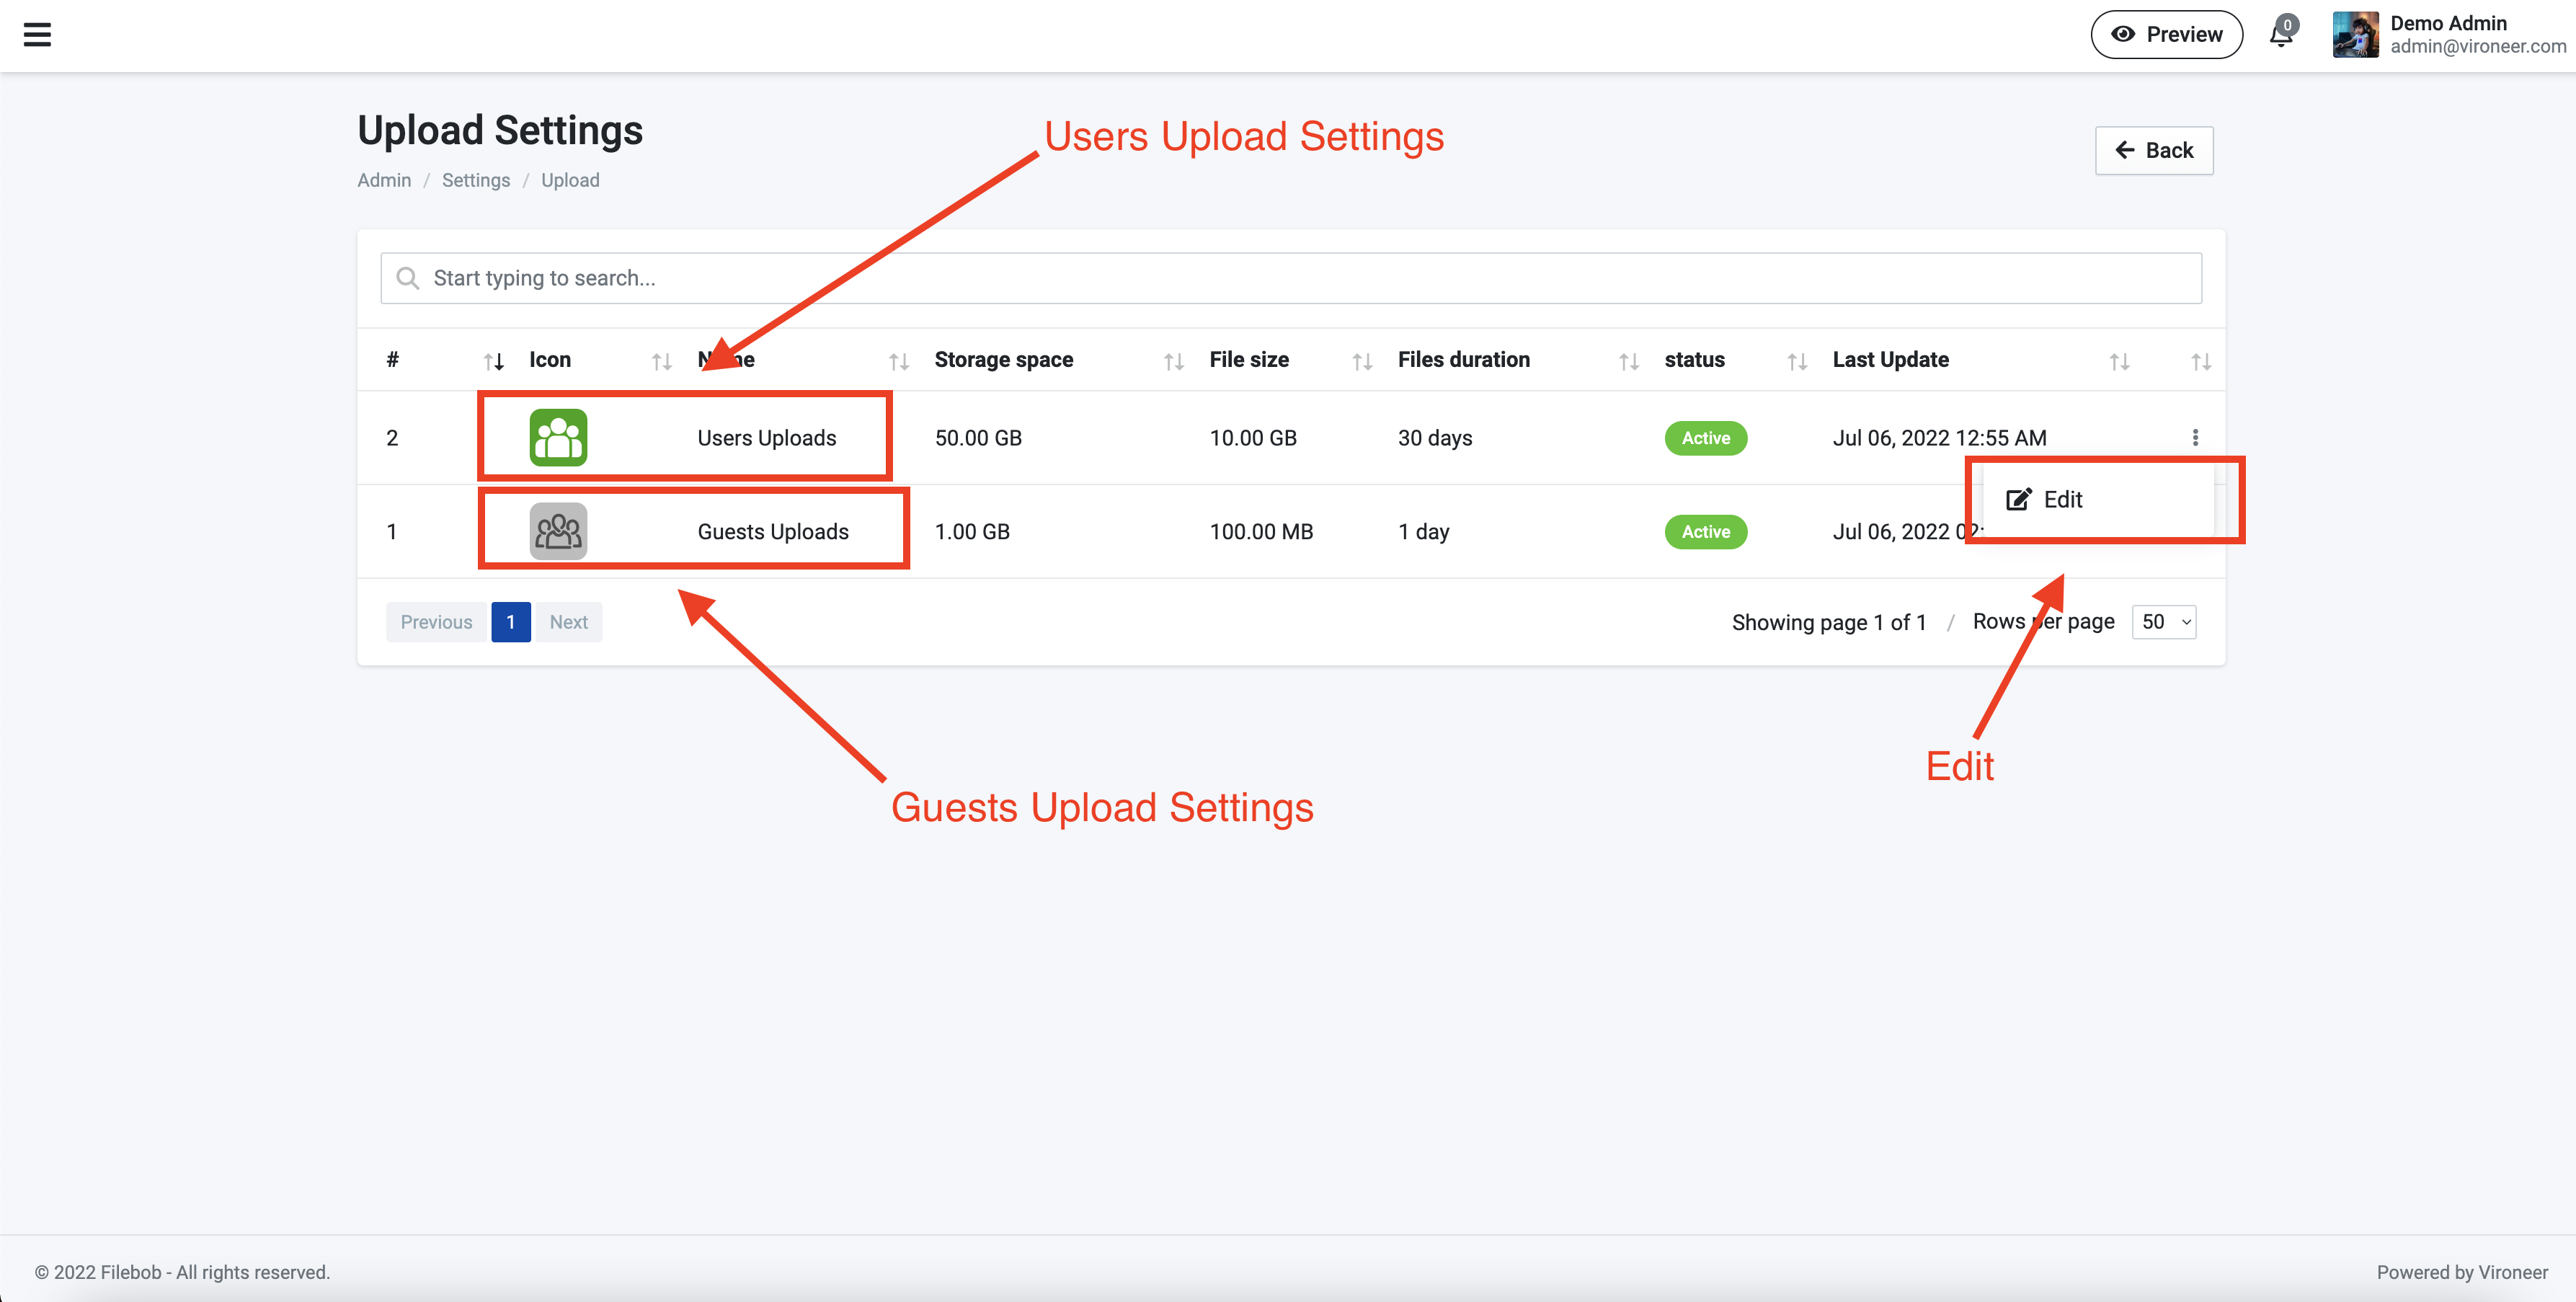
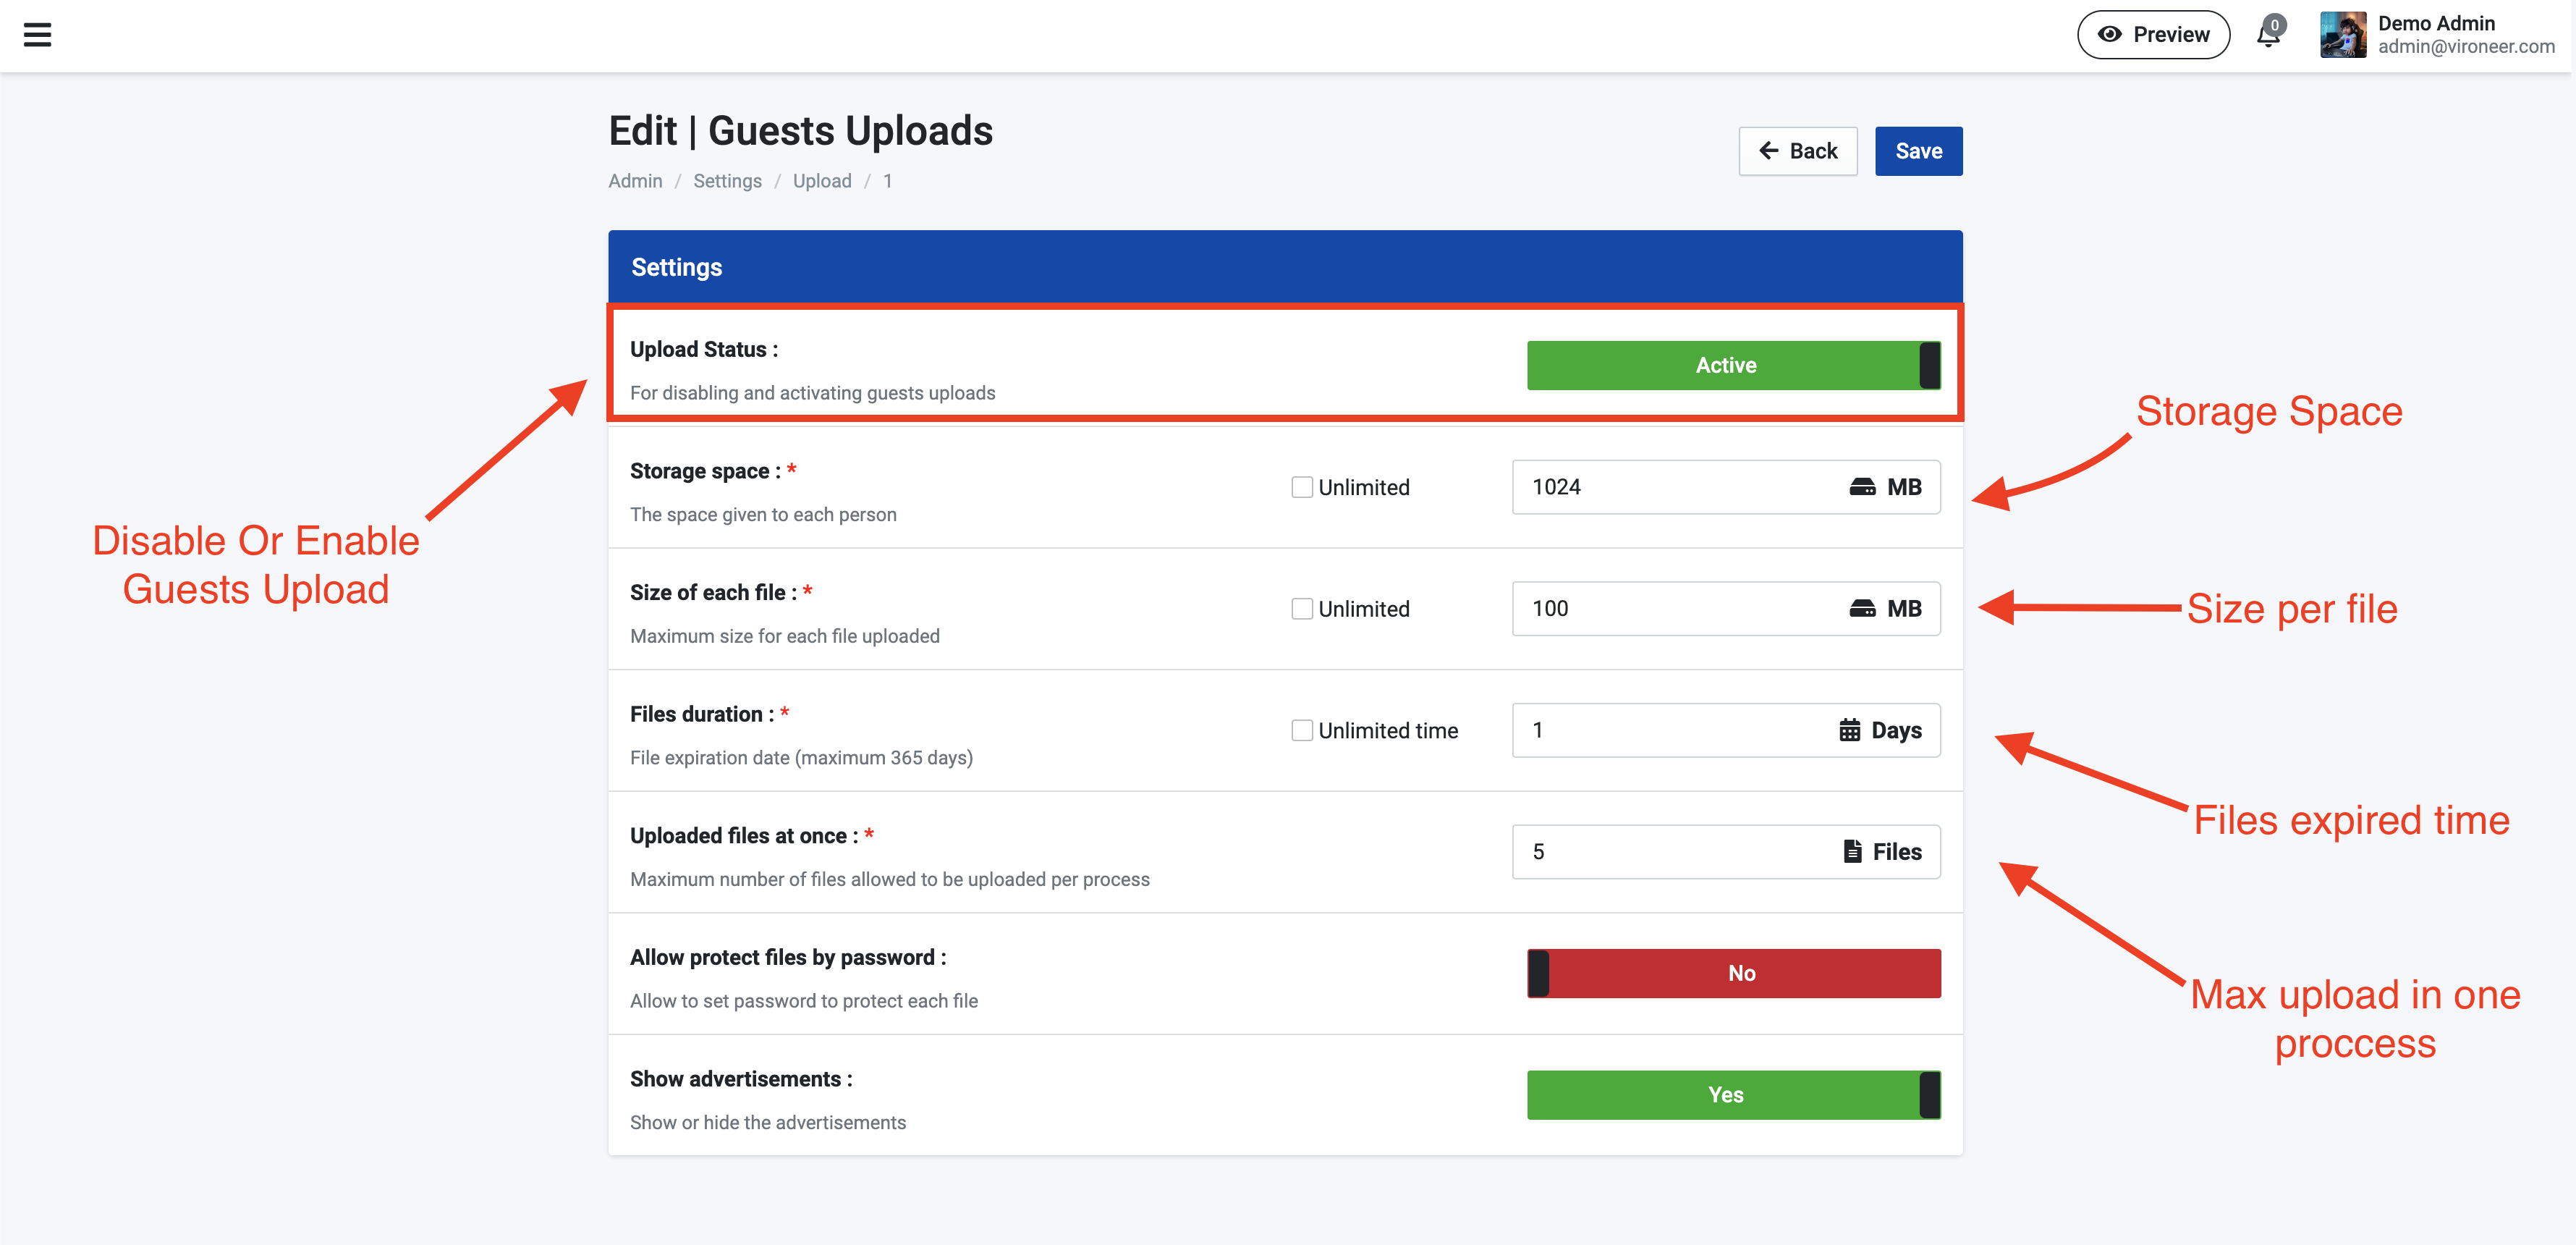
Upload Settings Section
Go to Admin panel > Settings > Upload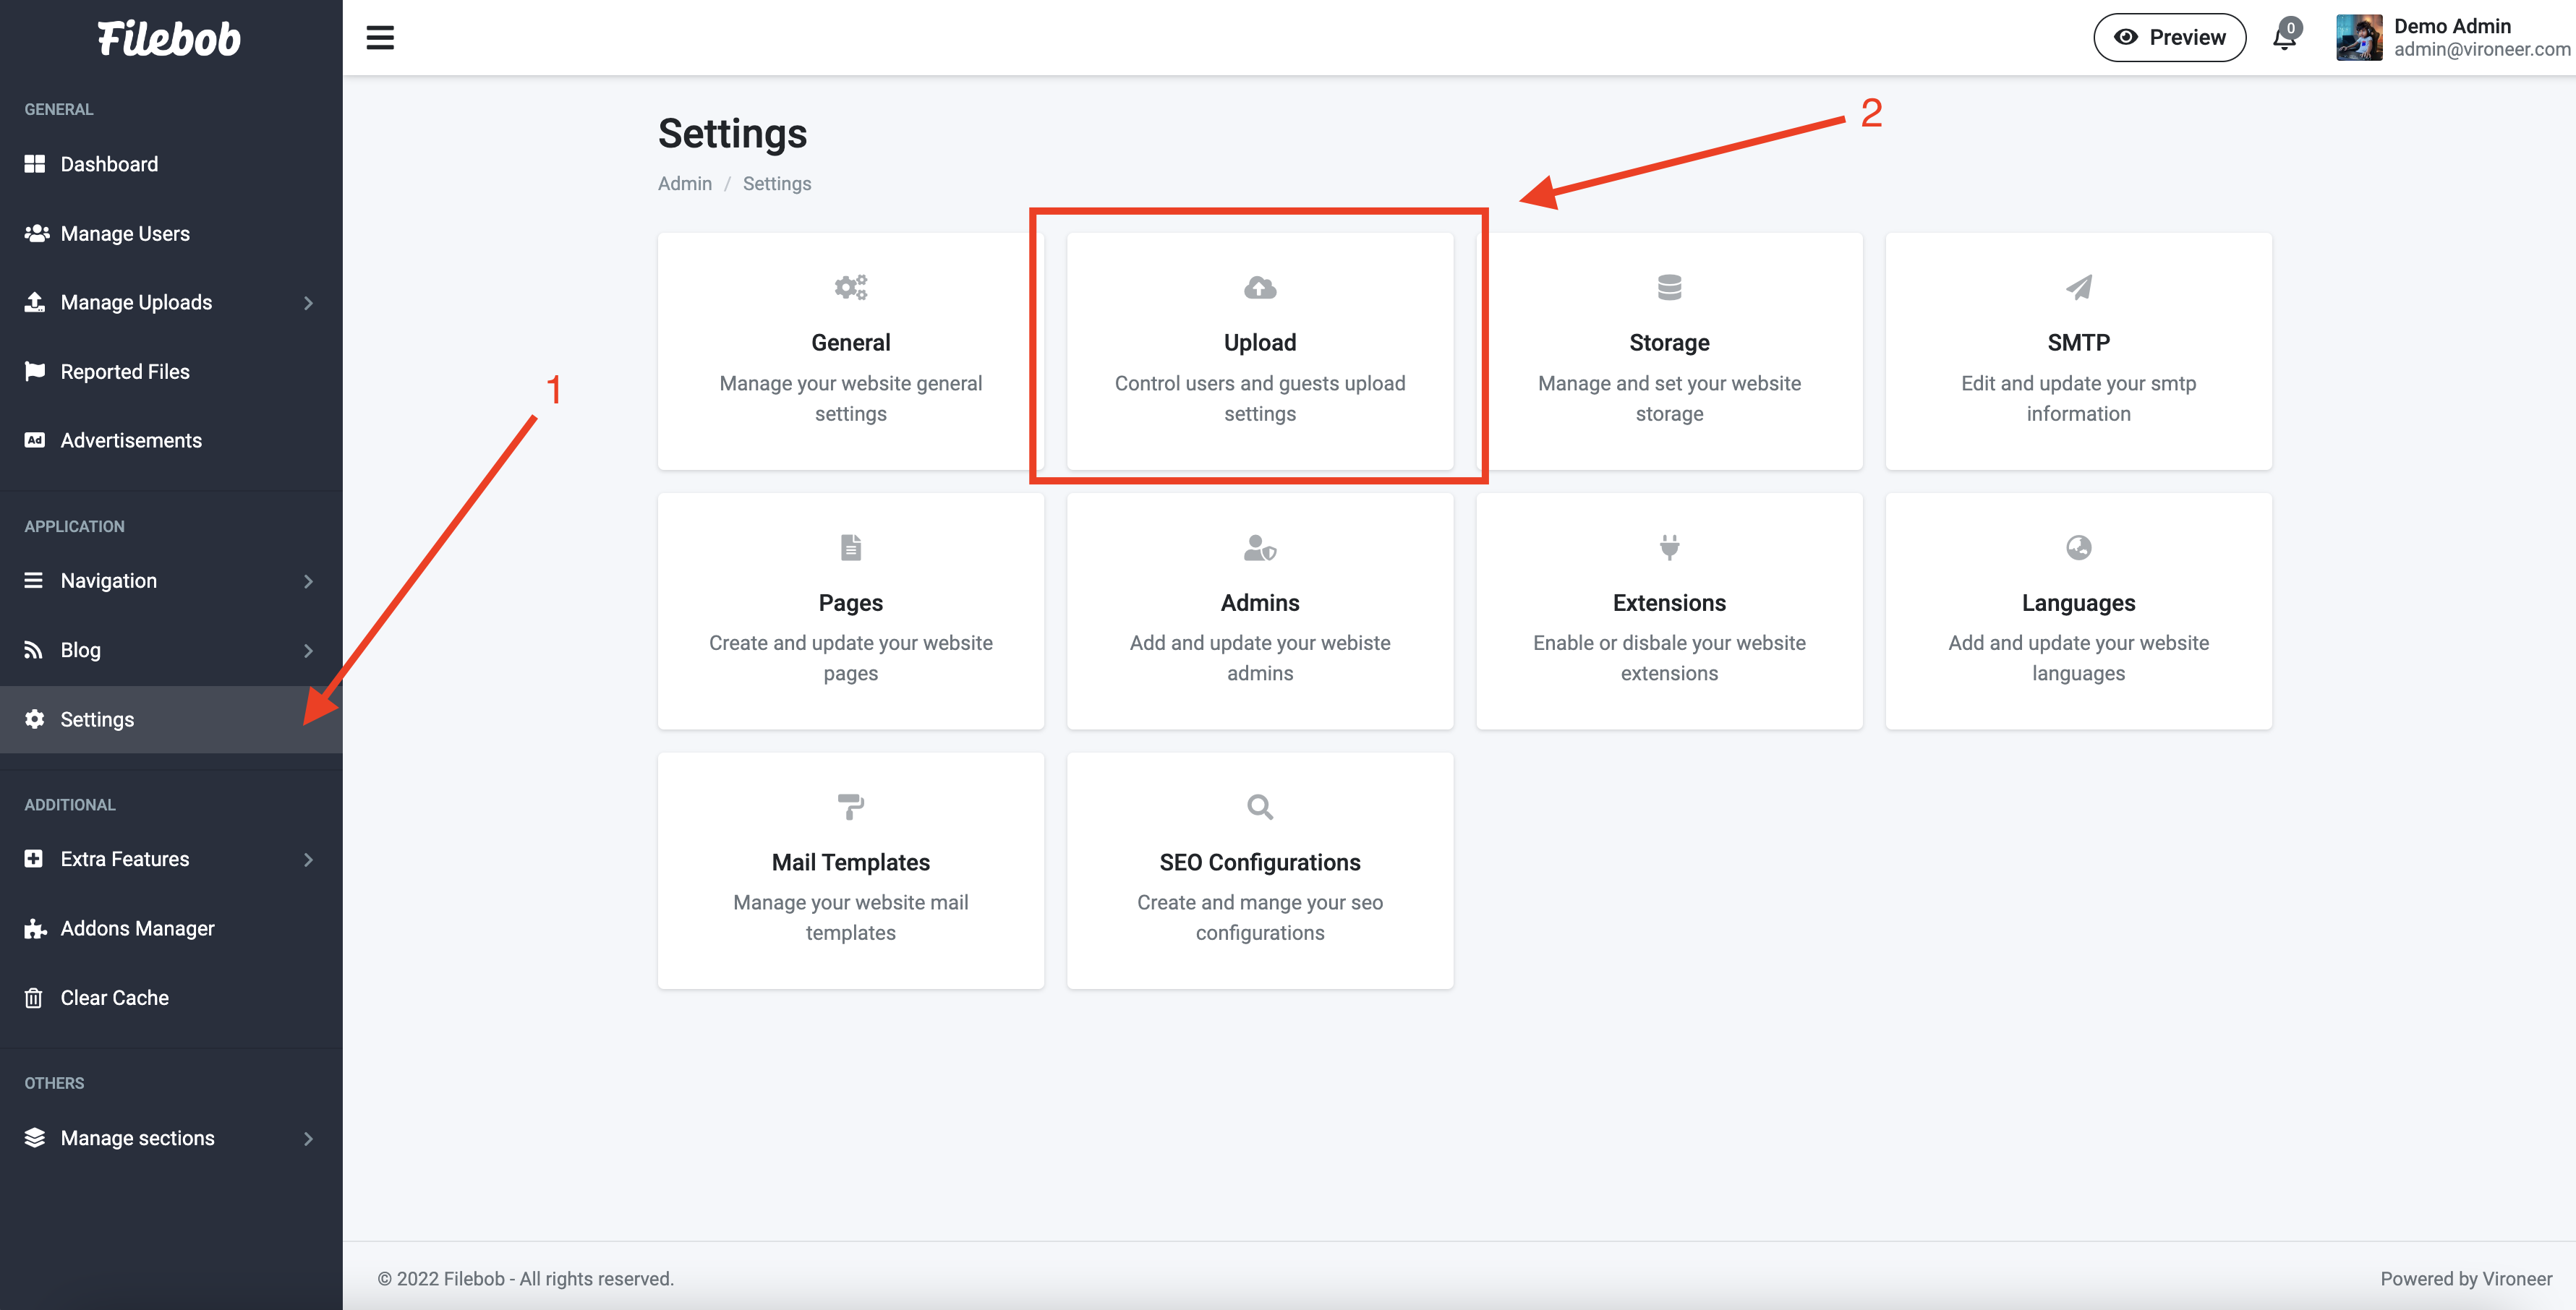
Storage Providers
Storage Section
Go to Admin panel > Settings > storage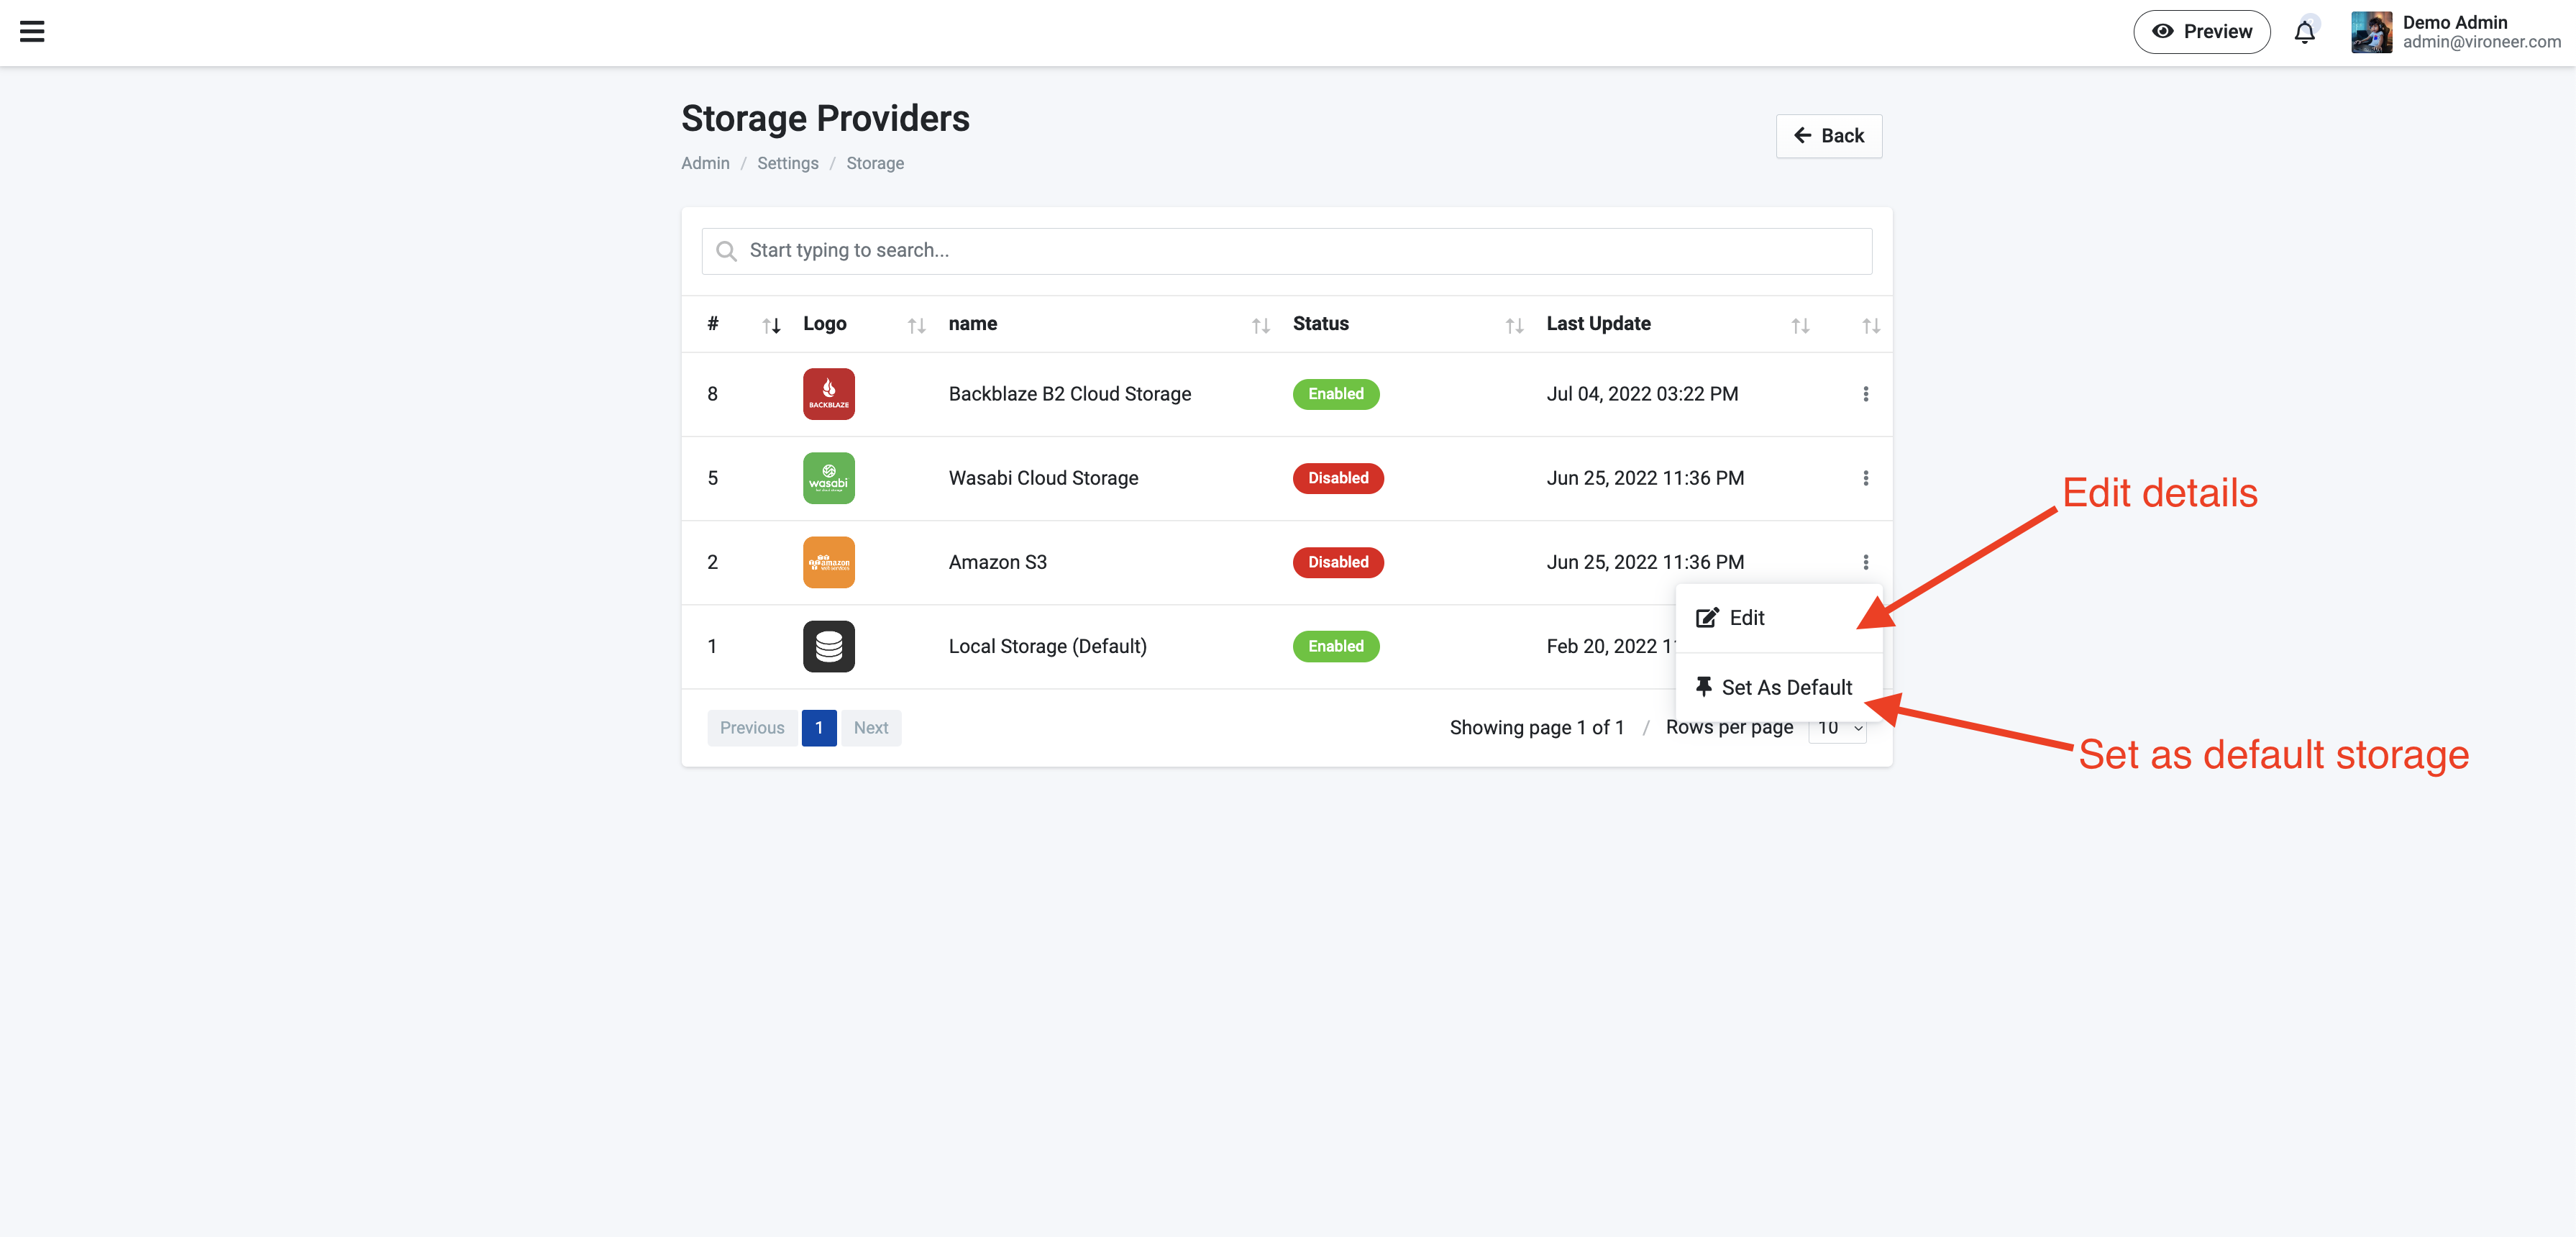
Amazon S3
Please watch this video to know how you can setUp amazon s3
Wasabi
Please watch this video to know how you can setUp wasabi details
Backblaze B2
Please watch this video to know how you can setUp Backblaze B2 details
SMTP Details
SMTP Section
Go to Admin panel > Settings > Smtp
Update And Test
Enter your details and enable the SMTP so you can test it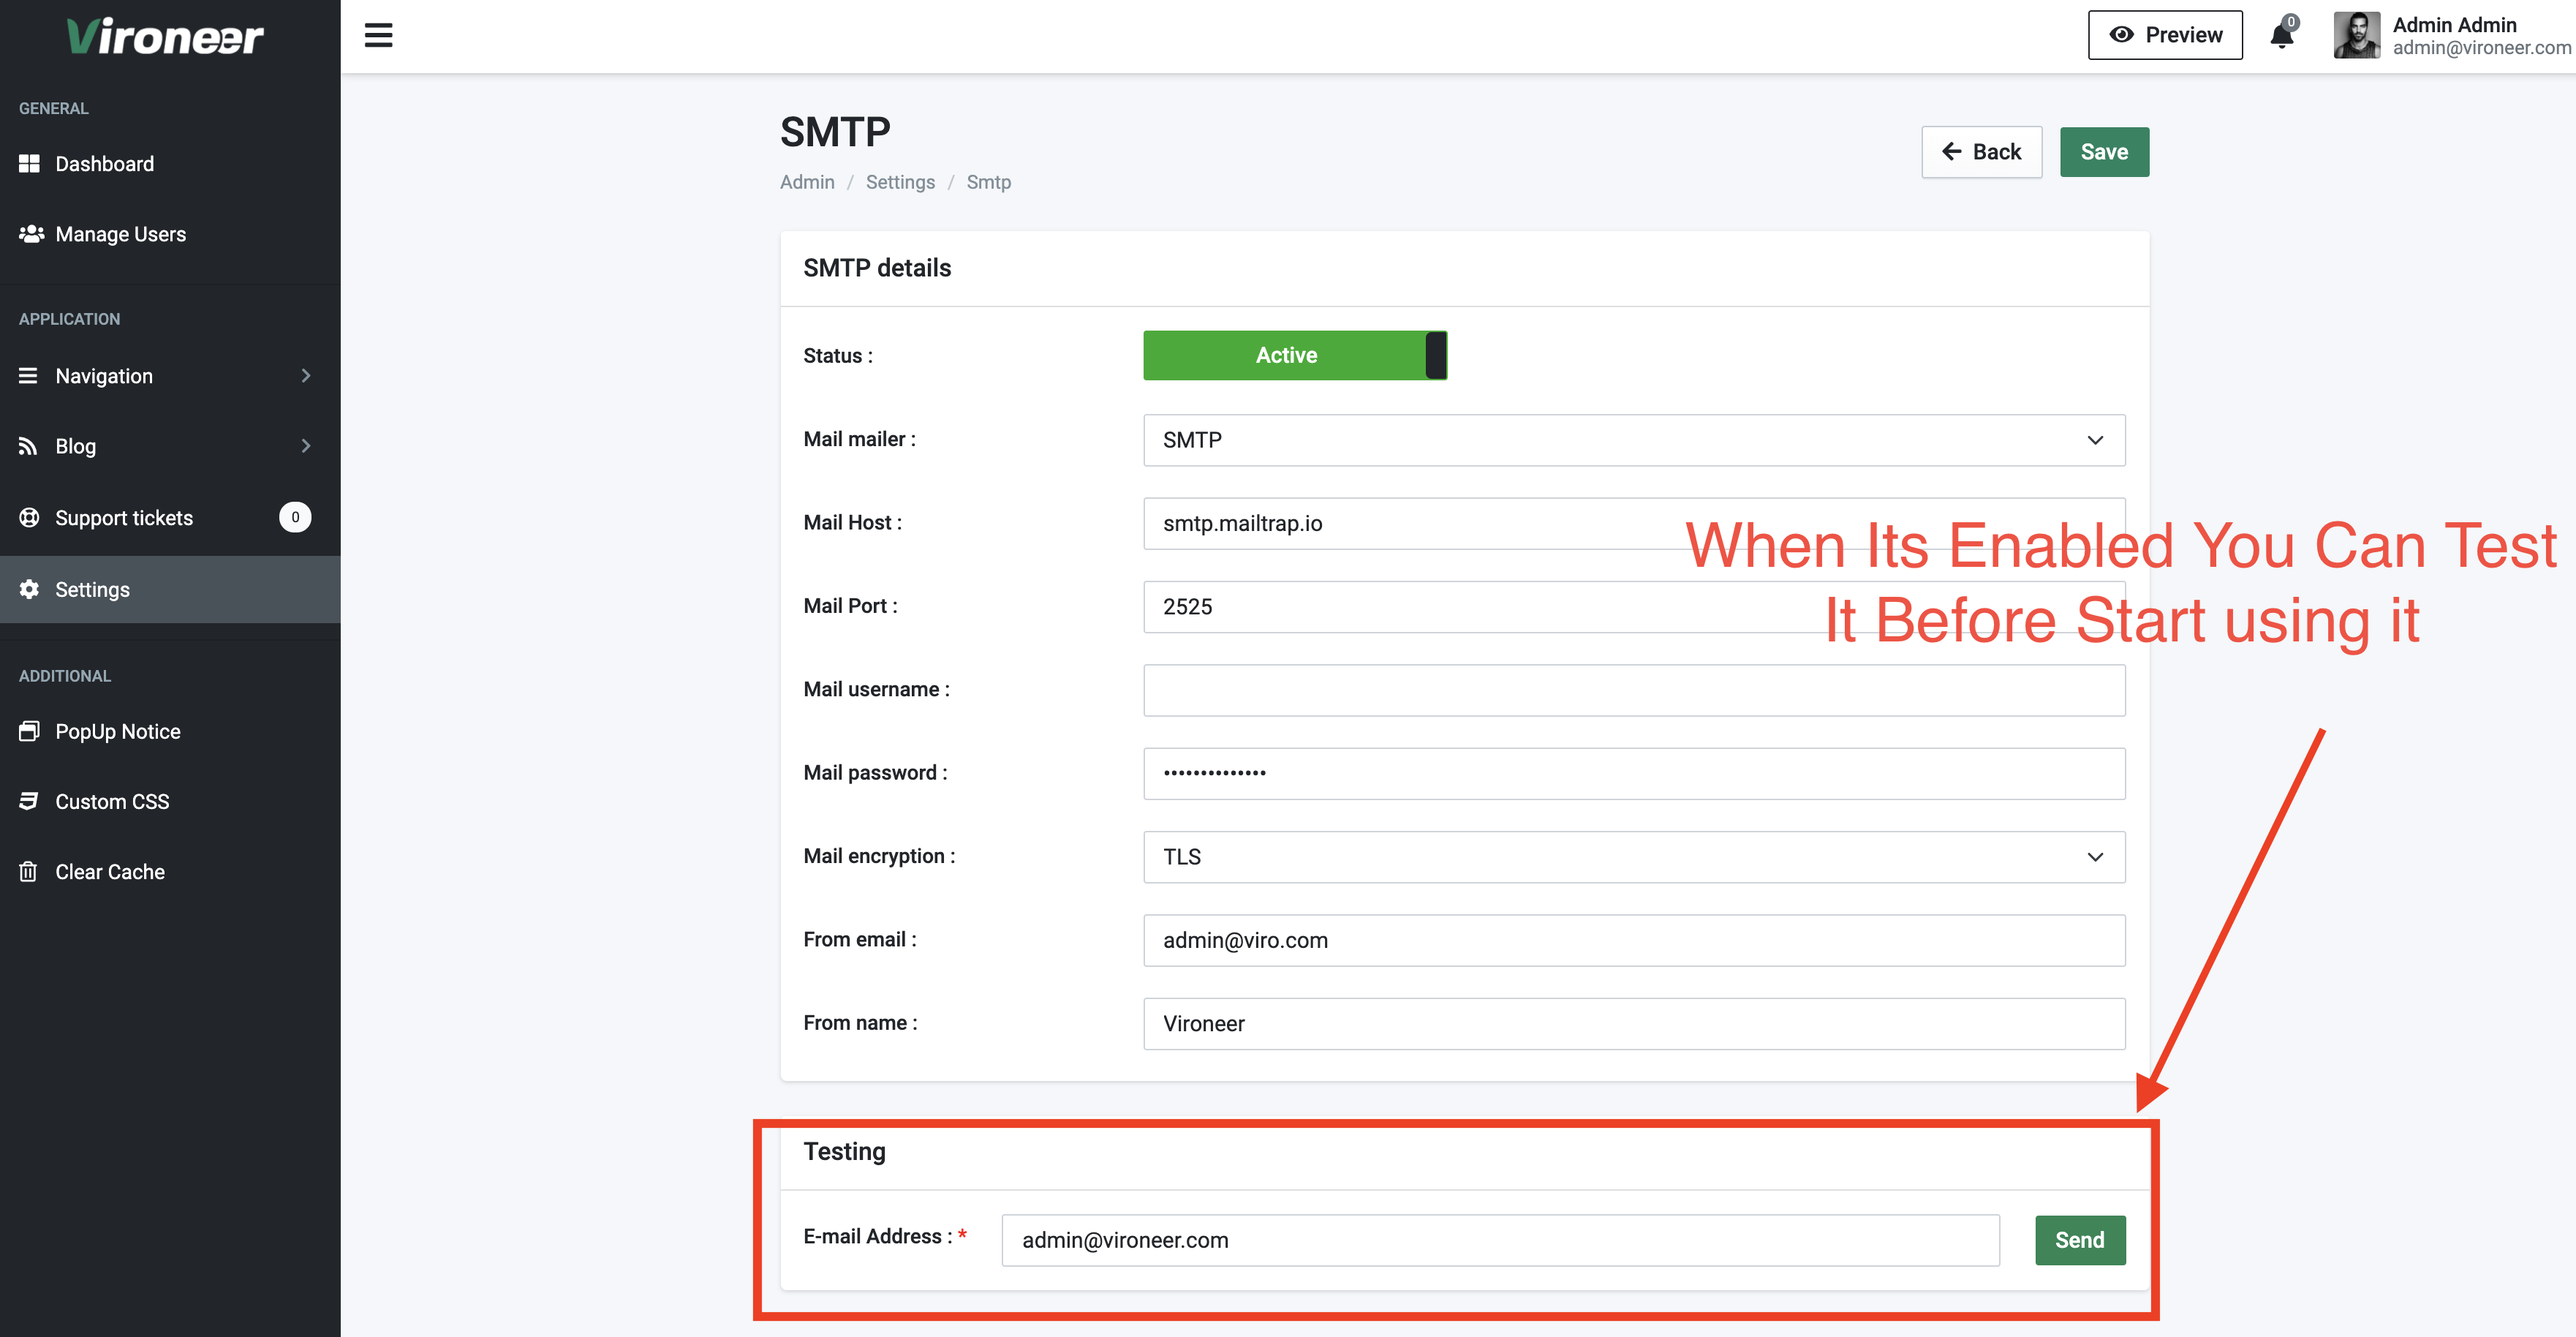
Manage Pages
Pages section
Go to Admin panel > Settings > Pages
Create a new page
Click on the plus button to create new page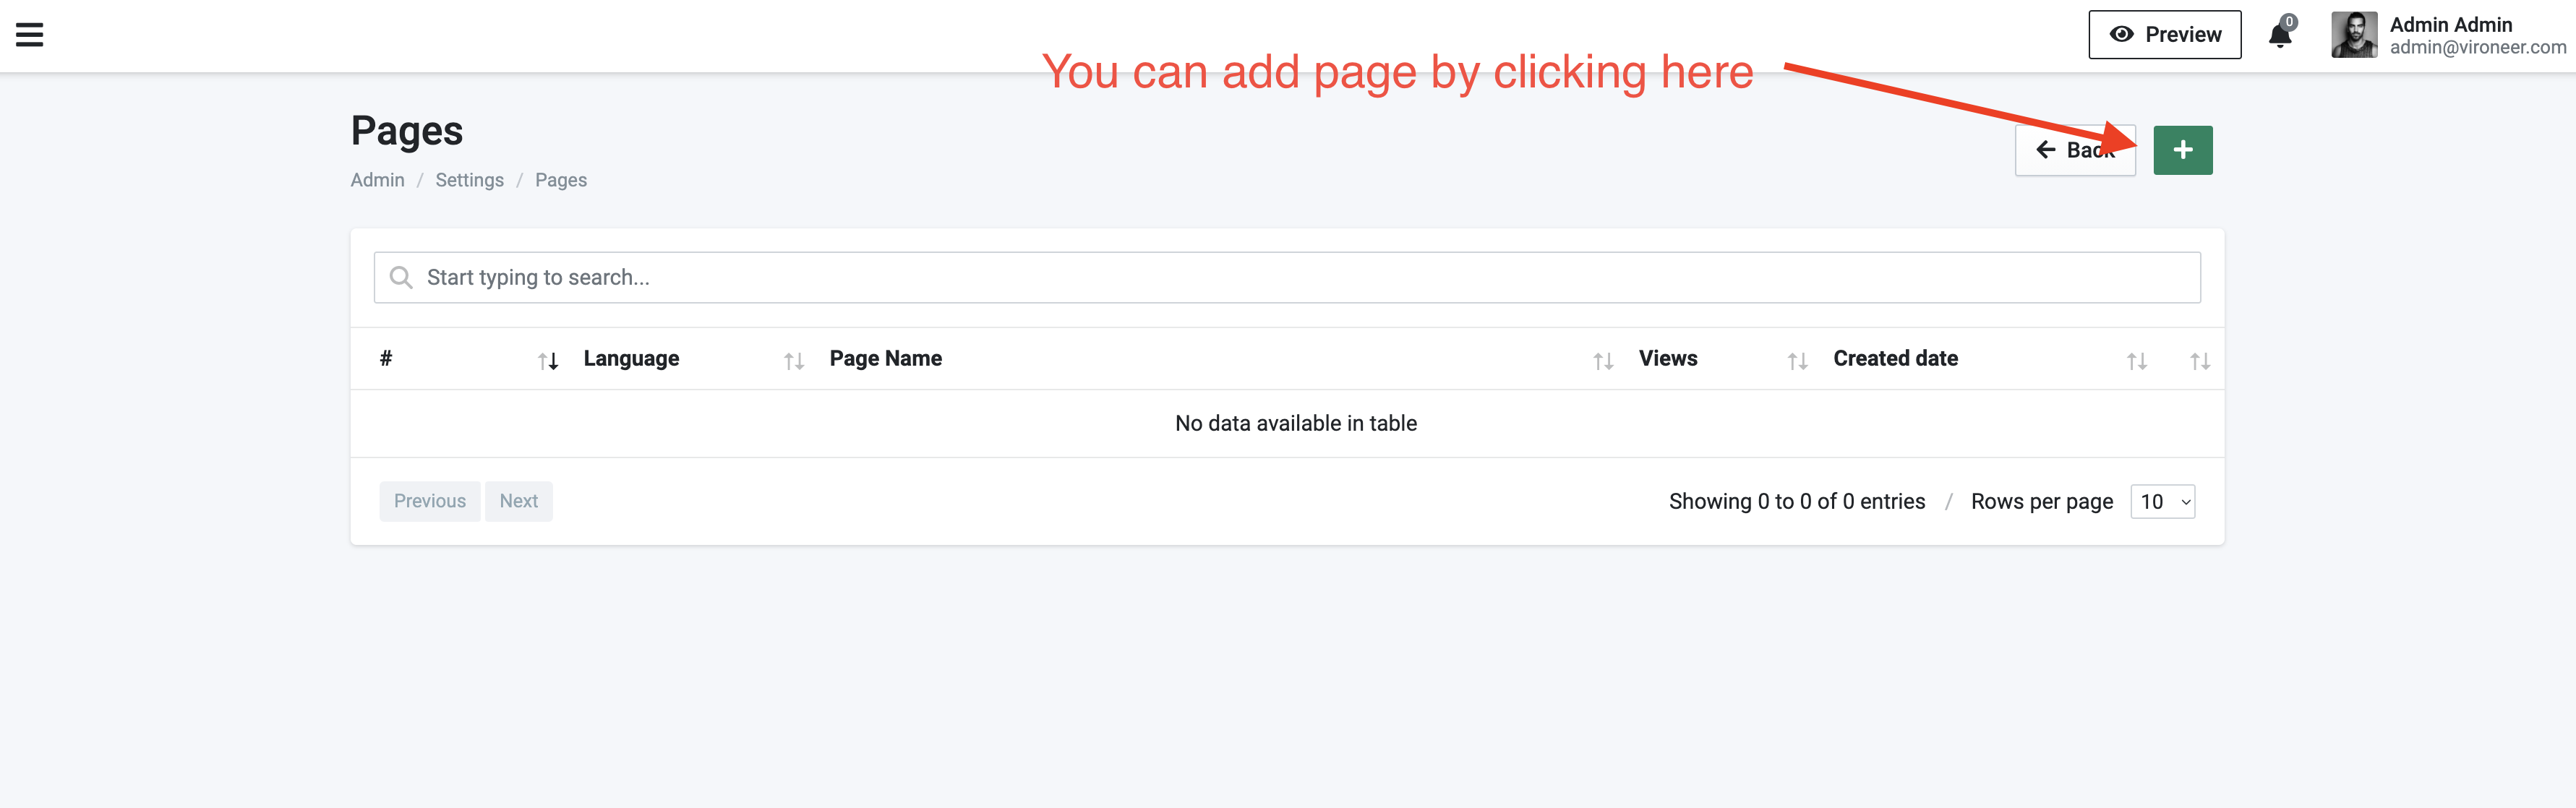
Page details
Enter your page details and click save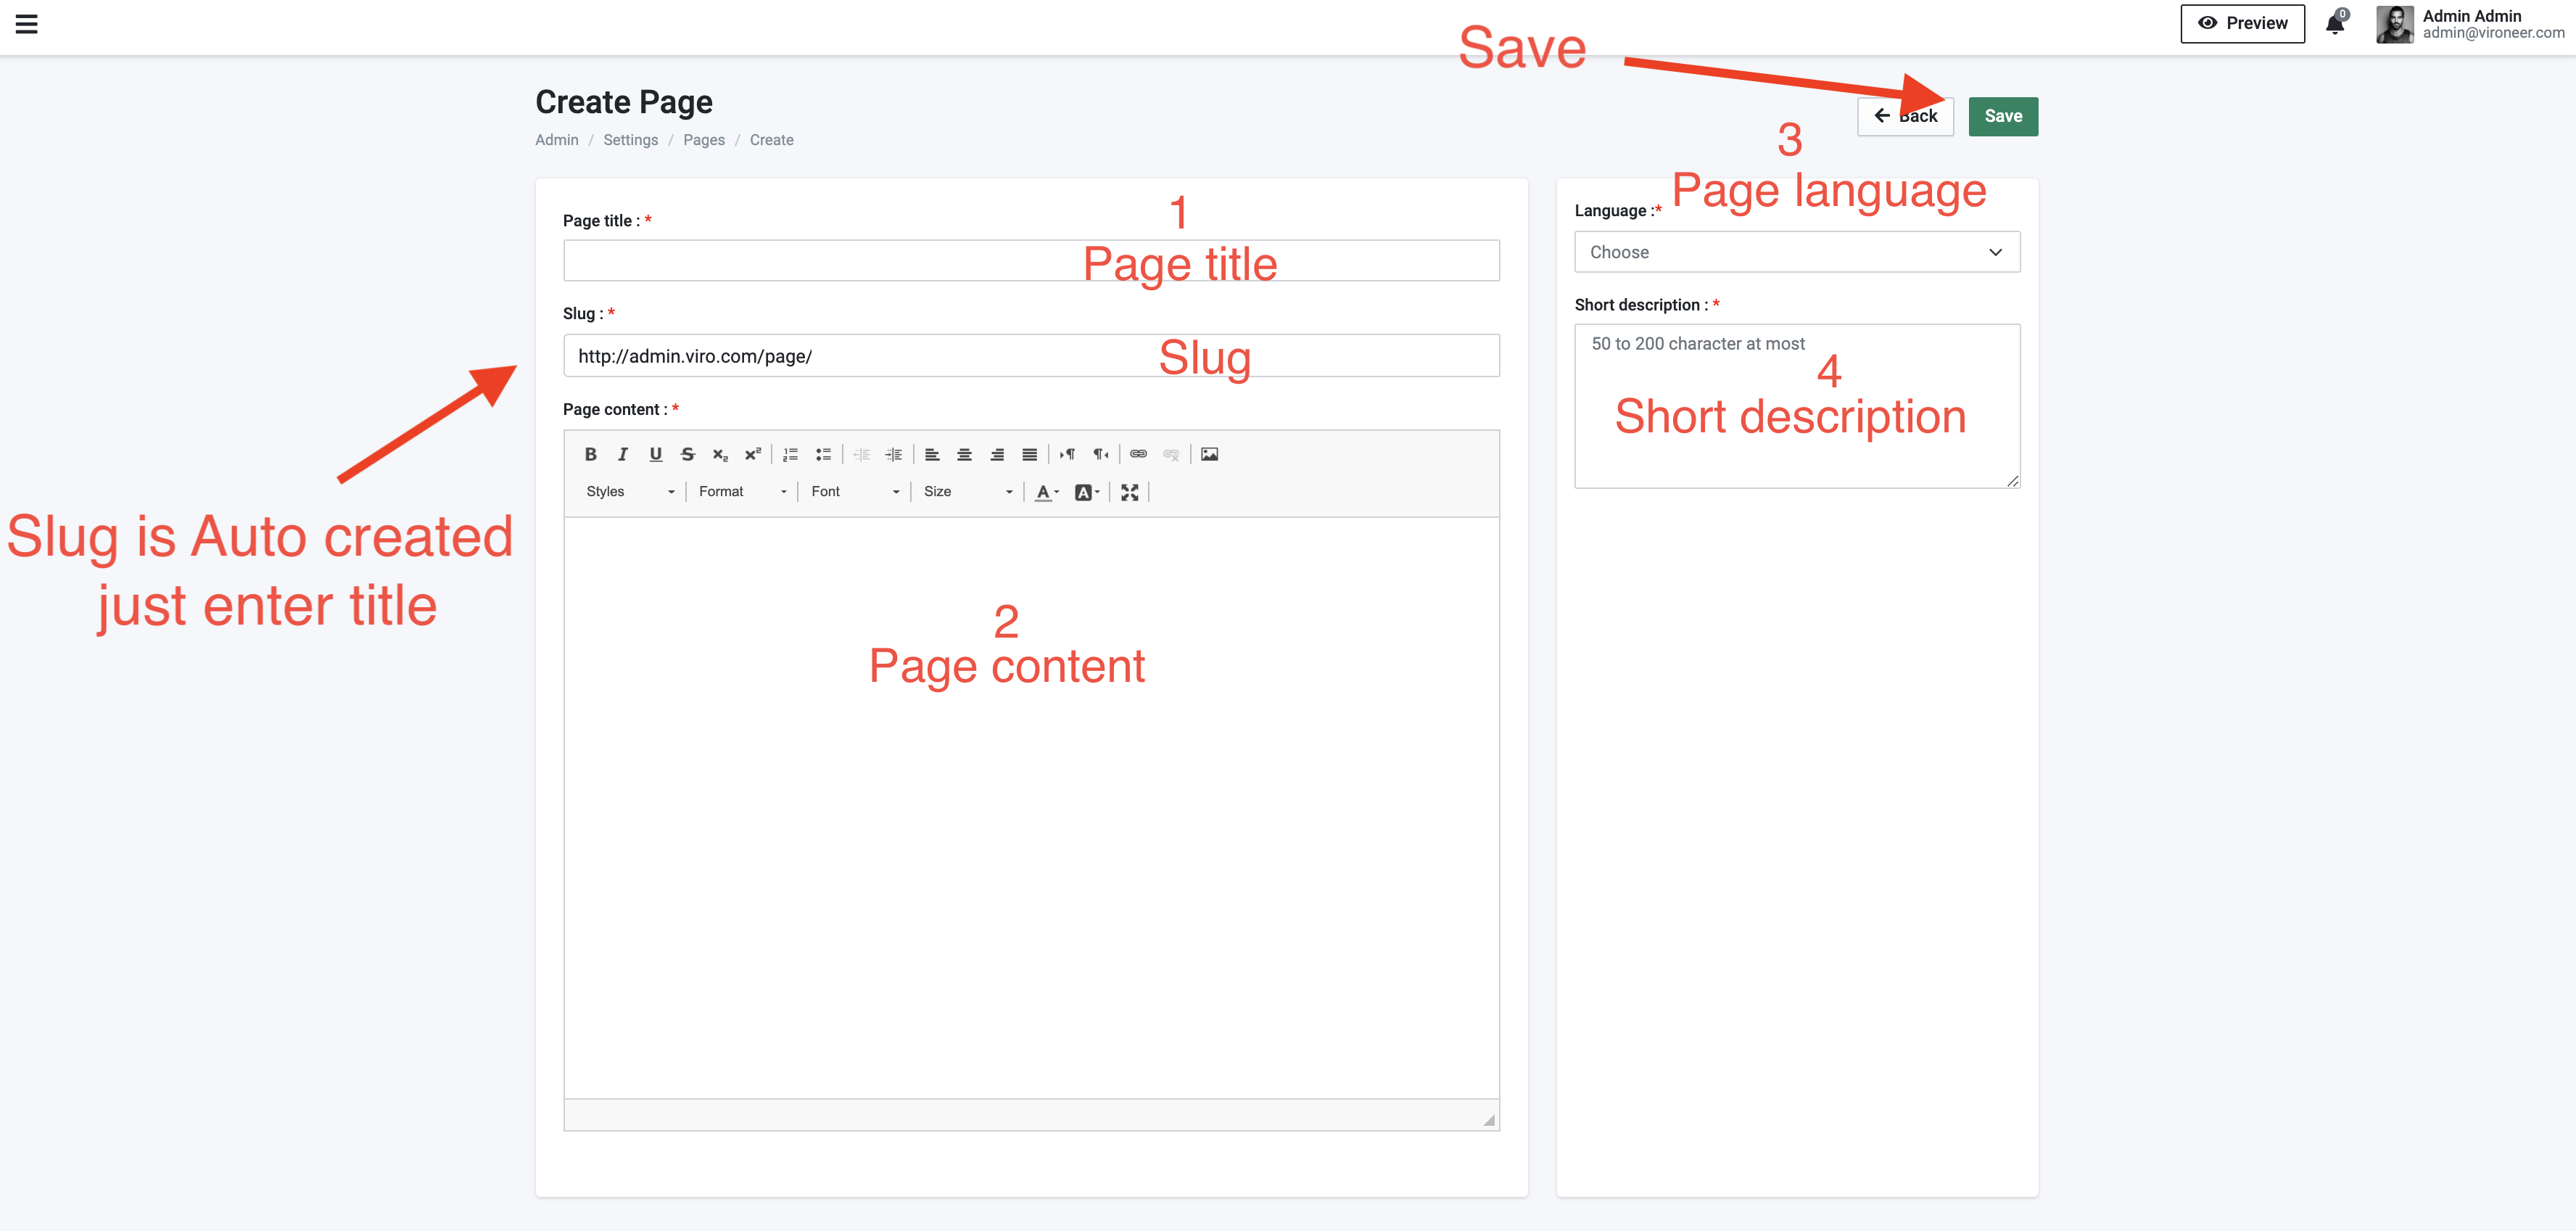
Manage Admins
Admins section
Go to Admin panel > Settings > Admins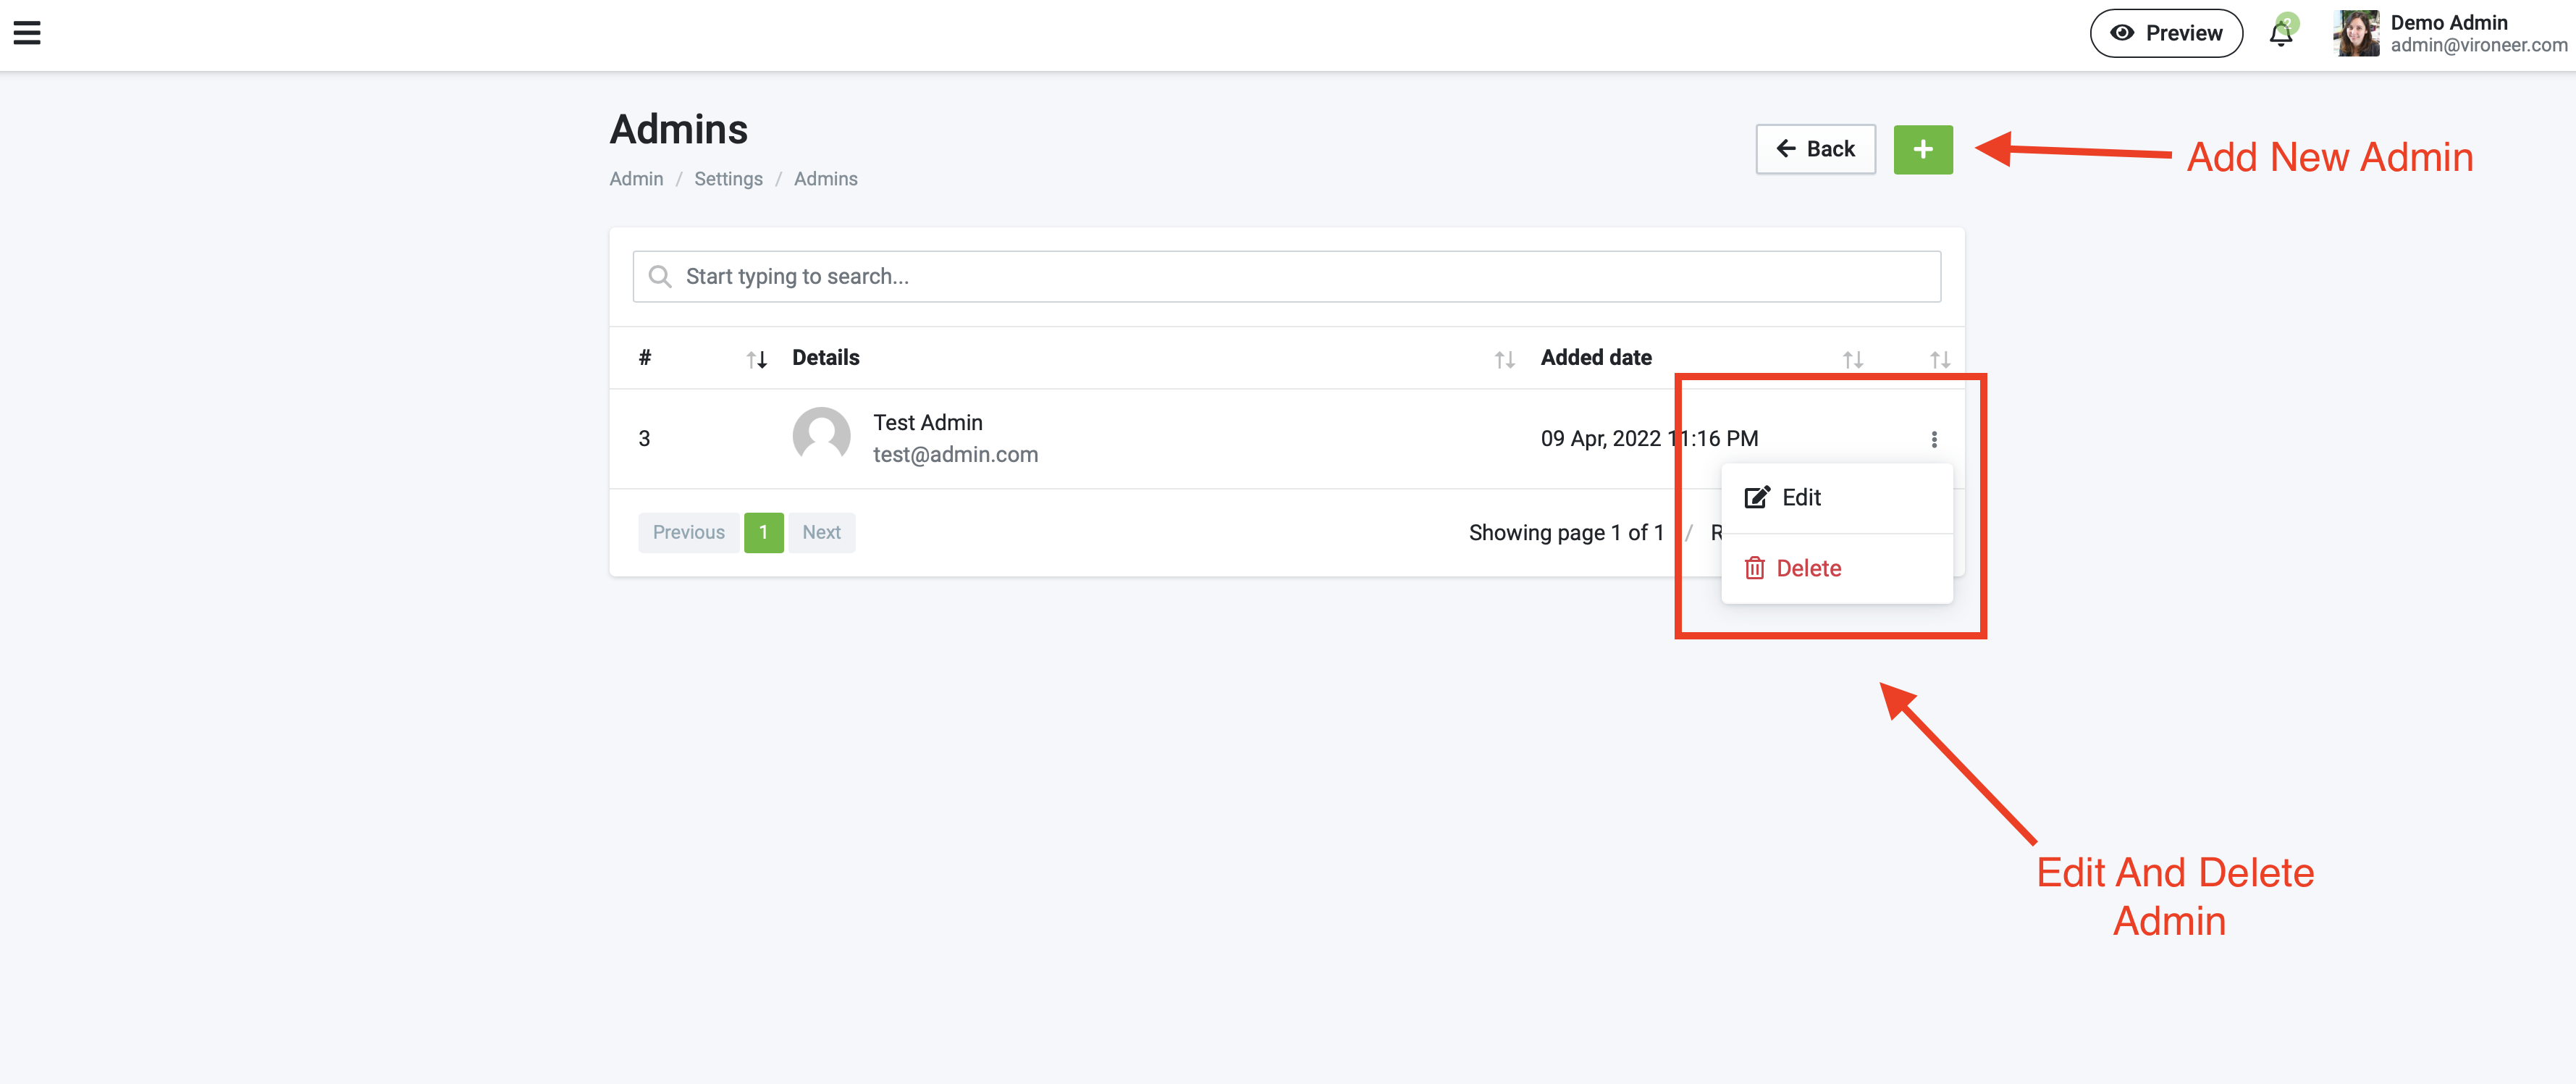
Create new admin
Enter details to create new admin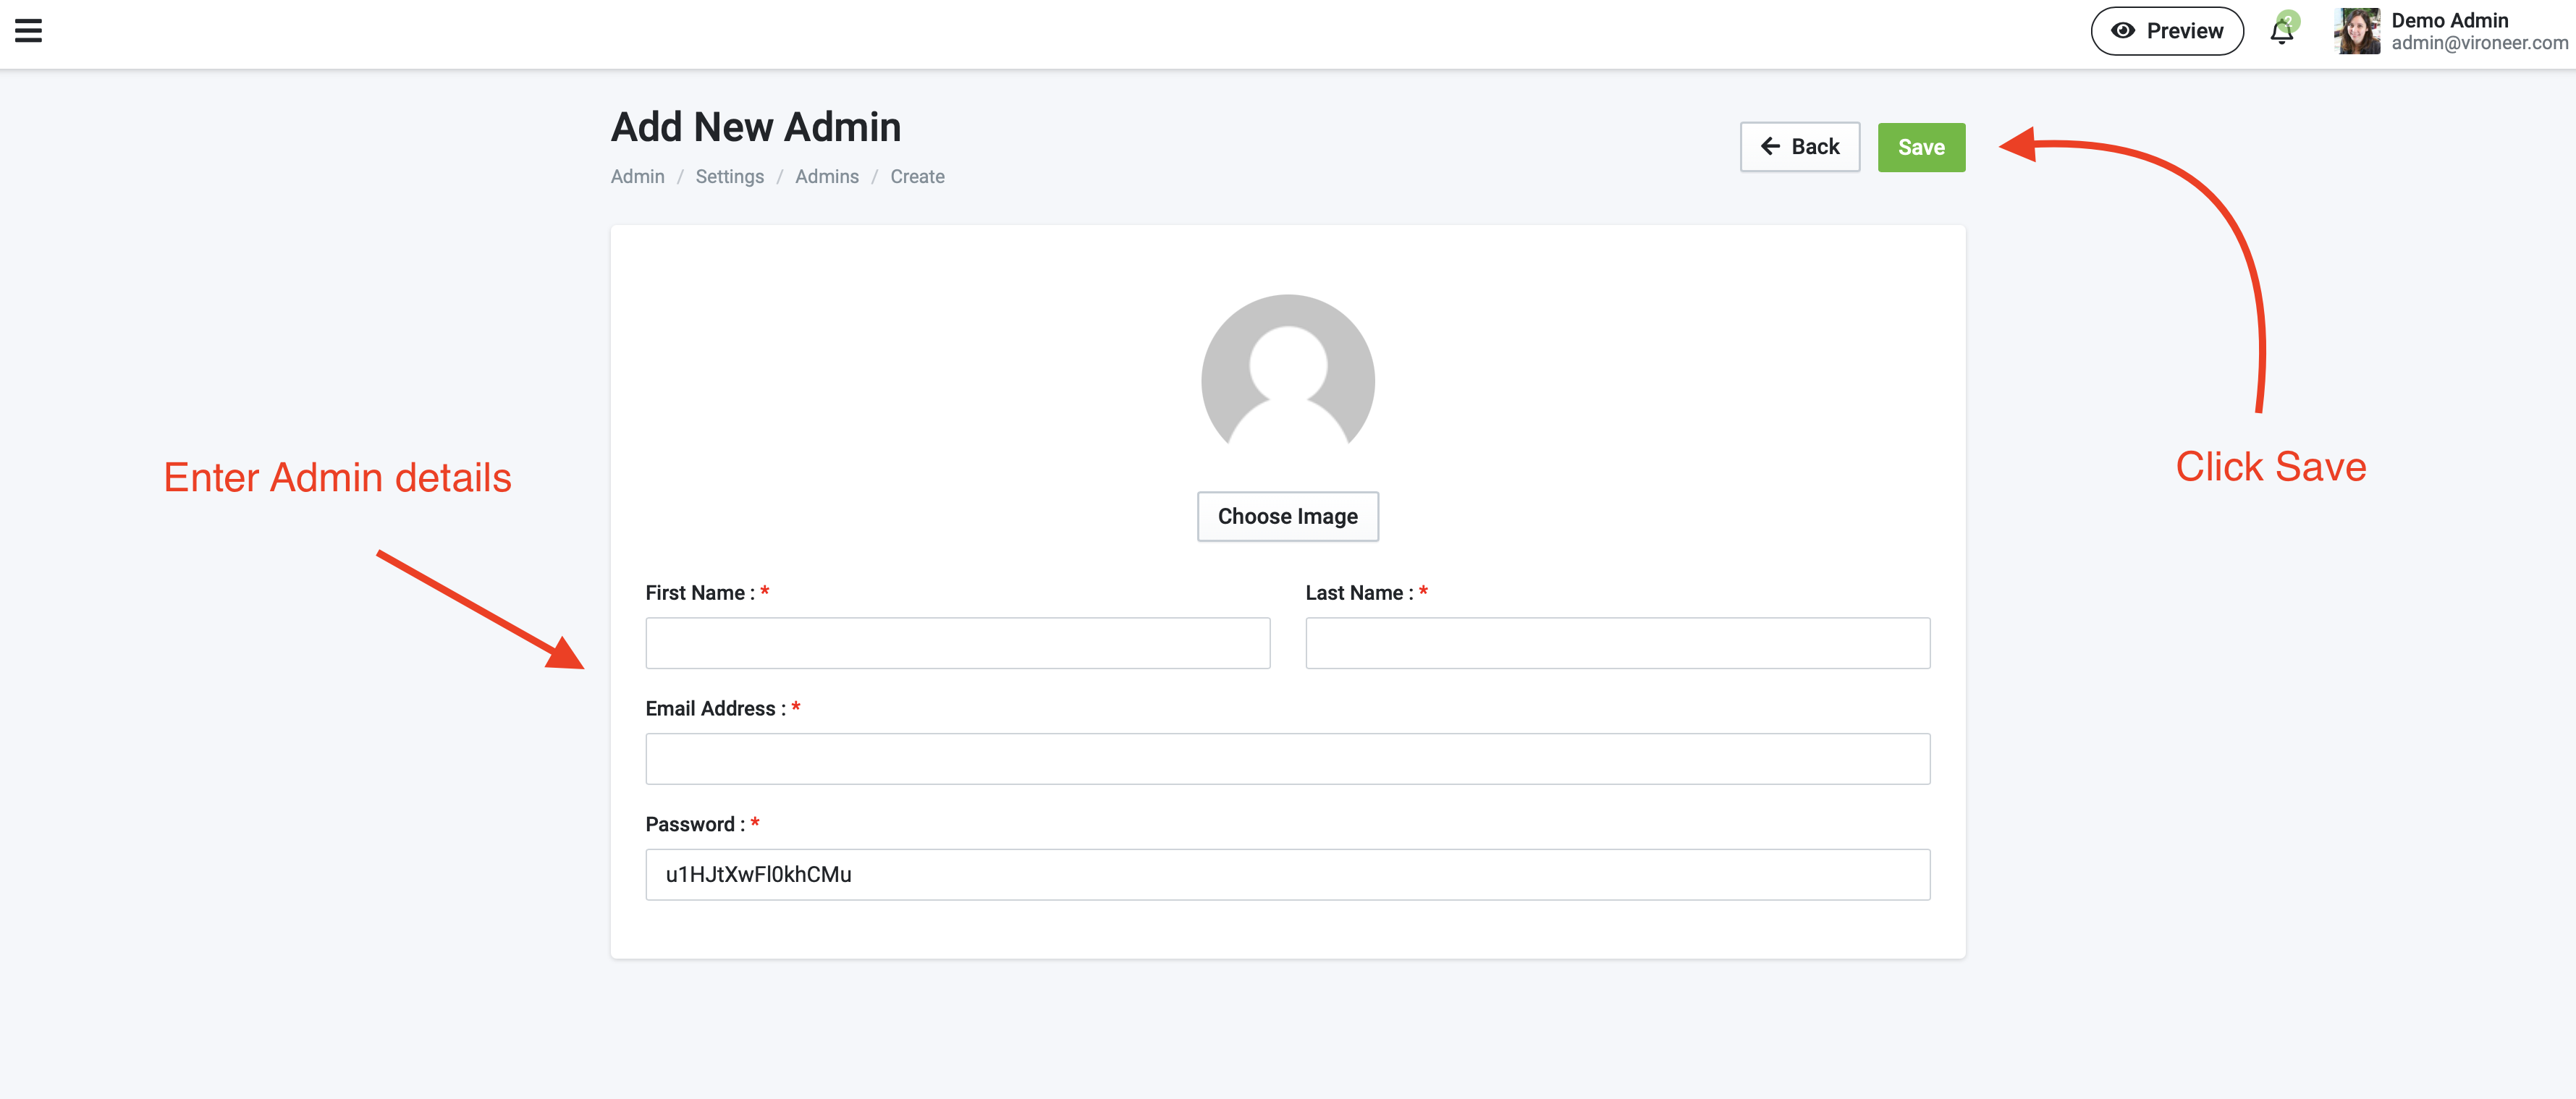
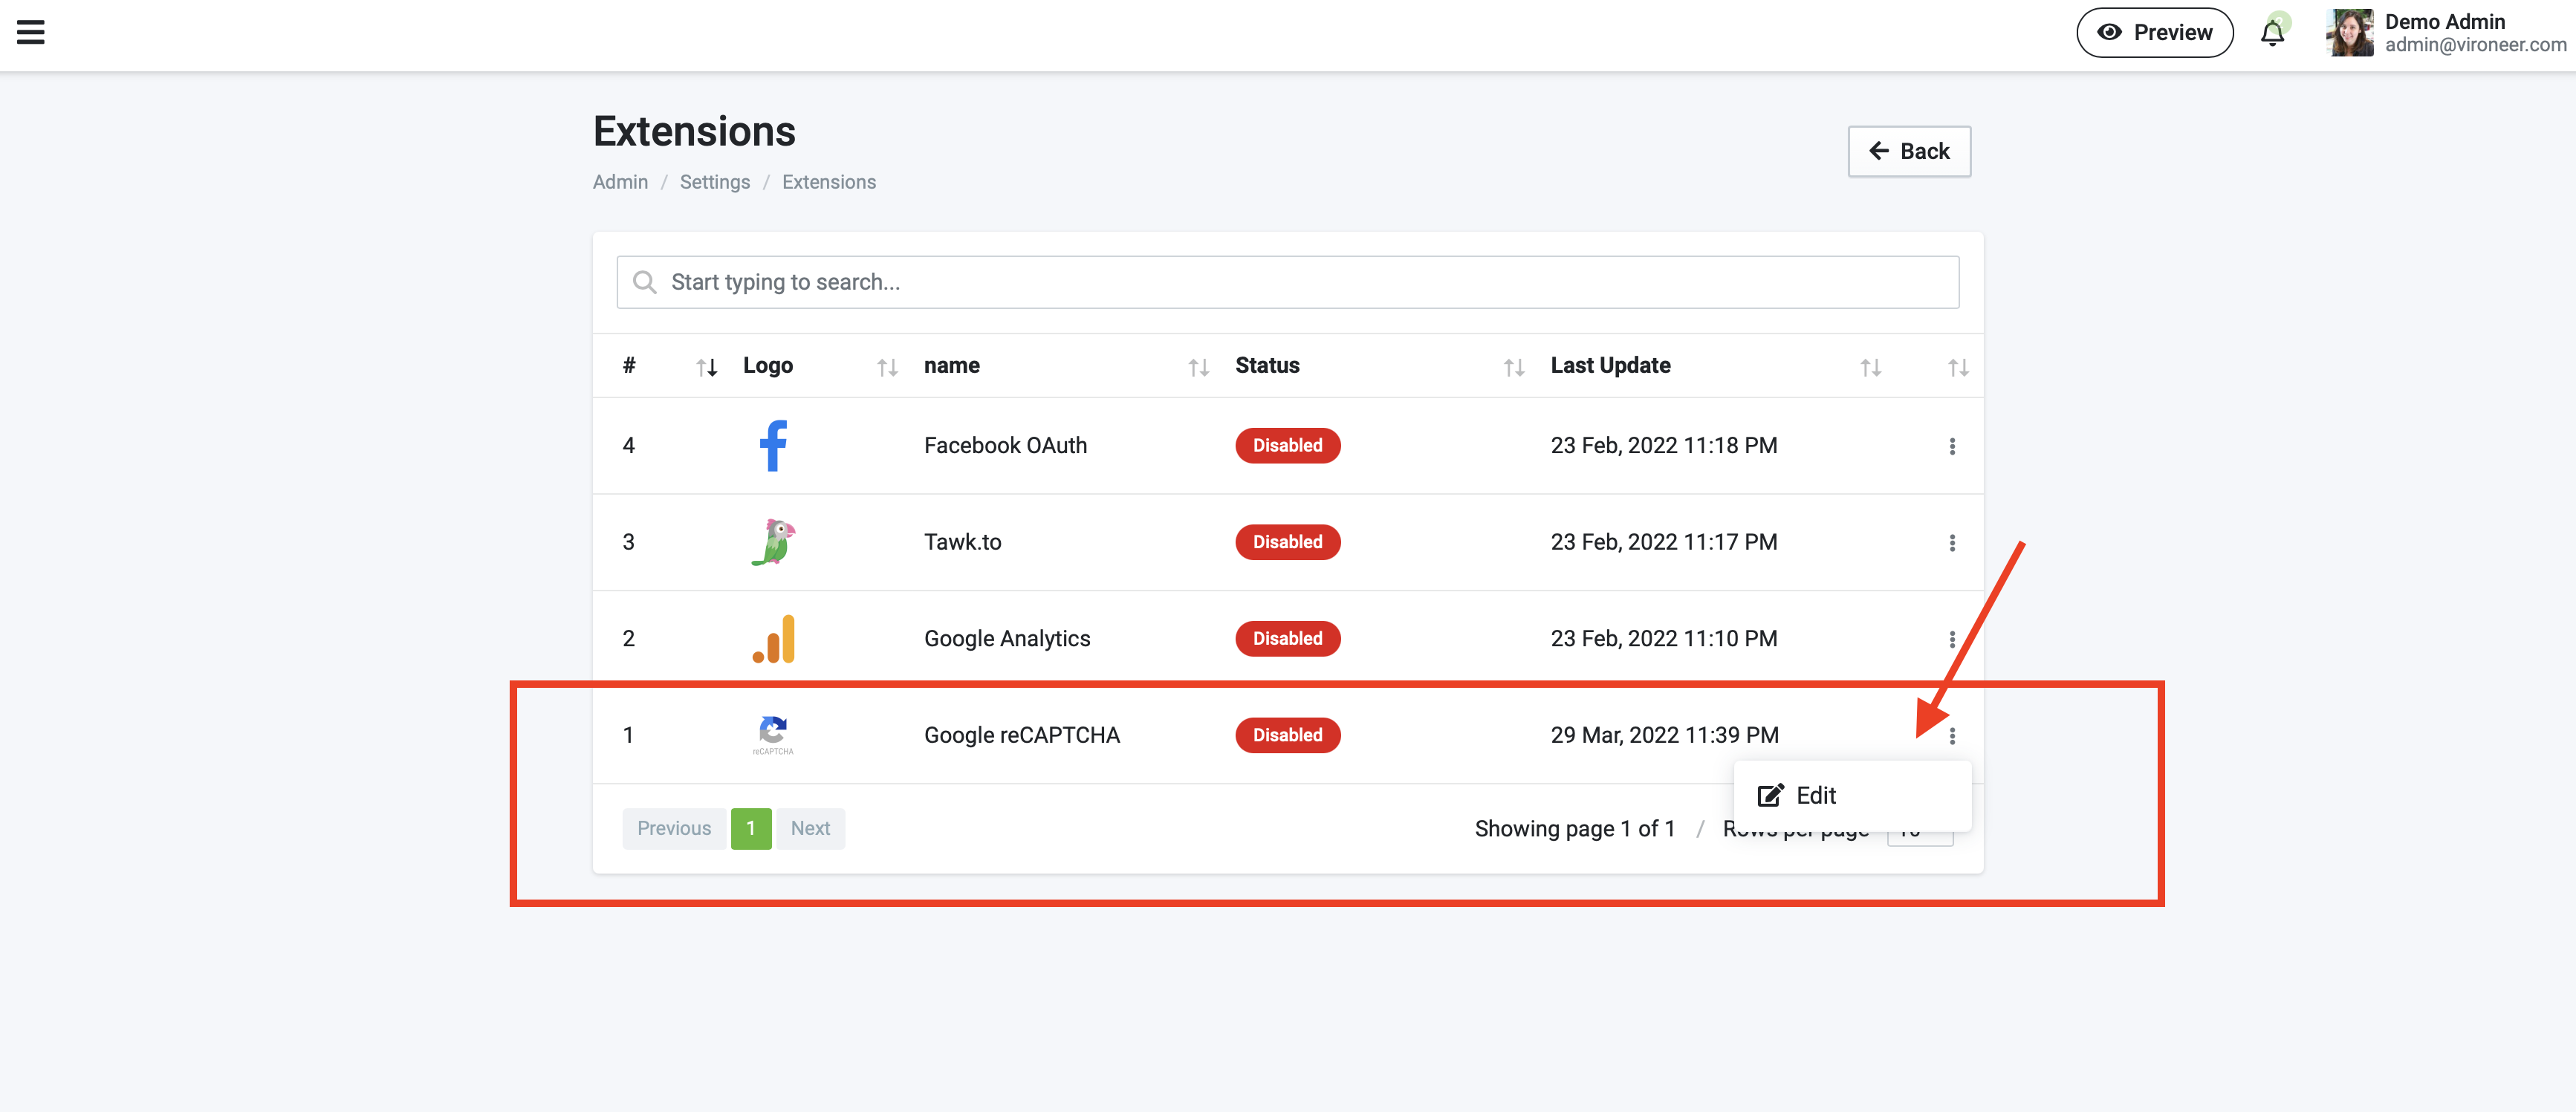
Manage Extensions
Extensions section
Go to Admin panel > Settings > Extensions
- How to get your Google Analytics tracking code : Click here
- How to get Facebook OAuth Api keys : Click here
- How to setup Google reCAPTCHA scroll down to Google reCAPTCHA section
Tawk.to
Go to https://www.tawk.to and login or create account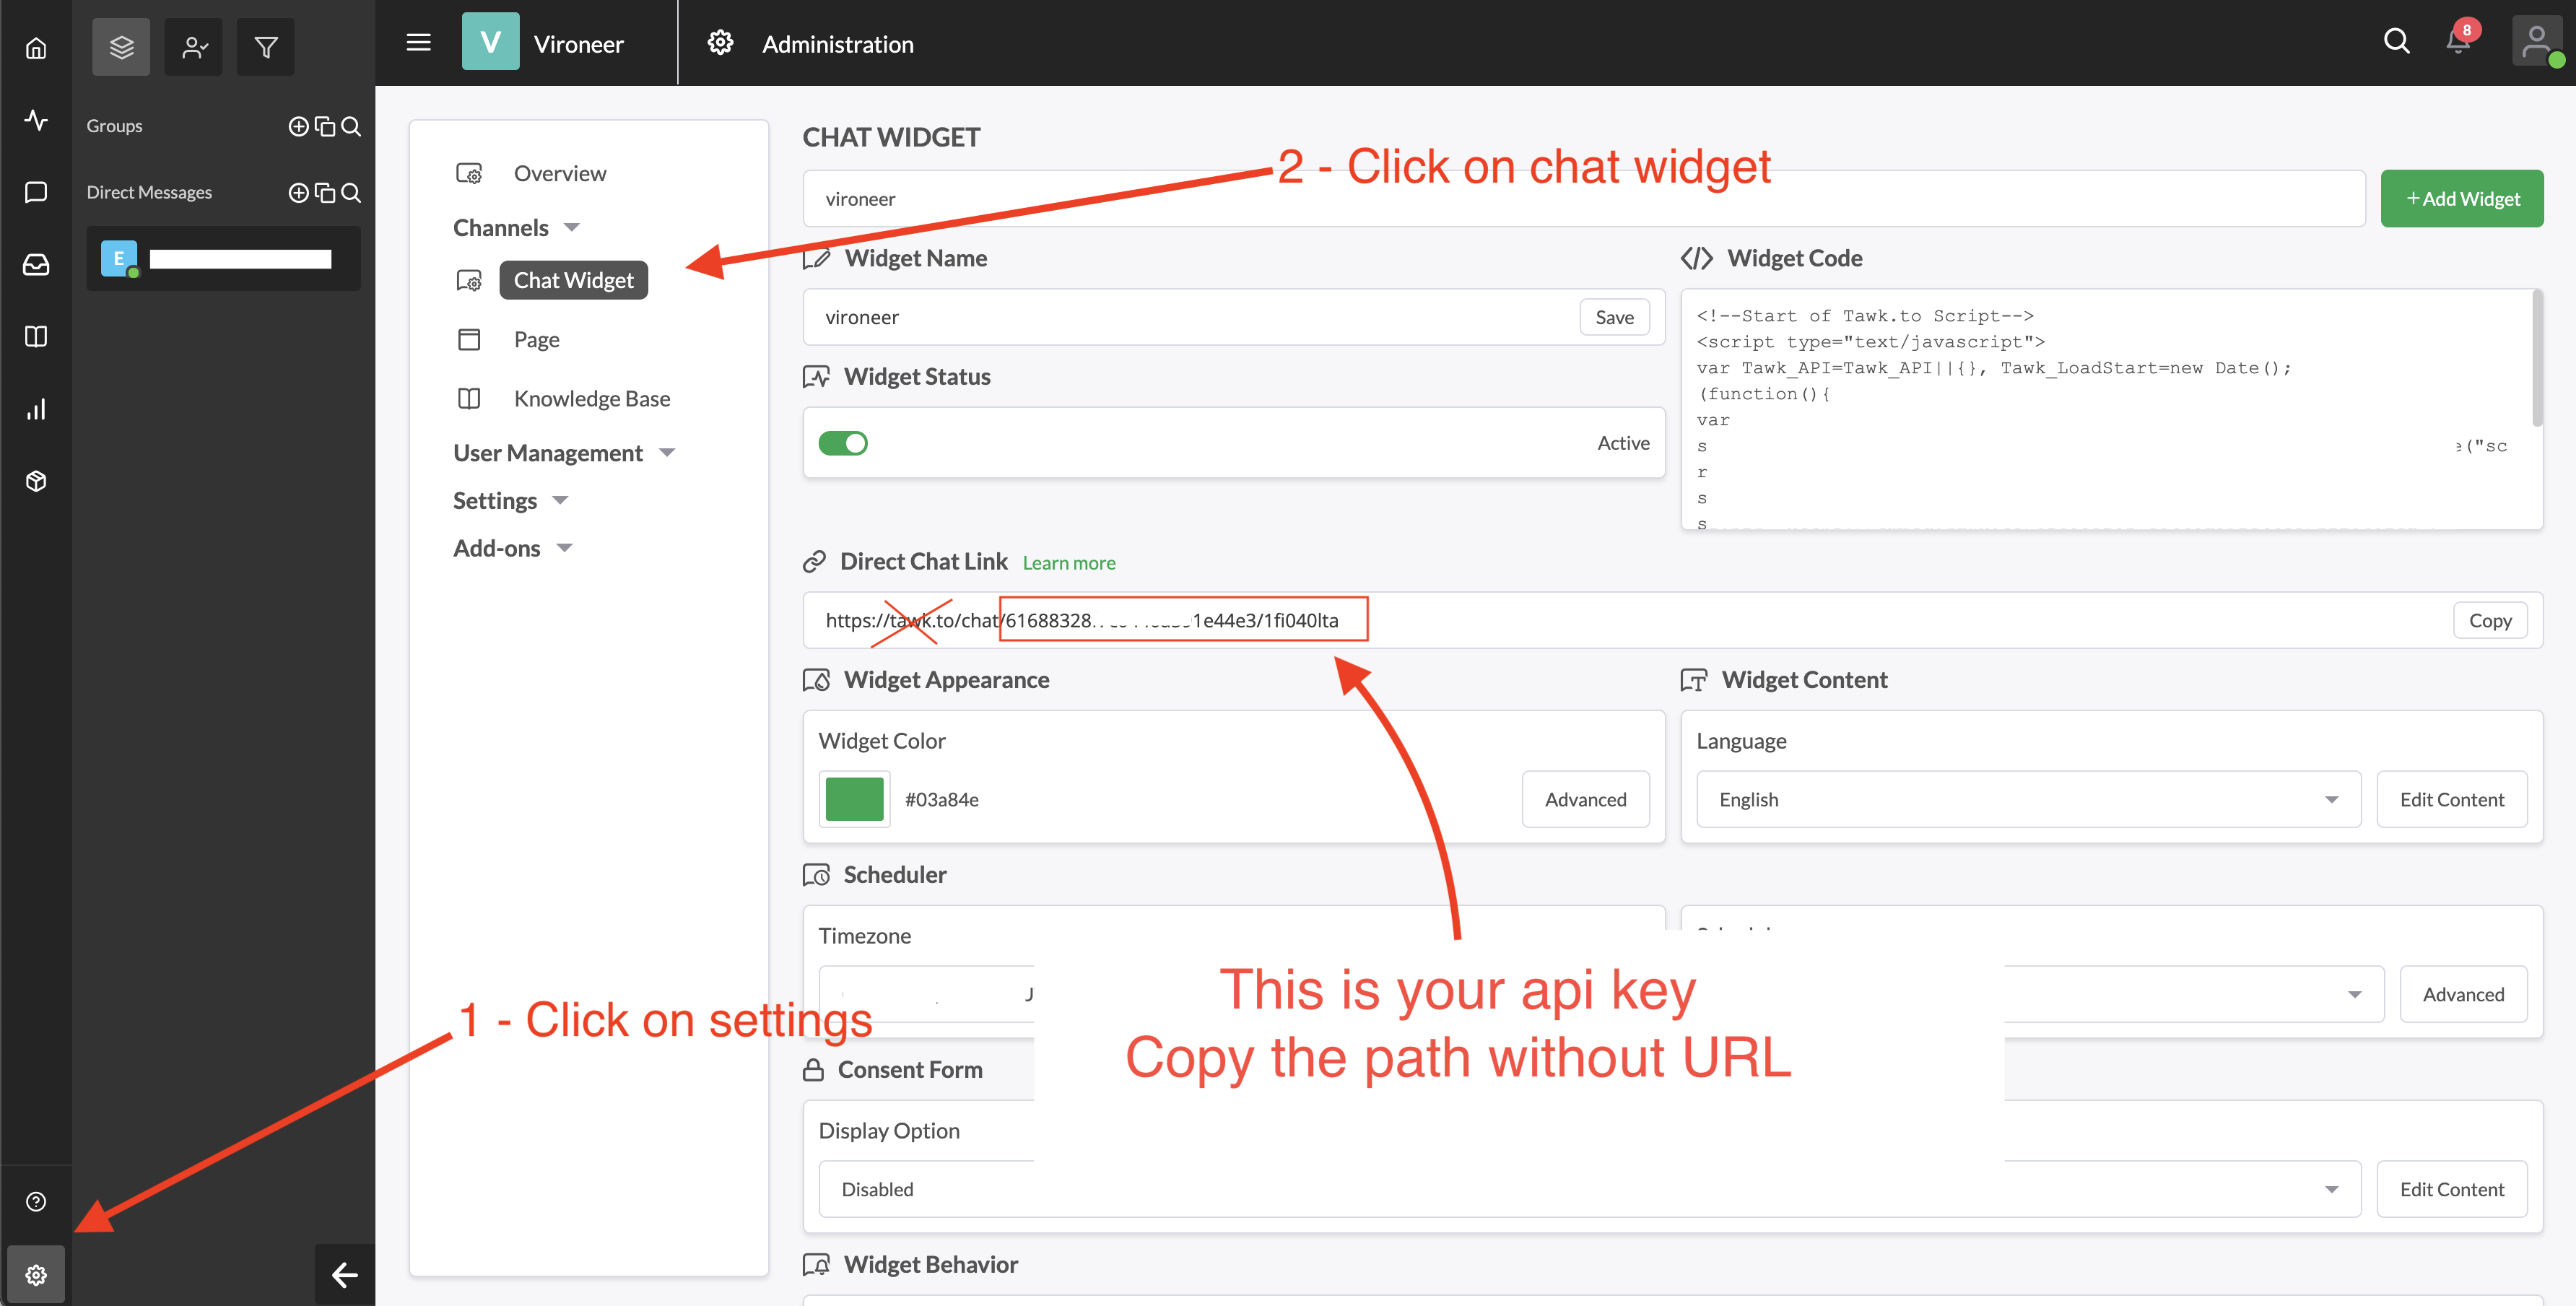
Edit Tawk.to details
Go to Admin panel > Settings > Extensions > Tawk.to
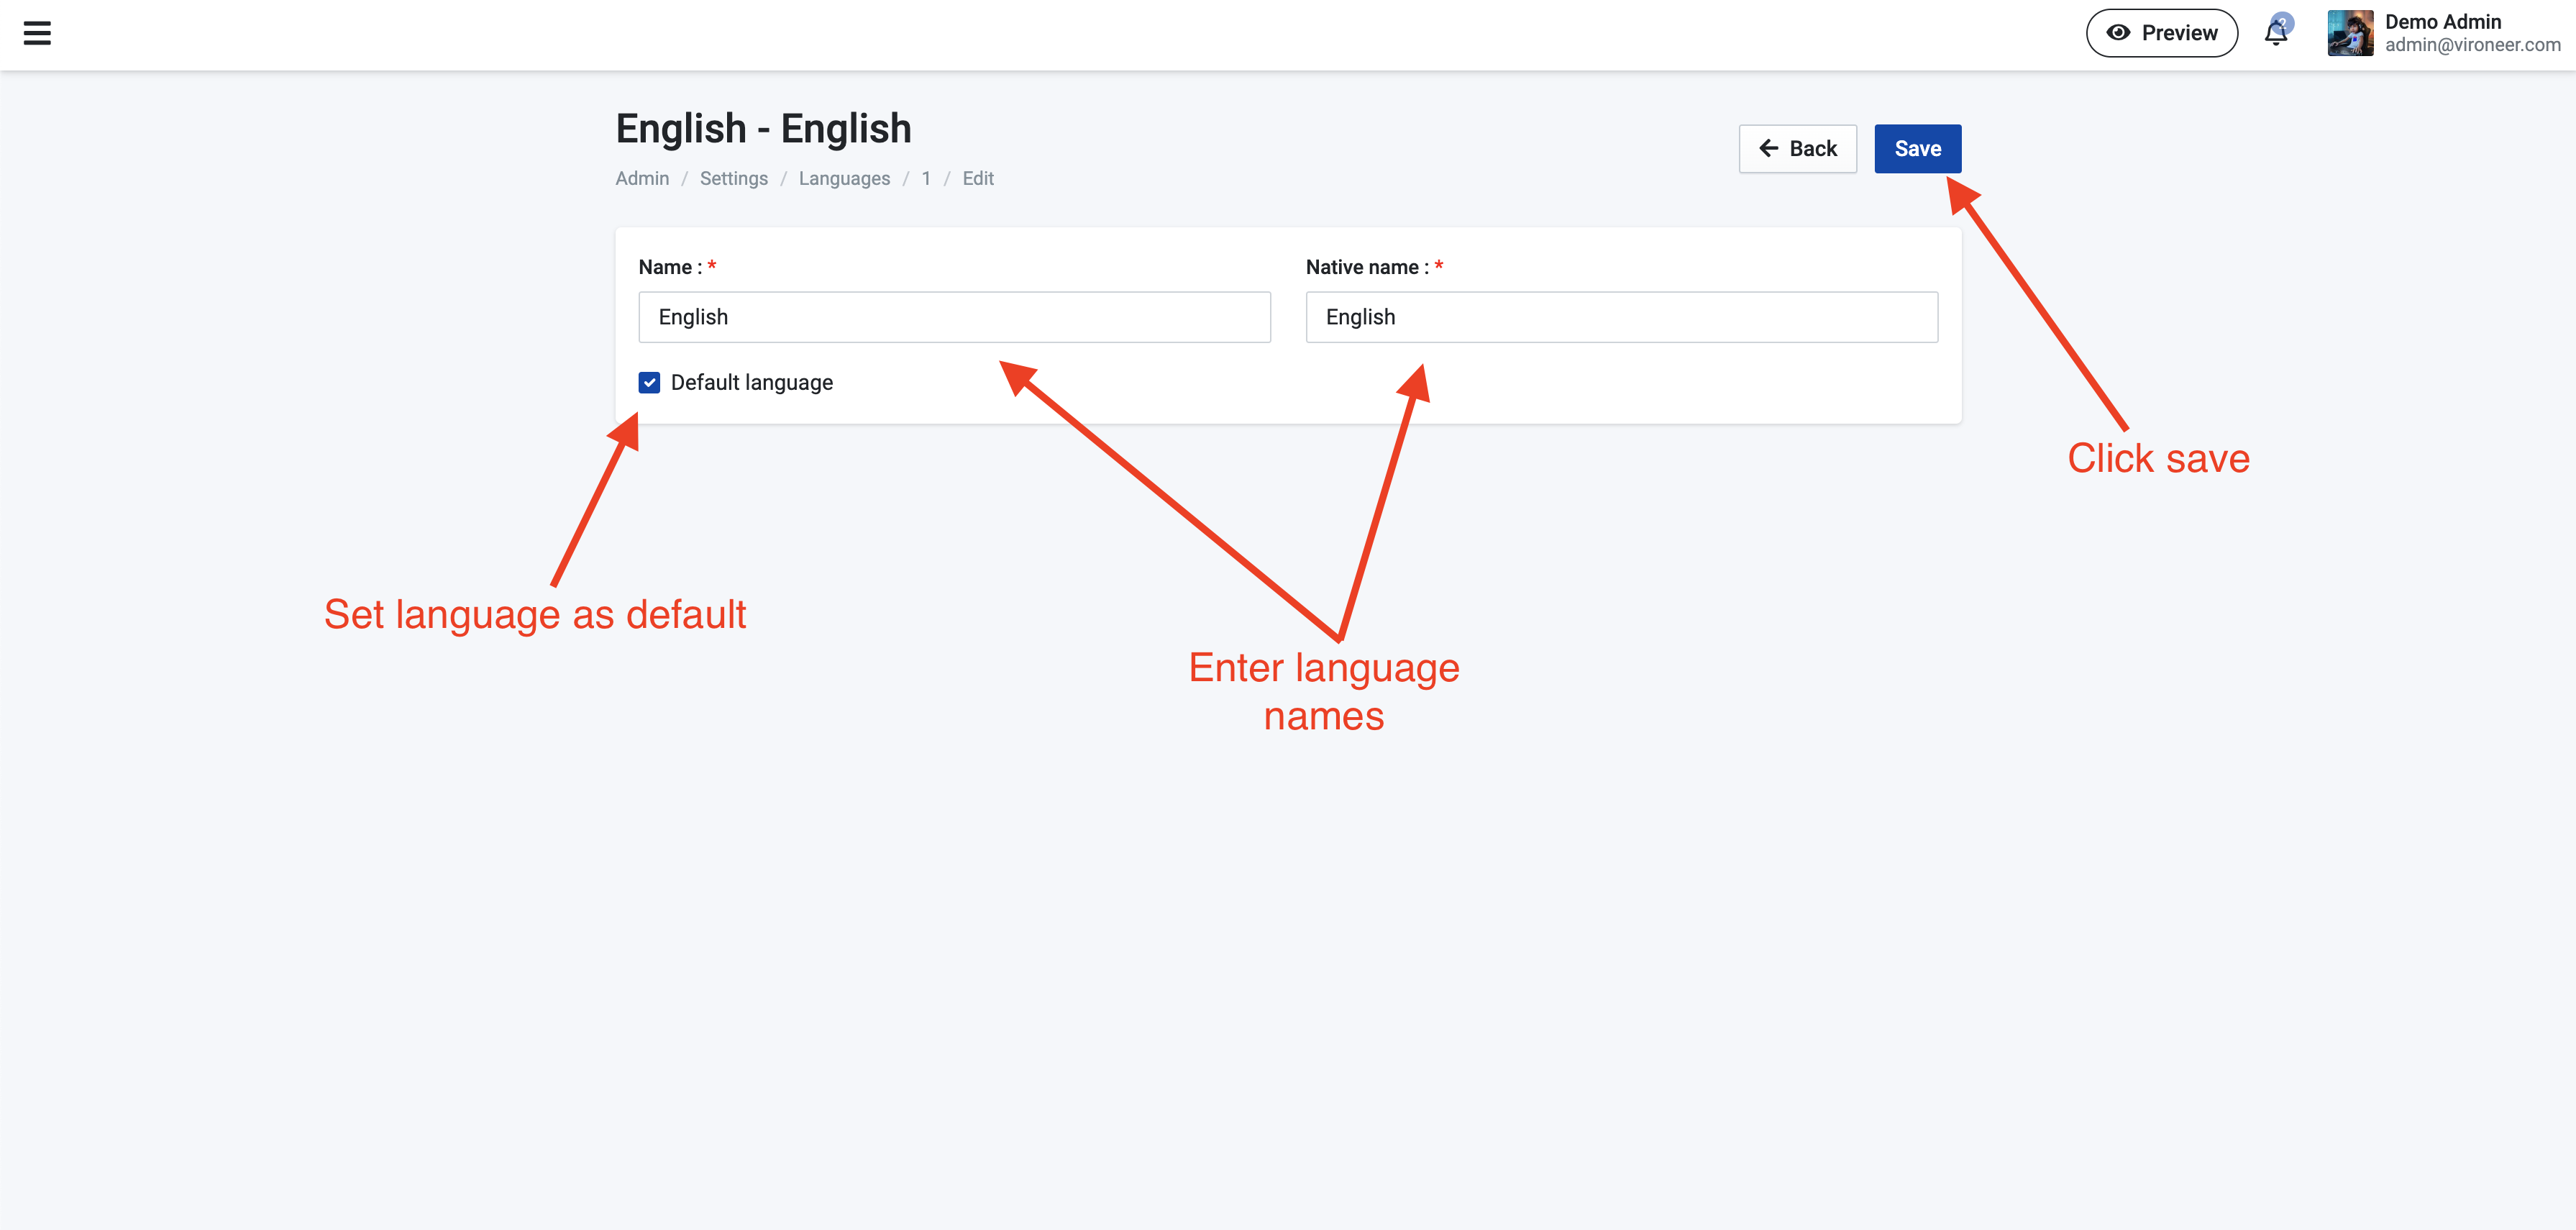
Languages & Translation
Languages section
Go to Admin panel > Settings > Languages
Edit language
Translation
You can translate your website easily to any language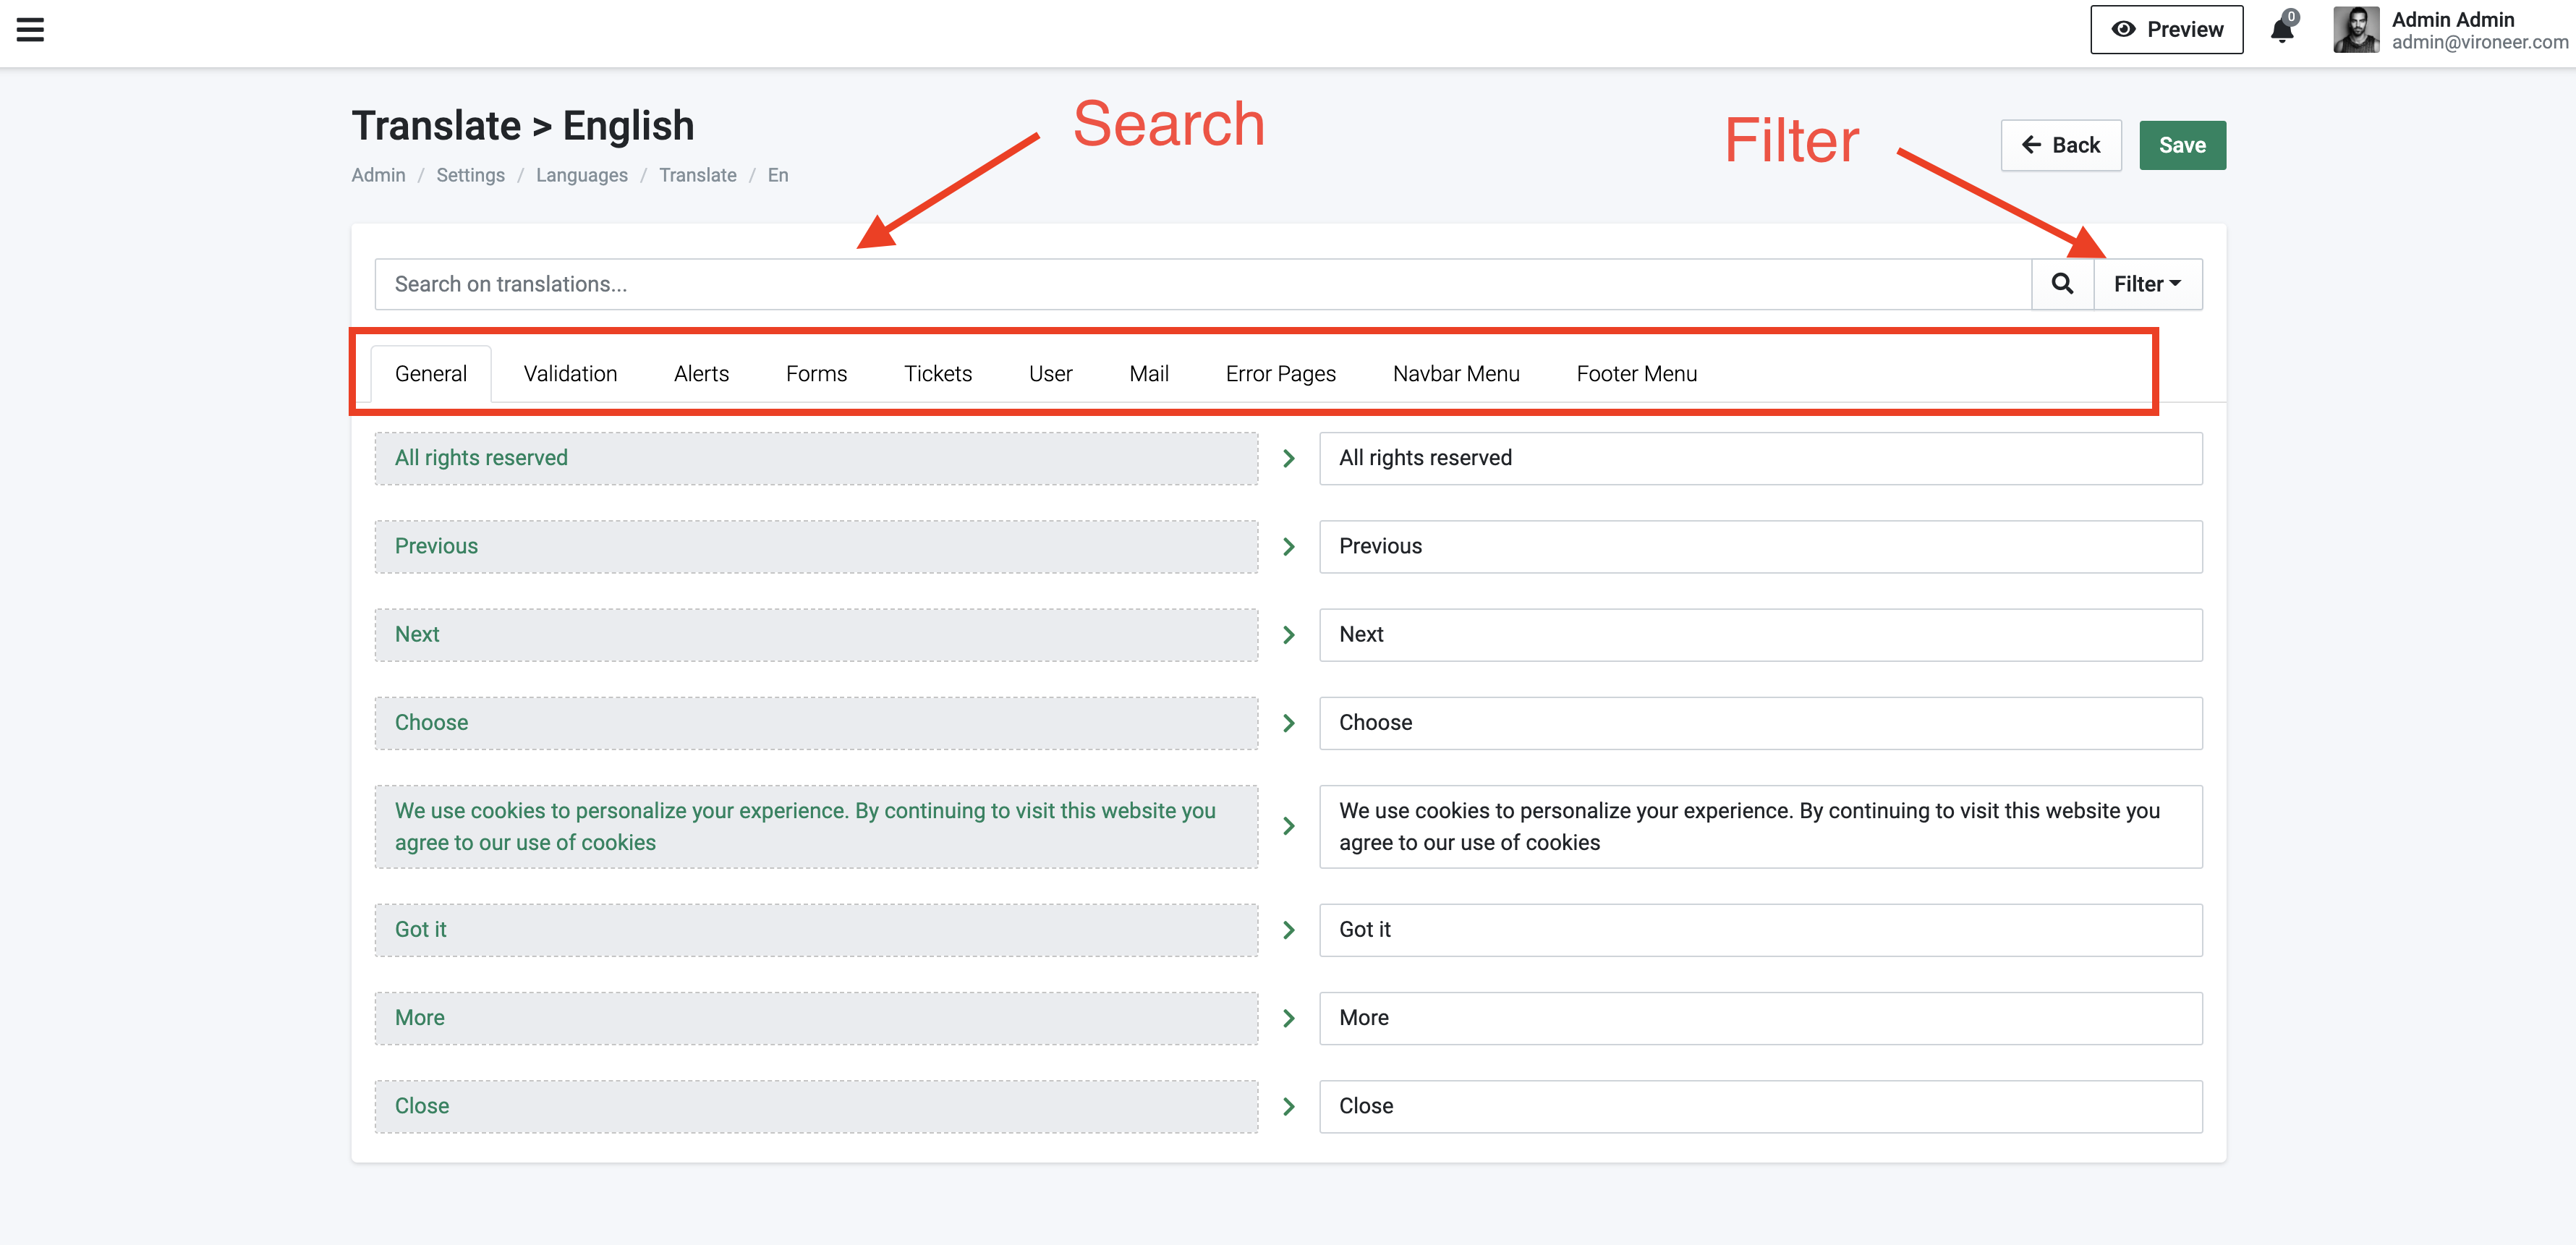
Mail Templates
Mail Templates Section
Go to Admin panel > Settings > Mail templates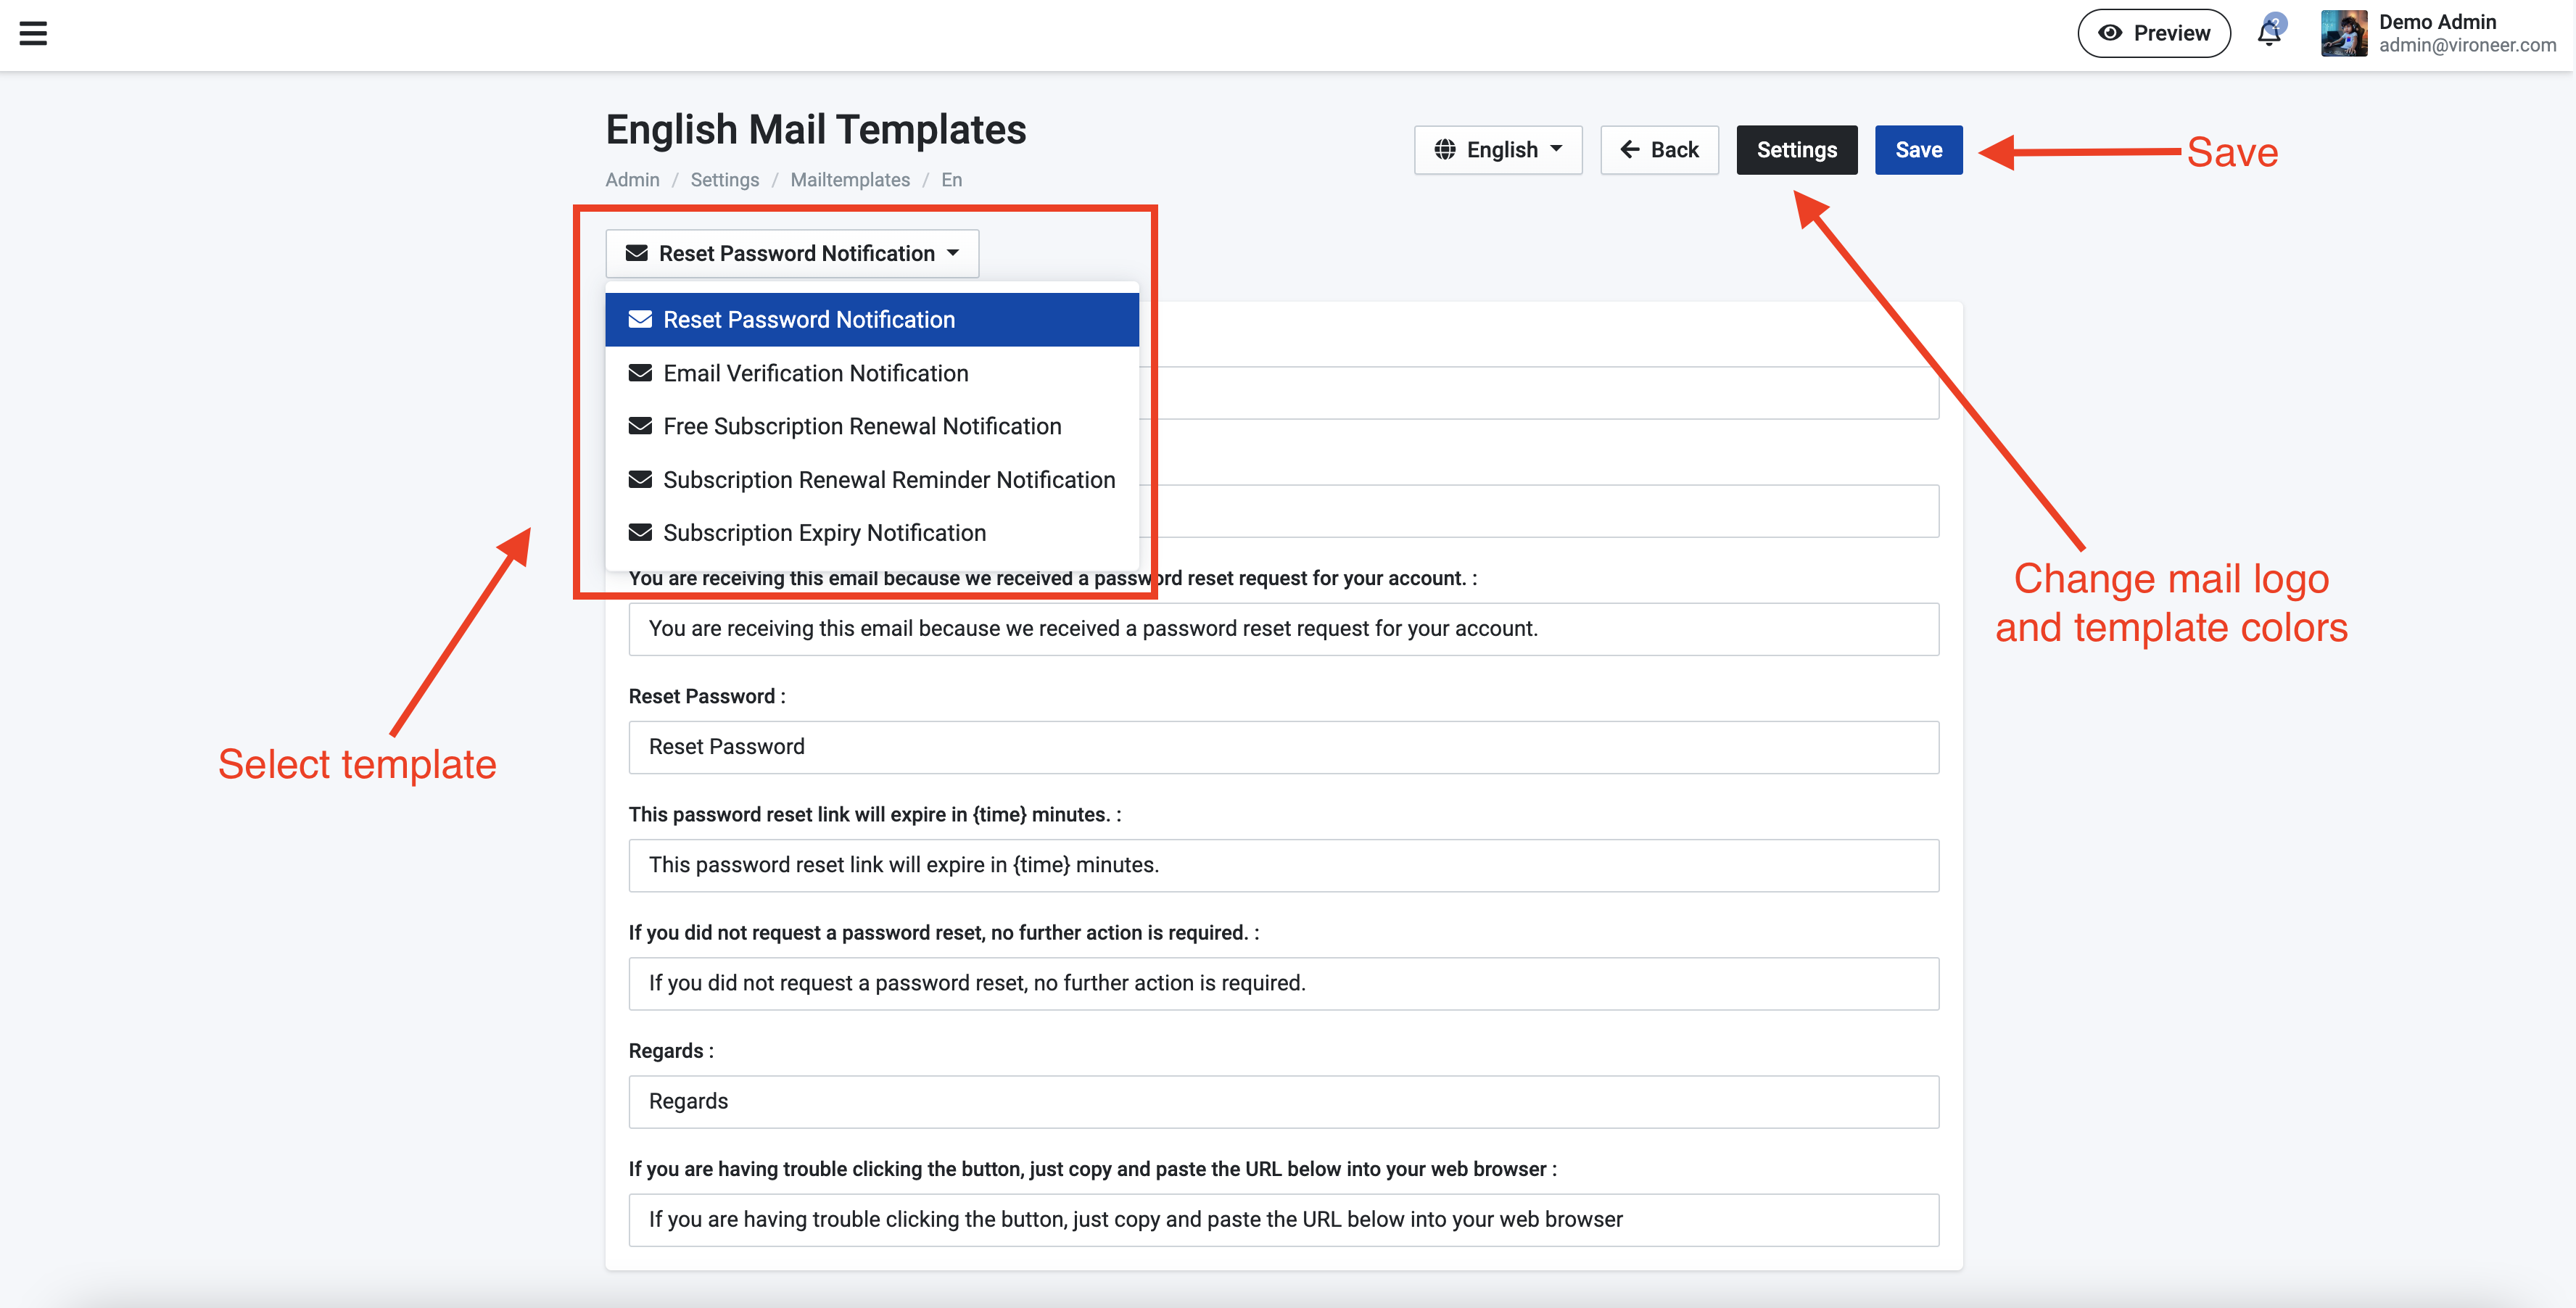
SEO Configurations
SEO Configurations Section
Go to Admin panel > Settings > SEO Configurations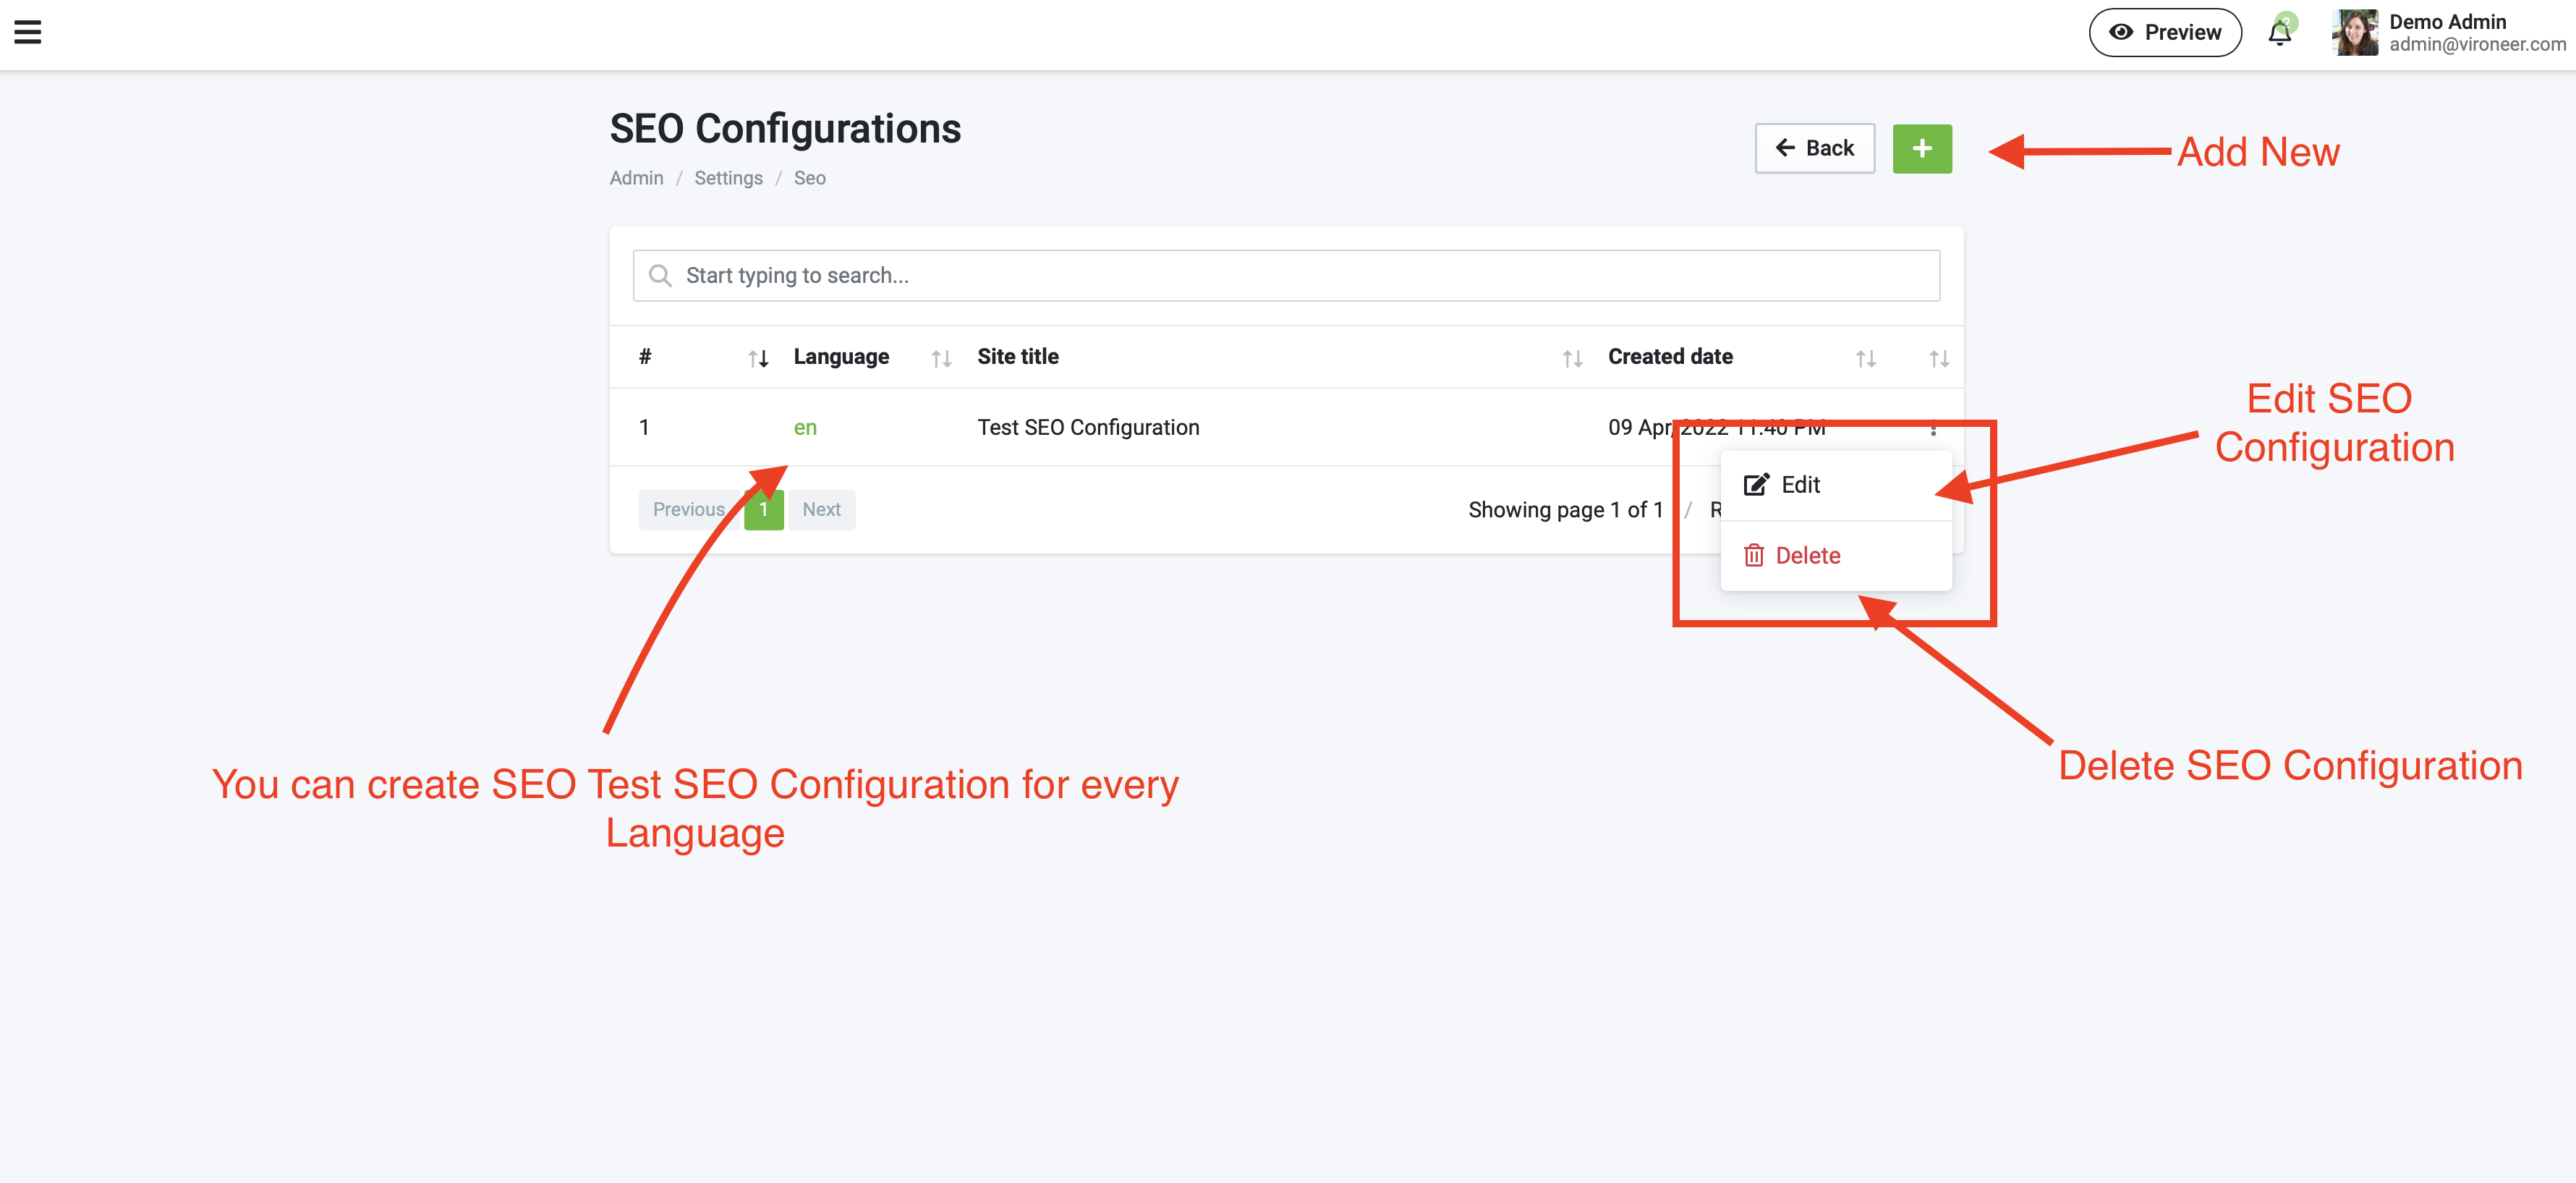
Create New SEO Configuration
Select language and enter details then click save
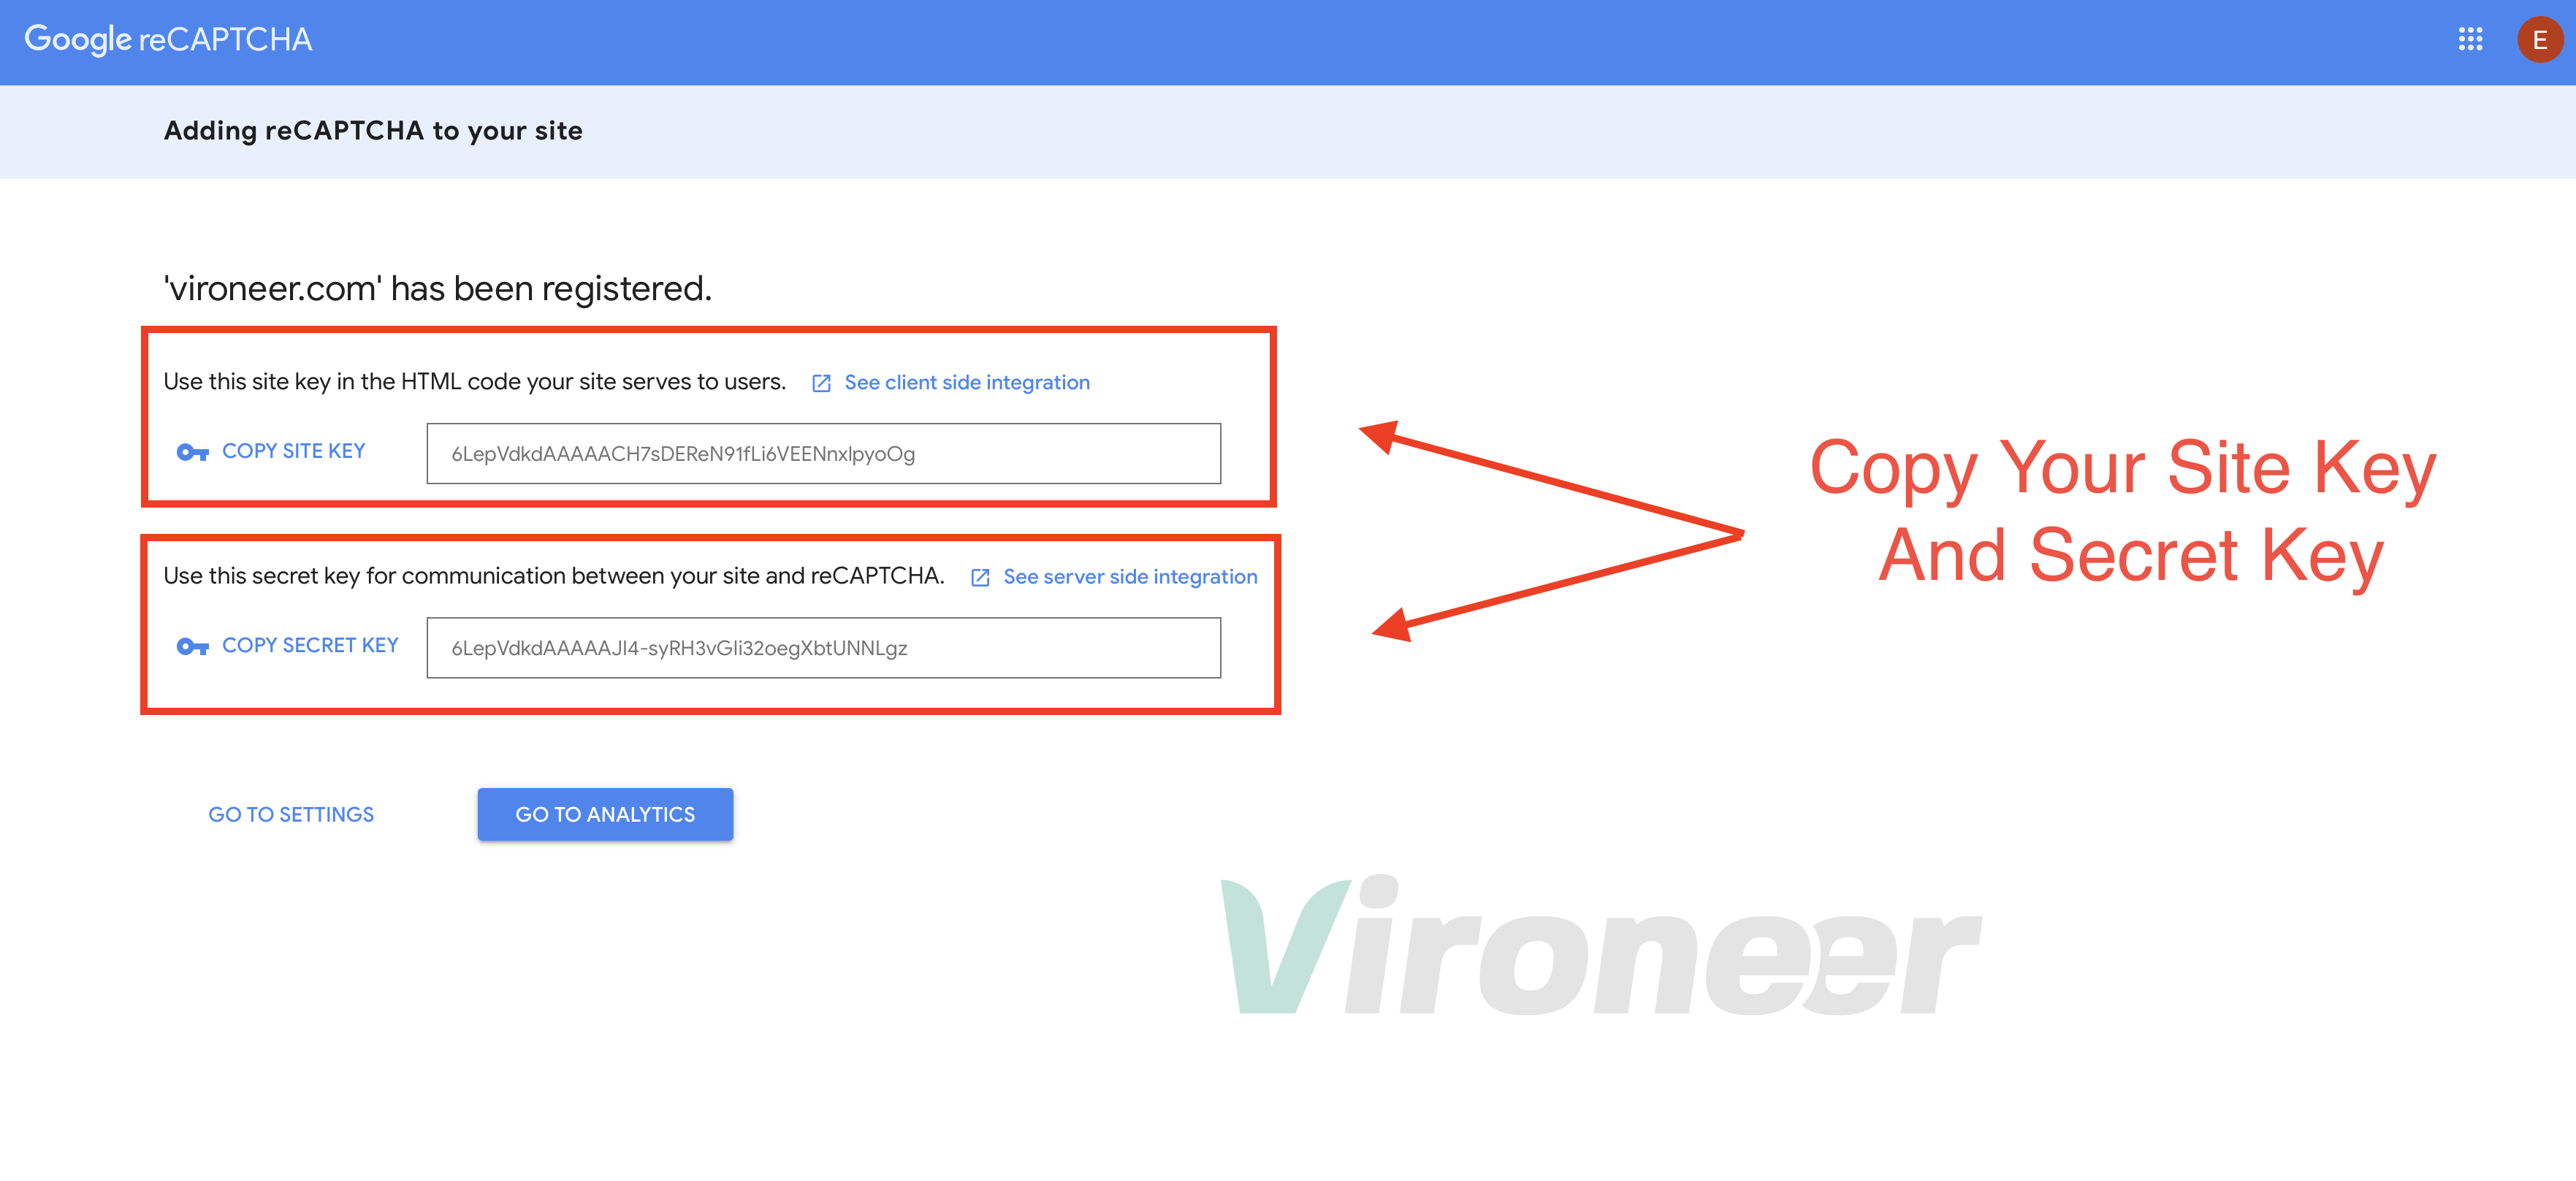
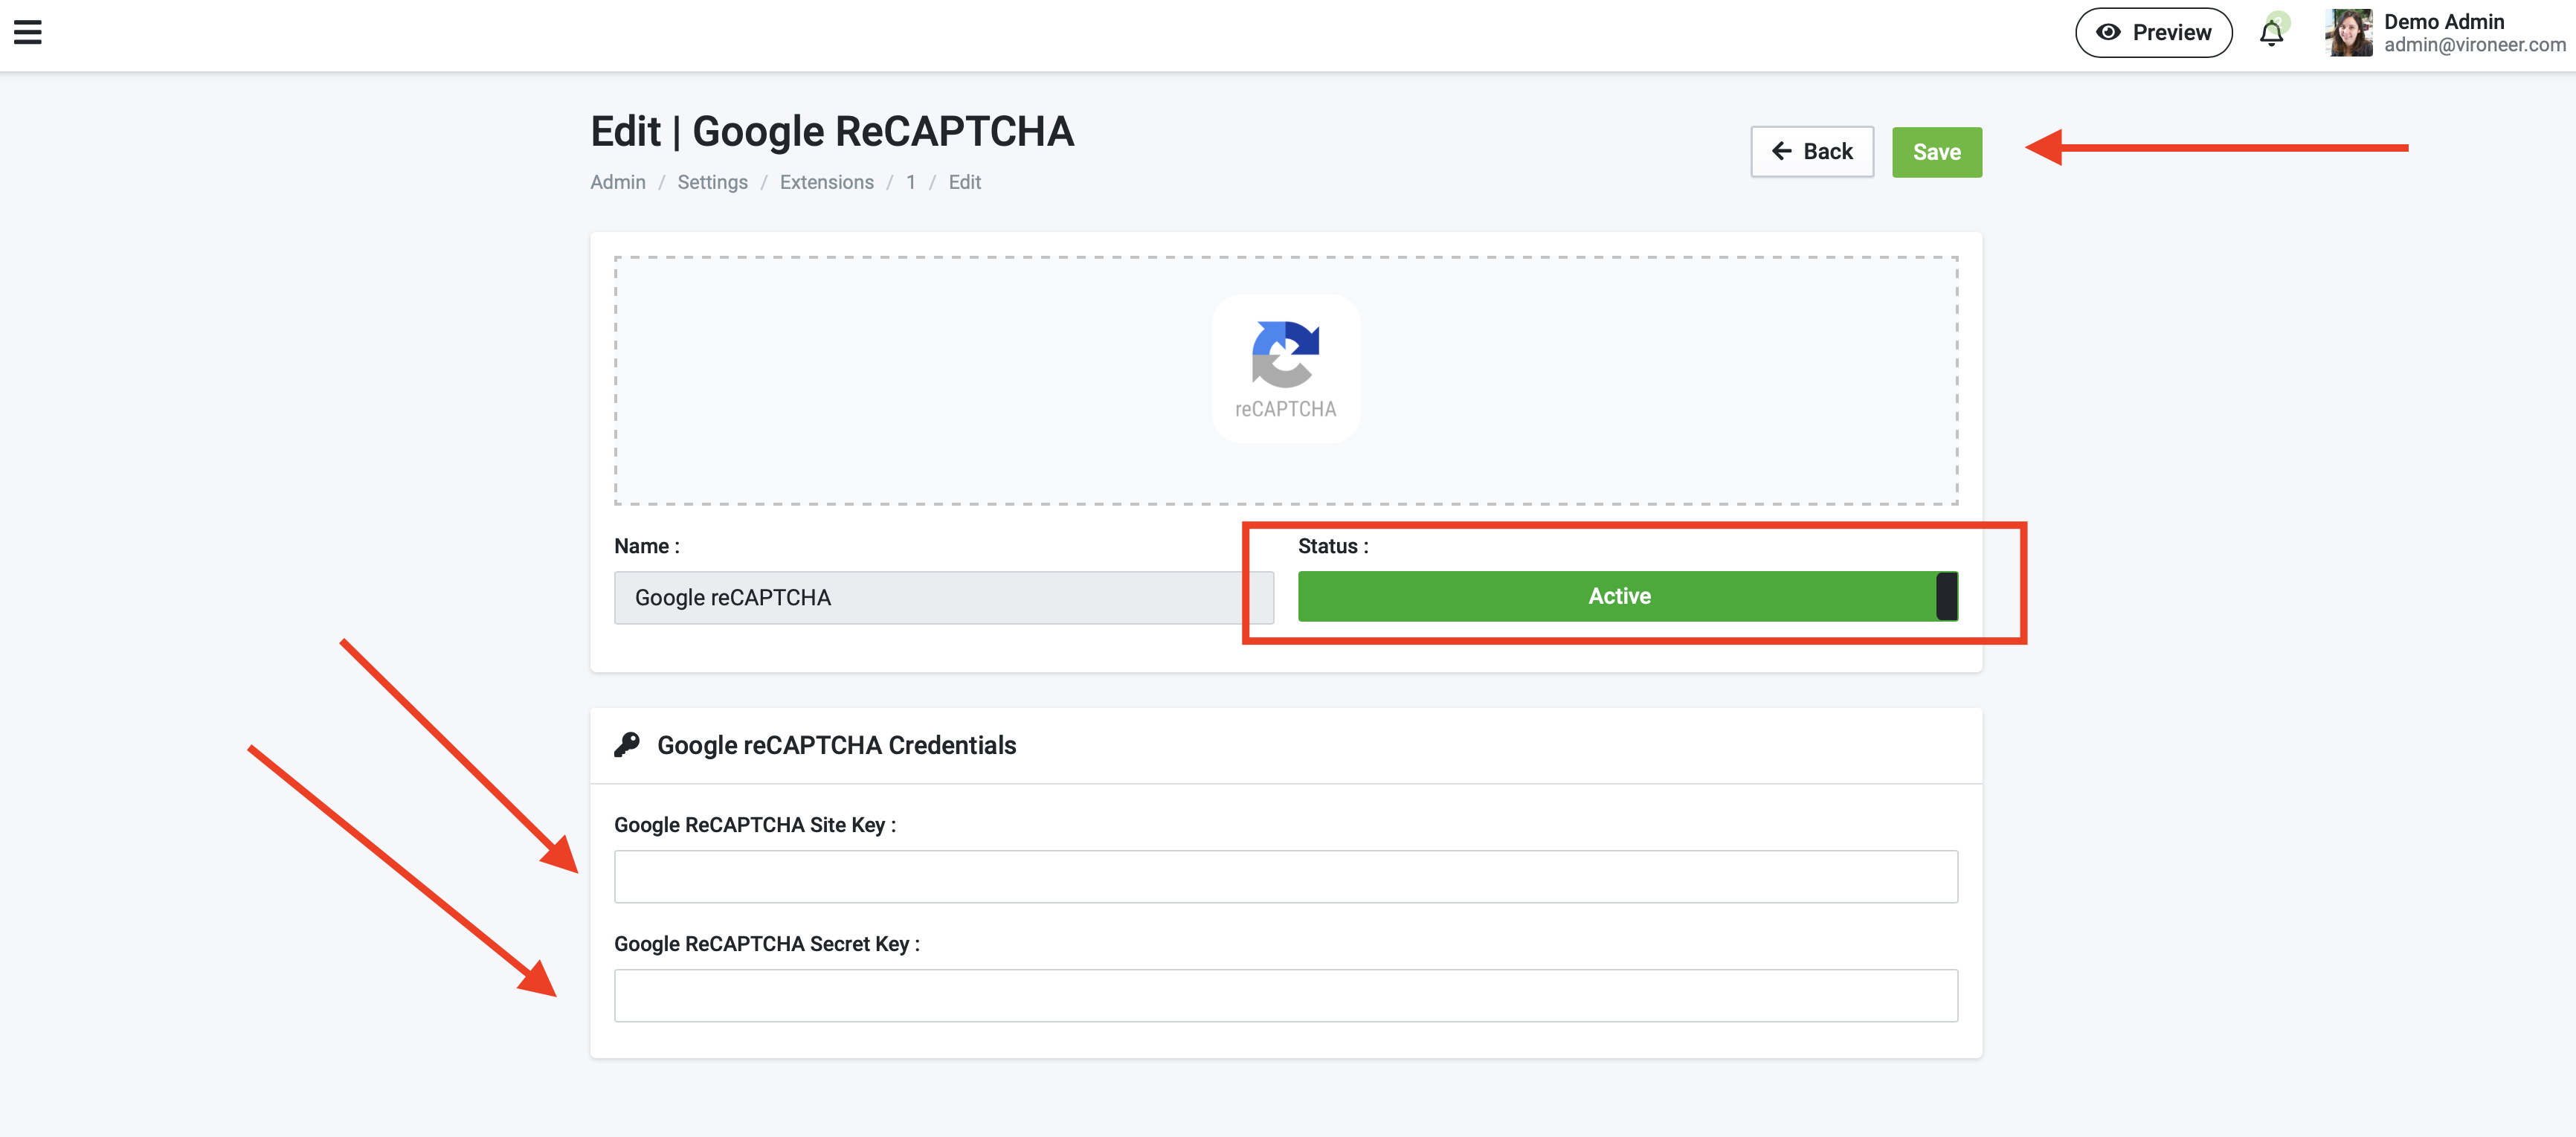
Google reCAPTCHA


Cron Job Commands
What is cron job?
A cron job is a Linux command used for scheduling tasks to be executed sometime in the future. This is normally used to schedule a job that is executed periodically – for example, to send out a notice every morning etc...
- How To Configure a Cron Job For Cpanel?
- Setting Up Cron Job in Plesk Panel?
- How to Set Up a Cron Job in Linux?
Why i need cron job in filebob?
Filebob is using cron job to delete expired files and also on saas version for subscriptions (renewal reminder, expiry reminder, renew free subscriptions) and also to delete temp files and also used on transactions to (delete unpaid transactions).
How i can setup cron job?
There are some commands that you need to setup :
For files :
1 - Delete expired files
This command is for deleting expired files.
- Cron :
* * * * * - Change
SERVER_PATHto your path
/usr/local/bin/php /home/SERVER_PATH/Application/artisan uploads:delete-expired >> /dev/null 2>&1
2 - Deleting the files and chunks that uploaded by users and not completed
This commands is for deleting the files and chunks that uploaded by users and example : (when user left before upload completed).
- Cron :
0 0 * * * - Change
SERVER_PATHto your path
/usr/local/bin/php /home/SERVER_PATH/Application/artisan uploads:delete-chunks >> /dev/null 2>&1